
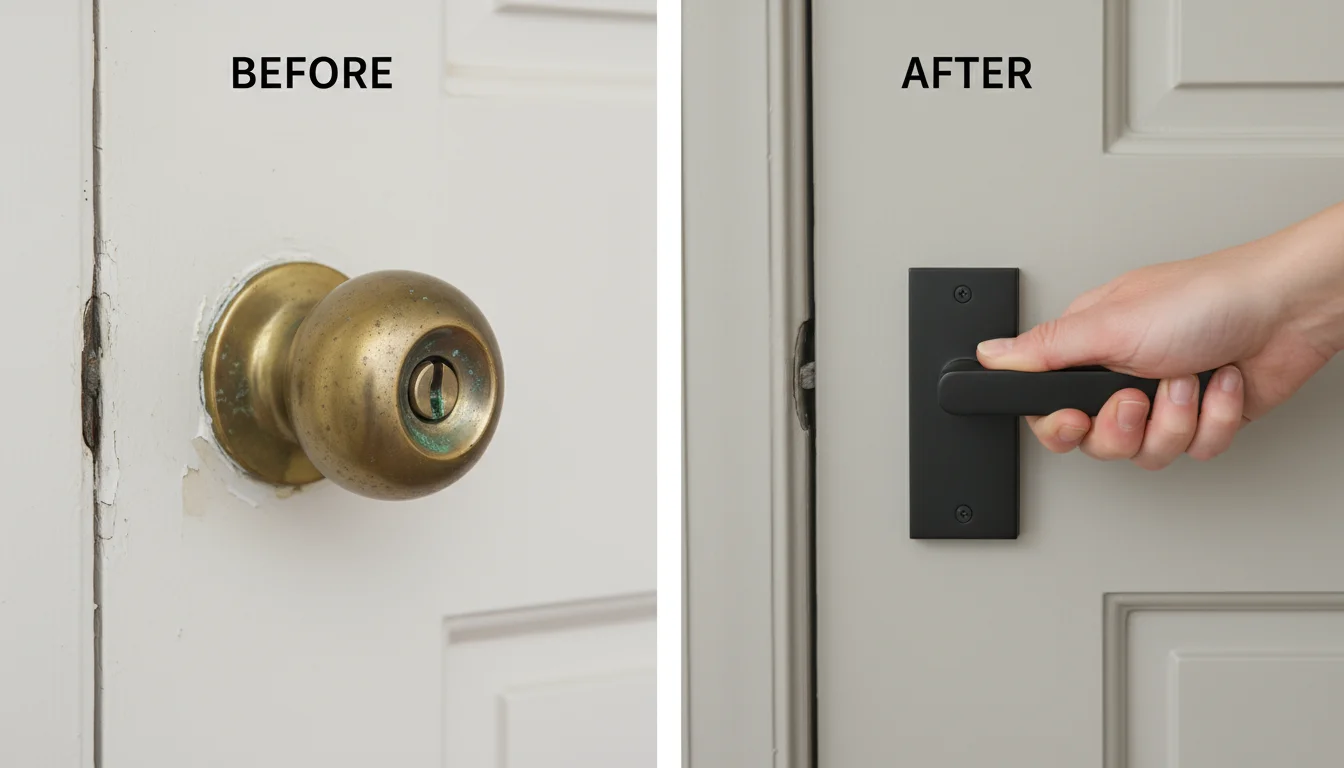
Your home should reflect your style and support your daily life. Often, you focus on major renovations or big furniture purchases, overlooking the smaller details that make a huge difference. Consider your door hardware. These unassuming elements, including knobs, levers, and hinges, impact both the feel and function of every room. Upgrading your door hardware offers an immediate, noticeable change without the expense or disruption of a large-scale project. It is a true quick win for homeowners, renters, and apartment dwellers looking for a fresh, polished look and improved functionality on a budget.
Unlock Style: Why Door Hardware is Your Next Easy Home Upgrade
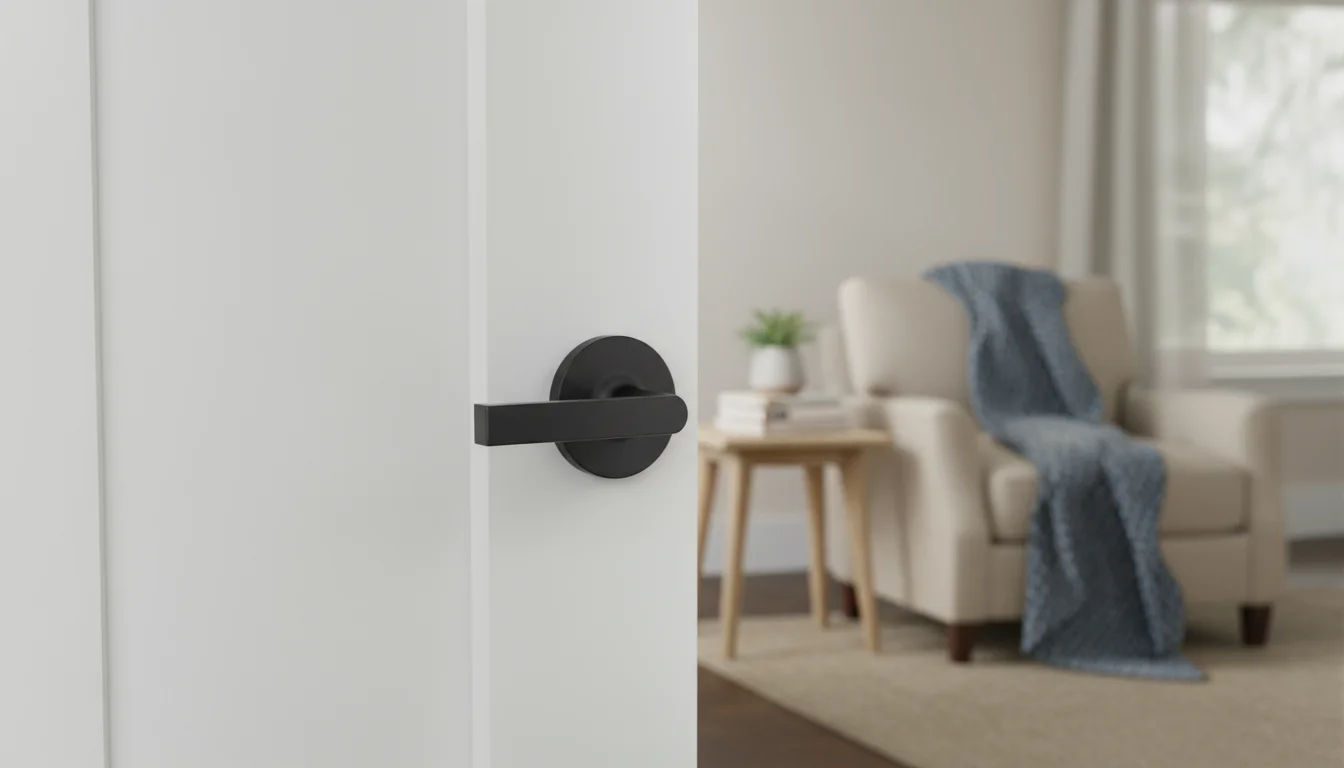
You interact with your door hardware countless times each day, often without a second thought. Yet, these small components silently influence your home’s aesthetic and your daily experience. Think of them as the jewelry for your rooms. Faded, tarnished, or outdated knobs and levers can detract from an otherwise well-decorated space. On the other hand, a modern, gleaming set of door hardware elevates a room instantly, offering a cohesive and polished look. This is the essence of a high-impact home upgrade: significant visual improvement achieved with minimal effort and expense.
This type of budget improvement is accessible to everyone. You do not need specialized skills or extensive tools. You can transform your interior doors, entryways, and even cabinet doors with a straightforward change. This quick win not only refreshes your home’s appearance, but it also provides a surprising sense of accomplishment. According to The Spruce, even small updates can significantly enhance your home’s appeal and functionality, proving that careful attention to details truly pays off.
More Than Just Looks: The Practical Benefits of Upgraded Door Hardware
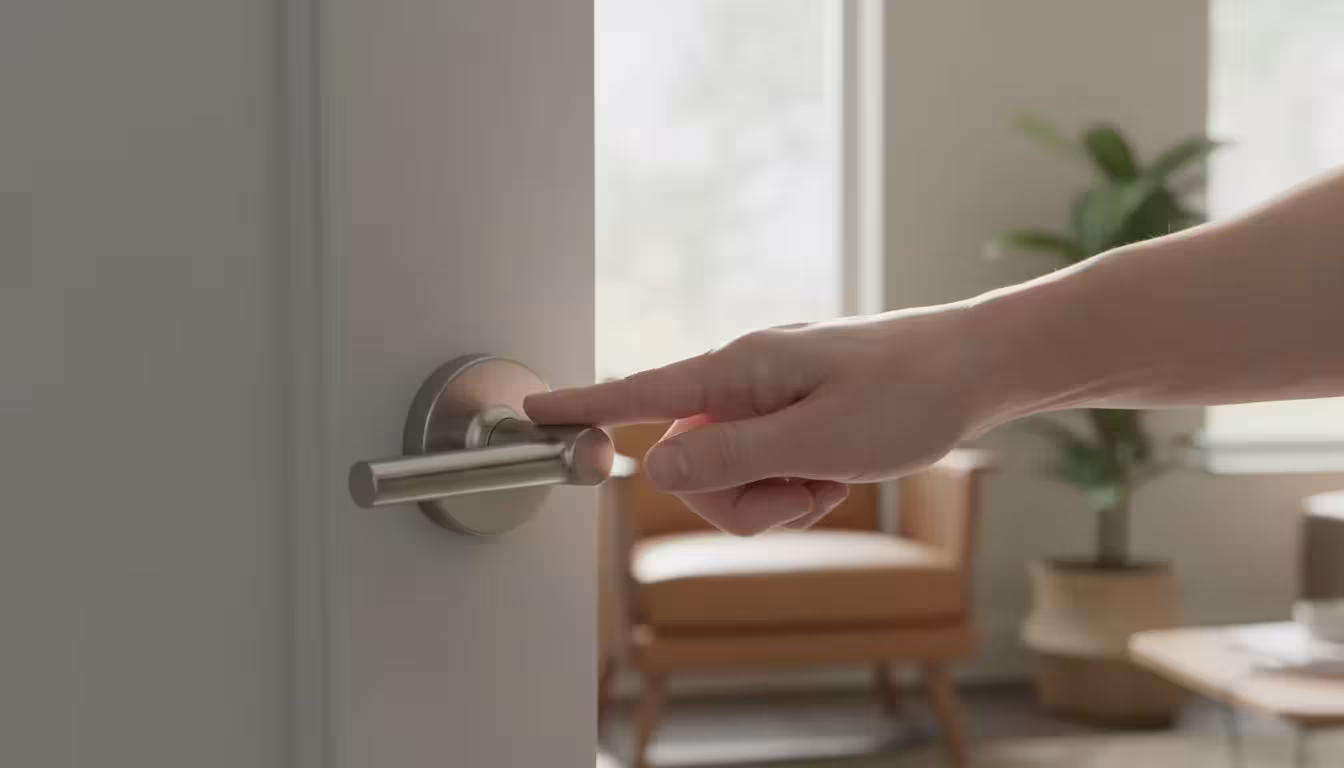
Beyond aesthetics, upgrading your door hardware brings tangible practical advantages to your home. Worn out door handles might stick, squeak, or fail to latch properly, causing daily annoyance. New hardware operates smoothly, securely, and quietly, improving the user experience for every resident. This includes better security for exterior doors, enhanced privacy for interior spaces, and improved accessibility for those with limited dexterity.
Consider the functional aspect. Old door knobs can be challenging for children, seniors, or individuals with arthritis. Switching to lever handles provides an ergonomic solution, requiring only a gentle push down with a hand or elbow to operate. This simple change dramatically improves the ease of access throughout your home. Furthermore, modern door hardware often features improved mechanisms that offer greater durability and reliability than older models, meaning fewer frustrations and repairs in the long run. A seamless experience when moving from room to room contributes significantly to overall home comfort and organization, making daily transitions effortless.
Choosing Your Perfect Match: Styles, Finishes, and Types of Door Hardware
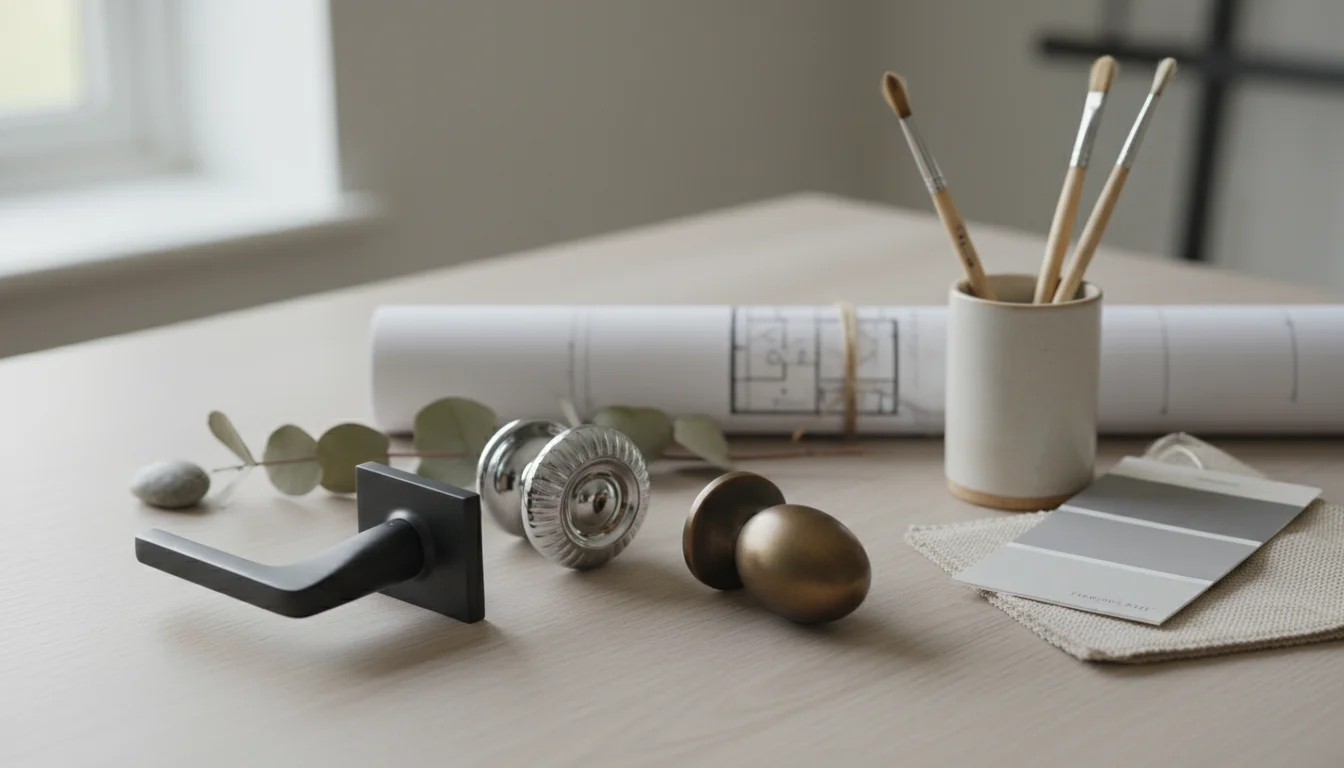
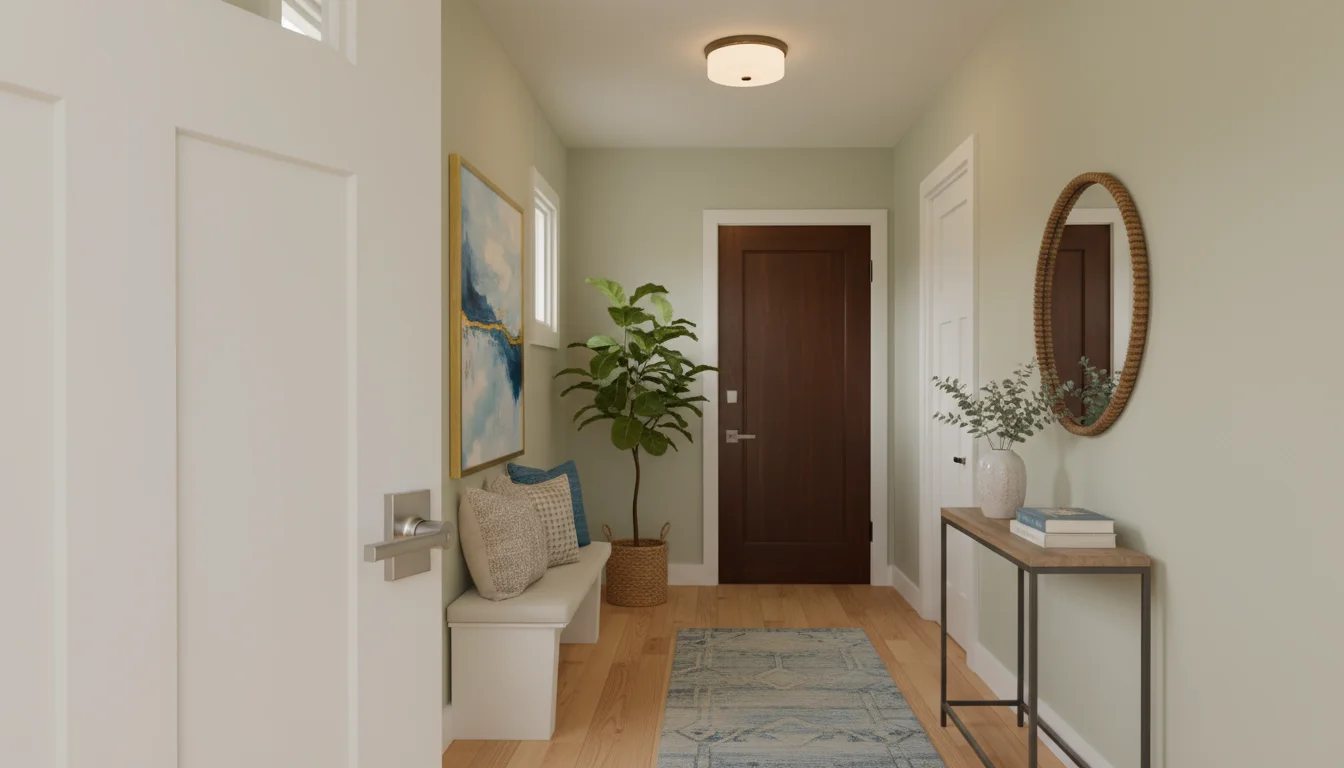
Selecting the right door hardware involves more than picking a style you like. You want to ensure your choices complement your existing decor and meet your functional needs. A well-chosen set of door hardware ties together a room’s elements, creating a harmonious environment. Consider the architectural style of your home, the finishes of your light fixtures, and even your furniture. Consistency creates a sophisticated, well-thought-out look.
Styles and Finishes
Manufacturers offer an incredible array of styles and finishes. Here are common options to consider:
- Modern/Contemporary: Characterized by clean lines, minimalist designs, and often geometric shapes. Finishes like brushed nickel, matte black, and polished chrome are popular.
- Traditional: Features ornate details, classic curves, and often heavier, more substantial designs. Finishes such as oil-rubbed bronze, polished brass, and antique pewter are common.
- Farmhouse/Rustic: Combines functionality with a warm, lived-in feel. Think simple designs, often with a distressed look. Finishes include matte black, bronze, and brushed brass.
- Transitional: Blends elements of both traditional and modern styles, offering versatility. Brushed nickel and satin chrome are frequent choices.
When selecting a finish, aim for consistency across your home. While you do not need every piece of hardware to match exactly, having a consistent palette of finishes throughout a floor or specific zone creates a cohesive design story. According to experts at Better Homes & Gardens, coordinating hardware finishes with other metallic accents like lighting and plumbing fixtures can elevate your entire home’s design.

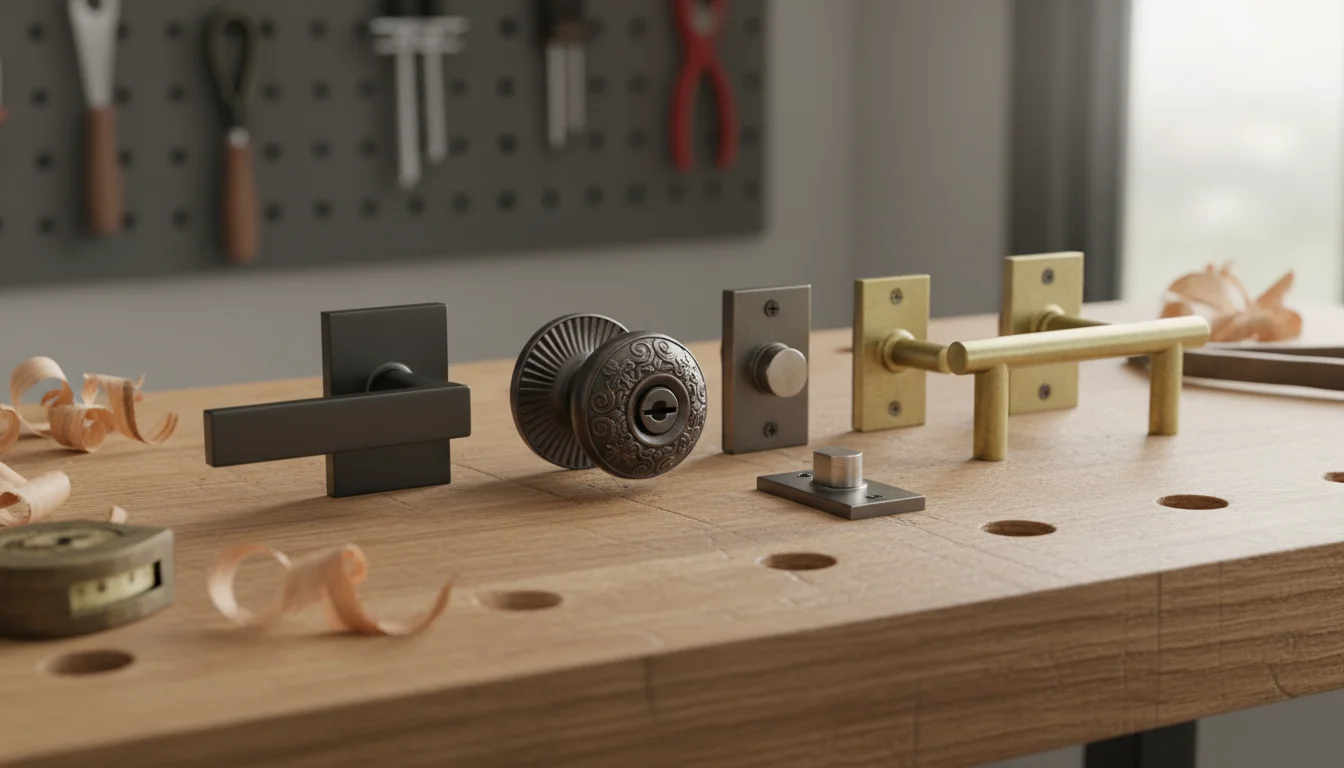
Types of Door Hardware
Understanding the different types of door hardware helps you choose the right product for each door:
- Passage Knobs/Levers: Used for doors that do not require locking, such as closets, hallways, or laundry rooms. They simply turn to open the latch.
- Privacy Knobs/Levers: Ideal for bedrooms, bathrooms, and offices where you need a locking mechanism but no key. They typically feature a push-button or turn-button lock on the interior side and a small emergency release hole on the exterior.
- Keyed Entry Knobs/Levers/Handlesets: Designed for exterior doors, these lock with a key from the outside and usually have a turn-button lock on the inside. Handlesets offer a more decorative and substantial look for front doors.
- Dummy Knobs/Levers: These are non-functional and do not turn. You use them on pantry doors, closet doors, or other double doors where only one door needs to latch, and the other remains stationary. They provide a consistent look.
- Hinges: Often overlooked, hinges play a critical role. When upgrading hardware, consider replacing old, squeaky hinges with new ones in a matching finish. Pay attention to the corner shape (square or rounded) and size of your existing hinges for easy replacement.
Your Step-by-Step Guide to a Smooth Hardware Swap
Replacing door hardware is a straightforward process you can complete in under an hour per door. You only need a few basic tools. This step-by-step guide walks you through the process, ensuring a smooth and successful home upgrade.
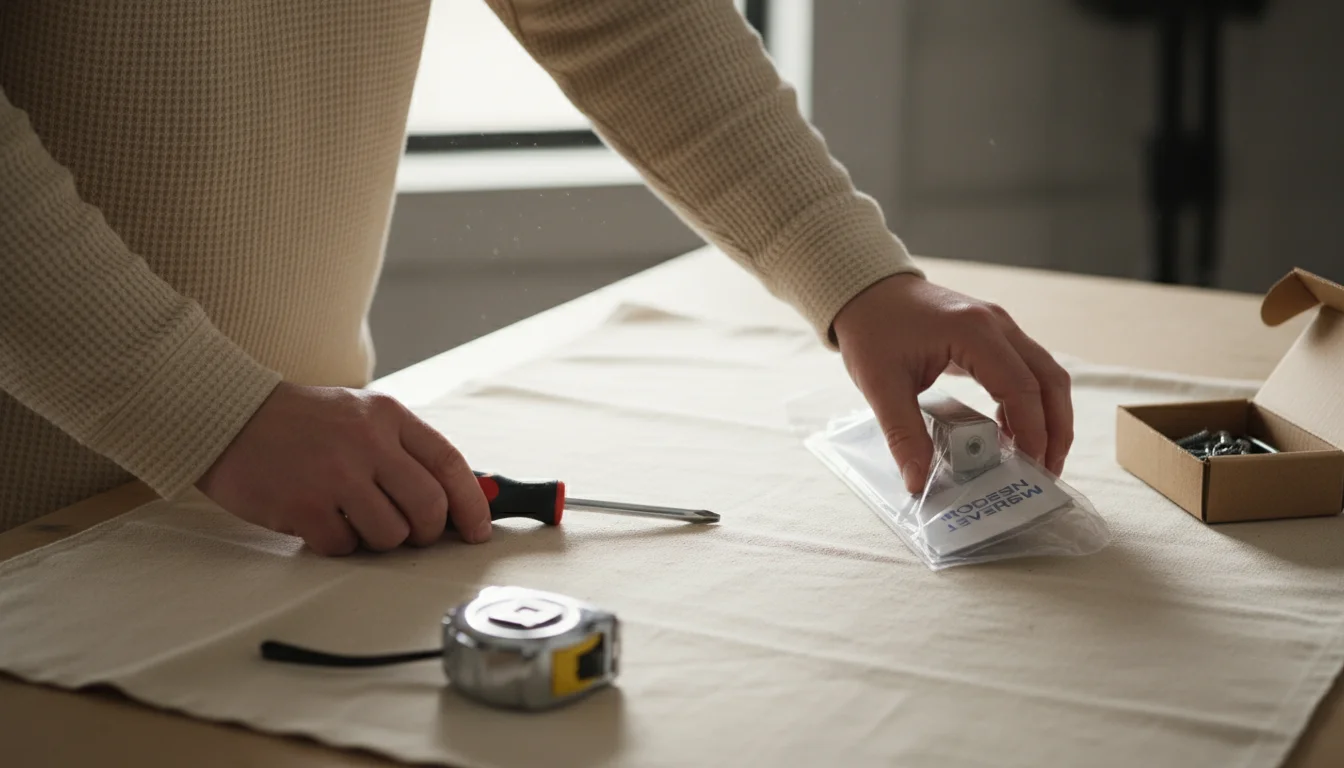
Tools You Will Need:
- Phillips head screwdriver
- Flathead screwdriver (sometimes needed for prying)
- Measuring tape (for new hardware compatibility)
- Utility knife (optional, for scoring paint around old hardware)
- New door hardware set (knob or lever, latch, strike plate)
- Safety glasses (recommended)
The Process:
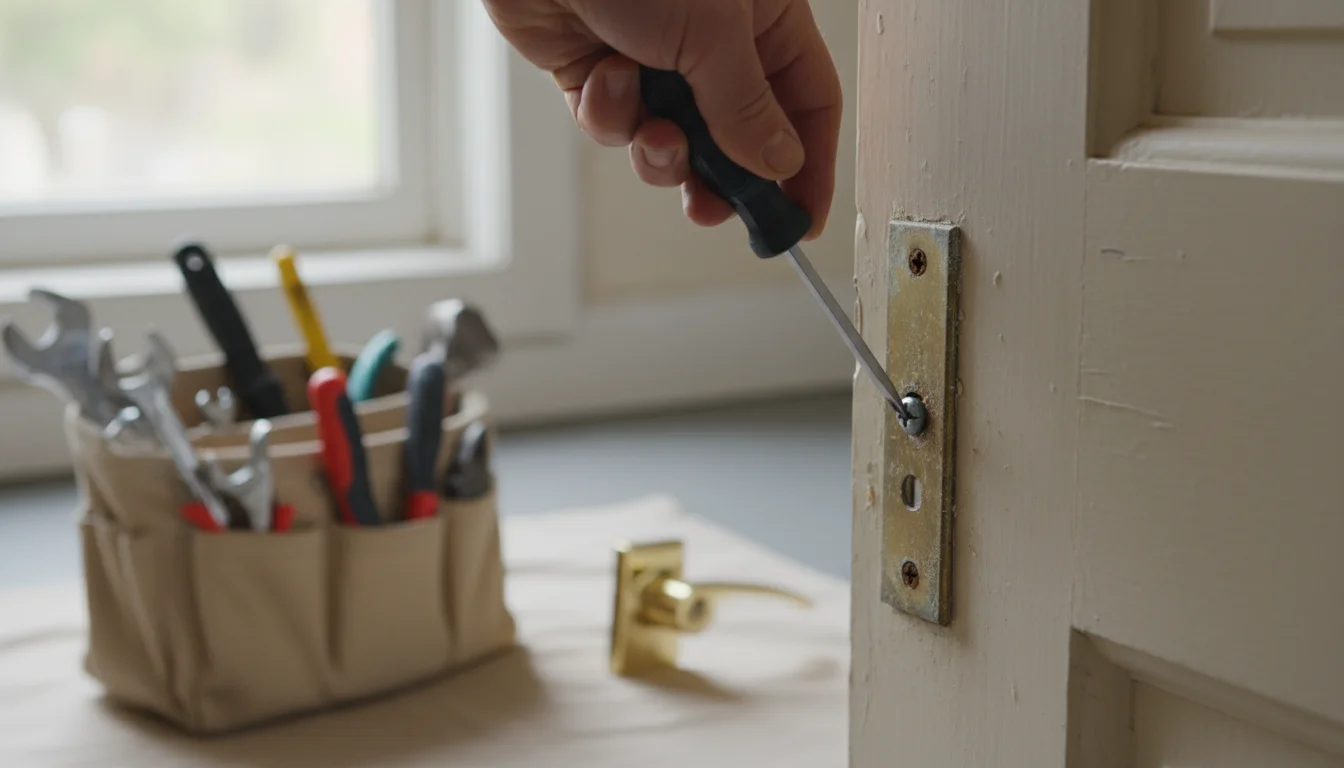
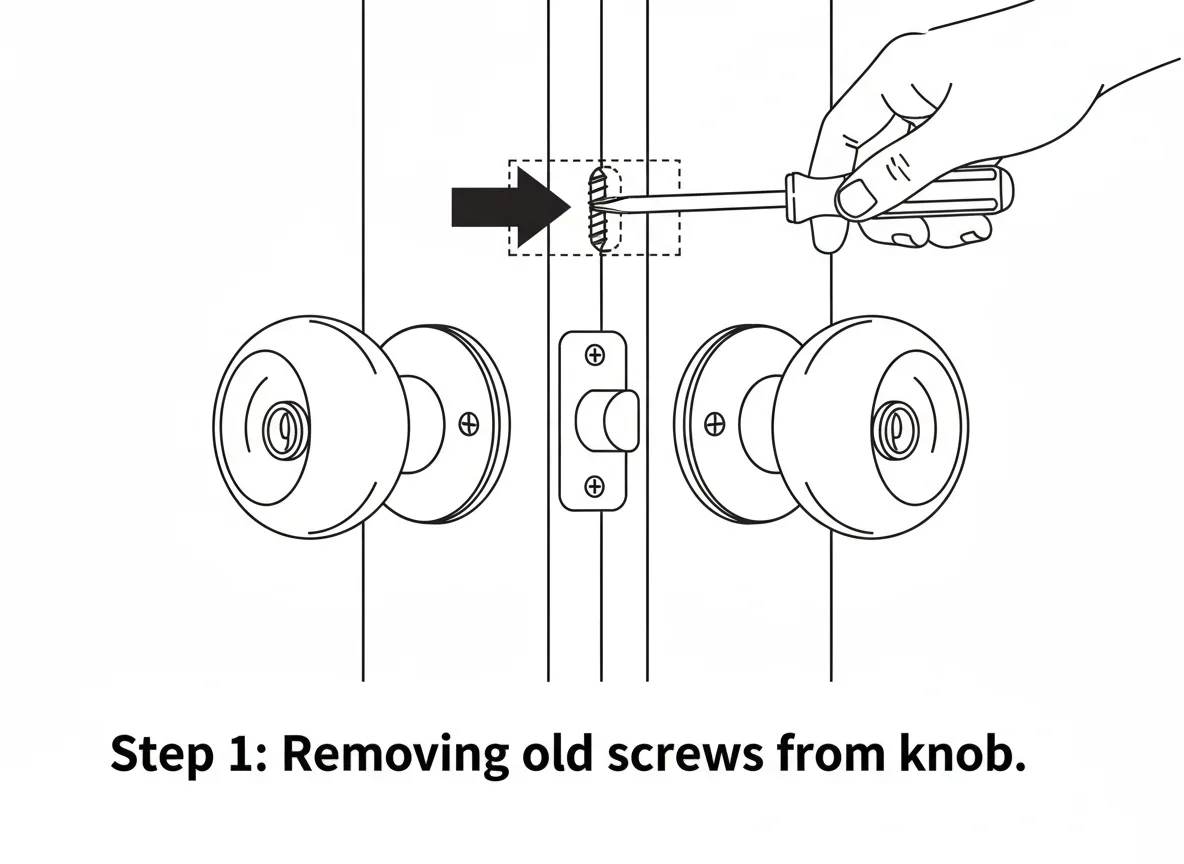
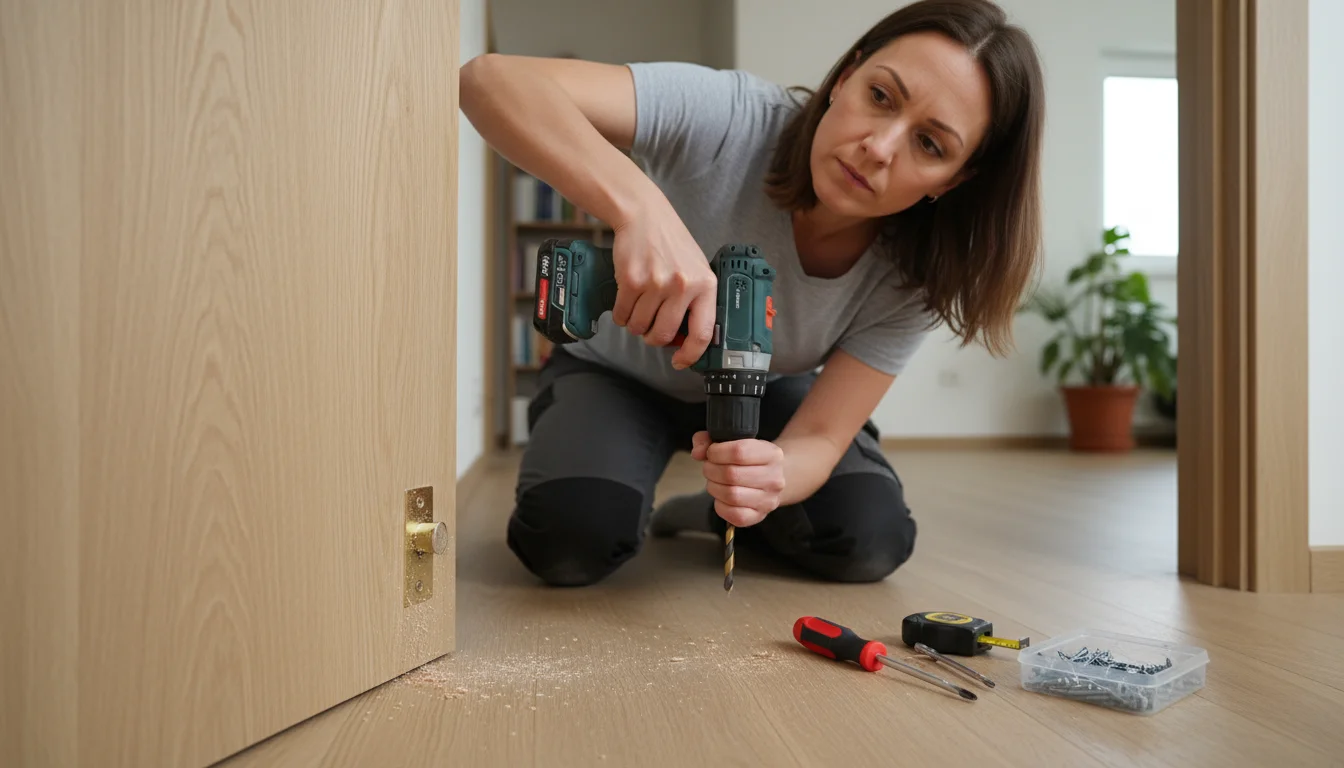
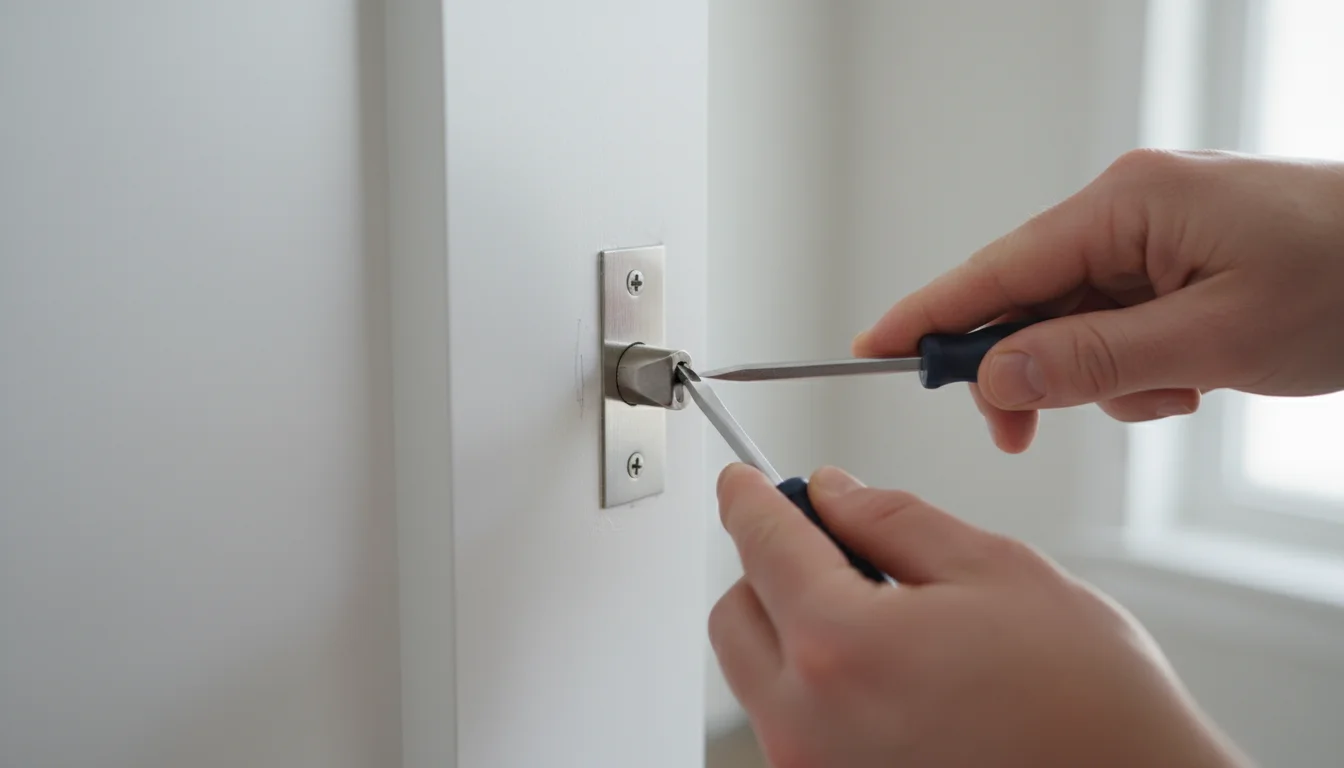
- Remove the Old Hardware:
Begin by locating the screws on your existing door knob or lever. Most interior door hardware has screws visible on one side of the knob or lever. Use your Phillips head screwdriver to remove these screws. The two halves of the knob or lever will separate. Next, remove the latch mechanism from the edge of the door. This often involves two smaller screws. Finally, remove the strike plate from the door frame, which also typically uses two small screws.
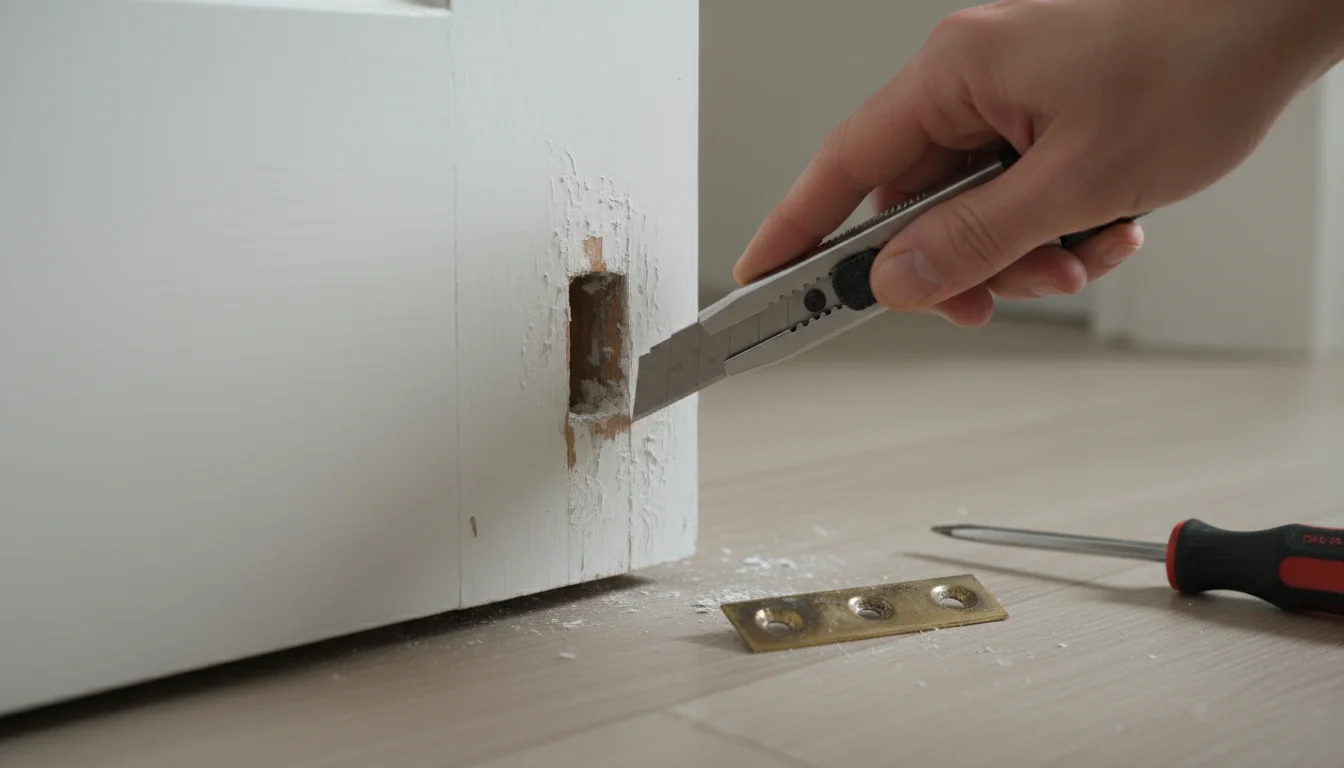
- Prepare the Door:
With the old hardware removed, inspect the door and frame. If paint has built up around the old hardware, gently score it with a utility knife to prevent chipping when you install the new pieces. Clean any dust or debris from the holes and surrounding area. Ensure the new hardware’s backset, the distance from the edge of the door to the center of the bore hole, matches your existing door. Most residential doors have a backset of 2-3/8 inches or 2-3/4 inches. Adjust new hardware if it offers a convertible backset.
- Install the New Latch:
Slide the new latch mechanism into the hole on the edge of the door. Ensure the angled side of the latch faces the direction the door closes. Secure it with the provided screws. Do not overtighten, as this can strip the wood or cause the latch to bind.
- Install the New Knobs or Levers:
With the latch in place, insert one half of your new door hardware through the door, ensuring the spindle or connecting mechanism passes through the square hole in the latch. Then, align the second half of the hardware on the other side of the door, connecting it to the first half. Secure the two halves together using the screws provided with your new hardware. Many modern sets feature hidden screws for a cleaner look. Ensure the knob or lever turns smoothly and the latch retracts correctly before tightening fully.
- Install the New Strike Plate:
Finally, replace the strike plate on the door frame. Use the new strike plate that came with your hardware, as it is designed to match your new latch. Align it with the latch bolt and secure it with the provided screws. Test the door to ensure it latches properly and smoothly. If the door does not close easily, you may need to adjust the strike plate slightly.
Replacing door hardware truly offers a rewarding home upgrade. It is an ideal weekend project or even an evening task, requiring minimal time but delivering significant visual and functional impact. For additional guidance on home improvement projects, Family Handyman provides excellent detailed tutorials and tips for DIY enthusiasts.
Smart Savings: Achieving a High-Impact Home Upgrade on a Budget
You do not need to spend a fortune to achieve a high-impact home upgrade with door hardware. This budget improvement strategy is inherently cost-effective compared to major renovations. Several approaches help you maximize your savings while still getting the look and functionality you desire.
Prioritize Key Areas
Instead of replacing every piece of hardware in your home at once, focus on the most visible or frequently used doors. Your front entry, bathroom doors, and main living area doors often see the most traffic and attention. Updating these first yields the most noticeable improvement for your investment. You can tackle less critical doors later, spreading out the cost over time.

Shop Smart
Keep an eye out for sales at home improvement stores. Many retailers offer discounts on door hardware during seasonal sales events or as part of bundle deals. Buying in bulk, if you have many doors to update, can sometimes secure a better price per unit. Also, consider online retailers, which often provide competitive pricing and a wider selection. Research from Consumer Reports often highlights that comparing prices from multiple vendors can lead to significant savings on home goods.
DIY Installation
The biggest cost saver for this project is performing the installation yourself. As outlined in the previous section, the process is straightforward and does not require professional help for standard replacements. By handling the labor, you save on contractor fees, which can quickly add up. This empowers you to manage your budget effectively while gaining a valuable new skill.
Refinish Existing Hardware (When Possible)
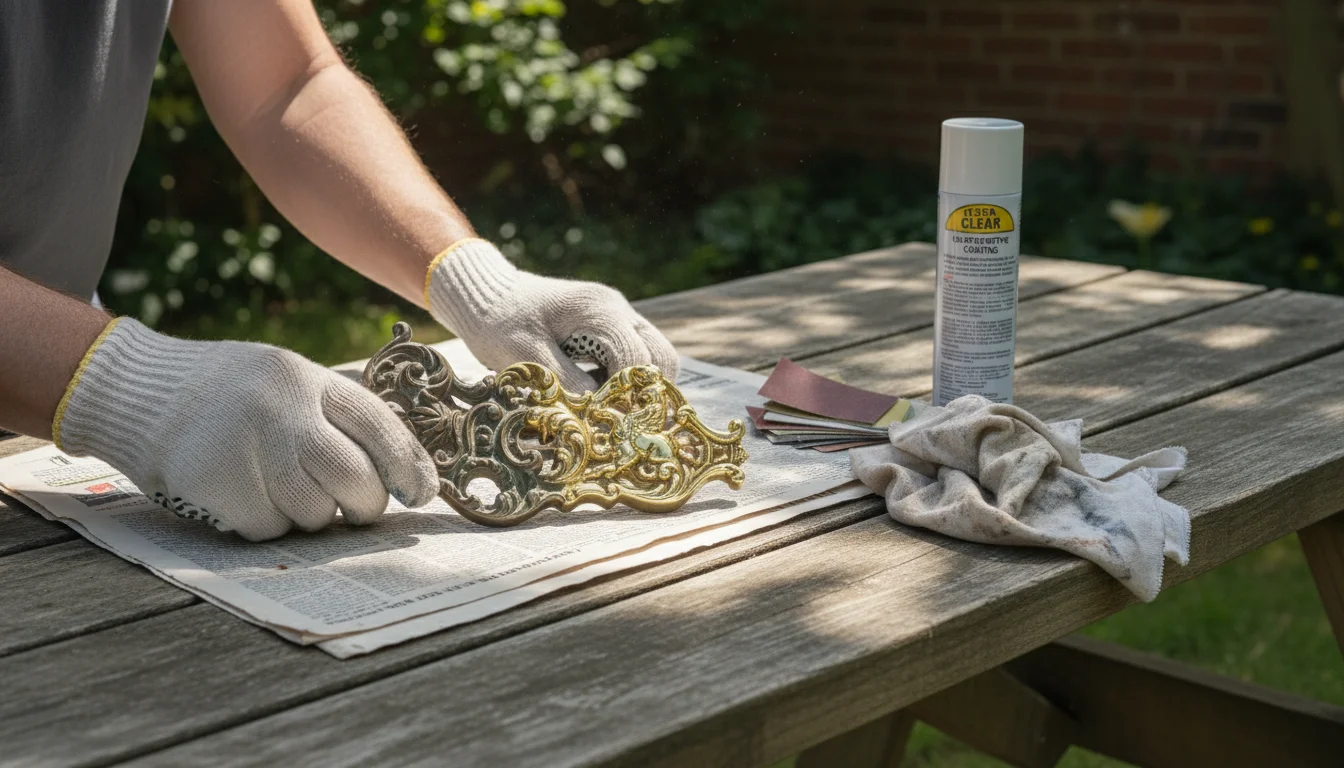
For some antique or unique hardware, refinishing offers an alternative to full replacement. If your existing hardware is structurally sound but looks dated, cleaning, sanding, and applying a new coat of spray paint or a chemical antiquing solution can revitalize it. This method works best for solid metal pieces and requires careful preparation, but it can be incredibly budget-friendly if done correctly. Ensure the hardware is not rusted or severely damaged before attempting this.
Troubleshooting Common Hardware Hurdles
While upgrading door hardware is generally simple, you might encounter a few common issues. Knowing how to address them helps ensure a smooth installation and lasting functionality.
- Door Does Not Latch Properly: This often indicates a misaligned strike plate on the door frame. Loosen the strike plate screws and adjust its position slightly inward or outward until the latch bolt enters cleanly. You might need to use a pencil to mark where the latch hits the plate, then adjust accordingly. If the plate cannot be adjusted enough, you may need to slightly enlarge the opening in the door frame with a chisel.
- Squeaky Hinges: If you did not replace your hinges, squeaks often arise from friction. Apply a small amount of lubricant, such as silicone spray or WD-40, directly to the hinge pins. Open and close the door several times to distribute the lubricant. For persistent squeaks, remove the hinge pins, clean them, and apply grease before reinserting.
- Loose Knobs or Levers: If your new hardware feels wobbly, first check that the screws holding the two halves together are securely tightened. If the screws are tight but the hardware still moves, the issue might be an oversized bore hole in the door or insufficient wood around the bore hole. You can often address this by shimming the interior of the bore hole with wood putty or a thin piece of wood veneer before reinstalling the hardware.
- Stripped Screws: Over-tightening screws, especially in older wooden doors, can strip the screw hole. To fix this, remove the screw, fill the hole with wood putty or a wood dowel glued in place, let it dry, and then redrill a pilot hole before reinserting the screw. Alternatively, use a slightly larger or longer screw.
- Difficulty Turning Key or Latch: If your new keyed entry hardware is stiff, ensure you installed all components correctly and nothing is binding. Sometimes, applying graphite lubricant to the lock cylinder can resolve stiffness. If the problem persists, the internal mechanism might be faulty, requiring replacement.
Addressing these small issues proactively ensures your new door hardware performs optimally and continues to enhance your home’s comfort and aesthetic for years to come. For more detailed troubleshooting advice on home repairs, resources like Bob Vila offer extensive guides.

Frequently Asked Questions
Can I mix different hardware finishes in my home?
While a consistent finish creates a cohesive look, you can mix finishes if you do so intentionally and thoughtfully. For example, use one finish for all door hardware and another coordinating finish for cabinet pulls. Or, stick to one finish per room. Avoid too many different finishes in one sightline, as this can create a cluttered or uncoordinated appearance. Aim for two primary finishes that complement each other.
Do I need to replace my hinges when I upgrade my door knobs?
You do not always need to replace hinges, but it is highly recommended. Old hinges might squeak, show wear, or have a different finish than your new hardware. Replacing them ensures a unified look and smooth operation. When replacing hinges, ensure the new hinges match the size and corner radius (square or rounded) of your existing ones for an easy swap.
How do I know what size door hardware to buy?
The most important measurement is the “backset,” the distance from the edge of the door to the center of the bore hole where the knob or lever passes through. Common residential backsets are 2-3/8 inches and 2-3/4 inches. Measure this distance on your existing doors before purchasing. Also, check the thickness of your door to ensure the new hardware will fit, though most residential hardware accommodates standard door thicknesses.
Is it possible to install a locking door knob on a door that previously only had a passage knob?
Yes, you can easily install a privacy (locking) knob where a passage knob once was, as long as the bore holes and backset measurements match. You simply swap out the passage set for a privacy set. For exterior doors, installing a keyed entry knob might require ensuring your door has sufficient thickness and that the existing bore hole is compatible with the new lock’s mechanism, or possibly drilling an additional bore hole for a deadbolt if you are upgrading to a full handleset.
Your home should be a source of comfort and pride, and often, the smallest changes create the biggest impact. Upgrading your door hardware offers an accessible, practical, and highly effective way to refresh your space, improve functionality, and achieve a polished look without breaking the bank. Embrace this quick win for a brighter living experience.
For expert home organization guidance, visit
Bob Vila, HGTV — Home and Apartment Therapy.
Disclaimer: This article is for informational purposes only and is not a substitute for professional advice. Consult professional organizers or specialists for personalized recommendations.


Leave a Reply