Working from home offers incredible flexibility, but it also shifts the responsibility of your workspace comfort squarely onto your shoulders. Hours spent hunched over a laptop or perched on a kitchen stool can quickly lead to discomfort, aches, and reduced productivity. An ergonomic home office is not a luxury; it is a fundamental aspect of your long-term health and efficiency as a remote worker. It ensures your body stays comfortable, supported, and aligned, reducing strain and preventing common ailments like back pain, neck stiffness, and carpal tunnel syndrome.
Beyond ergonomics, applying the art of Hygge to your decor can make your office a place where you truly enjoy spending time.
You can create an effective, body-friendly workspace regardless of your space or budget. This guide empowers you with practical, actionable insights to set up an ergonomic home office that supports your well-being and enhances your work. We address common challenges, such as limited space in apartments or budget constraints, offering realistic solutions you can implement today.
Understanding Ergonomics: Why Your Workspace Matters
Ergonomics is the science of designing and arranging workplaces so people and equipment interact most efficiently and safely. For your home office, this translates to optimizing your desk, chair, monitor, and accessories to fit your body, rather than forcing your body to adapt to an ill-suited setup. A properly optimized workspace reduces physical stress, prevents injuries, and improves overall comfort and productivity. Think of it as investing in your long-term health, directly influencing your home wellness.
If your office is part of a multi-use room, using room divider ideas can help create a mental boundary between your professional and personal life.
If you are working with limited square footage, these studio apartment layout tips can help you integrate a workspace without sacrificing your home’s aesthetic.
In addition to physical equipment, incorporating air-purifying plants can create a fresher, more revitalizing environment for deep work.
When you sit or stand at a desk for hours each day, even subtle misalignments can lead to cumulative strain. Your body naturally seeks balance, and when your setup forces awkward postures, your muscles and joints bear the brunt. Over time, this can manifest as chronic back pain, neck stiffness, shoulder tension, headaches, and wrist discomfort. Studies show that poor ergonomics can significantly contribute to musculoskeletal disorders, which are a leading cause of missed workdays. By proactively addressing ergonomics, you actively protect yourself from these preventable issues.
A well-designed ergonomic home office does more than prevent pain; it fosters an environment where you can focus better and sustain your energy throughout the workday. When you are comfortable, you are less distracted by physical discomfort, allowing your mental energy to concentrate on tasks. This enhances productivity and improves the quality of your work. It creates a seamless interaction between you and your tools, making work feel less like a physical challenge and more like a focused activity.
The Foundation: Choosing Your Ergonomic Home Office Desk
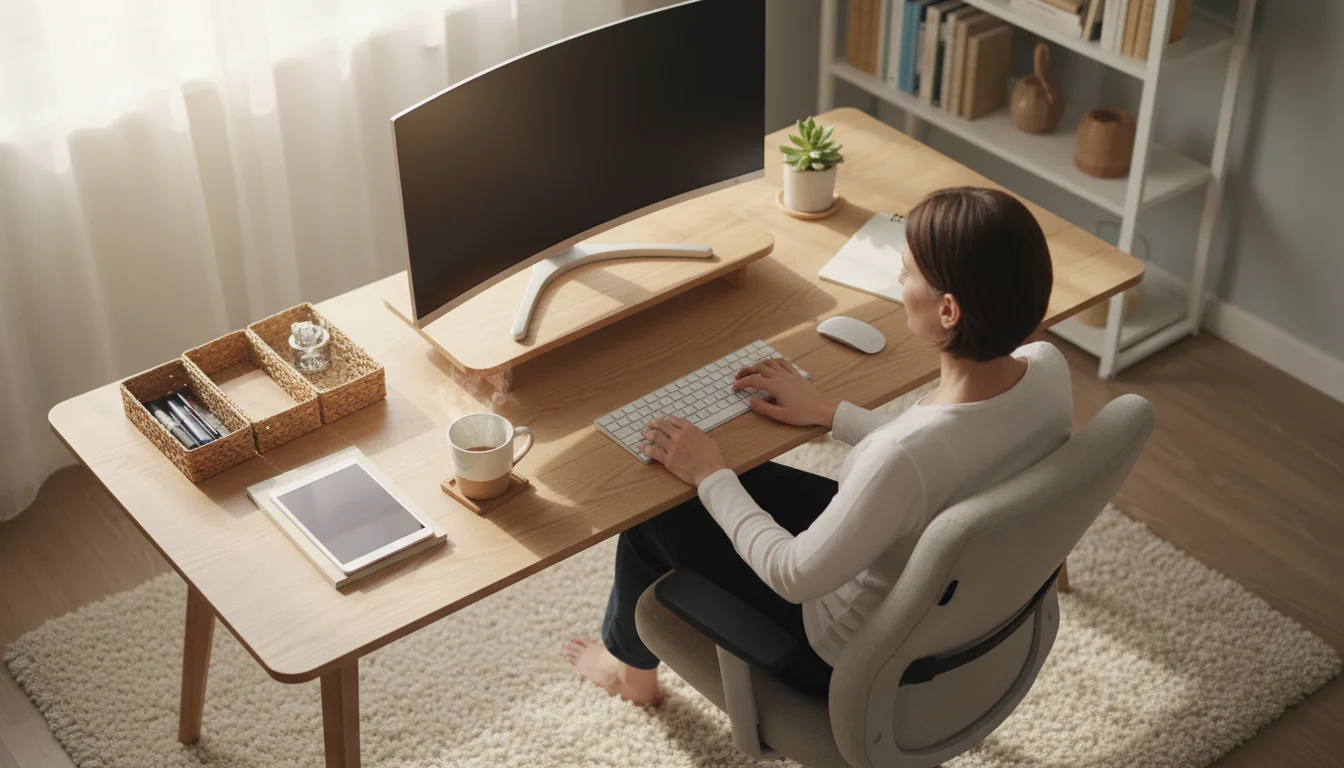
Your desk forms the literal foundation of your ergonomic home office. Its height and size critically impact your posture and comfort. The ideal desk allows you to keep your forearms parallel to the floor, with your elbows at a 90-degree angle, while your feet remain flat on the ground. Most standard desks are about 29-30 inches high, which works for individuals of average height, but may be too high or low for others.
For those in very tight quarters, exploring fold-down desk ideas for tiny home offices can provide a functional surface that tucks away at the end of the day.
Managing auditory distractions is also key for productivity; you can learn how to reduce noise in your apartment to create a quieter focus zone.
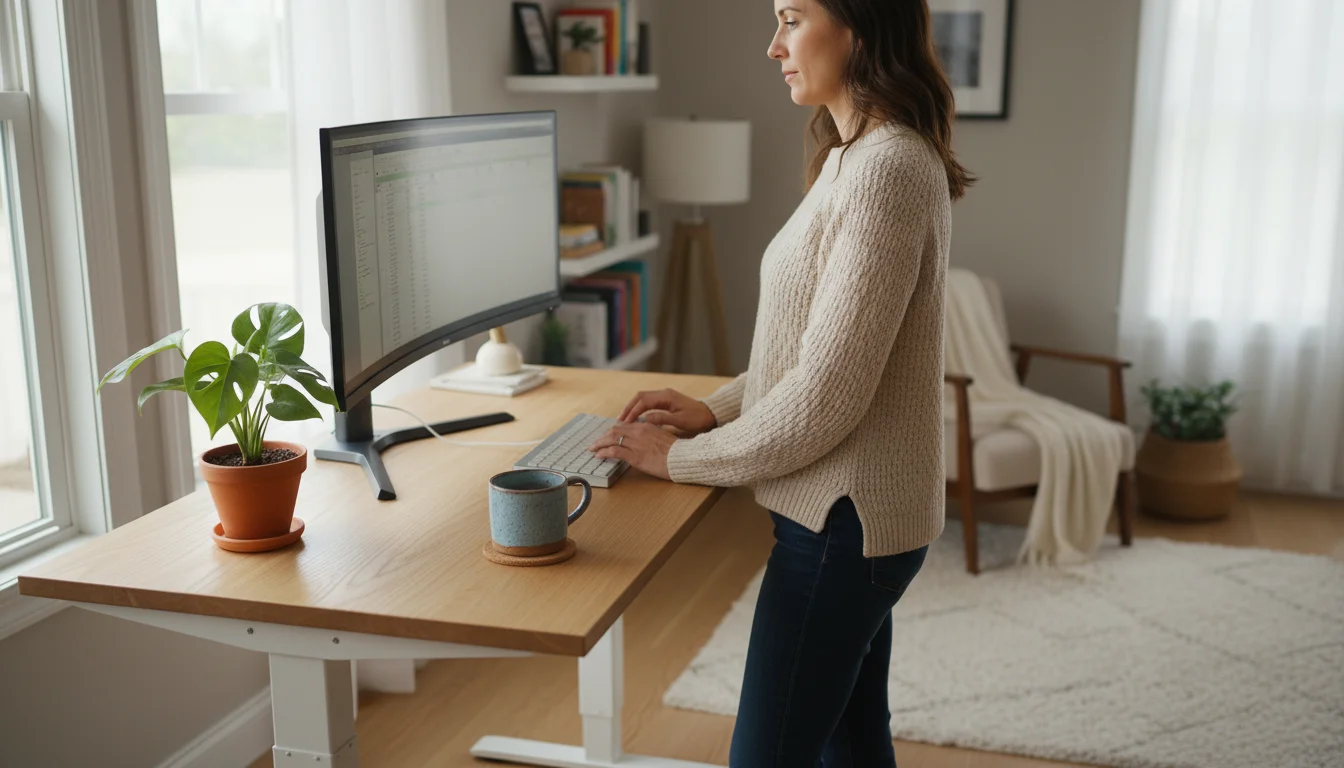
Many remote workers now explore the benefits of a standing desk. These desks allow you to alternate between sitting and standing throughout the day, significantly reducing the amount of time you spend sedentary. Research consistently highlights the positive impacts of reducing prolonged sitting, linking it to lower risks of heart disease, diabetes, and even certain cancers. Incorporating standing intervals can also boost your energy levels and improve focus. For instance, a 2014 study published in the International Journal of Environmental Research and Public Health found that standing desks led to increased productivity among call center employees.
Desk Options for Every Budget and Space:
- Adjustable Height Desks (Sit-Stand Desks): These offer the most flexibility, allowing you to easily switch between sitting and standing positions with the press of a button or a manual crank. You can find electric models with memory presets that save your preferred heights. While they represent a larger investment, the long-term health and productivity benefits often justify the cost.
- Desk Risers or Converters: If replacing your entire desk is not feasible, a desktop converter sits on top of your existing desk and elevates your monitors and keyboard to standing height. This provides many standing desk benefits without needing a new furniture piece. Many models offer gas-spring assisted lifting for smooth adjustments.
- Fixed Height Standing Desks: These desks are permanently set at standing height. They are typically more affordable than adjustable models, but you will need a separate ergonomic stool or chair if you wish to sit occasionally.
- DIY Solutions: For budget-conscious individuals, you can create a makeshift standing desk using sturdy boxes, crates, or even stacks of books to elevate your monitor and keyboard. Ensure your setup is stable and at the correct height. This allows you to experiment with standing work before committing to a larger purchase.
When selecting your desk, consider the available space in your home, especially if you live in an apartment. Corner desks or compact wall-mounted desks can maximize functionality in smaller rooms. Aim for a desk surface large enough to accommodate your monitor, keyboard, mouse, and essential work tools without feeling cluttered. A deeper desk (at least 24-30 inches) provides sufficient distance between your eyes and the monitor, which is crucial for comfort.

Seating for Support: Finding the Right Desk Chair
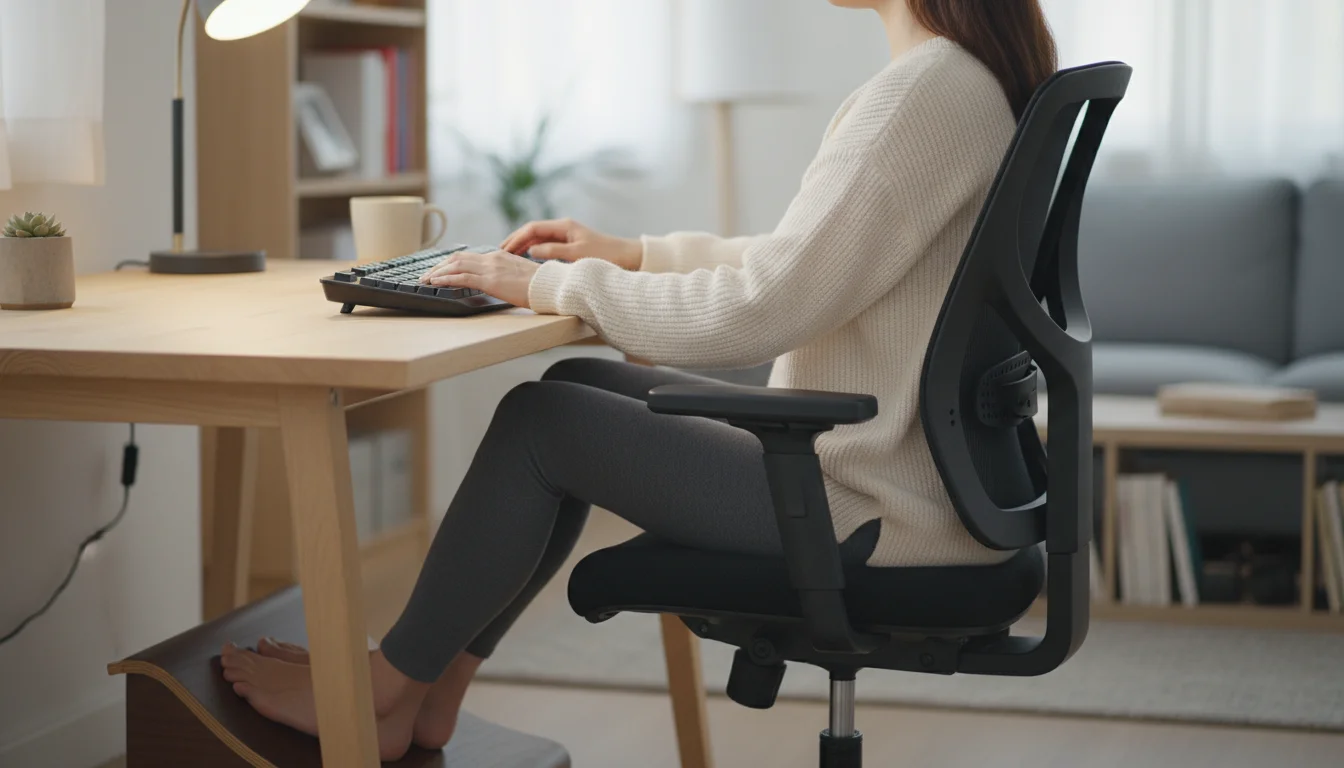
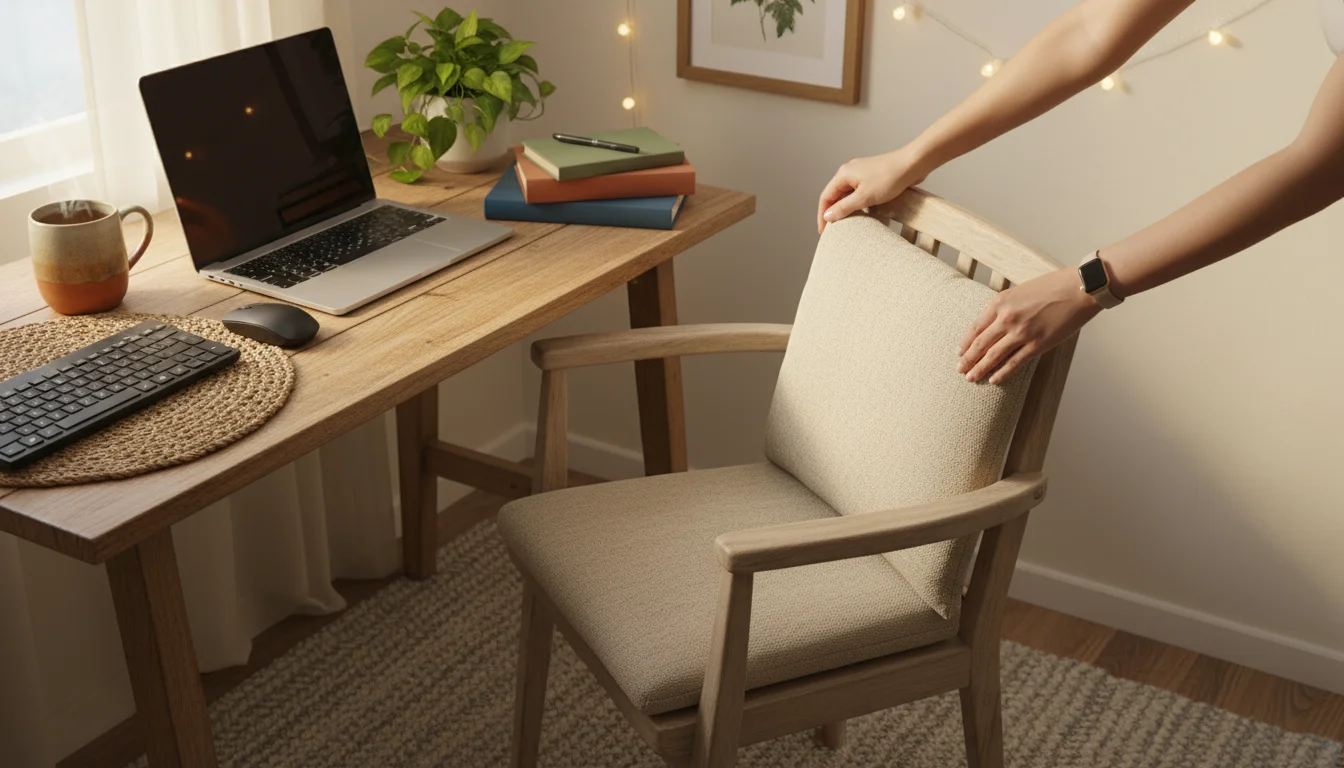
After your desk, your desk chair is the single most critical component of an ergonomic home office. A good ergonomic chair provides crucial desk chair lumbar support, encourages proper posture, and reduces pressure points. Investing in a quality chair directly translates to less pain and more comfortable workdays.
While sitting correctly is vital, ensuring your body recovers overnight with one of the best mattresses for back pain relief is equally important for long-term health.
If a brand-new ergonomic chair isn’t in your budget, consider using the smart shopper’s guide to buying quality secondhand furniture to find high-end office seating at a fraction of the cost.
Key Features to Look For:
- Adjustable Seat Height: You should be able to adjust the seat height so your feet rest flat on the floor or on a footrest, and your knees form a 90-degree angle. Your forearms should also be parallel to the floor when typing.
- Seat Depth: The seat should be deep enough to support your thighs, but leave about 2-4 inches between the edge of the seat and the back of your knees. This prevents pressure on the popliteal fossa (the area behind your knees), promoting healthy circulation. Many chairs offer sliding seats to adjust depth.
- Backrest with Lumbar Support: The backrest should conform to the natural curve of your spine, providing firm desk chair lumbar support, particularly in the lower back. Many ergonomic chairs feature adjustable lumbar support, allowing you to customize its position and intensity to fit your unique spinal curve. This support helps maintain the natural inward curve of your lower back, reducing strain.
- Armrests: Adjustable armrests are vital. They should allow your shoulders to relax, keeping your arms at a 90-degree angle at the elbow when typing. Avoid armrests that force your shoulders upwards. Ideally, they should adjust in height, depth, and pivot.
- Swivel and Wheels: A chair that swivels easily allows you to reach different areas of your desk without twisting your body. Wheels facilitate movement around your workspace, reducing strain from reaching or stretching.
How to Adjust Your Chair for Optimal Posture:
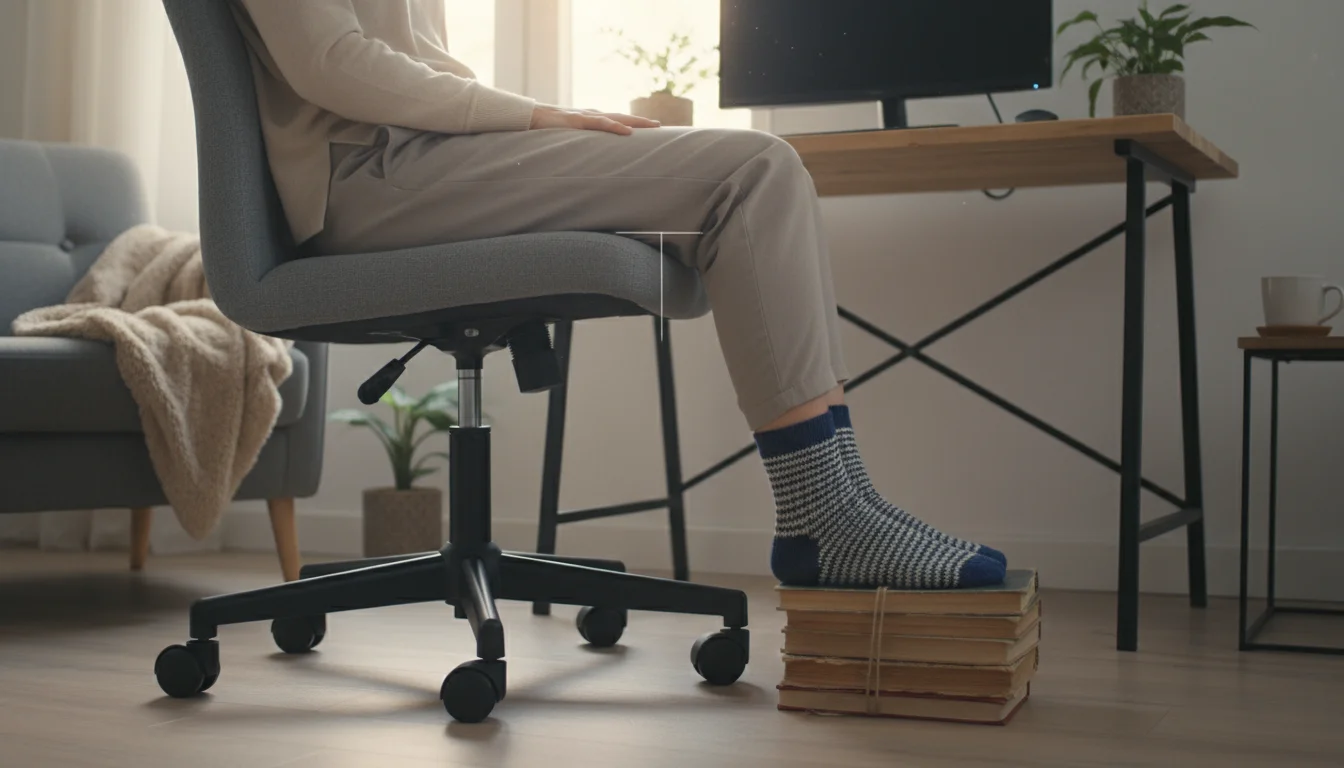
- Feet Flat, Knees at 90 Degrees: Adjust the seat height until your feet are flat on the floor. If your feet dangle, use a footrest. Your knees should form a 90-degree angle.
- Thigh Support: Ensure there is a small gap (2-4 fingers) between the front edge of the seat and the back of your knees. Adjust seat depth if your chair allows.
- Lumbar Support: Position the backrest and its lumbar support so it fits snugly into the curve of your lower back. This prevents slouching and supports your natural spinal alignment.
- Relaxed Shoulders, 90-Degree Elbows: Adjust the armrests so your arms rest lightly on them, keeping your shoulders relaxed and elbows bent at a 90-degree angle when you type.
For budget-conscious solutions, you can enhance a basic chair with accessories. A rolled towel or a small cushion placed at the curve of your lower back can provide temporary desk chair lumbar support. A footrest, even a stack of sturdy books, ensures your feet are supported. Consider a seat cushion to improve comfort and pressure distribution on an existing chair. These temporary fixes allow you to gradually improve your setup while saving for a more comprehensive ergonomic chair.

Visual Comfort: Monitor Height Positioning and Setup
The correct monitor height positioning is crucial for preventing neck and eye strain. When your monitor is too low, you crane your neck forward or down, putting undue stress on your cervical spine. If it is too high, you tilt your head back, also causing strain. Achieving the right height promotes a neutral head and neck posture, a cornerstone of an ergonomic home office.
To reduce eye fatigue and boost your mood, you can also learn how to improve natural light in dark rooms to create a brighter, more inviting workspace.
Don’t overlook air moisture, as using one of the best humidifiers can help prevent dry eyes during long periods of screen time.

Optimal Monitor Height Positioning:
- Eye Level Rule: Position the top of your monitor screen at or slightly below eye level. This ensures your gaze falls naturally on the screen without needing to tilt your head up or down. If you wear bifocals, you might need to lower it a bit more.
- Arm’s Length Distance: Sit comfortably in your chair and extend your arm straight out. Your fingertips should almost touch the screen. This distance minimizes eye strain by keeping the content within a comfortable focal range.
- Tilt: Tilt your monitor slightly backward (10-20 degrees) to reduce glare and optimize viewing angles.
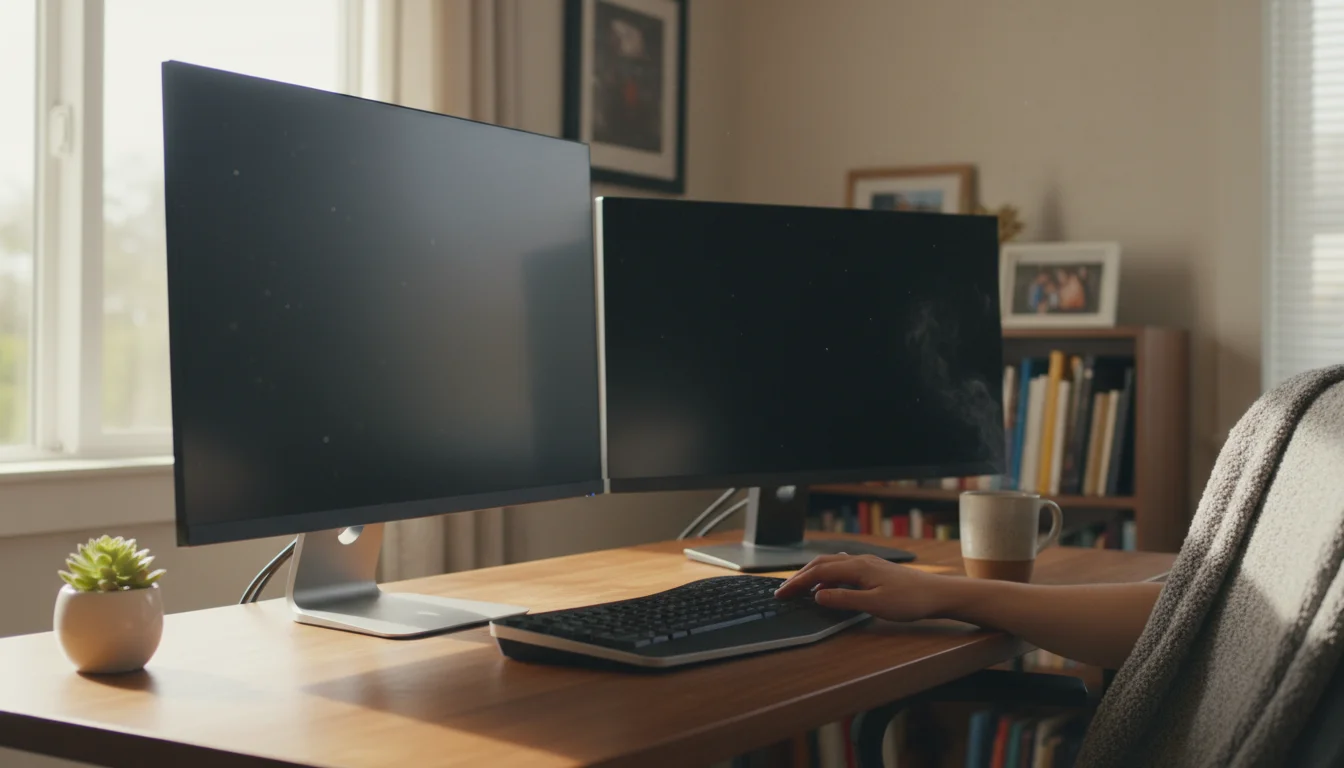
Single vs. Multiple Monitor Setups:
- Single Monitor: Center the monitor directly in front of you.
- Dual Monitors: If you use two monitors equally, place them side-by-side, angled slightly inwards, with the seam between them directly in front of your nose. If you primarily use one monitor more than the other, place the primary monitor directly in front of you and position the secondary monitor to its side, angled in.
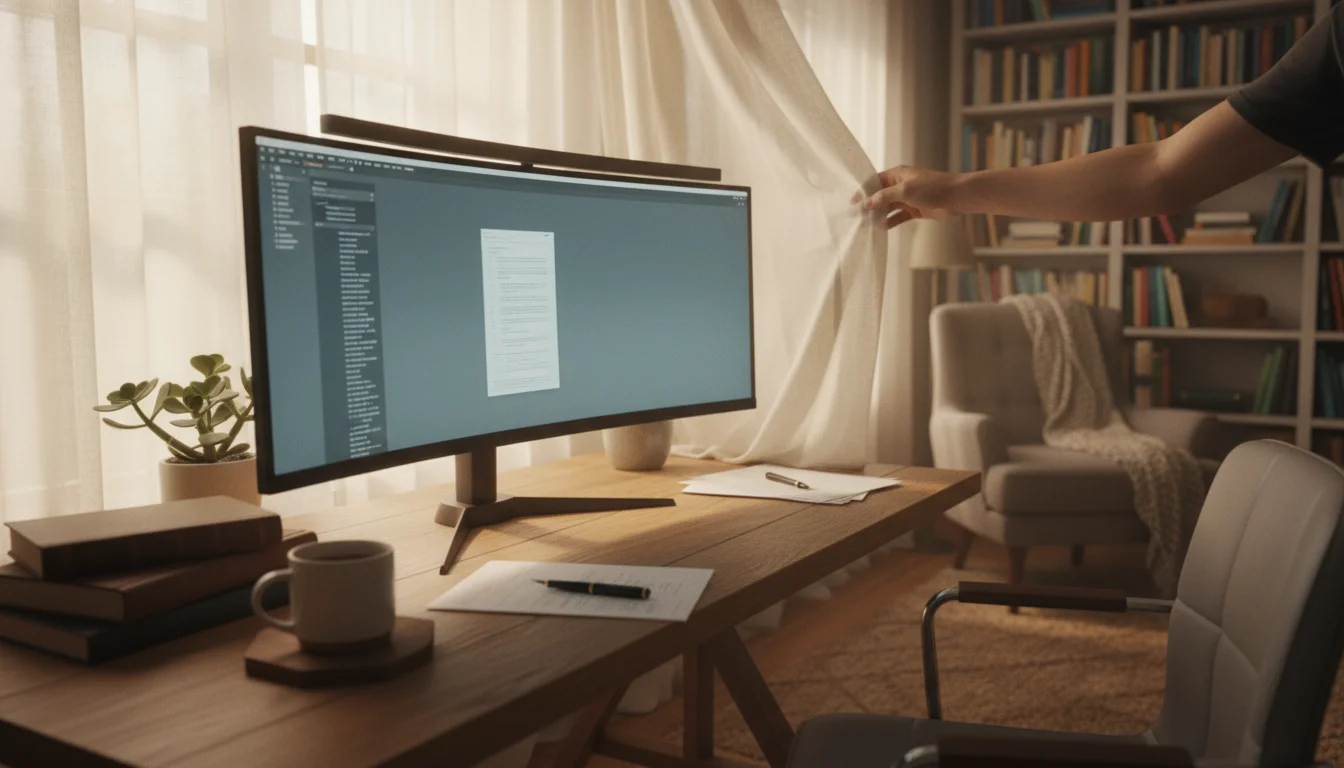
Managing Glare and Lighting:
Glare from windows or overhead lights reflects off your screen, causing eye fatigue. Position your monitor to avoid direct glare. If possible, set up your desk perpendicular to a window, or use blinds and curtains to control natural light. For artificial lighting, use diffuse, indirect light, and avoid placing bright lights directly behind or in front of your monitor. Monitor hoods or anti-glare screens can also help.

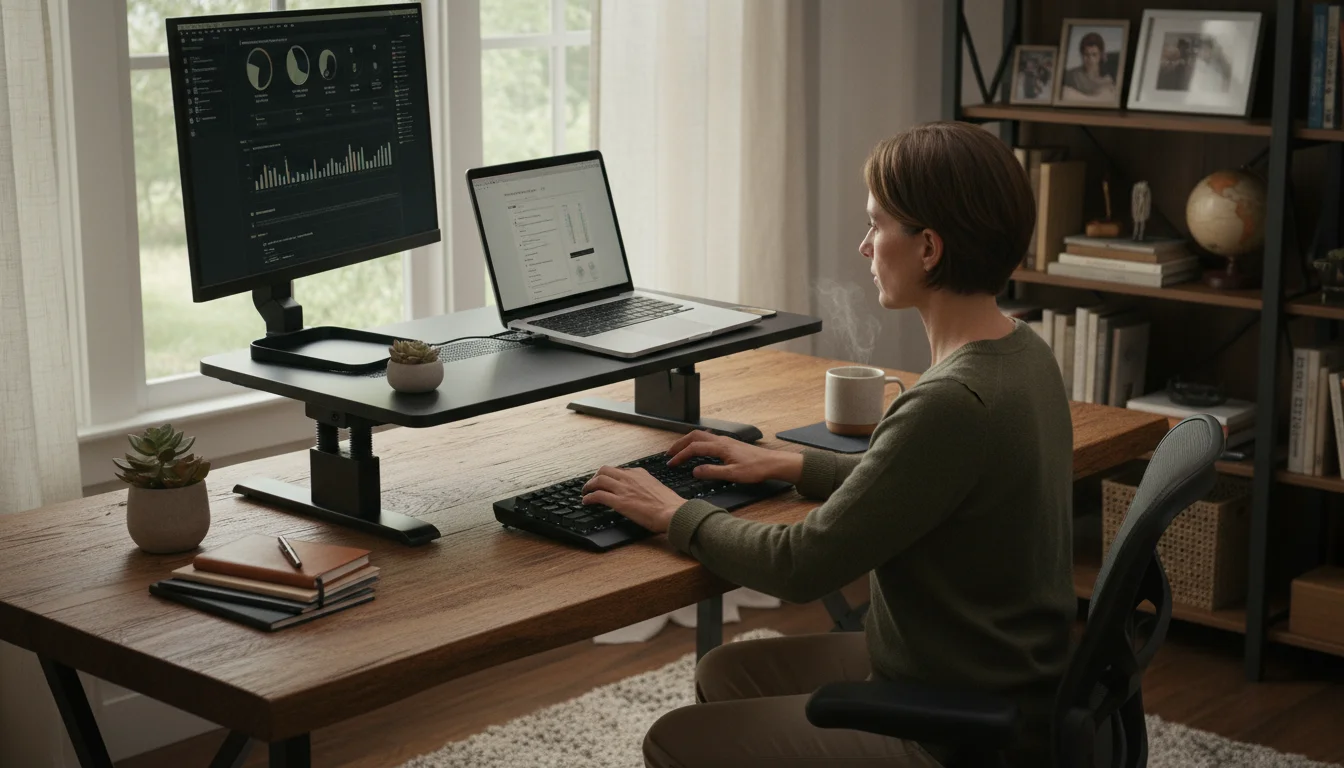
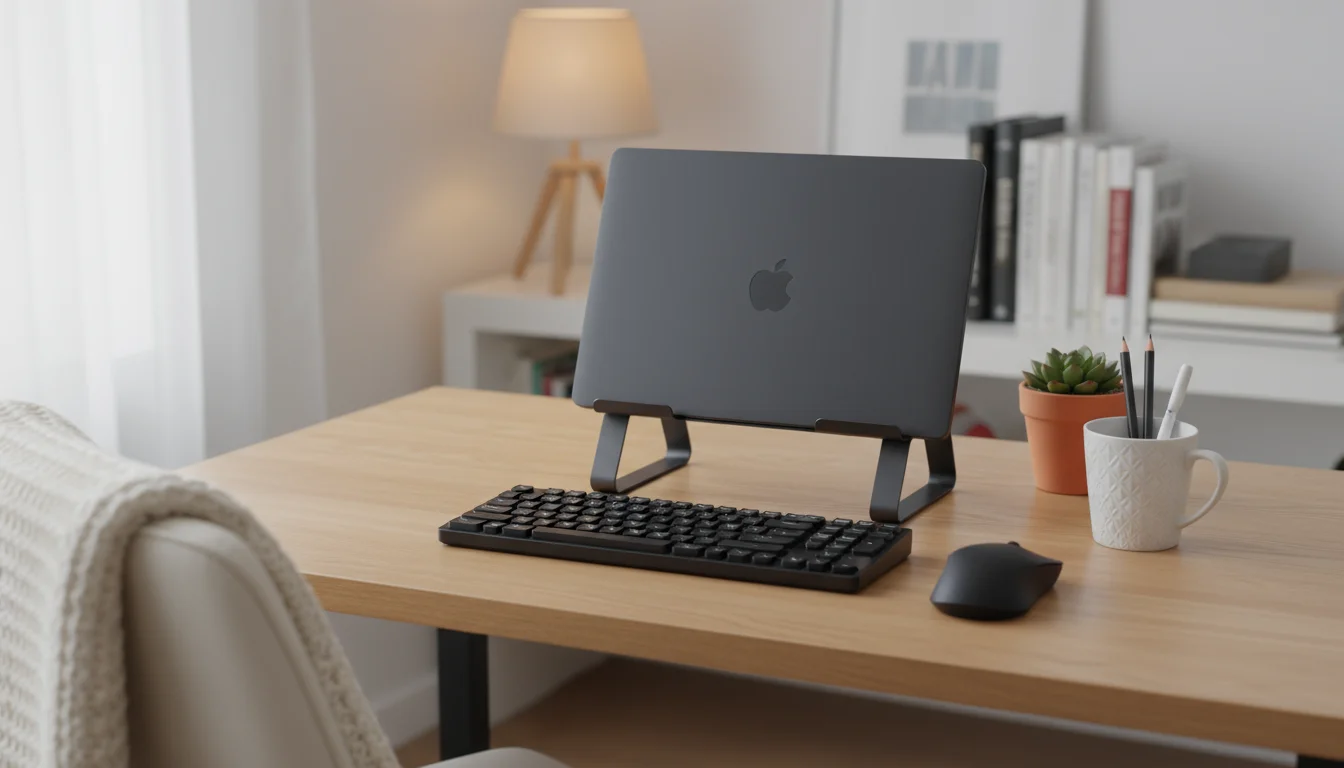
Laptop Stands vs. External Monitors:
Working directly from a laptop rarely allows for proper monitor height positioning or keyboard ergonomics. The screen is too low, forcing you to look down, and the keyboard is attached to the screen. To achieve an ergonomic setup:
- Laptop Stands: Elevate your laptop on a stand to achieve the correct screen height. You will then need to use an external keyboard and mouse to maintain proper wrist and arm posture.
- External Monitors: Connect your laptop to a separate monitor. This provides a larger screen that you can position correctly. Again, use an external keyboard and mouse.
Adjustable monitor arms or risers are excellent tools for achieving the perfect height and distance. Many are clamp-on, making them ideal for renters or small spaces where permanent fixtures are not an option. You can also use sturdy books or monitor stands for a budget-friendly solution, ensuring they are stable and secure.
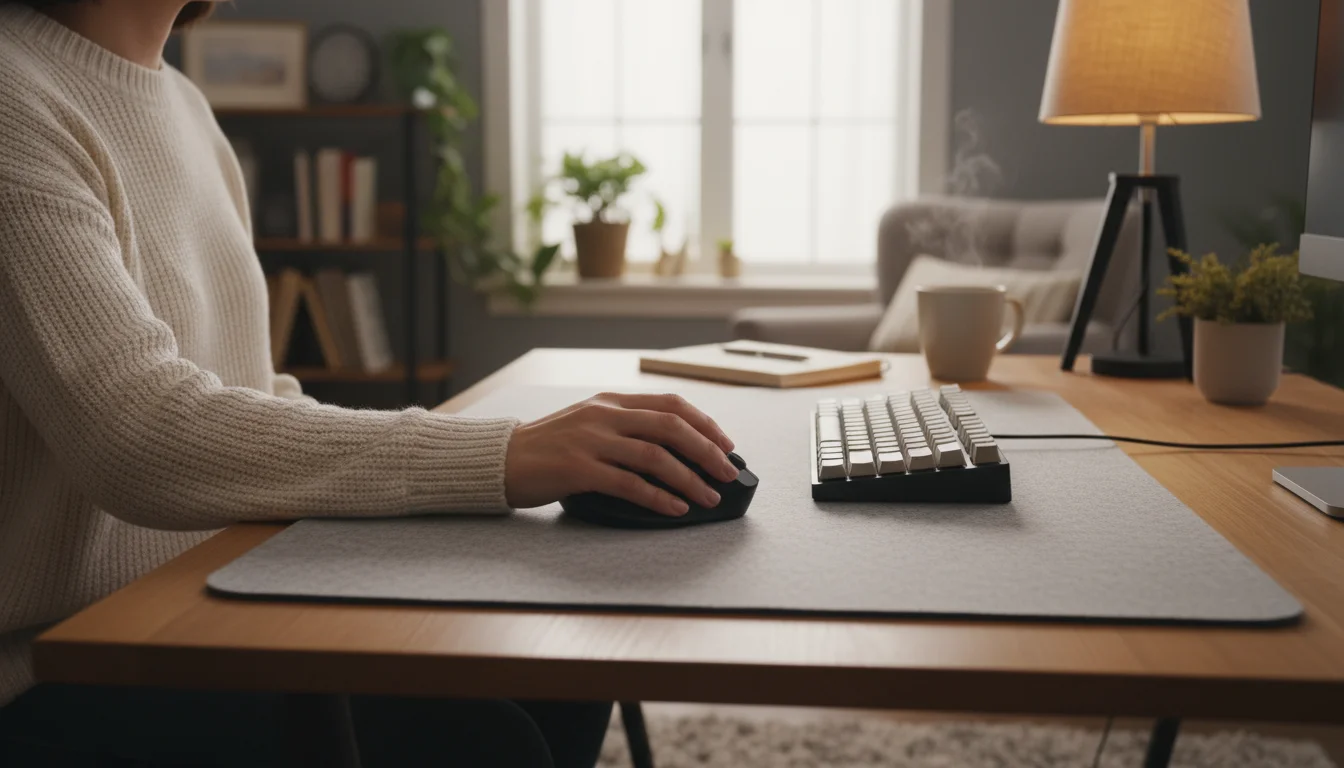
Keyboard and Mouse: Preventing Strain and Injury
Your keyboard and mouse are extensions of your hands, and their setup profoundly impacts wrist and arm health. Incorrect positioning or repetitive strain can lead to discomfort, tingling, or even conditions like carpal tunnel syndrome and repetitive strain injuries (RSIs). Prioritizing proper hand and wrist posture is essential for long-term comfort in your home office.

Optimal Keyboard Placement:
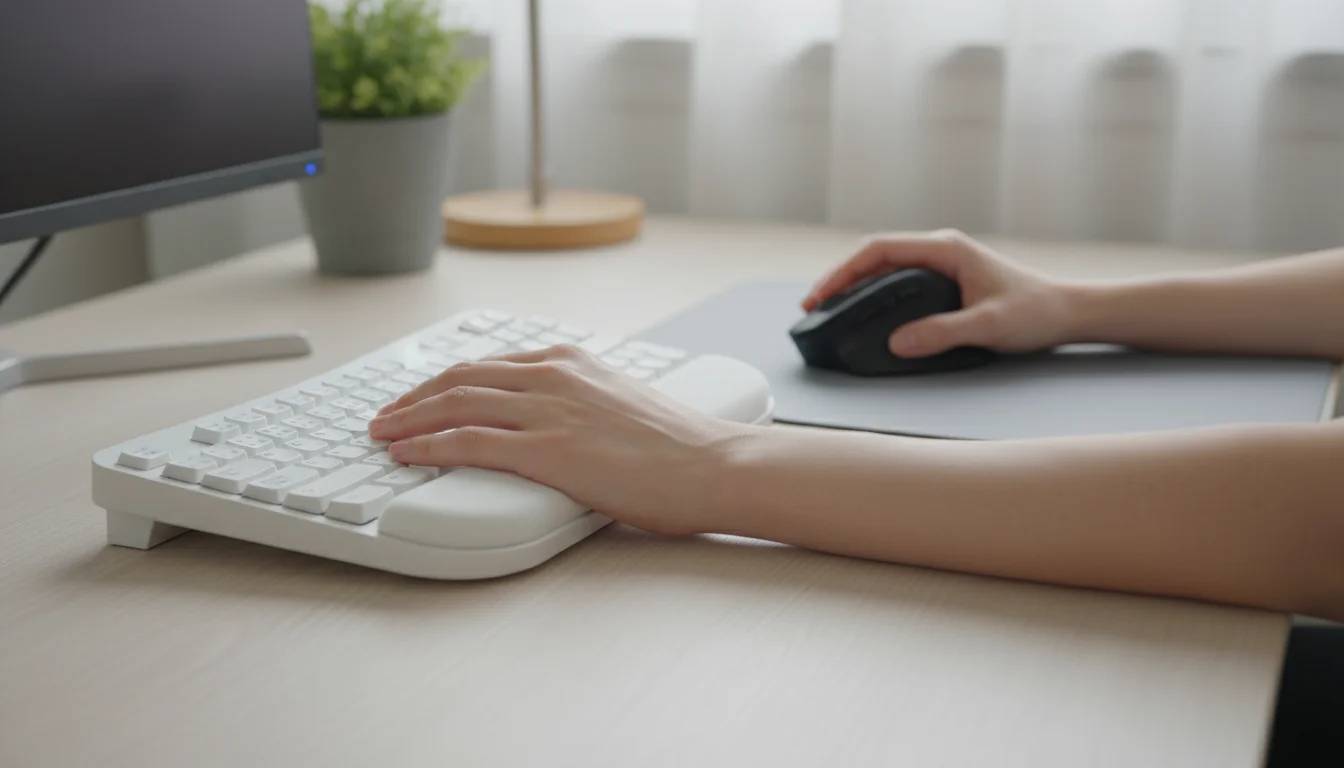
- Shoulders Relaxed, Elbows at 90 Degrees: Your keyboard should be positioned directly in front of you, close enough that you can type with your shoulders relaxed and your elbows bent at roughly a 90-degree angle.
- Straight Wrists: Keep your wrists straight, not bent up or down. Avoid resting your wrists on the desk surface while typing; use your arm muscles to float your hands above the keyboard. If you need wrist support, use a padded wrist rest only during breaks, not while actively typing.
- Avoid Wrist Extensions: Many keyboards have small feet that prop them up at an angle. For most ergonomic setups, it is better to keep the keyboard flat or even slightly angled down (negative tilt) to maintain neutral wrist posture.

Ergonomic Keyboard Options:
- Split Keyboards: These separate the keyboard into two halves, allowing you to position your hands more naturally, aligning with your shoulders.
- Curved or Wave Keyboards: These offer a gentle curve that can reduce wrist pronation.
- Compact Keyboards: If you do not use the numeric keypad often, a compact keyboard without it allows your mouse to be placed closer to your body, reducing reaching.
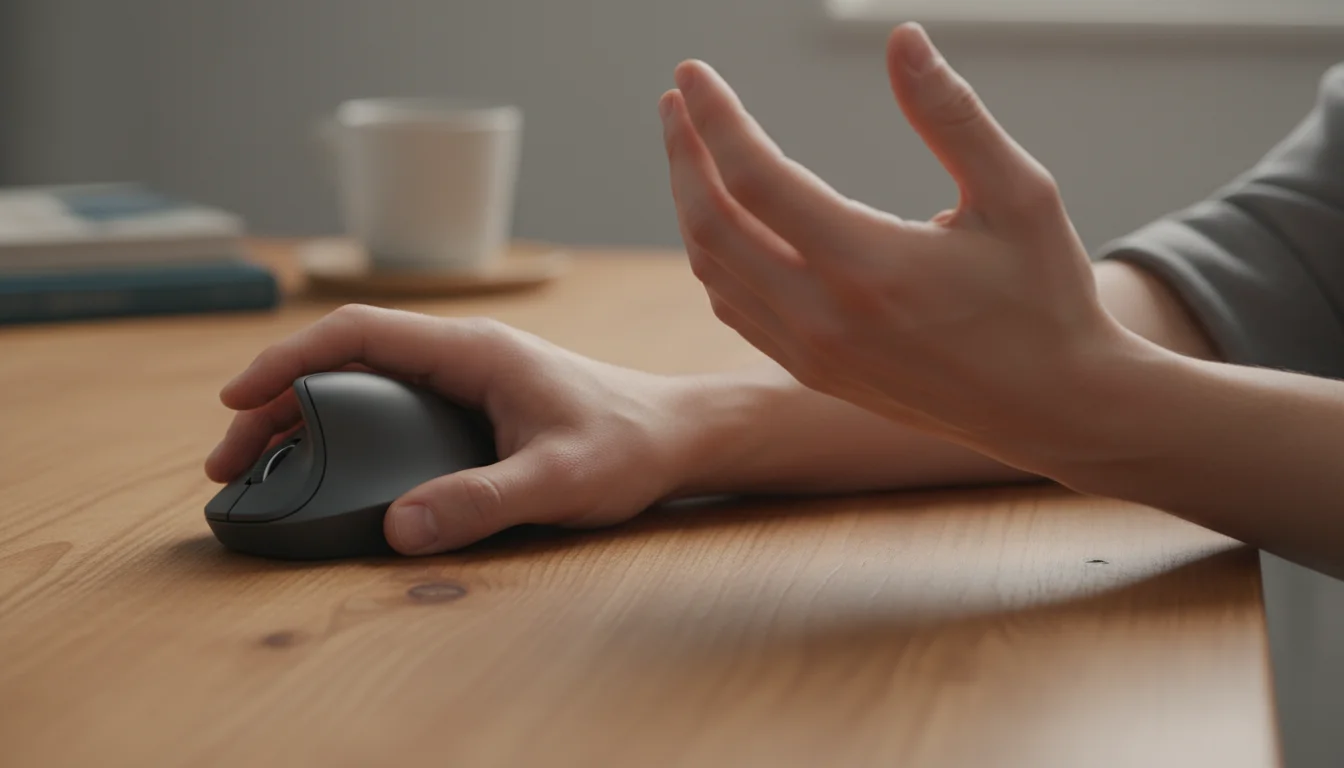
Optimal Mouse Placement and Usage:
- Close to Your Body: Position your mouse as close to your keyboard as possible to minimize reaching. This reduces shoulder and arm strain.
- Neutral Wrist: Maintain a straight wrist while mousing, just as you do with your keyboard.
- Alternate Hands: If possible, switch your mouse hand occasionally to distribute the workload and reduce repetitive strain on one side.
Ergonomic Mouse Options:
- Vertical Mice: These mice position your hand in a “handshake” grip, reducing forearm pronation and wrist twisting.
- Trackball Mice: You move the cursor with your thumb or fingers on a stationary ball, eliminating the need to move your entire arm. This is excellent for limited desk space or reducing arm movement.
- Large or Small Mice: Choose a mouse that comfortably fits the size of your hand to prevent cramping or excessive gripping.
Beyond equipment, taking regular micro-breaks is paramount. Every 20-30 minutes, pause, stretch your fingers, wrists, and arms. Even a minute of gentle movement can significantly alleviate cumulative strain. For additional guidance on improving your workspace, you can explore resources on general home organization for practical desk setup ideas.
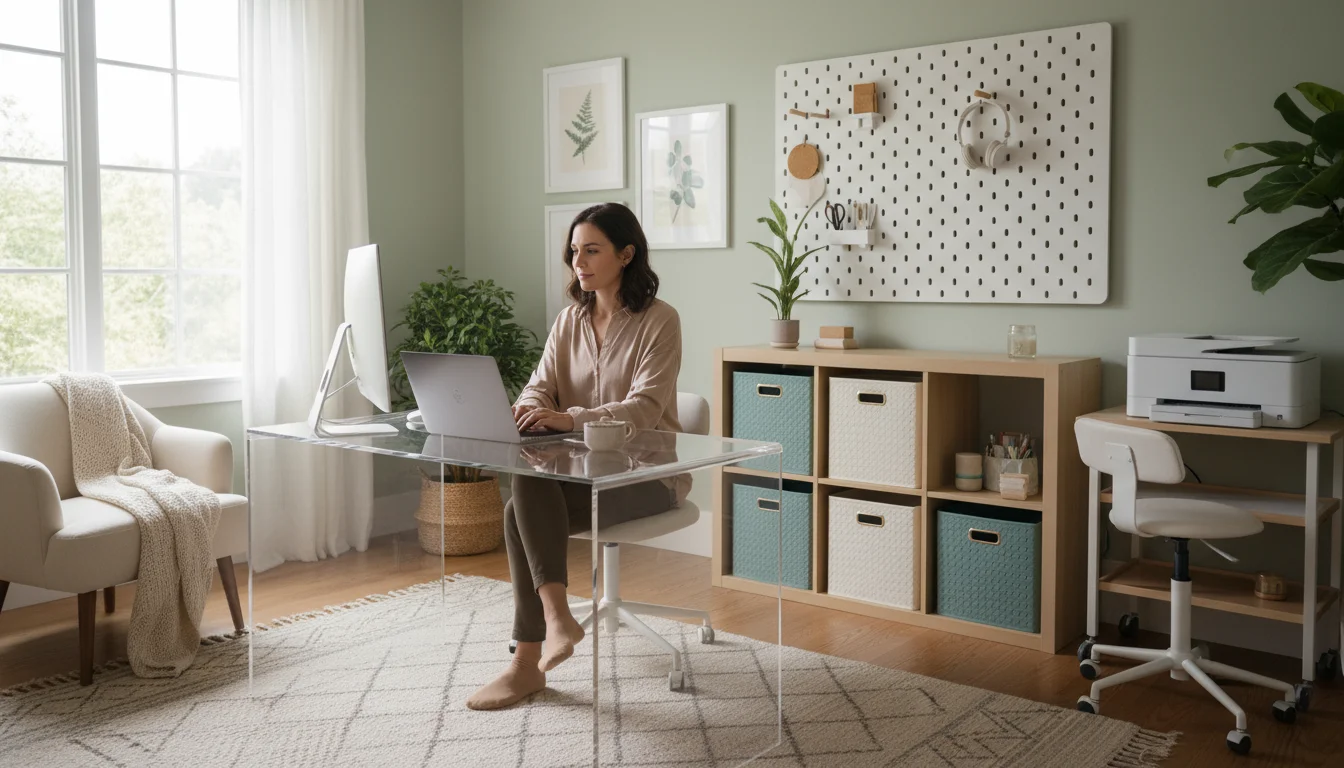
Optimizing Your Workspace Flow and Organization
An ergonomic setup extends beyond just your chair and desk; it includes the overall organization and flow of your workspace. A cluttered, disorganized desk can lead to physical strain as you reach for items or mental strain from distractions. Optimizing your workspace flow promotes efficiency and contributes to your overall home wellness, making your office a pleasant place to work.
Keeping your physical surface clear is only half the battle; consider a digital declutter to manage your computer files and online workspace just as efficiently.
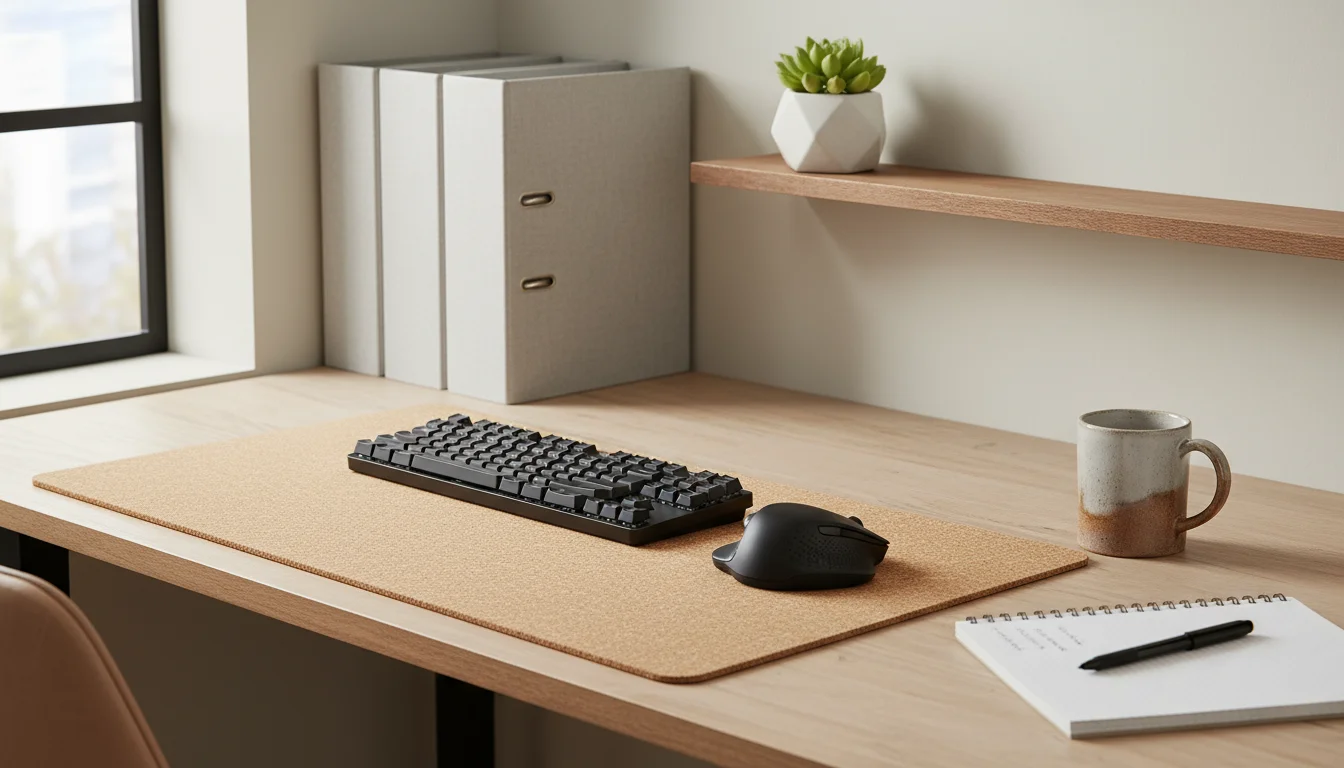
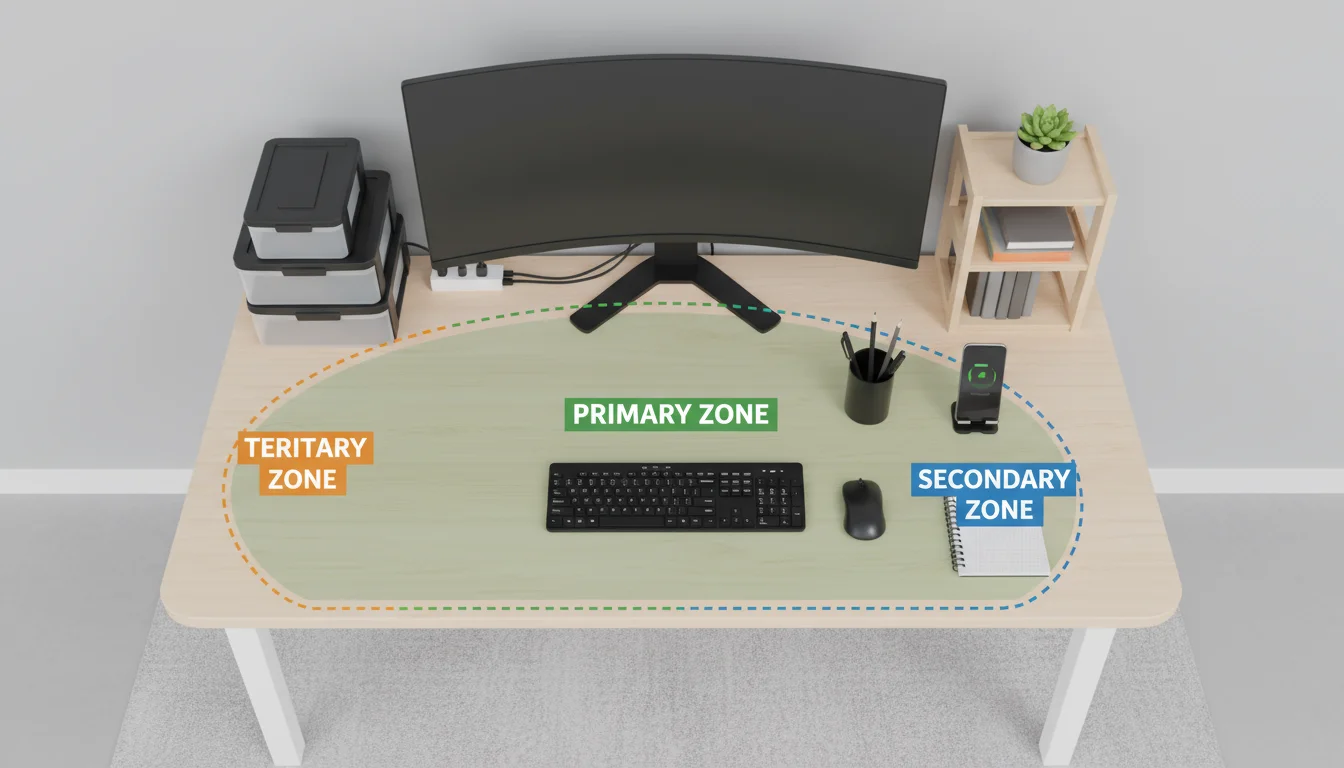
Creating “Zones” Within Your Desk Area:
Think of your desk as having distinct zones, each with a specific purpose. This strategy minimizes unnecessary movement and keeps essential items within easy reach.
- Primary Zone (Immediate Reach): This is the area directly in front of you, where your keyboard, mouse, and monitor reside. These are your most frequently used items and should require minimal arm extension.
- Secondary Zone (Arm’s Length): This zone includes items you use frequently, but not constantly, such as your phone, a notepad, pens, and a water bottle. Place these items within a comfortable arm’s reach without needing to lean or stretch significantly.
- Tertiary Zone (Beyond Arm’s Length): This zone holds items you access occasionally, like binders, reference books, or less-frequently used office supplies. Store these in drawers, on shelves, or in nearby cabinets.
Apply the “prime real estate” principle: the closer an item is to your hands, the more frequently you should use it. For instance, storing a stapler you use once a week in your primary zone wastes valuable space needed for your keyboard and mouse. Instead, relegate it to a drawer or a shelf within your secondary zone.
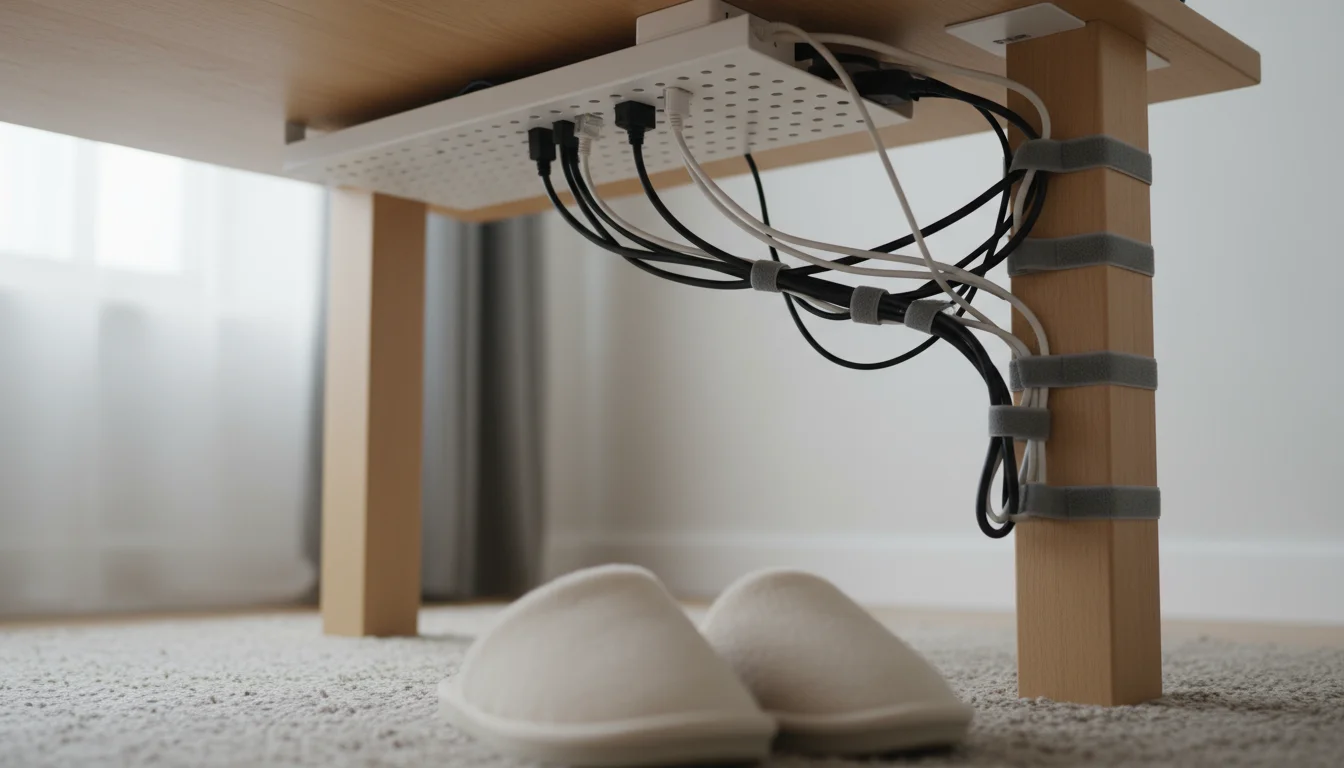
Cable Management for a Tidy Workspace:
Tangled cables create clutter, pose tripping hazards, and make cleaning difficult. Effective cable management streamlines your workspace and improves aesthetics. Use cable ties, Velcro straps, cable sleeves, or adhesive clips to bundle and route cables neatly under your desk or along its legs. Consider a cable management tray or box to hide power strips and excess cable slack. This small effort makes a significant difference in the professionalism and comfort of your home office.

Decluttering Strategies for Small Spaces:
Small apartments or shared living spaces often mean your home office serves multiple functions. Decluttering becomes even more critical to maintain functionality and a sense of calm. Follow these strategies:
- Vertical Storage: Maximize vertical space with shelves, wall-mounted organizers, or drawer units. This frees up valuable desk surface area.
- Multi-functional Furniture: Opt for furniture that serves dual purposes, such as an ottoman with storage or a desk that folds away.
- Digital First: Digitize documents whenever possible to reduce paper clutter. Use cloud storage for files.
- One In, One Out: When you acquire a new item, commit to decluttering something similar you already own.
For more home organization inspiration, consider exploring guides on Real Simple’s organizing section.
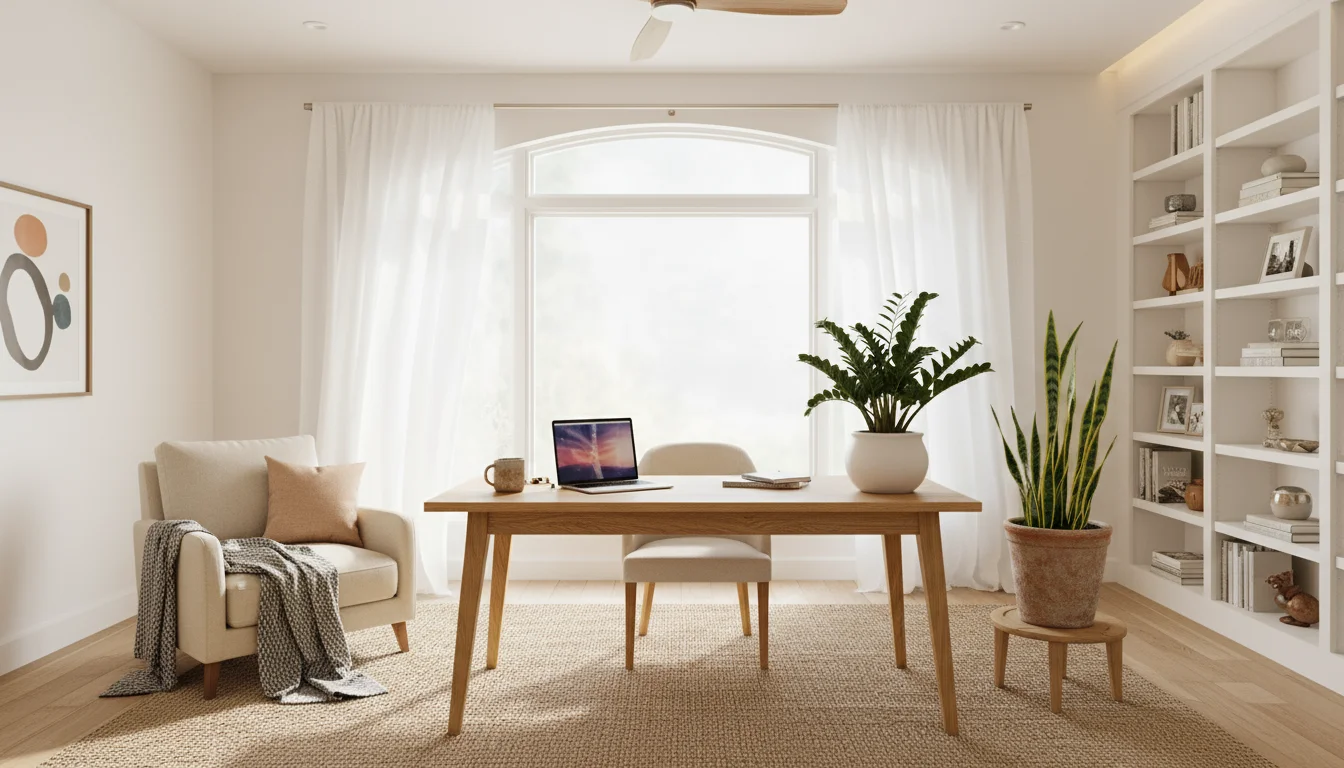
Natural Light and Indoor Plants for Home Wellness:
Beyond physical setup, your environment impacts your well-being. Position your desk to take advantage of natural light, which can boost mood and reduce eye strain. If direct sunlight is too intense, use sheer curtains or blinds to diffuse it. Integrate indoor plants into your workspace. Plants enhance air quality, reduce stress, and add a touch of nature that contributes positively to your overall home wellness. Good choices include snake plants, ZZ plants, or Pothos, which are low maintenance and thrive in various light conditions.
Integrating Movement and Breaks into Your Workday
Even the most perfectly ergonomic home office cannot entirely counteract the effects of prolonged static postures. Your body needs movement. Integrating regular breaks and movement into your workday is a non-negotiable component of a healthy remote work routine. This complements the benefits of a standing desk and prevents stiffness and fatigue.
To make your downtime more restorative, consider creating a reading nook nearby where you can fully disconnect during your lunch hour.

Why Breaks Are Crucial:
Breaks do more than prevent physical discomfort; they also boost mental clarity and focus. Your brain needs periodic pauses to process information and reset. Regular breaks reduce the risk of burnout, improve attention span, and can even increase creativity. Think of them as essential maintenance for both your body and your mind.

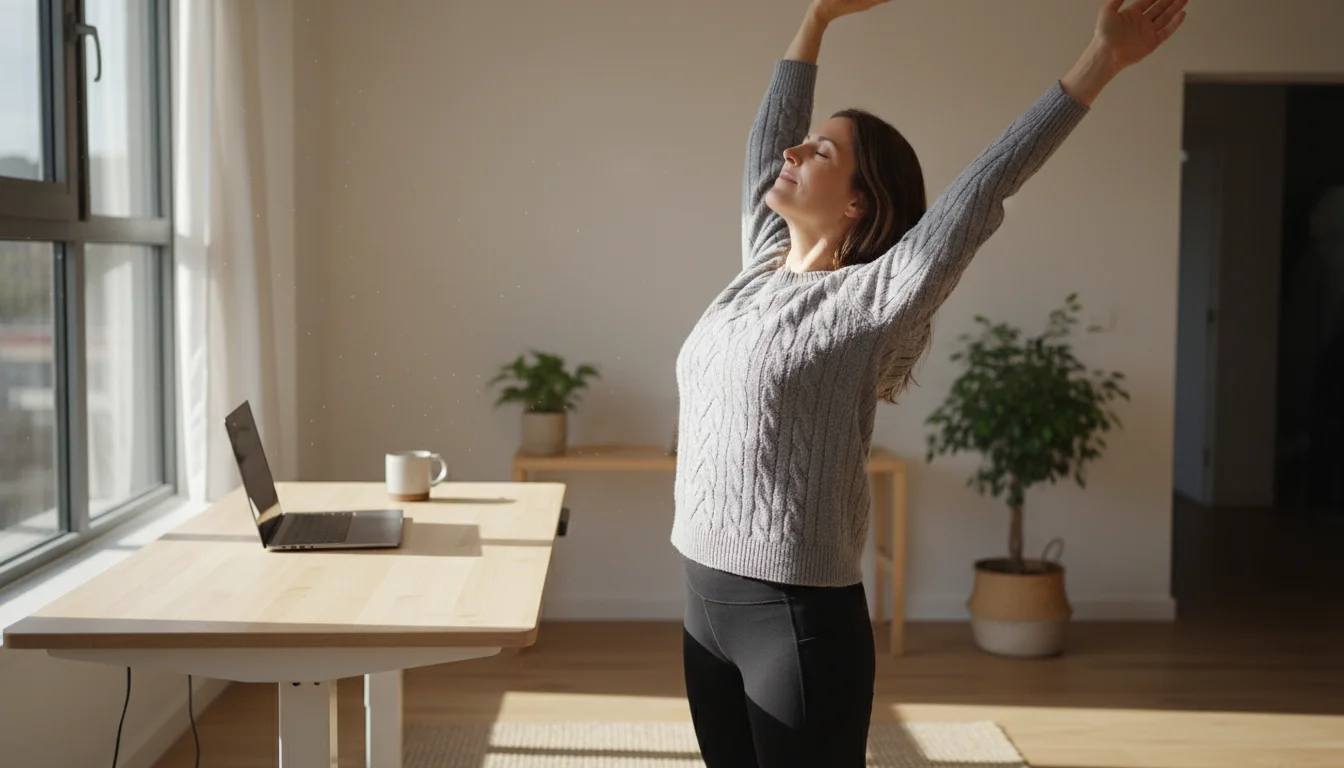
Simple Stretches and Exercises:
You do not need to do a full workout during your breaks. Short, targeted movements make a significant difference:
- Neck Rolls: Gently roll your head from side to side, ear towards shoulder, then chin towards chest.
- Shoulder Shrugs: Shrug your shoulders up towards your ears, hold, then release them down. Repeat several times.
- Wrist and Finger Stretches: Extend your arm, palm facing out, and gently pull your fingers back towards your body. Then, flip your hand, palm facing in, and gently pull your fingers down.
- Torso Twists: While seated, gently twist your upper body to one side, holding for a few seconds, then twist to the other.
- Walk Around: Stand up and walk around your room, get a glass of water, or step outside for a minute. This simple action gets blood flowing to your legs and resets your posture.

Using Timers and Reminders:
It is easy to get absorbed in work and forget to take breaks. Use a timer or a simple app to remind you to stand up and move every 30-60 minutes. The Pomodoro Technique, which alternates focused work periods with short breaks, can be an effective way to structure your day and ensure consistent movement.
If you use a standing desk, alternate between sitting and standing throughout the day. Start with shorter standing intervals (15-20 minutes) and gradually increase them. The goal is not to stand all day, but to break up long periods of sitting. This active alternation contributes directly to the standing desk benefits, keeping your muscles engaged and your circulation healthy. A good rhythm might be 20-30 minutes sitting, 10-15 minutes standing, repeating throughout the day.

Budget-Friendly Ergonomic Solutions for Every Home
Creating an ergonomic home office does not require an unlimited budget. Many practical solutions exist that can significantly improve your comfort and posture without breaking the bank. The key is to prioritize and get creative with what you already have.
If your home office also serves as the household hub, learn how to create a command center to keep personal and professional schedules from overlapping.

DIY Adjustments Using Household Items:
- Monitor Risers: Use sturdy books, reams of paper, or even a robust shoebox to elevate your monitor to eye level. Ensure the stack is stable and level.
- Lumbar Support: A rolled-up towel, a small pillow, or a firm cushion placed at the curve of your lower back can provide effective desk chair lumbar support for a basic chair. Experiment with its position to find what feels best.
- Footrest: If your feet do not rest flat on the floor, use a stack of sturdy books, a small box, or a repurposed step stool as a footrest. This helps maintain the 90-degree knee angle.
- Wrist Rests: While not for constant use during typing, a small, soft cushion or even a folded cloth can provide temporary wrist relief during breaks.
Affordable Product Recommendations:
When you are ready to invest, certain items offer high value for a relatively low cost:
- Laptop Stands: Simple, affordable laptop stands elevate your screen, allowing you to use an external keyboard and mouse. Look for adjustable models.
- External Keyboard and Mouse: Basic ergonomic keyboards and mice are available at reasonable prices and offer significant improvements over a built-in laptop setup.
- Seat Cushions: A good ergonomic seat cushion can transform a less-than-ideal chair, improving pressure distribution and comfort. Memory foam or gel cushions are popular choices.
- Adjustable Monitor Arms: While some can be pricey, many budget-friendly single or dual monitor arms exist that clamp to your desk, providing excellent flexibility for monitor height positioning.
- Desk Converters: As mentioned, these sit on your existing desk and provide standing desk benefits without needing a full desk replacement. Many reputable brands offer solid, affordable models.
Prioritizing Your Purchases:
If you cannot overhaul your entire setup at once, prioritize items based on your most pressing needs and pain points:
- Adjust Your Monitor: This is often the easiest and cheapest fix, significantly impacting neck comfort.
- Improve Your Chair: Lumbar support and seat height are critical. Start with DIY fixes, then consider a seat cushion or a budget-friendly ergonomic chair if discomfort persists.
- External Keyboard & Mouse: If you use a laptop, this investment immediately improves wrist and arm posture.
- Standing Desk Solution: If prolonged sitting causes fatigue or pain, consider a desk converter or a full standing desk.
Remember, small, consistent adjustments lead to significant long-term benefits for your home wellness and productivity. You can gradually build a highly functional and comfortable ergonomic home office tailored to your needs and budget.

Frequently Asked Questions
How often should I adjust my ergonomic setup?
You should initially adjust your setup until it feels comfortable and aligned according to the guidelines provided. However, your body might change, or you might switch equipment. Re-evaluate your setup periodically, especially if you start experiencing any discomfort, or at least once every few months. Small tweaks can make a big difference, so do not be afraid to fine-tune your chair or monitor height positioning.
Can I achieve an ergonomic setup in a small apartment?
Absolutely. Even in limited spaces, you can create an ergonomic home office. Focus on compact, multi-functional furniture, vertical storage solutions, and careful organization. For instance, a wall-mounted desk, a laptop stand with an external keyboard and mouse, and a well-adjusted ergonomic chair can fit into surprisingly small nooks. Prioritize the core ergonomic principles: correct monitor height, good seating, and proper keyboard/mouse positioning, even if it means using DIY solutions.
Is a standing desk truly worth the investment?
For many remote workers, yes, a standing desk is a worthwhile investment. The primary benefit lies in its ability to facilitate movement and reduce prolonged sitting, which studies link to various health issues. Users often report increased energy, improved focus, and reduced back pain when incorporating standing intervals. If a full standing desk is too expensive, a desk converter offers many of the same standing desk benefits at a lower cost, allowing you to experience the advantages before a larger financial commitment.
What if I already have back or neck pain?
If you are experiencing existing back or neck pain, establishing an ergonomic home office is even more critical. Proper desk chair lumbar support, correct monitor height positioning, and regular movement can alleviate pressure and prevent further aggravation. It is always wise to consult with a healthcare professional, such as a physical therapist or chiropractor, as they can provide personalized advice and specific exercises tailored to your condition. They might also recommend specific ergonomic accessories.
How do I choose between different ergonomic chair features?
Focus on adjustability that matches your body. Key features include adjustable seat height, seat depth, and especially desk chair lumbar support. Armrests that adjust in multiple directions are also beneficial. If you are taller or shorter than average, look for chairs designed for your specific height range. Test chairs if possible, even if only for a short period, to ensure they provide adequate support for your unique body shape. Prioritize features that directly address your comfort and support needs.


Leave a Reply