As the vibrant colors of fall emerge, your home needs specific attention to brace itself for winter’s chill. Neglecting crucial seasonal home maintenance can lead to costly repairs, energy inefficiency, and discomfort when temperatures drop. In my 20 years of experience, I have seen firsthand how proactive maintenance saves homeowners thousands of dollars and prevents major headaches.
Once you have completed your maintenance chores, you can reward yourself with these budget-friendly ways to make your living room cozier as the weather cools down.
This comprehensive checklist outlines 12 practical, actionable tasks to prepare your home for winter, ensuring it remains warm, safe, and efficient. We will cover everything from exterior upkeep to indoor system checks, providing clear, step-by-step guidance for each.
Essential Exterior Preparations
Your home’s exterior takes the brunt of winter weather. Securing these components now prevents water damage, pest infestations, and structural issues.
After trimming back shrubs near the foundation, follow these lawn and garden winterization steps to protect your landscaping from heavy snow.
Don’t forget that deck and patio maintenance is also critical this time of year to prevent moisture from damaging wood and stone surfaces.
While fall is about preparation, reviewing your summer home maintenance checklist can help you spot issues that may have developed over the warmer months.
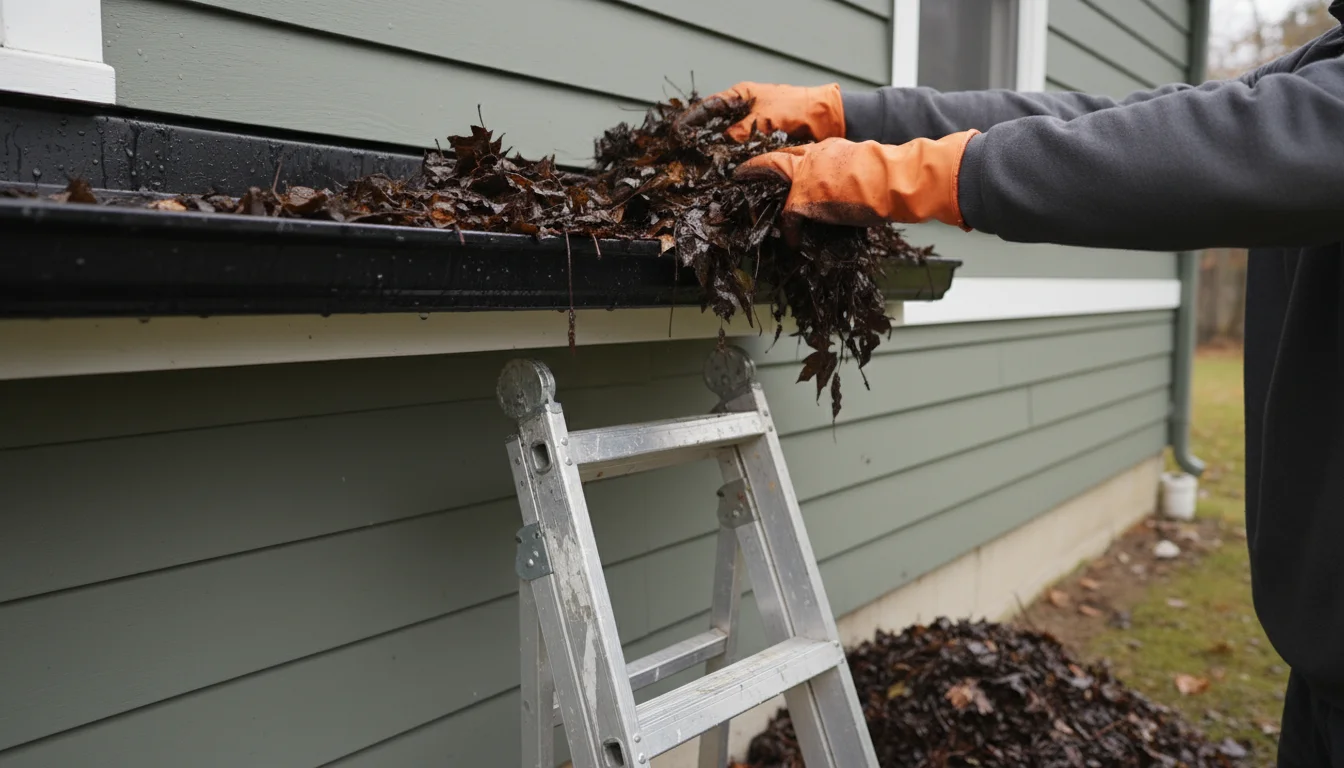
Task 1: Inspect and Clean Gutters and Downspouts
Timeframe: 1-2 hours, depending on home size and debris. Perform this task after most leaves have fallen.
Why it matters: Clogged gutters prevent proper drainage, causing water to back up, freeze, and potentially damage your roof, fascia boards, and foundation. This is a top priority for winterizing home readiness.

How to do it:
- Safety First: Use a sturdy ladder, ensuring it stands on level ground. Have a helper spot you. Wear work gloves to protect your hands from sharp debris and potential pests.
- Clear Debris: Remove all leaves, twigs, and sediment from your gutters. You can use a small trowel or your hands.
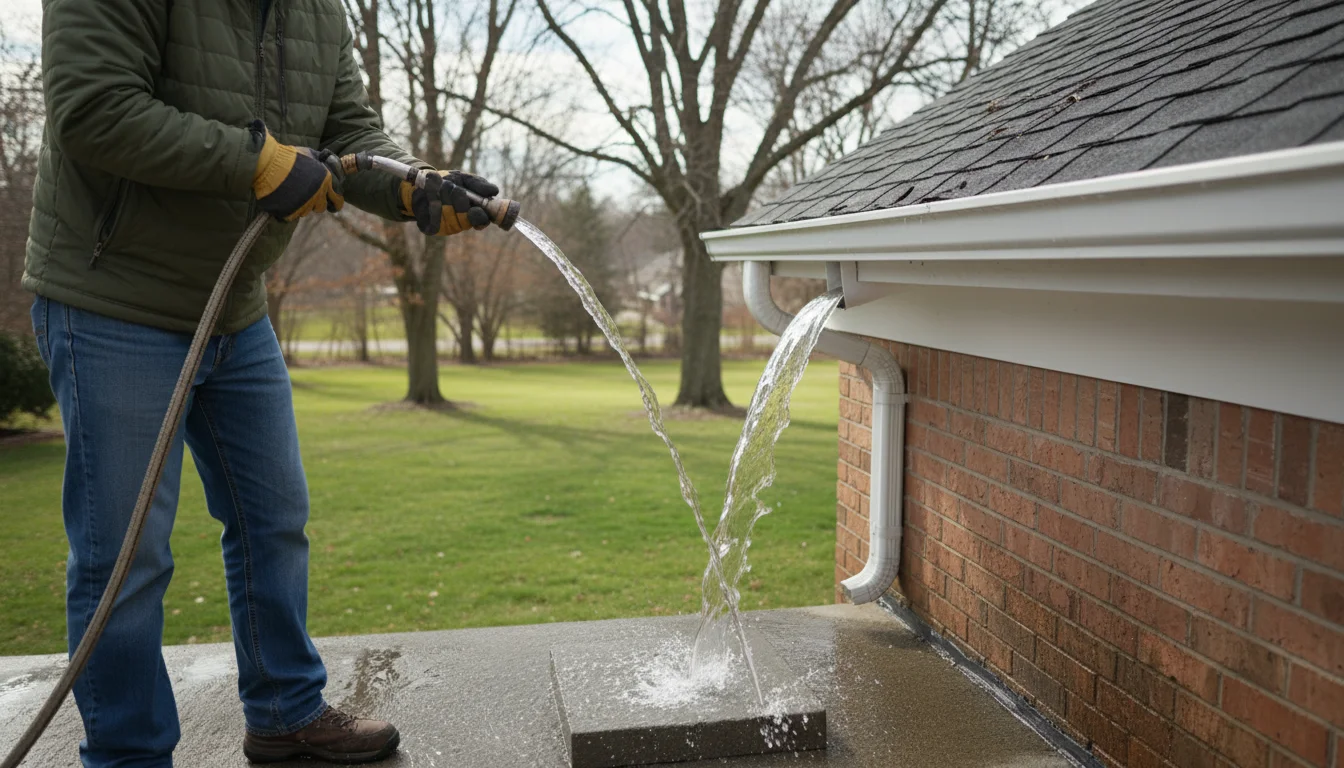
- Flush with Water: Once physically clear, flush the gutters with a garden hose. Observe the water flow. It should move freely through the gutters and out the downspouts.
- Check Downspouts: If water pools or flows slowly, your downspouts may be clogged. Use a plumber’s snake or the hose to dislodge any blockages.
- Inspect for Damage: Look for any cracks, rust spots, or loose fasteners. Repair minor issues with gutter sealant or by tightening fasteners. Consider adding gutter guards if clogs are a recurring problem, as this reduces your fall gutter cleaning schedule frequency.
Pro Tip: For homes with tall or difficult-to-reach gutters, consider hiring a professional. Their specialized equipment and training reduce risk and ensure thorough cleaning.

Task 2: Inspect and Repair Your Roof
Timeframe: 30-60 minutes for visual inspection, longer for minor repairs.
Why it matters: Winter storms expose every weakness in your roof. Identifying and fixing issues now prevents leaks, ice dams, and significant structural damage.
How to do it:
- Safety First: Inspect your roof from the ground with binoculars if possible. If you must go on the roof, wear non-slip shoes and use a harness on steep pitches. Avoid doing this alone or in icy/wet conditions.
- Look for Damaged Shingles: Identify any missing, cracked, curled, or buckling shingles. These are prime entry points for water.
- Check Flashing: Inspect the metal flashing around chimneys, skylights, and vents. Ensure it lies flat and shows no signs of rust or separation.
- Examine Soffits and Fascia: Look for any signs of water staining, rot, or animal entry points.
- Address Moss and Algae: While not immediately damaging, excessive growth can trap moisture. Remove it carefully or consult a professional.
Warning: Roof repair can be dangerous. If you find significant damage or feel uncomfortable performing the inspection yourself, contact a qualified roofing professional immediately.
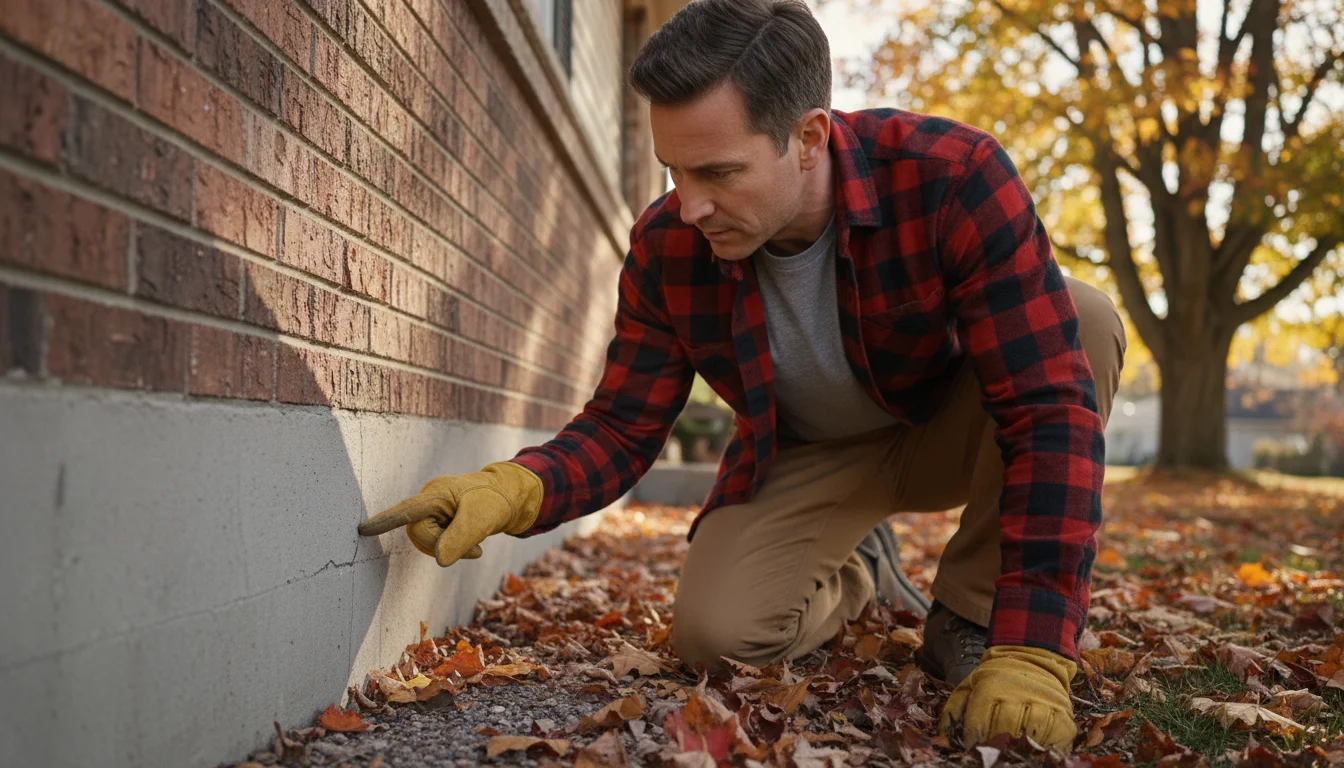
Task 3: Inspect Your Home’s Foundation and Exterior
Timeframe: 30-45 minutes.
Why it matters: Cracks in your foundation or exterior walls allow water penetration, leading to structural issues, mold, and increased energy loss. Winter’s freeze-thaw cycles can exacerbate small cracks into major problems.
How to do it:
- Walk Around Your Home: Systematically inspect your foundation for any visible cracks, both horizontal and vertical. Pay attention to corners and areas near windows.
- Check Exterior Walls: Look for crumbling mortar between bricks, damaged siding panels, or peeling paint that could indicate moisture issues.
- Examine Grade Slop: Ensure the ground slopes away from your foundation for at least six feet. Poor grading directs water towards your home, increasing risk.
- Seal Small Cracks: Use exterior-grade caulk or hydraulic cement for small, non-structural cracks. For larger or spreading cracks, consult a structural engineer.
- Trim Vegetation: Cut back any trees or shrubs that are too close to your foundation or siding, as roots can cause damage and branches can scrape during winter winds.

Sealing Your Home’s Envelope
An airtight home is an energy-efficient home. Sealing drafts prevents heat loss and reduces your heating bills significantly.

Task 4: Check and Seal Windows and Doors
Timeframe: 1-3 hours, depending on the number of windows and doors.
Why it matters: Drafty windows and doors are major sources of heat loss, accounting for 10% to 25% of your heating bill. Sealing these gaps is a fundamental step in winterizing home efficiency.
How to do it:
- Identify Drafts: On a windy day, hold a lit candle or incense stick near window and door frames. A flickering flame or wavering smoke indicates a draft.
- Inspect Weather Stripping: Examine existing weather stripping on doors and windows. Look for cracks, gaps, or flattening that compromises its seal.
- Replace Worn Weather Stripping: Remove old, degraded weather stripping. Clean the surface thoroughly, then apply new foam, rubber, or V-strip weather stripping according to manufacturer instructions. This is crucial for effective weather stripping windows and doors.
- Caulk Gaps: Apply a bead of exterior-grade caulk to any visible gaps between window/door frames and your home’s exterior siding. For interior gaps, use interior caulk. Ensure surfaces are clean and dry before applying.
- Install Door Sweeps: For drafts under exterior doors, install a door sweep. Measure carefully and trim to fit.
Pro Tip: For older or particularly drafty windows, consider using temporary window insulation film kits. These are inexpensive, easy to install, and significantly reduce heat transfer.
Optimizing Indoor Systems
Ensure your home’s vital indoor systems are ready to run efficiently and safely all winter long.
In addition to furnace checks, performing water heater maintenance now will ensure your unit operates efficiently during the peak demand of winter.
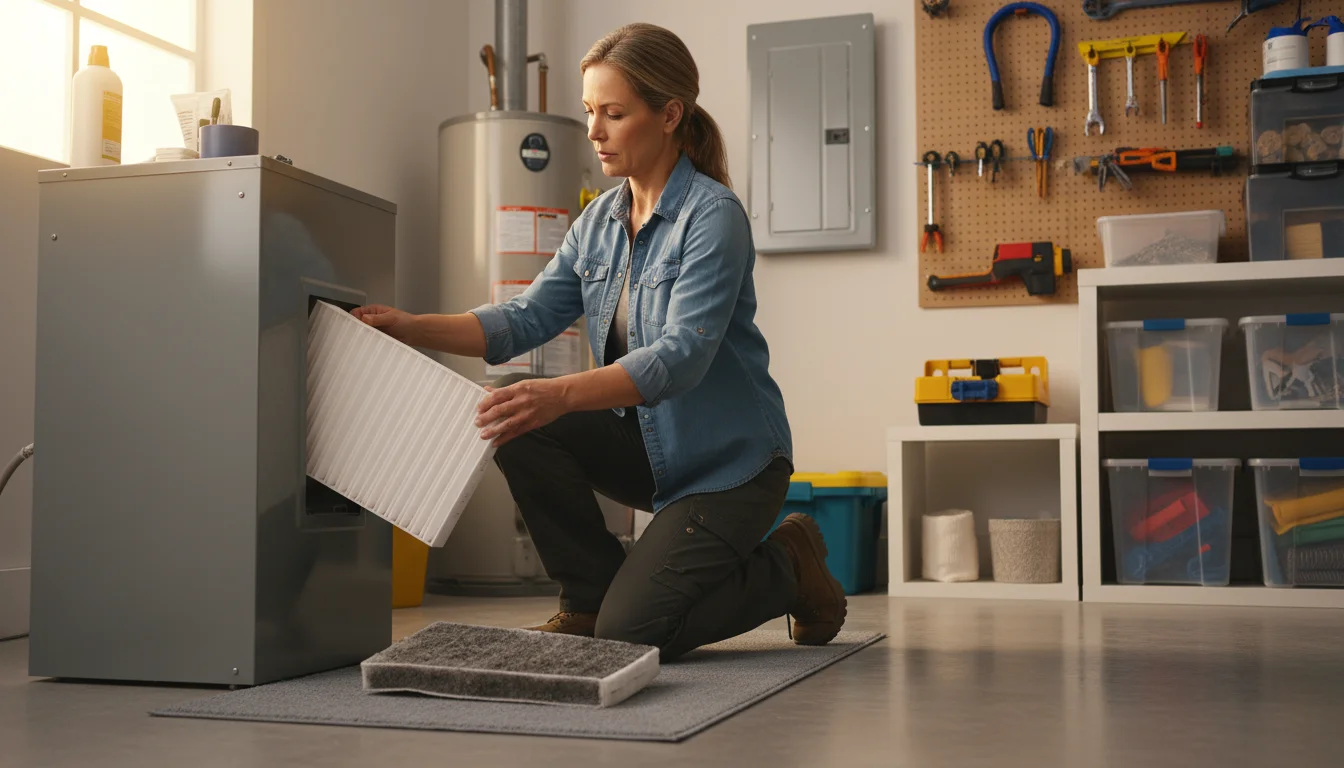
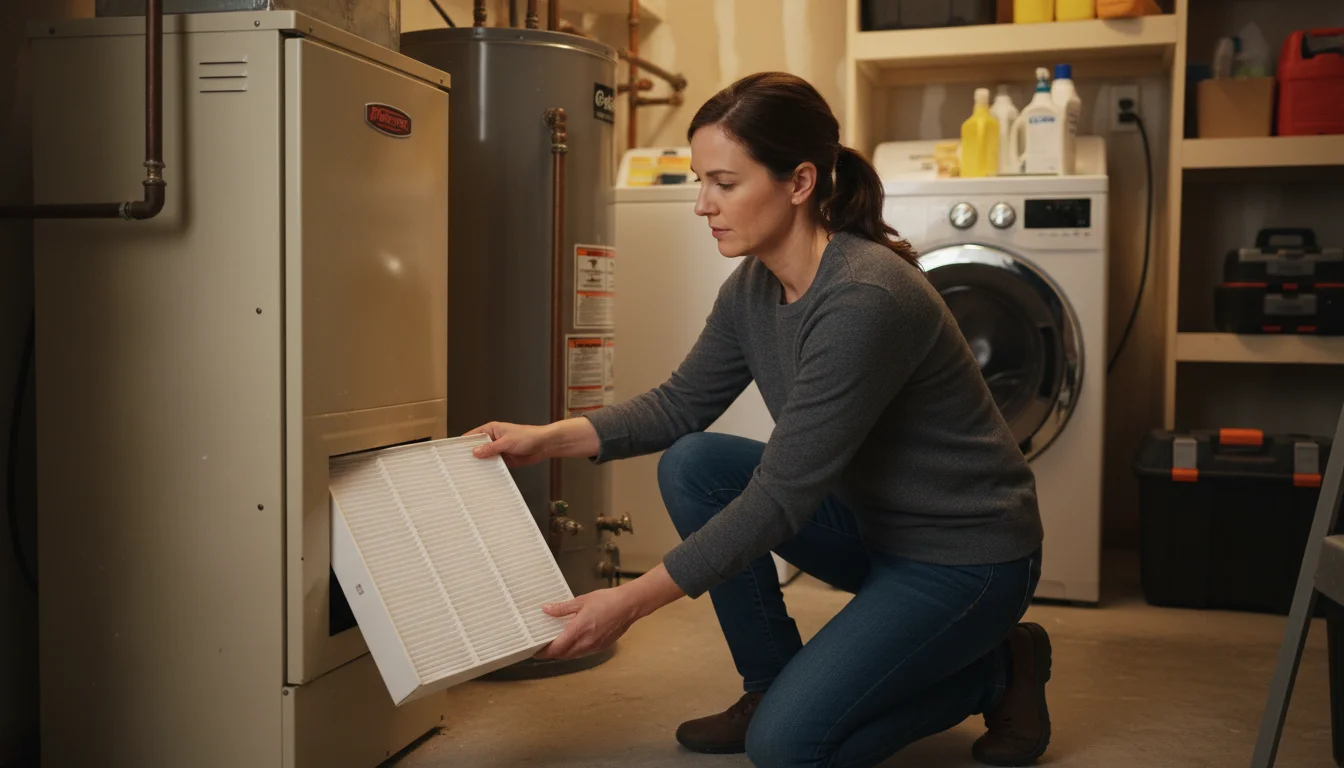
Task 5: Service Your HVAC System (Furnace Focus)
Timeframe: 30 minutes for DIY checks, 1-2 hours for professional service.
Why it matters: A well-maintained furnace operates more efficiently, consumes less energy, and reduces the risk of breakdowns during cold snaps. Regular HVAC maintenance in fall can extend your system’s lifespan by several years and prevent carbon monoxide leaks.
How to do it:
- Replace Air Filter: Before winter, install a fresh air filter. A clean filter improves airflow, system efficiency, and indoor air quality. Aim to replace filters every 1-3 months during peak heating season.
- Clean Vents and Registers: Vacuum dust and debris from all supply and return air vents. Obstructions force your system to work harder.
- Test Thermostat: Turn on your furnace and ensure the thermostat accurately controls the temperature. Consider upgrading to a smart thermostat for better energy management.
- Schedule Professional Inspection: Have a certified HVAC technician perform an annual tune-up. They will clean internal components, check electrical connections, test safety controls, and assess for potential carbon monoxide leaks. This is invaluable for ensuring safe and efficient operation.
Warning: Never attempt complex repairs on your HVAC system unless you are a qualified professional. Gas furnaces involve combustible fuels and high voltage. Always turn off power to the unit at the breaker before performing any DIY cleaning or filter changes.
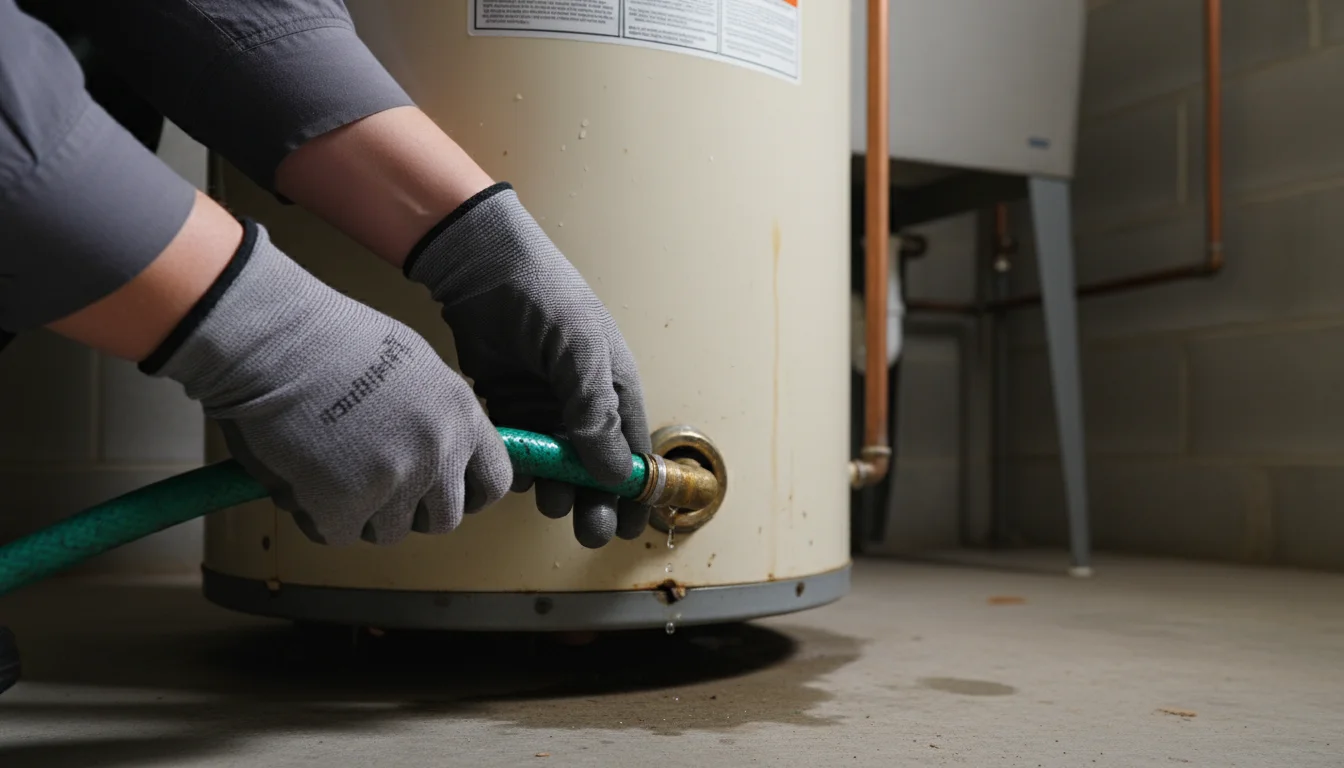
Task 6: Check Your Water Heater
Timeframe: 30-60 minutes.
Why it matters: Sediment buildup in your water heater reduces its efficiency and lifespan. Regular flushing removes these deposits, ensuring you have reliable hot water and preventing premature failure.
How to do it:
- Safety First: Turn off the gas supply or electrical power to the water heater before you begin.
- Turn Off Cold Water Inlet: Locate the cold water inlet valve at the top of the tank and turn it off.
- Open a Hot Water Faucet: Open a hot water faucet in a nearby sink to relieve pressure and prevent a vacuum.
- Attach Hose: Connect a garden hose to the drain valve at the bottom of the water heater. Extend the hose to a floor drain or outside area where hot water can safely drain.
- Open Drain Valve: Open the water heater’s drain valve and allow the tank to empty. You will see sediment flush out.
- Flush: Once the tank is empty, briefly open the cold water inlet valve to stir up any remaining sediment, then close it and allow more water to drain. Repeat until the water runs clear.
- Refill and Restart: Close the drain valve. Remove the hose. Turn on the cold water inlet valve and allow the tank to refill completely (listen for the sound of water). Close the open hot water faucet. Once full, restore power or gas to the water heater.
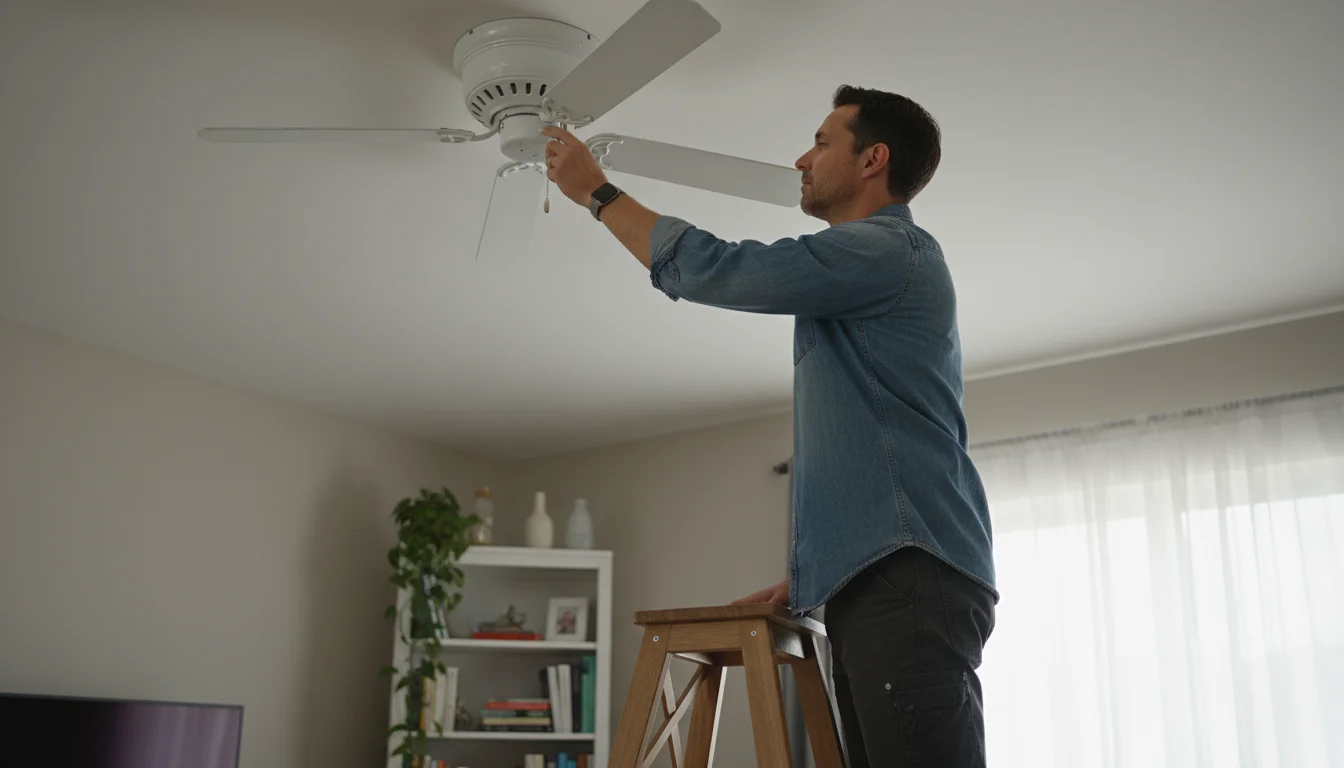
Task 7: Reverse Ceiling Fan Direction
Timeframe: 5 minutes per fan.
Why it matters: In winter, ceiling fans should rotate clockwise at a low speed. This pulls cool air up and pushes warm air down, recirculating heat and potentially reducing your heating costs by up to 10%.
How to do it:
- Locate Switch: Find the small switch on the fan’s motor housing, usually just above the blades.
- Flip Switch: Flip the switch to reverse the blade direction. Ensure the fan is off before doing this.
- Test: Turn the fan on low speed and observe the airflow. You should feel a gentle updraft, not a direct breeze.
Protecting Outdoor Assets
Prepare your garden, lawn, and outdoor equipment for winter’s dormancy and harsh conditions.
While you are busy with the house, don’t overlook your landscaping; follow these essential fall lawn and garden tasks to protect your plants and soil for next spring.
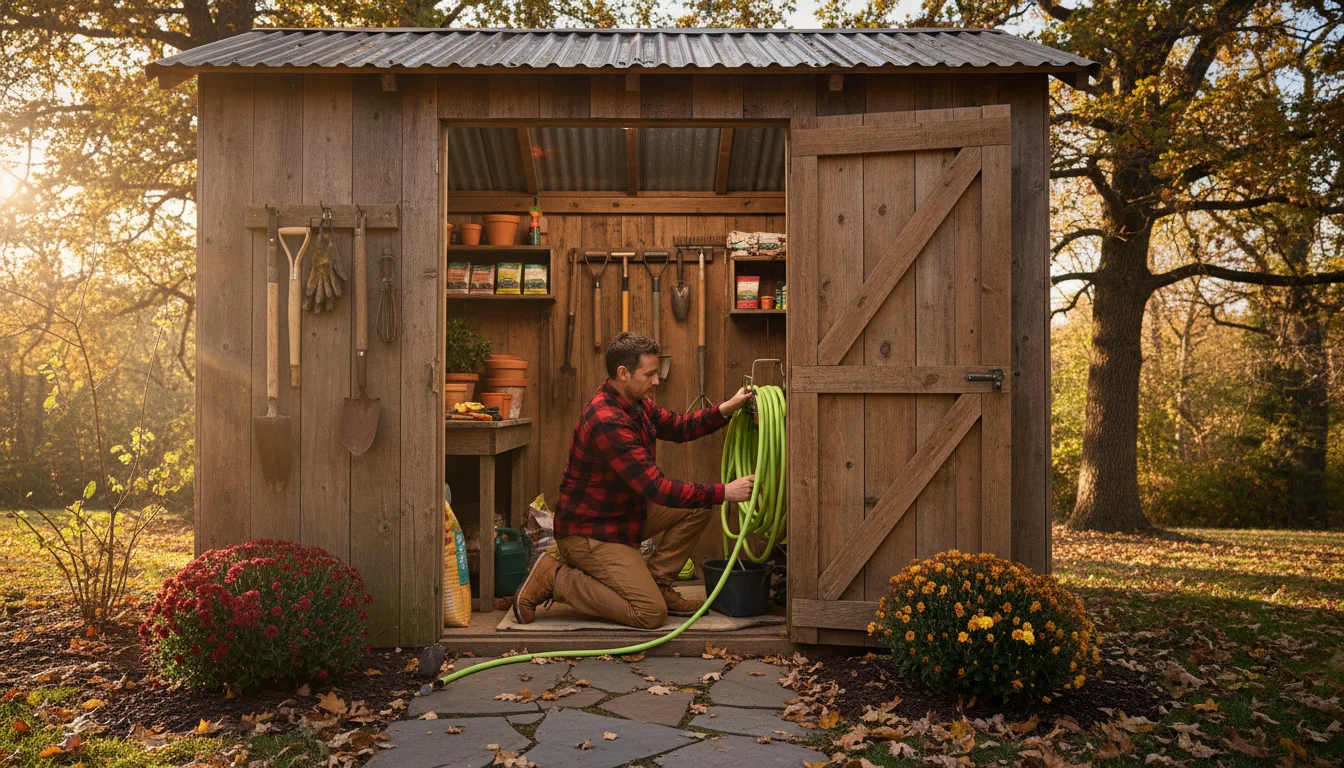
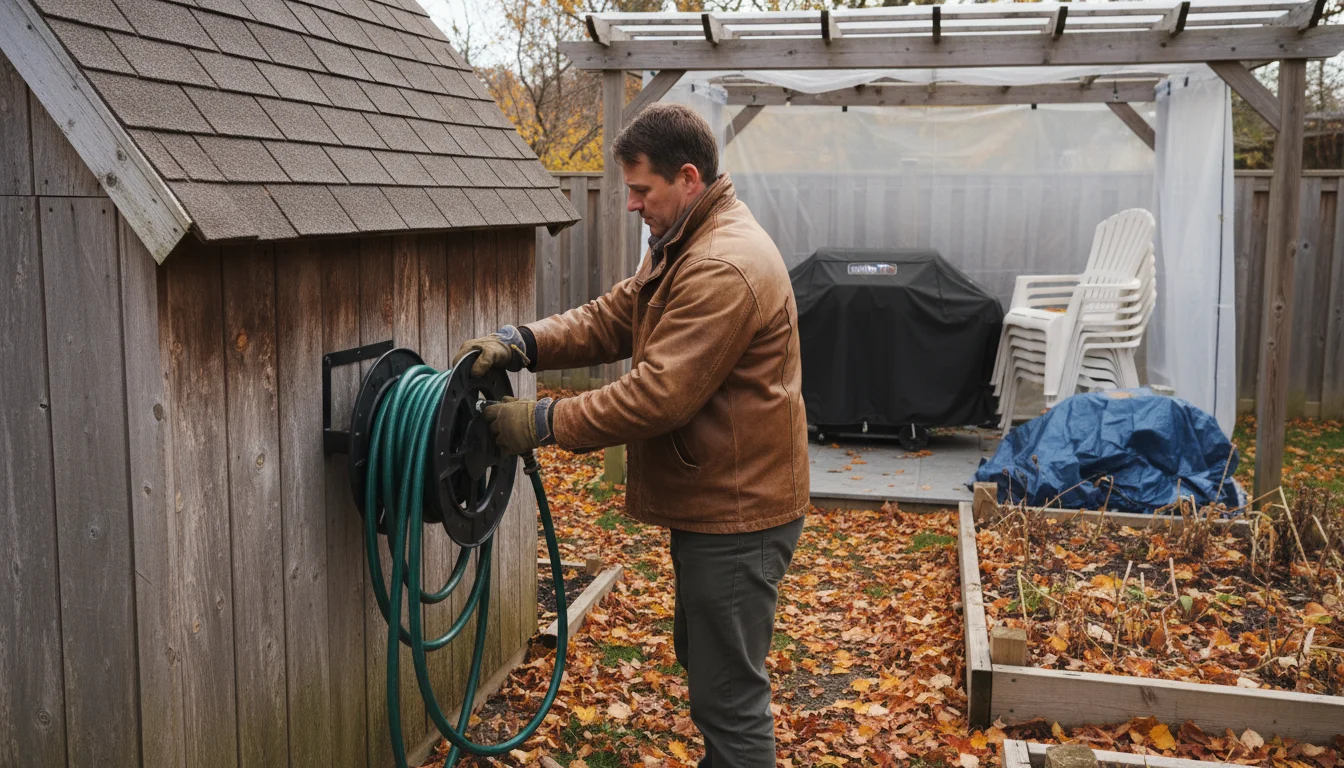
Task 8: Drain and Store Outdoor Hoses and Sprinkler Systems
Timeframe: 30-60 minutes.
Why it matters: Water left in hoses, spigots, and sprinkler lines can freeze, expand, and burst pipes, leading to costly water damage in spring. This is a critical step in seasonal home maintenance.
How to do it:
- Disconnect Hoses: Detach all garden hoses from outdoor spigots. Drain them completely and coil them neatly for storage in a garage or shed.
- Winterize Sprinkler System:
- Turn off the main water supply to the sprinkler system.
- Open all manual drain valves to allow water to empty from the lines.
- If your system has an automatic backflow preventer, follow manufacturer instructions for draining it.
- For regions with harsh winters, consider having a professional perform a “blow out” using an air compressor to force all remaining water from the lines.
- Cover Outdoor Spigots: Install insulated covers on all outdoor spigots to protect them from freezing.
Warning: Do not use an air compressor without proper knowledge and equipment, as improper use can damage your sprinkler system. Consult a landscaping or irrigation professional if you are unsure.
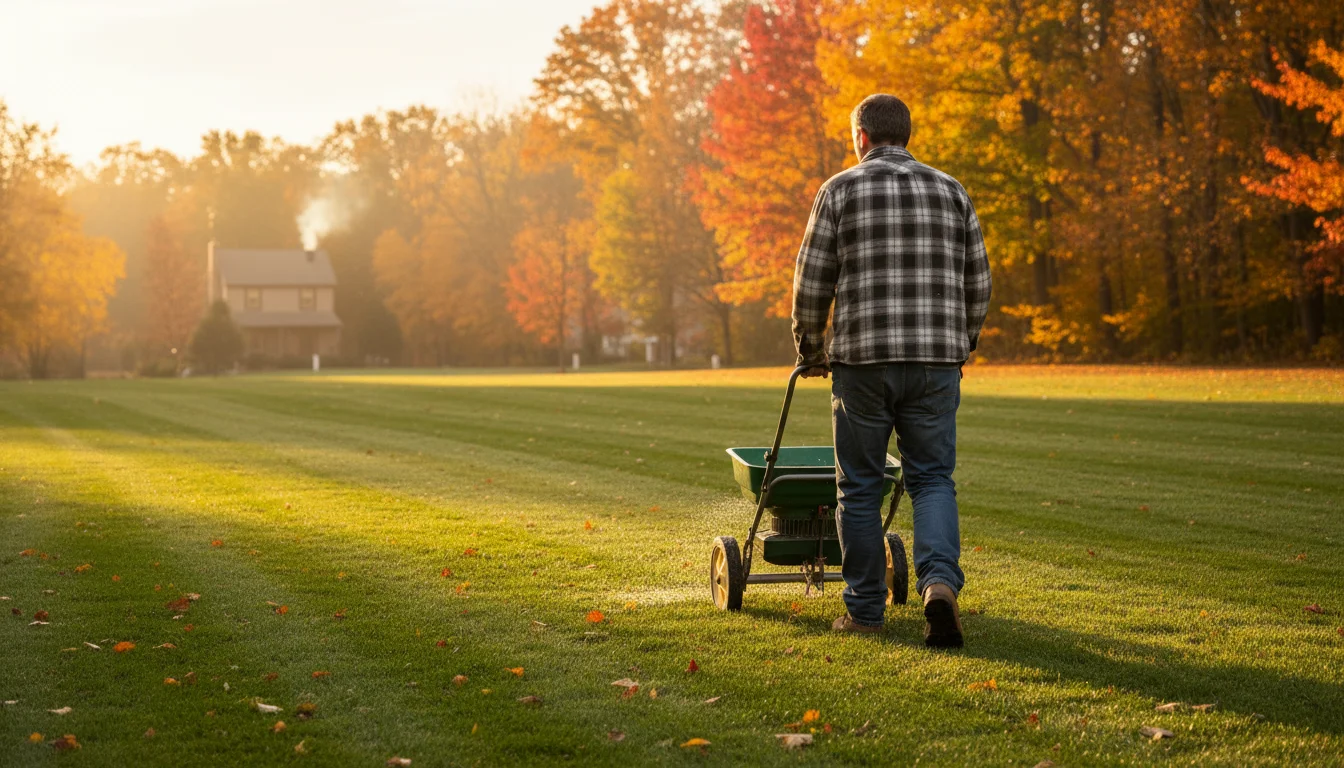
Task 9: Prepare Your Lawn and Garden for Winter
Timeframe: 1-3 hours, depending on garden size.
Why it matters: Proper fall preparation ensures your lawn and garden survive winter and thrive again in spring. It also reduces spring workload.
How to do it:
- Fertilize Lawn: Apply a winterizer fertilizer to your lawn. This provides essential nutrients for root development, promoting a healthier lawn next spring.
- Aerate Your Lawn: If your soil is compacted, consider aerating it. This creates small holes, allowing water, air, and nutrients to reach the roots more effectively.
- Mow for the Last Time: Give your lawn one last trim to a shorter height (around 2-2.5 inches) before winter dormancy. This helps prevent snow mold.
- Clear Leaves: Rake or mulch fallen leaves. Excessive leaf cover can smother grass, harbor pests, and lead to fungal diseases.
- Prune Perennials and Shrubs: Trim back dead or diseased perennial foliage. Prune deciduous shrubs after they enter dormancy.
- Plant Bulbs: Fall is the ideal time to plant spring-flowering bulbs like tulips and daffodils.
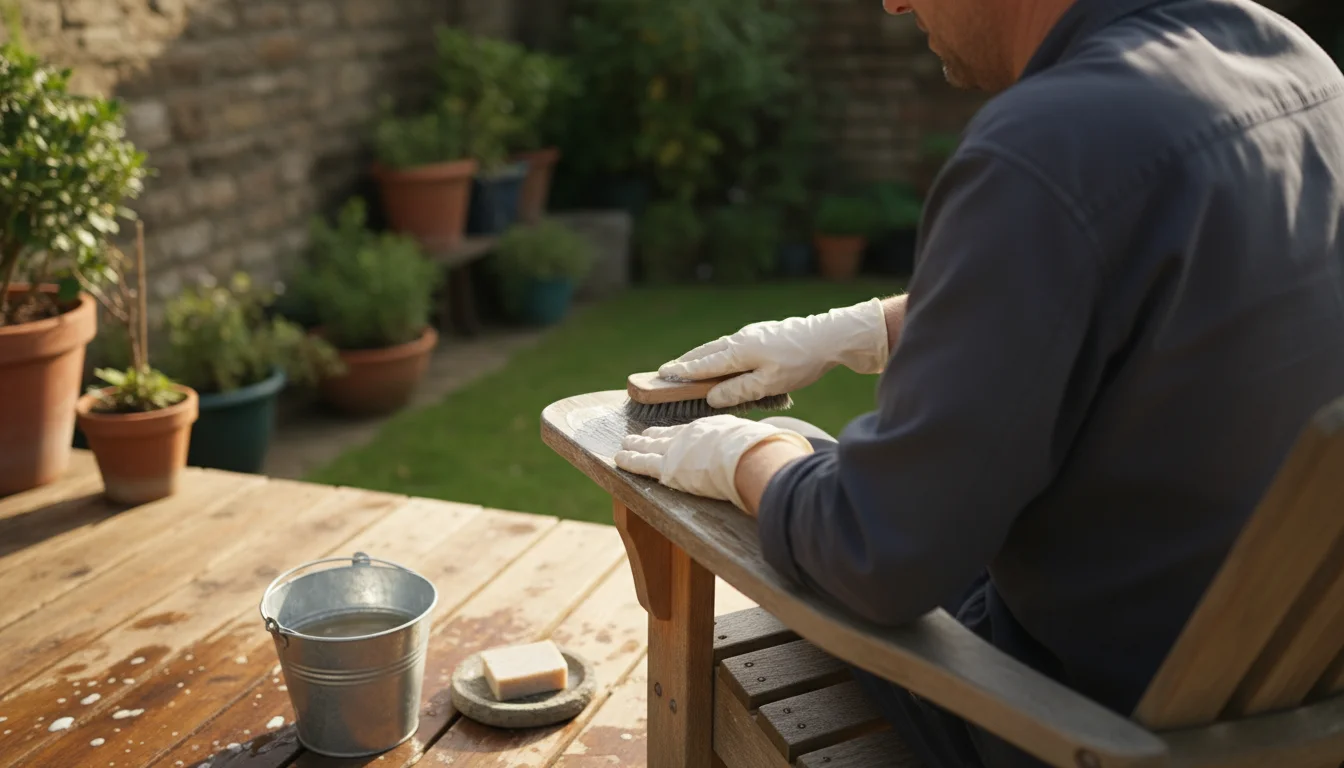
Task 10: Clean and Store Outdoor Furniture
Timeframe: 1-2 hours.
Why it matters: Protecting your outdoor furniture from harsh winter elements extends its lifespan, prevents rust, rot, and fading, and keeps it looking good for next season.
How to do it:
- Clean Thoroughly: Wash all outdoor furniture with a mild soap and water solution. For specific materials, follow manufacturer cleaning instructions. Rinse thoroughly and allow to air dry completely.
- Treat Wooden Furniture: Apply a protective sealant or oil to wooden furniture to prevent cracking and rot.
- Store Cushions and Textiles: Remove all cushions, pillows, and fabric elements. Clean them according to care instructions, ensure they are completely dry, and store them indoors in airtight containers to prevent mold and mildew.
- Cover or Store Furniture: If you have space, store furniture in a garage, shed, or basement. If outdoor storage is necessary, use heavy-duty, waterproof furniture covers, ensuring they are securely fastened to prevent wind damage.

Critical Safety Checks
Winter often means more time indoors and increased use of heating appliances. Ensure your home is safe from fire and carbon monoxide.
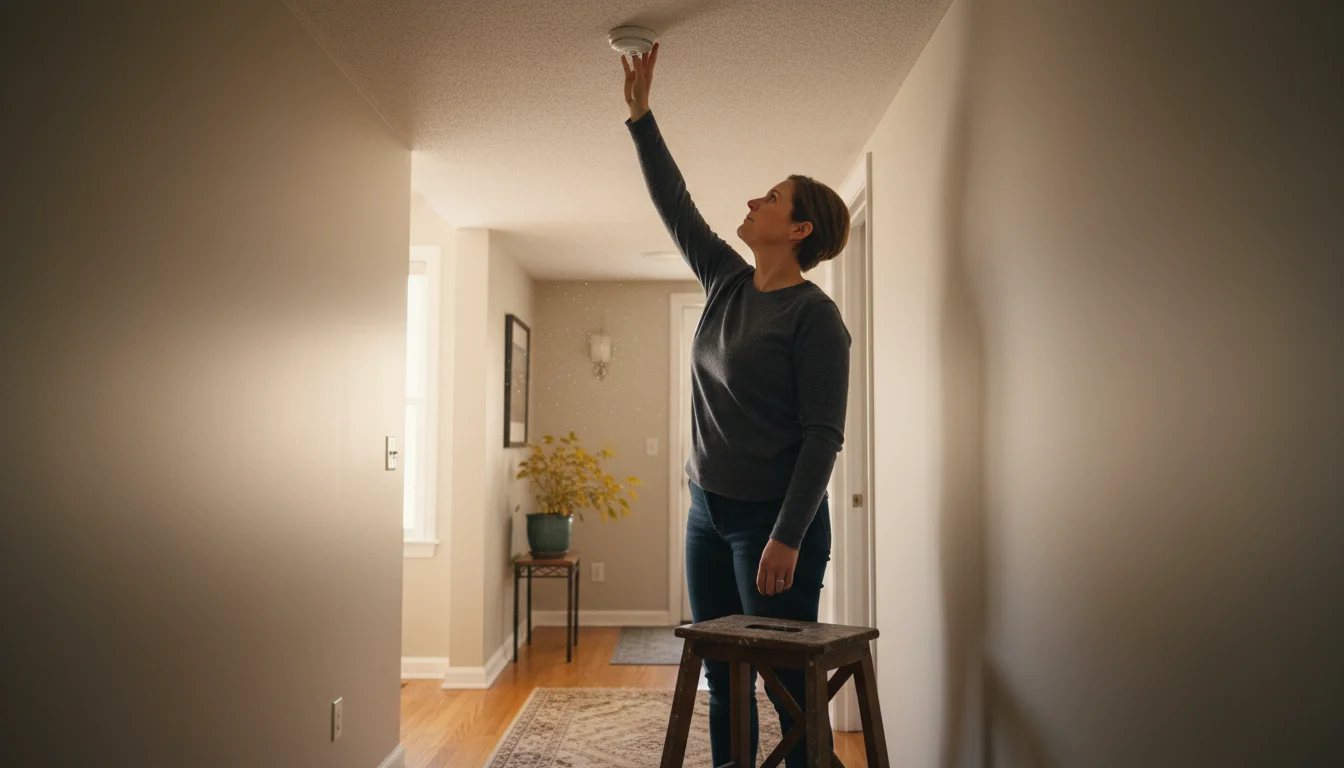
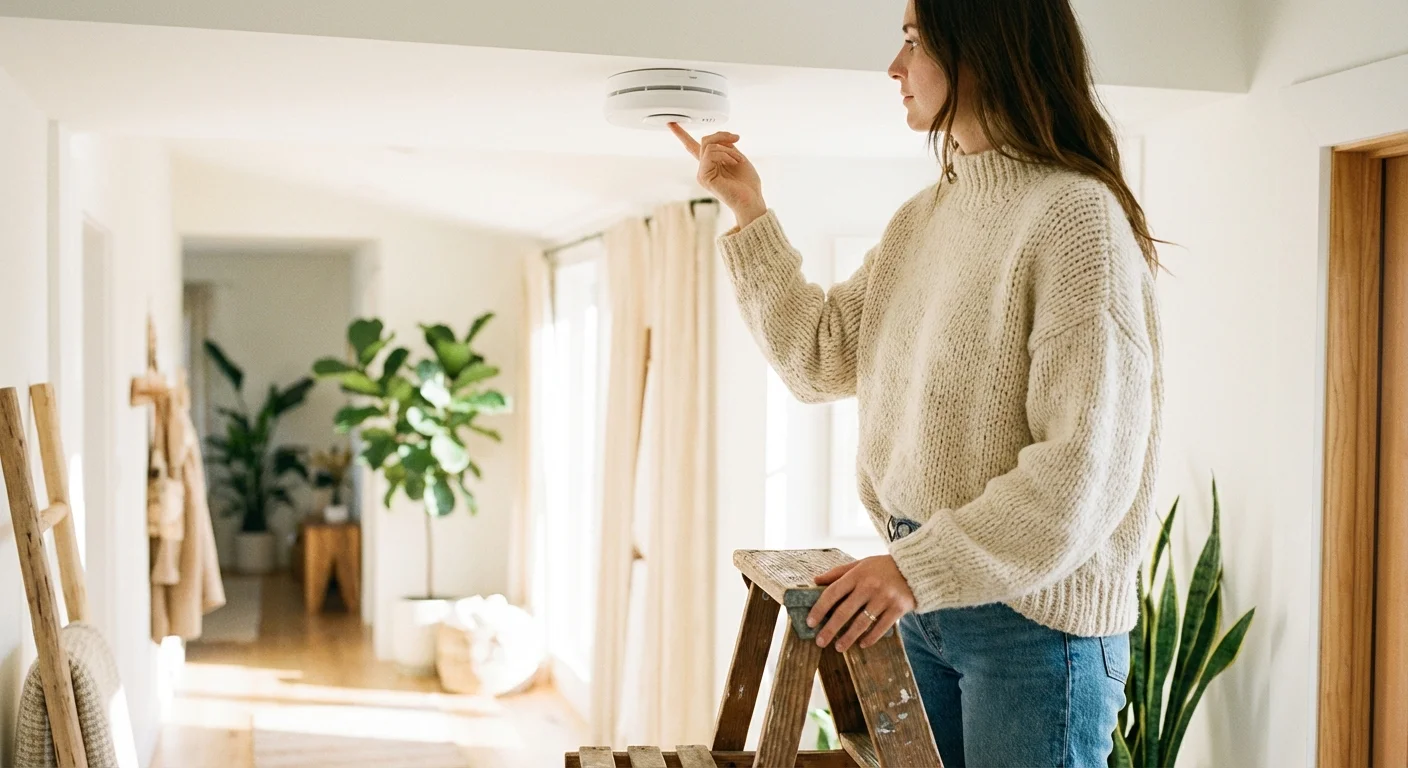
Task 11: Test Smoke and Carbon Monoxide Detectors
Timeframe: 10-15 minutes.
Why it matters: Working smoke and carbon monoxide detectors are vital for your family’s safety, providing early warning in case of fire or invisible, odorless toxic gas. This is non-negotiable for seasonal home maintenance.
How to do it:
- Test Buttons: Press the test button on each smoke and carbon monoxide detector. You should hear a loud alarm. If not, replace batteries or the unit.
- Replace Batteries: Even if they chirp during the test, replace batteries in all detectors at least once a year, or twice a year if recommended by the manufacturer. Fall is an excellent time for this annual refresh.
- Check Age: Most smoke detectors have a lifespan of 10 years, and CO detectors typically last 5-7 years. Check the manufacture date on the back of each unit. Replace any detectors past their recommended lifespan.
- Placement: Ensure you have detectors on every level of your home, inside and outside sleeping areas.
Pro Tip: Install detectors that are interconnected, so if one alarm sounds, they all sound, providing maximum warning.
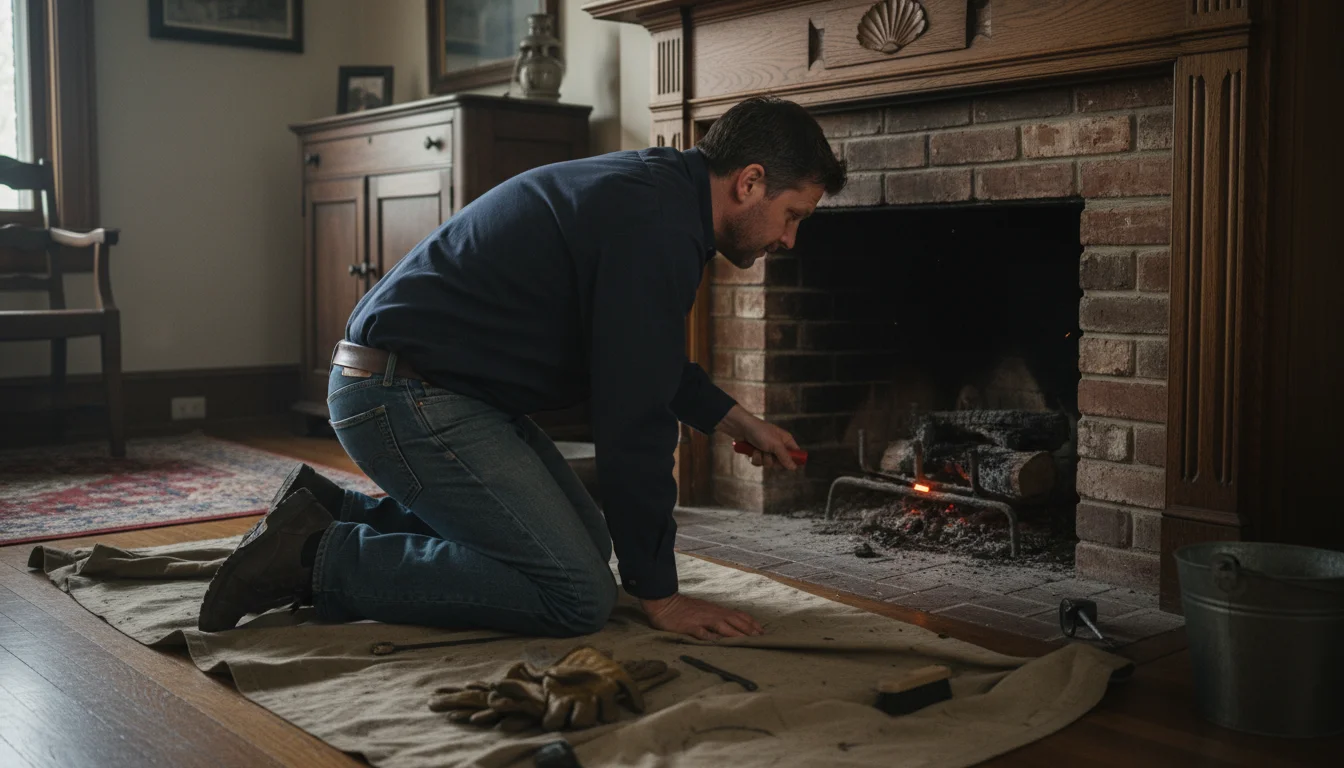
Task 12: Inspect and Clean Fireplace and Chimney
Timeframe: 30-60 minutes for basic inspection, professional cleaning takes longer.
Why it matters: A dirty chimney can lead to creosote buildup, a highly flammable substance that causes chimney fires. Blockages can also send dangerous carbon monoxide back into your home.
How to do it:
- Clear Firebox: Remove old ashes and debris from the fireplace firebox.
- Inspect Flue: Using a flashlight, look up the chimney flue from the firebox. Check for any obstructions like bird nests, excessive creosote buildup (a dark, tar-like substance), or damaged flue liners.
- Check Damper: Ensure the damper opens and closes smoothly and seals tightly when closed to prevent heat loss.
- Inspect Chimney Cap: From the ground (or safely from a ladder), check the chimney cap for damage, missing mesh screens, or blockages.
- Schedule Professional Cleaning: If you use your fireplace regularly, schedule an annual inspection and cleaning by a certified chimney sweep. They possess the tools and expertise to safely remove creosote and identify structural issues.
Warning: Never use a fireplace with a damaged flue or significant creosote buildup. The risk of fire or carbon monoxide poisoning is too high.
Preparing for Power Outages and Emergencies
Winter storms can bring power outages. Being prepared offers peace of mind and safety.
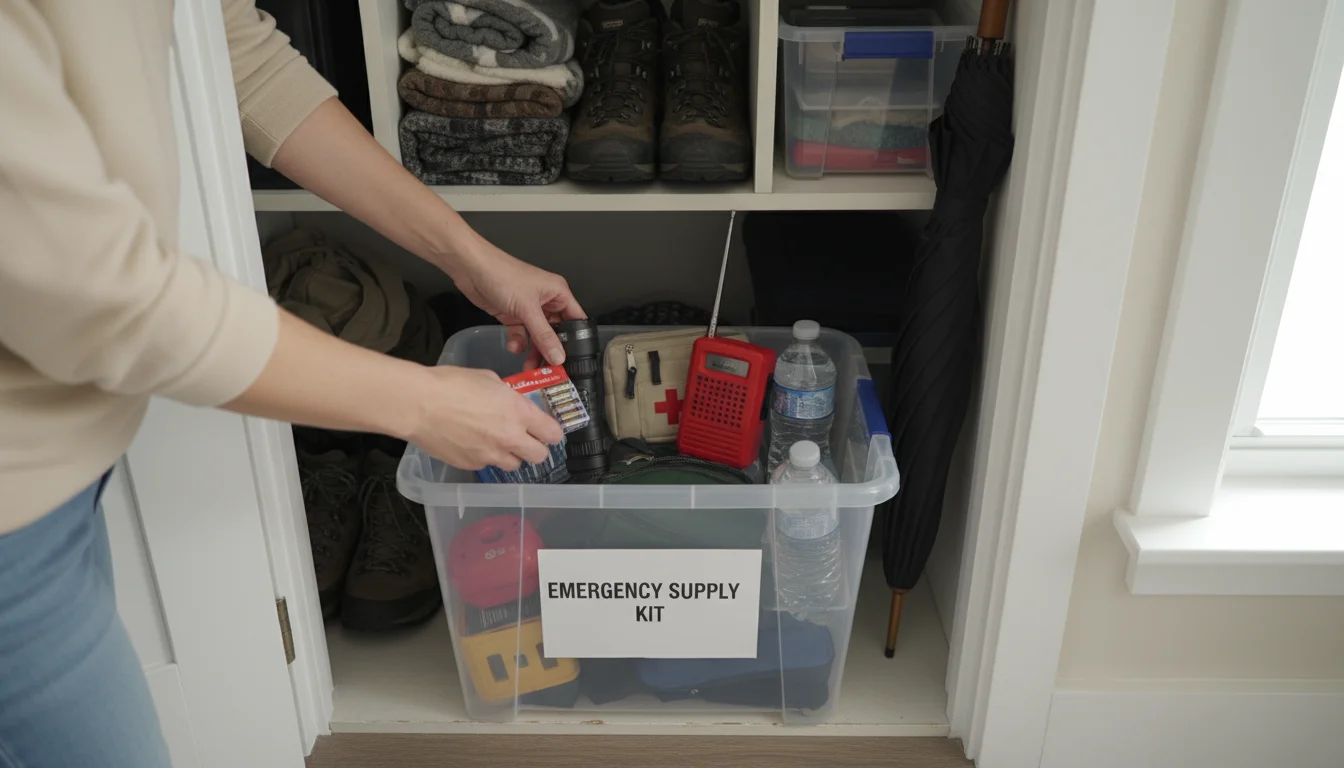
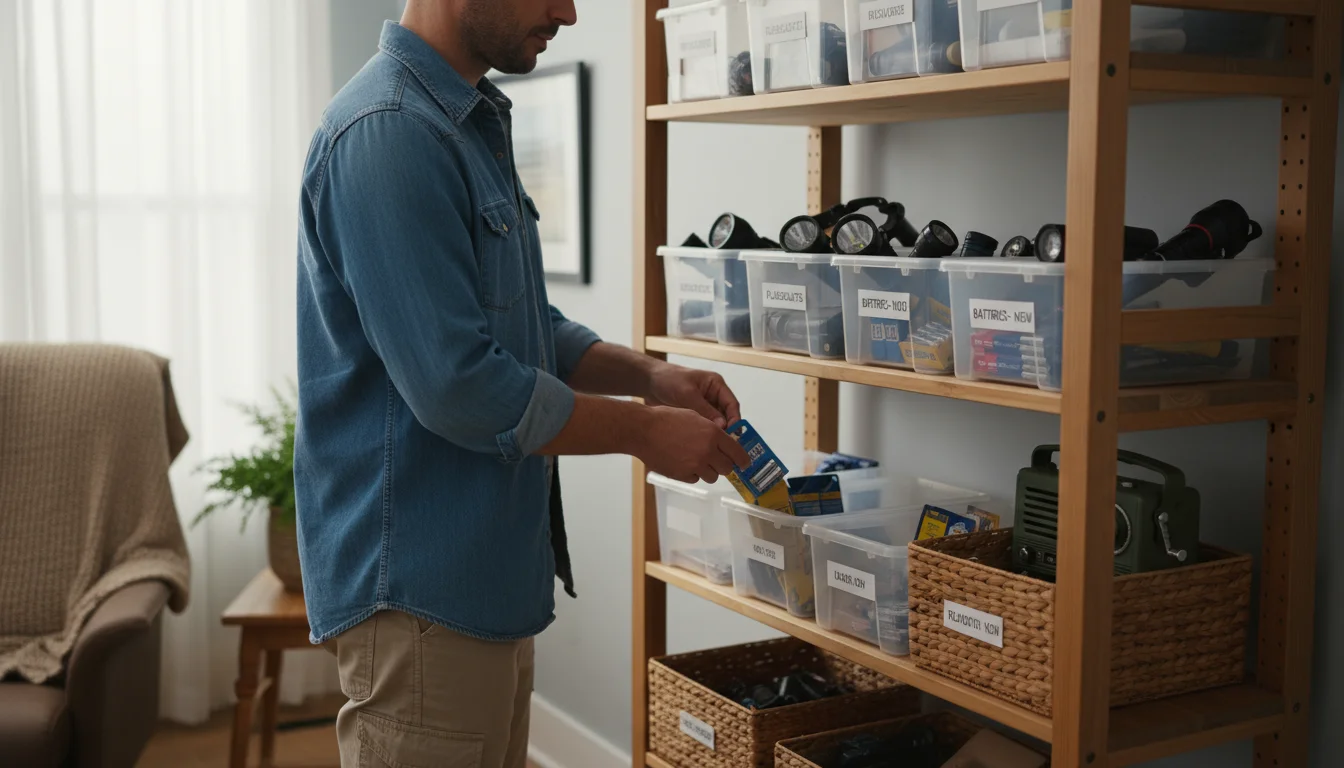
Assemble an Emergency Kit
Timeframe: Ongoing assembly.
Why it matters: A well-stocked emergency kit ensures you have essentials during a power outage or storm, preventing discomfort and potential dangers.
What to include:
- Flashlights and extra batteries (avoid candles as a primary light source).
- A battery-powered or hand-crank radio for weather updates.
- Non-perishable food and bottled water (at least a 3-day supply per person).
- First-aid kit and any necessary prescription medications.
- Blankets, sleeping bags, and warm clothing.
- Manual can opener.
- External battery packs or power banks for charging phones.
- Cash in small denominations.
Pro Tip: Store your emergency kit in an easily accessible location, like a closet near an exit, and review its contents biannually, ensuring batteries are fresh and food has not expired.

Frequently Asked Questions
What is the most important fall home maintenance task?
While all tasks contribute to a resilient home, cleaning gutters and servicing your HVAC system often top the list. Clogged gutters can lead to extensive water damage to your roof, foundation, and interior walls, while a faulty furnace poses safety risks and impacts comfort and energy costs. Prioritize these for preventing significant issues.
How often should I clean my gutters?
You should clean your gutters at least twice a year: once in the late spring after tree pollen and seeds fall, and crucially, once in late fall after most leaves have fallen. Homes surrounded by many trees may benefit from more frequent cleaning, especially if you experience heavy leaf shedding.
Can I winterize my sprinkler system myself?
Yes, you can often drain a simple sprinkler system yourself by turning off the water supply and opening drain valves. However, for more complex systems, especially in areas with deep freezes, a professional “blow out” using compressed air is highly recommended. Improperly clearing the lines can leave water pockets that freeze and damage components.
What temperature should I set my thermostat to when I am away from home in winter?
When you are away, set your thermostat no lower than 55 degrees Fahrenheit (13 degrees Celsius). This prevents your pipes from freezing and bursting, which can cause severe water damage. Maintaining a slightly warmer temperature also reduces the energy surge required to reheat your home upon your return, as noted by Energy Star guidelines.
Is it really necessary to have my furnace professionally serviced every fall?
Yes, an annual professional HVAC maintenance fall service is highly recommended. Technicians can identify potential issues before they become expensive breakdowns, ensure optimal efficiency, and check for safety concerns like carbon monoxide leaks. This investment often pays for itself through energy savings and extended equipment life, providing significant peace of mind for your winterizing home efforts.
Taking these 12 practical steps ensures your home is ready to face winter head-on. By prioritizing seasonal home maintenance, you safeguard your property, enhance comfort, and save money on unexpected repairs and energy bills. Start today, and enjoy a warm, worry-free winter.
Alongside your furnace, remember to schedule chimney and fireplace maintenance before the first cold snap of the season.
For more tips on protecting your exterior surfaces, consult our seasonal care schedule for decks and patios.


Leave a Reply