As a seasoned home maintenance expert with two decades of experience, I see the same patterns repeat: small, easily preventable issues escalate into expensive repairs because homeowners delay or overlook basic care. Your home is a significant investment, and protecting it requires consistent, proactive effort. Neglecting routine monthly tasks does not just create inconvenience, it directly translates into higher costs down the road. You can prevent costly breakdowns, extend the life of your appliances, and ensure your home remains safe and efficient with a consistent `preventive maintenance schedule`.
This guide equips you with the practical, actionable insights you need to take control of your home’s health. We will cover the essential monthly checks that save you money, time, and stress. Forget the myth that home maintenance requires a huge time commitment. Many critical tasks take only minutes, yet deliver monumental returns in terms of avoided repairs. Let’s start building your robust `home care checklist`.
The High Cost of Neglect: Why Monthly Home Care Pays Off
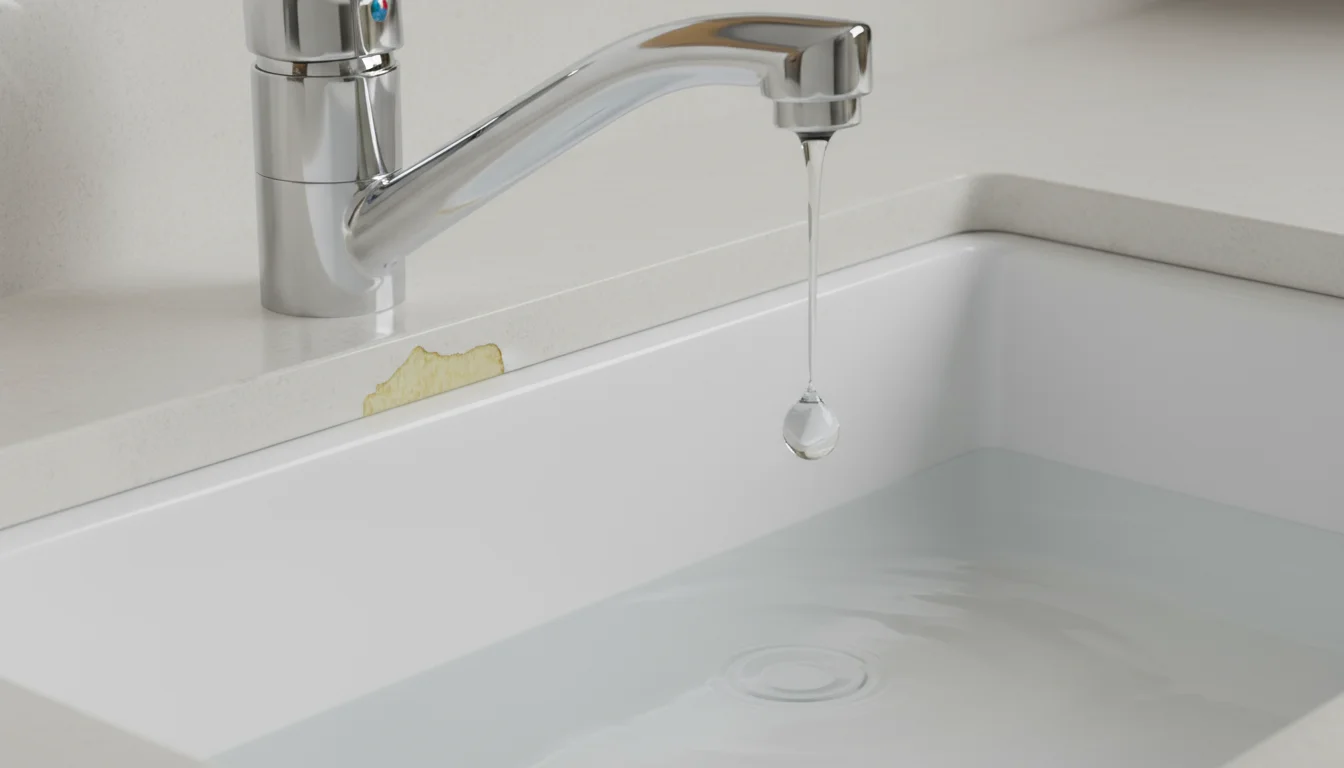
You work hard for your home, and you deserve for it to function flawlessly. The truth is, a leaky faucet, a clogged drain, or a dirty HVAC filter are not minor nuisances. They are early warnings. Ignoring them allows small problems to grow into major, expensive repairs. A persistently dripping faucet, for example, wastes gallons of water per day, raising your utility bill significantly and potentially causing water damage and mold growth over time. A professional plumber fixes a minor leak for a fraction of the cost of repairing extensive water damage to your subfloor or cabinetry. This is the core principle of `seasonal home maintenance`: addressing issues before they become emergencies.
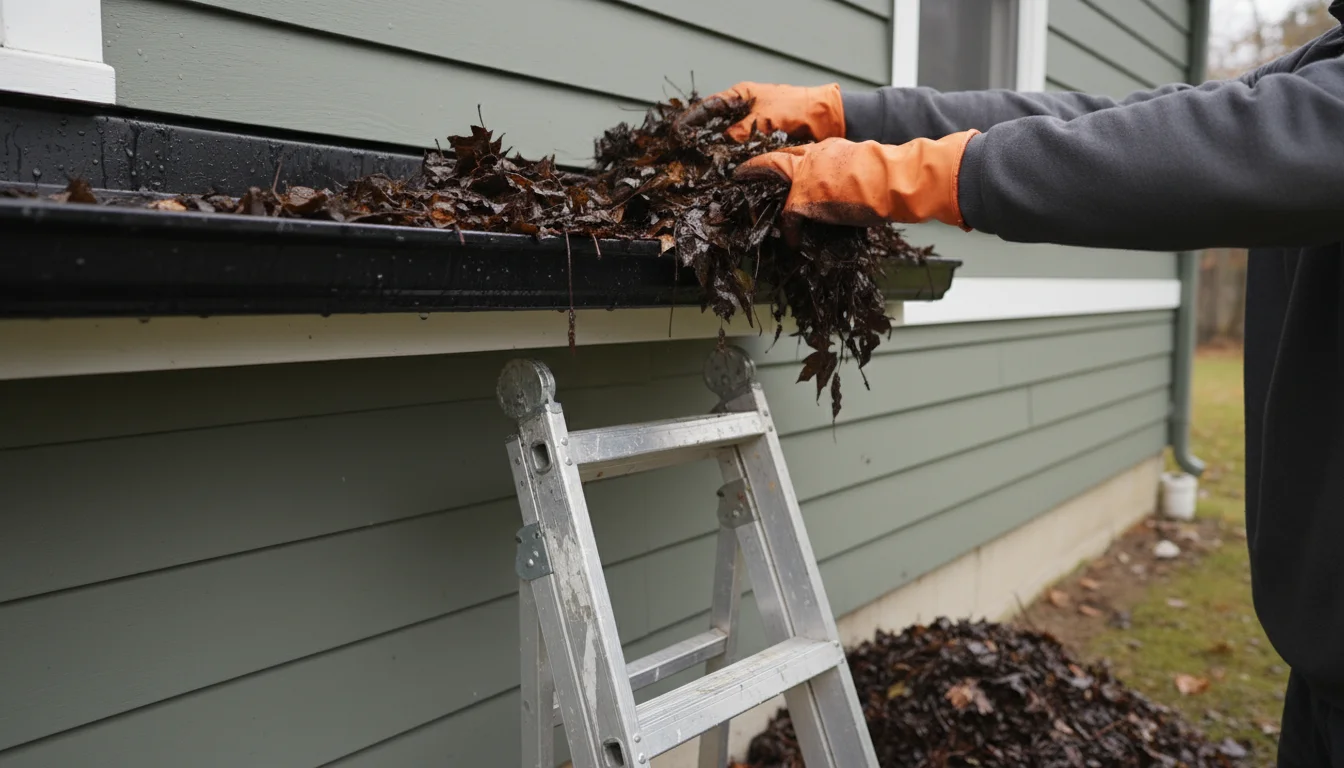
In addition to these indoor tasks, it is crucial to clean your gutters twice a year to prevent foundation issues and water damage.
Beyond monthly checks, it is vital to follow a fall home maintenance checklist to ensure your property is ready for colder weather.
Consider the data. A study by HomeAdvisor found that emergency home repairs can cost homeowners an average of $3,000 to $5,000, depending on the issue. Many of these emergencies, like burst pipes or HVAC system failures, are directly traceable to neglected maintenance. My 20 years in this field confirm this repeatedly: a small investment of your time each month yields substantial returns, protecting your financial well-being and the comfort of your home. You gain peace of mind knowing your home runs smoothly, avoiding the stress and financial burden of unexpected failures.

HVAC Filter Replacement: Breathing Easy and Saving Energy
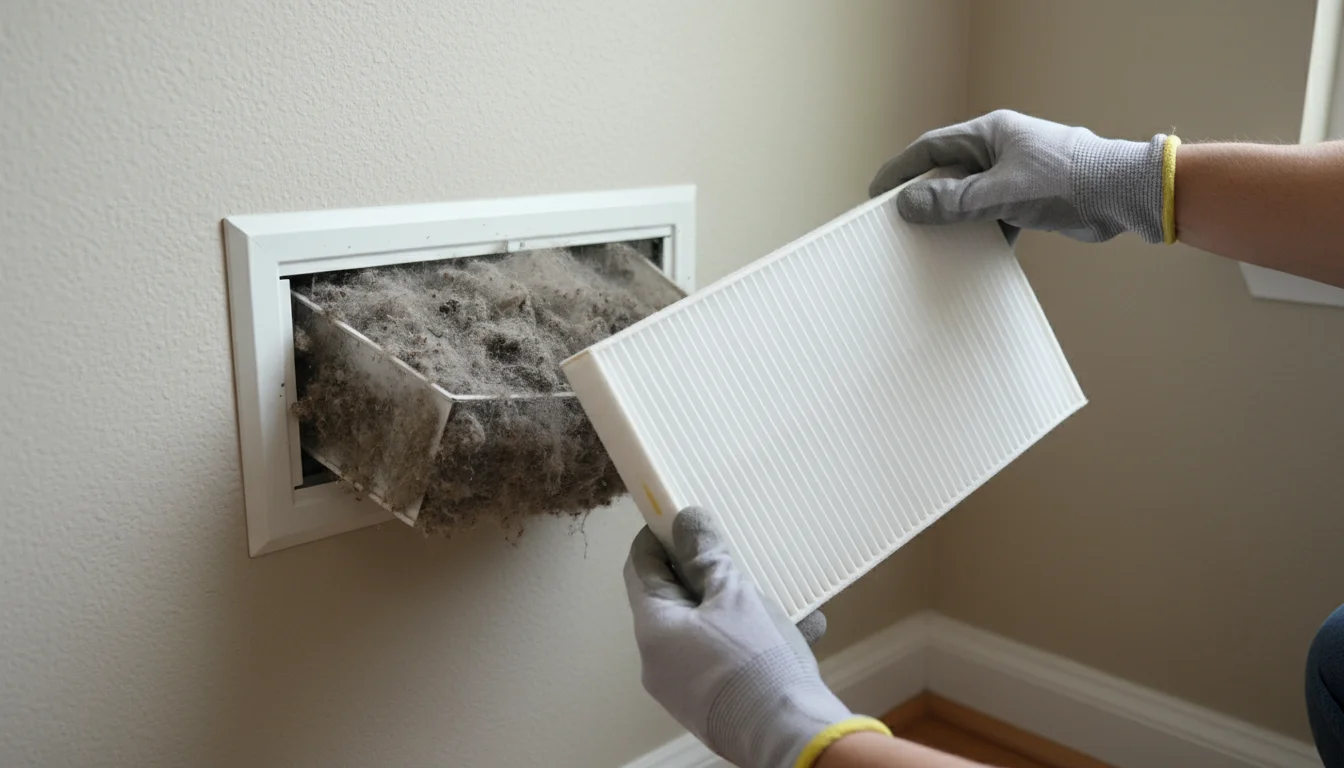
Your heating, ventilation, and air conditioning (HVAC) system is the circulatory system of your home, and the filter is its most vital organ. A clean filter ensures efficient operation, maintains healthy `indoor air quality`, and prevents expensive damage to your unit. Dirty filters restrict airflow, forcing your HVAC system to work harder, consume more energy, and ultimately shortening its lifespan. This is a monthly task that truly pays dividends.
To keep the rest of your home as well-maintained as your HVAC system, try implementing a 20-minute daily cleaning routine that prevents dust and clutter from building up.
For a deeper dive into system longevity, check out these HVAC maintenance tasks for every season.
The Critical Impact of Clean Filters
Studies show that replacing a dirty, clogged filter with a clean one can lower your air conditioner’s energy consumption by 5 percent to 15 percent. This directly impacts your utility bills. Furthermore, a dirty filter allows dust, allergens, and other particulates to circulate throughout your home, affecting your health. The EPA provides comprehensive guidance on how your home’s air quality impacts health, emphasizing the role of proper ventilation and filtration. Refer to the EPA’s comprehensive guide on indoor air quality for more details on maintaining a healthy home environment.

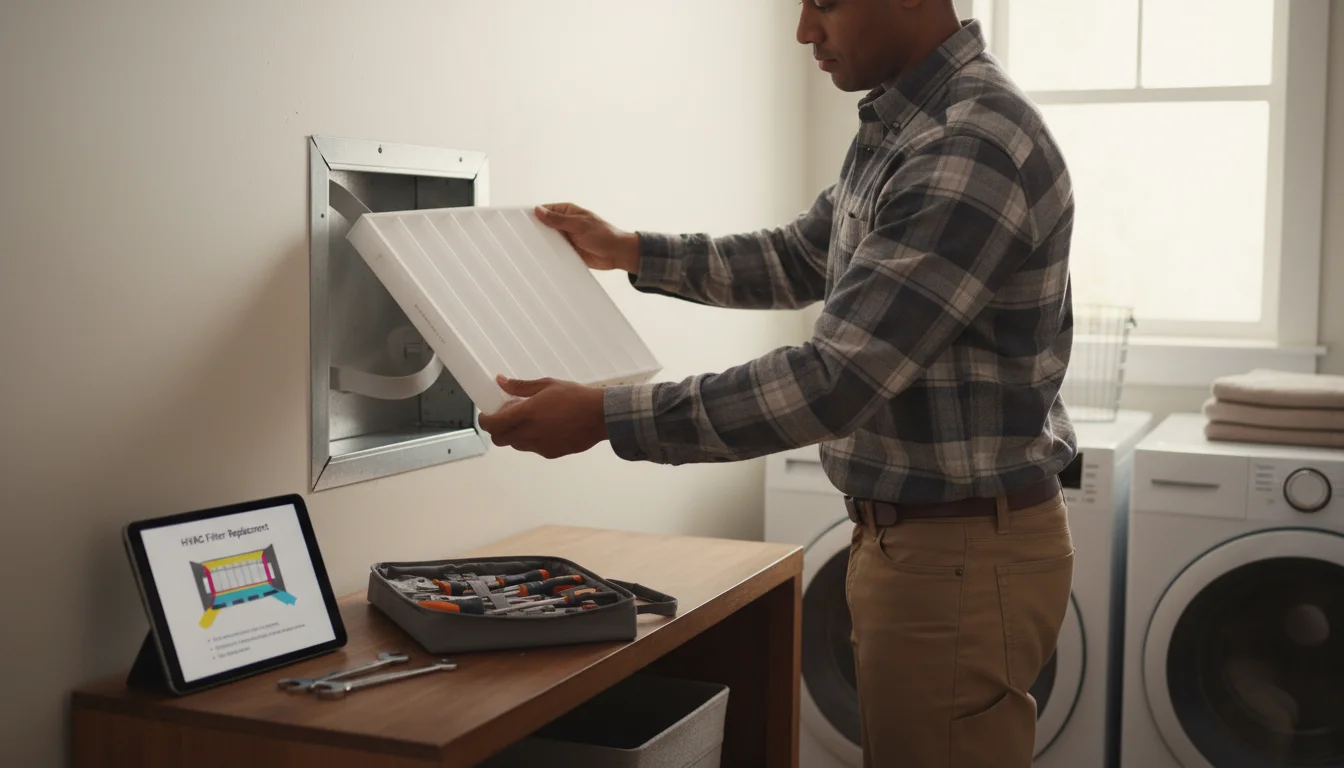
Your Monthly HVAC Filter Replacement Protocol
This task takes approximately 5-10 minutes each month, depending on your system’s accessibility. You need a new filter of the correct size and MERV rating, a marker, and perhaps a small step stool.
- Before you start, turn off the power to your HVAC system. Locate the thermostat and switch the system to “off.” For added safety, find your circuit breaker panel and switch off the breaker controlling your furnace or air handler. This prevents accidental startup during the process.
- Locate the filter slot. This is typically on the return air duct next to the furnace or air handler, or sometimes behind a large return air vent inside your home.
- Note the filter size and airflow direction. Filters have arrows indicating the direction of airflow, pointing towards the furnace/air handler. Write the size (e.g., 20x25x1) and the installation date on the edge of the new filter with your marker.
- Remove the old filter. Slide it out carefully. It will likely be visibly dirty, a clear indicator of its hard work.
- Insert the new filter. Ensure the airflow arrow points in the correct direction. Slide it firmly into place.
- Restore power. Turn the circuit breaker back on, then switch your thermostat back to your desired setting.
Pro tip: Always keep a spare filter on hand so you are ready for your monthly change. If you have pets or allergies, or during peak heating/cooling seasons, you might need to check or replace your filter even more frequently.
Warning: Never operate your HVAC system without a filter. Doing so allows dust and debris to accumulate on the coils and internal components, leading to serious damage and significantly reducing system efficiency. This type of damage often requires expensive professional cleaning or even component replacement.

Kitchen & Bathroom Plumbing Maintenance: Averting Disasters
`Plumbing maintenance tips` focus on preventing blockages and leaks before they cause major water damage or require emergency service. Most plumbing issues begin as small drips or slow drains. Your monthly checks prevent these from becoming burst pipes or extensive mold remediation projects.
While inspecting your pipes, remember that performing regular water heater maintenance is another essential step in preventing plumbing-related emergencies.
Drains: Keep Them Flowing Freely
Monthly attention to your drains protects your pipes and prevents the buildup that leads to clogs. This takes about 10-15 minutes per month.
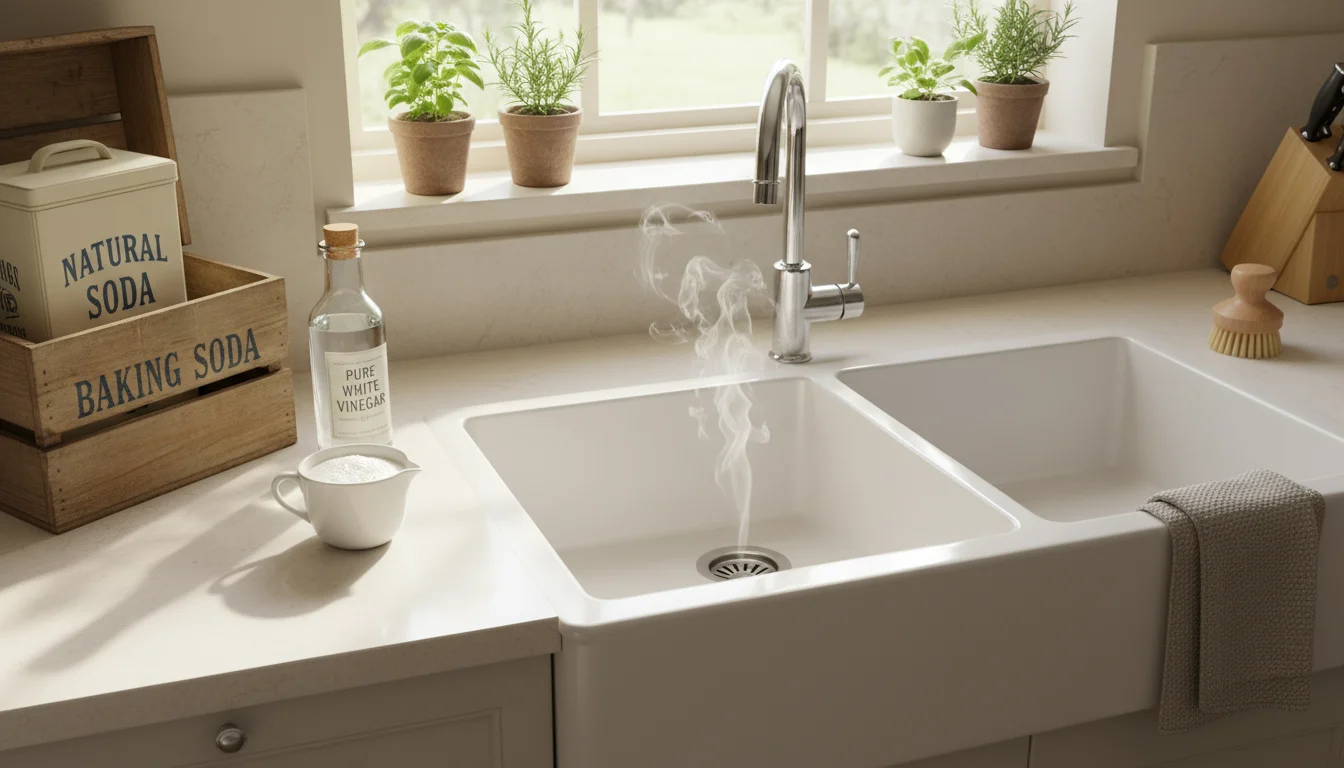
- Kitchen Sink: Run hot water down the drain for a minute after each use, especially after washing greasy dishes. Monthly, pour a cup of baking soda down the drain, followed by a cup of white vinegar. Let it sit for 30 minutes to an hour, then flush with very hot water. This natural solution helps break down minor grease and grime buildup.
- Bathroom Sinks & Showers: Use a hair snare or drain protector in shower drains to catch hair. Monthly, remove the drain cover and use a zip-it tool or needle-nose pliers to pull out any hair and soap scum buildup from the drain opening. For slow drains, the baking soda and vinegar method also works effectively here.
Warning: Avoid chemical drain cleaners. These harsh chemicals corrode pipes over time, particularly older PVC or metal pipes, leading to leaks and expensive replacements. They also pose a significant environmental and health risk. Stick to mechanical removal and natural enzymatic cleaners.

Faucets and Toilets: Spotting Leaks Early
A small drip can waste hundreds of gallons of water per year and cause rot in your cabinets or floors. Dedicate 5 minutes each month to checking these fixtures.
- Faucets: Visually inspect all faucets for drips or leaks around the handles and base. Feel the cabinet floor beneath sinks for any dampness or water stains. Tighten any loose handles or connections.
- Toilets: Listen for phantom flushing. Add a few drops of food coloring to the toilet tank. Wait 15-20 minutes without flushing. If the color appears in the bowl, you have a silent leak, often from a faulty flapper valve. Replacing a flapper valve is a simple, inexpensive DIY task that saves a significant amount of water.
Pro tip: If you detect a leak you cannot easily fix, schedule a plumber immediately. The cost of a service call pales in comparison to repairing extensive water damage.
Appliance Longevity: Maintaining Your Daily Workhorses
Your major home appliances—refrigerator, dishwasher, washer, dryer—represent a substantial investment. Neglecting their simple monthly maintenance tasks drastically shortens their lifespan and forces them to consume more energy. By dedicating 15-20 minutes each month, you ensure they run efficiently and serve you for years.
Beyond monthly maintenance, a thorough spring deep cleaning checklist will help you tackle the areas behind and underneath these heavy appliances.
To keep your exterior looking as good as your interior, consider following a summer home maintenance checklist during the warmer months.
For a more comprehensive seasonal refresh, you can integrate these tasks into a larger spring deep cleaning checklist.
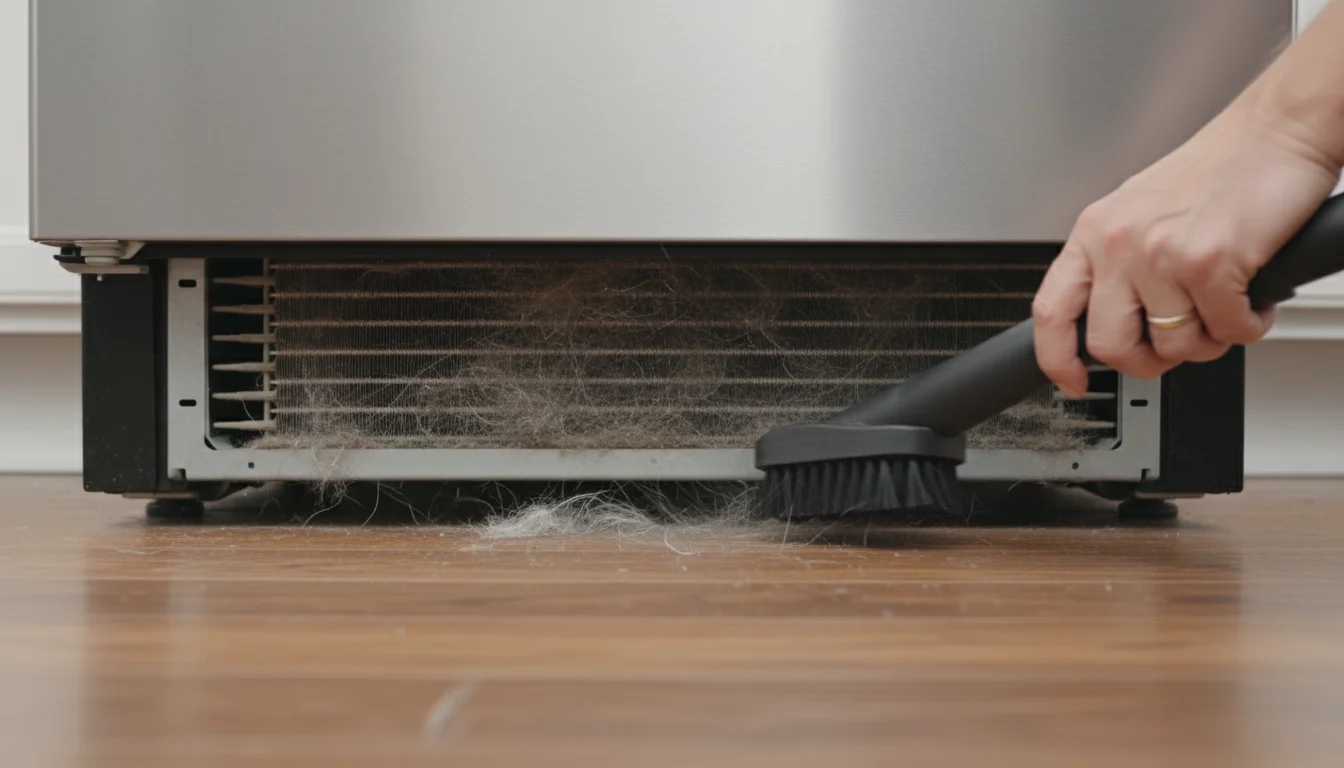
Refrigerator Coils: Keeping Your Food Fresh and Bills Low
Your refrigerator works constantly, and its condenser coils, usually located underneath or behind the unit, accumulate dust and pet hair. This buildup prevents efficient heat dissipation, forcing the compressor to work harder, consume more electricity, and wear out faster.
- Before you start, unplug the refrigerator. This is crucial for your safety.
- Locate the condenser coils. They are typically behind the kick plate at the bottom front of the fridge or on the back. You may need to pull the refrigerator away from the wall for rear coils.
- Clean the coils. Use a vacuum cleaner with a brush attachment or a long, slender coil brush to remove dust, lint, and pet hair. Pay attention to the fan area if accessible.
- Plug it back in.
Pro tip: Perform this task every 1-3 months, depending on if you have pets. Animals shed fur that rapidly clogs these coils. You can find more efficiency tips from Energy Star’s guidelines on efficient appliance use, which often highlight the importance of regular cleaning.
Warning: Do not use water or wet cloths to clean electrical components. Always ensure the unit is unplugged before cleaning any internal or electrical parts.
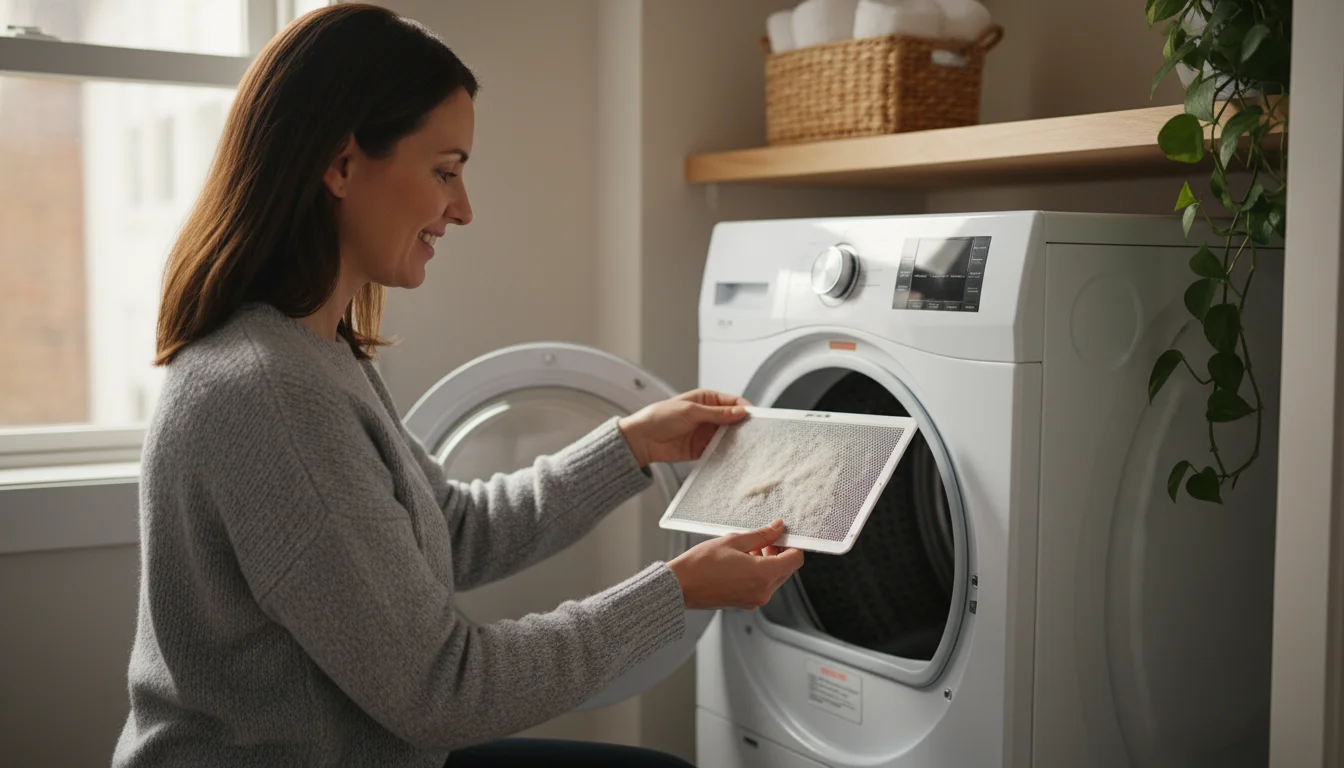
Dishwasher Filter: Ensuring Sparkling Clean Dishes
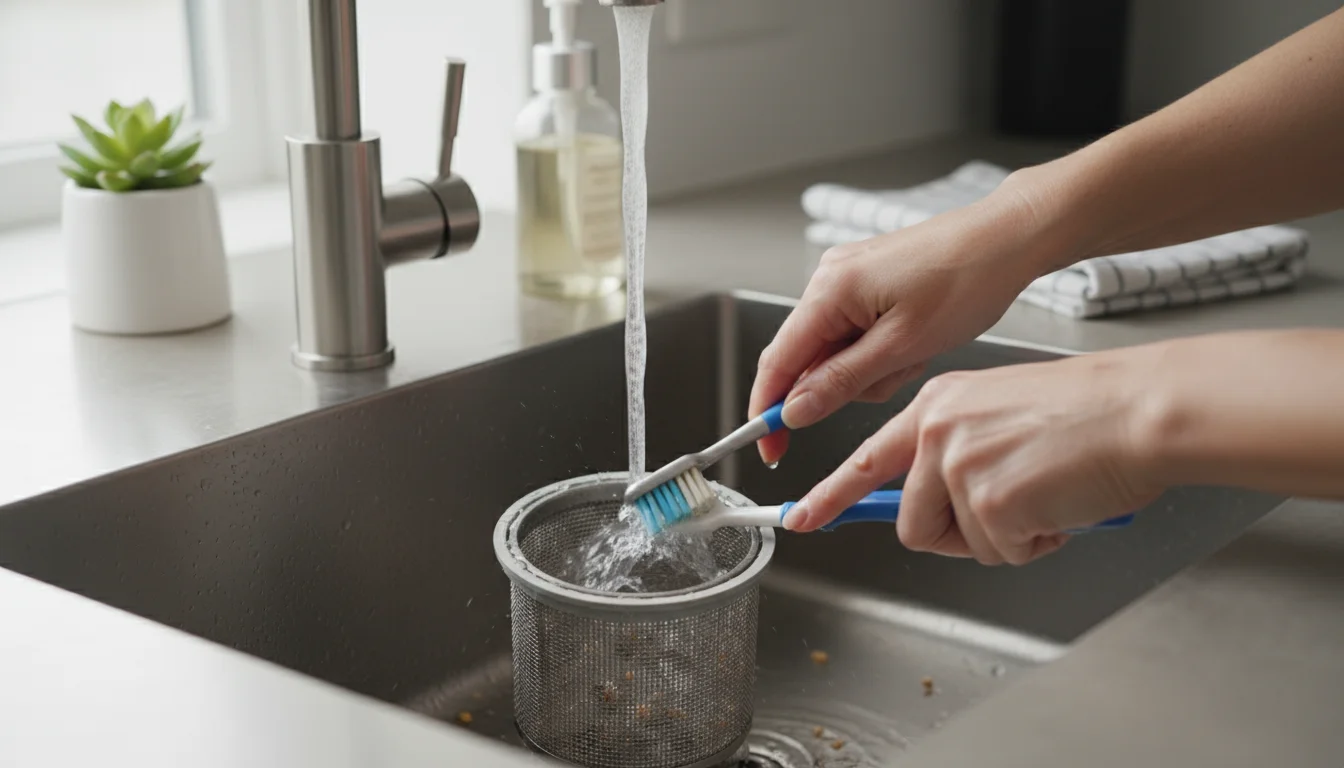
Many modern dishwashers have a removable filter in the bottom of the tub that traps food particles. If this filter gets clogged, your dishes will not get clean, and bacteria can grow, causing unpleasant odors.
- Locate the filter. Consult your owner’s manual if you are unsure. It is usually a cylinder or flat screen at the bottom center of the dishwasher.
- Remove and clean. Twist or unclip the filter and pull it out. Rinse it under running water, using a brush (an old toothbrush works well) to scrub off any trapped food debris.
- Reinstall. Ensure it clicks back into place securely.
This takes about 5 minutes.
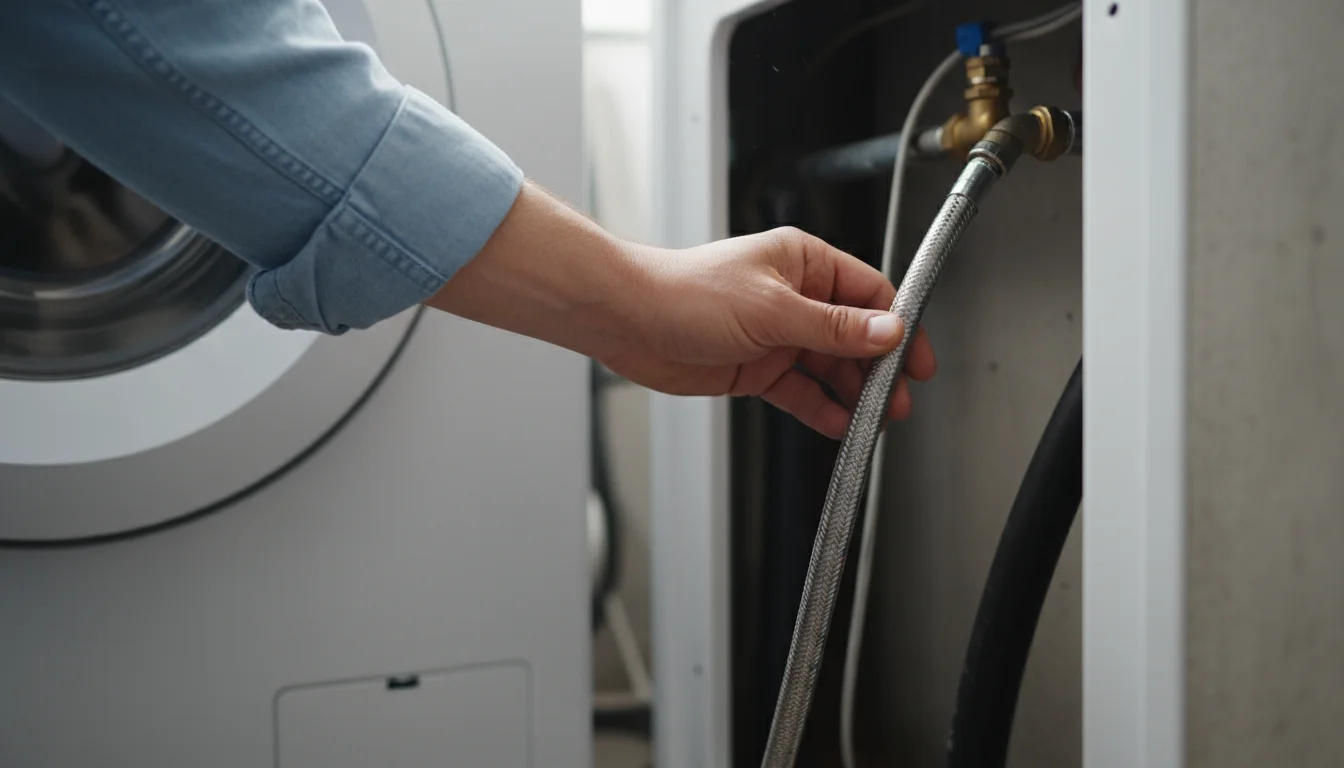
Washing Machine Hoses: Preventing Catastrophic Floods
Washing machine hoses are under constant pressure and are a common point of failure, leading to devastating floods. Replace rubber hoses with braided stainless steel ones, and check them monthly.
- Inspect Hoses: Visually check the hoses connecting your washing machine to the water supply. Look for bulges, cracks, fraying, or leaks around the connections.
- Tighten Connections: Gently tighten any loose connections with a wrench. Do not overtighten.
This quick check takes less than 2 minutes and can prevent thousands in water damage.
Electrical & Safety Systems: Protecting Your Family and Property
Electrical safety and proper functioning of your smoke and carbon monoxide detectors are not just about convenience, they are about life safety. Monthly checks ensure these critical systems are ready when you need them most.
In addition to electrical safety, ensuring proper chimney and fireplace maintenance is critical for fire prevention during the colder months.
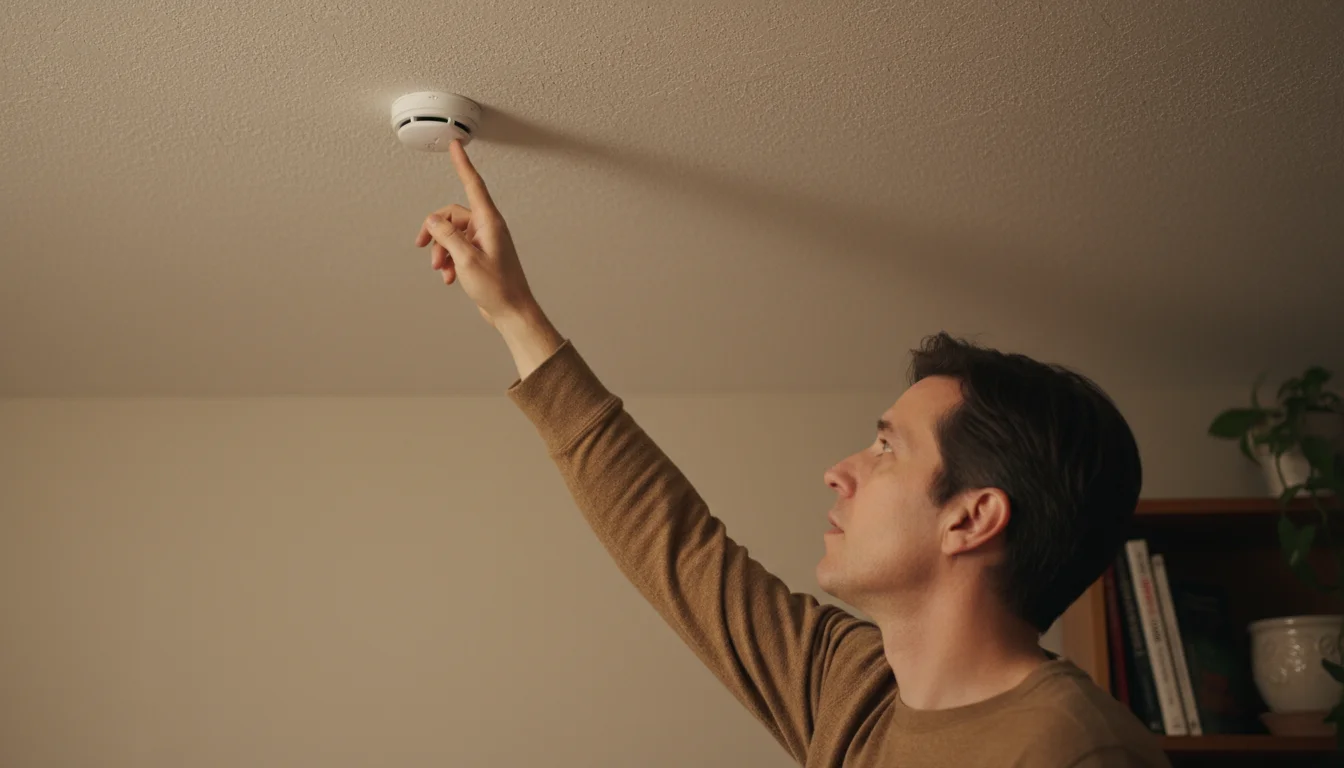
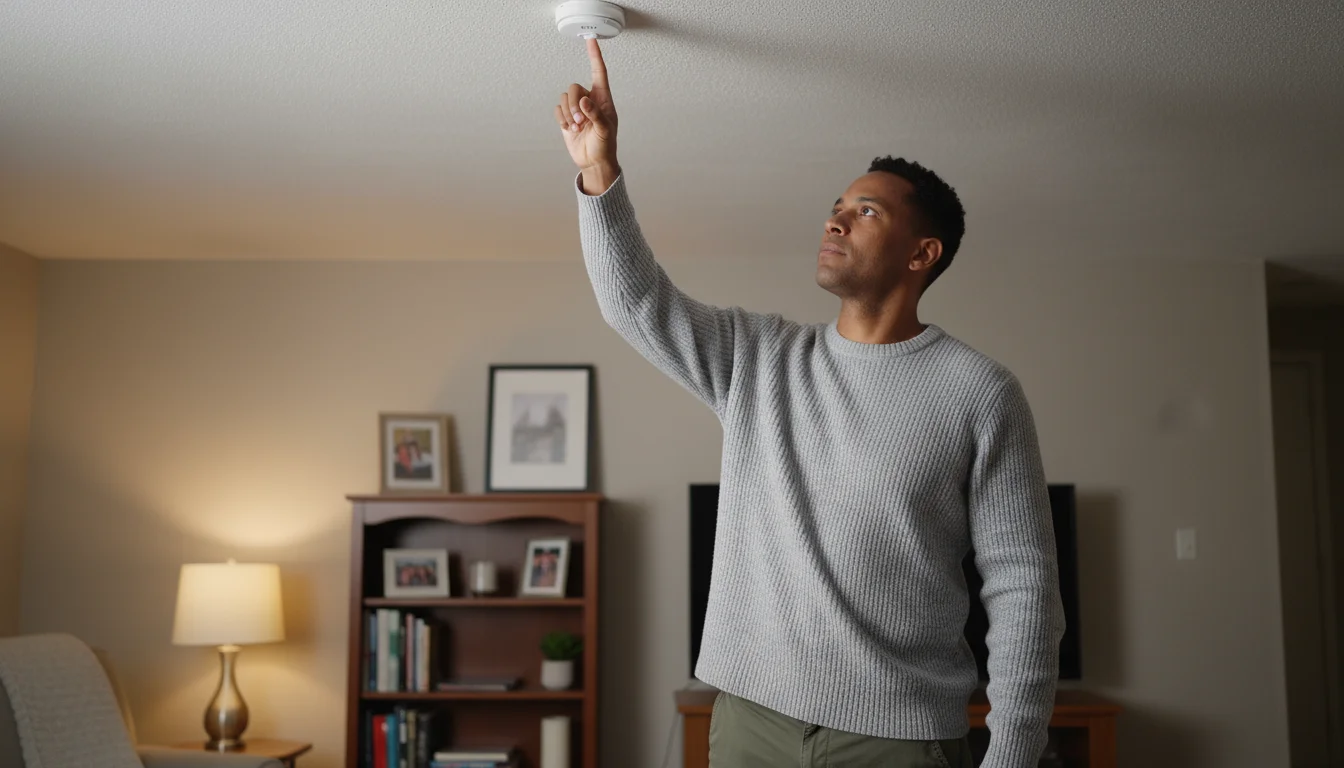
Smoke and Carbon Monoxide Detectors: Your Early Warning System
These devices are your first line of defense against fire and invisible gas threats. Test them monthly. This takes 2-3 minutes.
- Press the Test Button: Go to each detector in your home and press the “test” button. You should hear a loud alarm. If you do not, replace the batteries immediately. If it still fails, replace the unit.
- Check Expiration Dates: Smoke detectors typically last 10 years, and carbon monoxide detectors last 5-7 years. Look for the manufacturing date on the back of the unit and replace any expired detectors.
Pro tip: Change batteries annually, even if they seem to be working. A good reminder is to do this when you change your clocks for Daylight Saving Time.
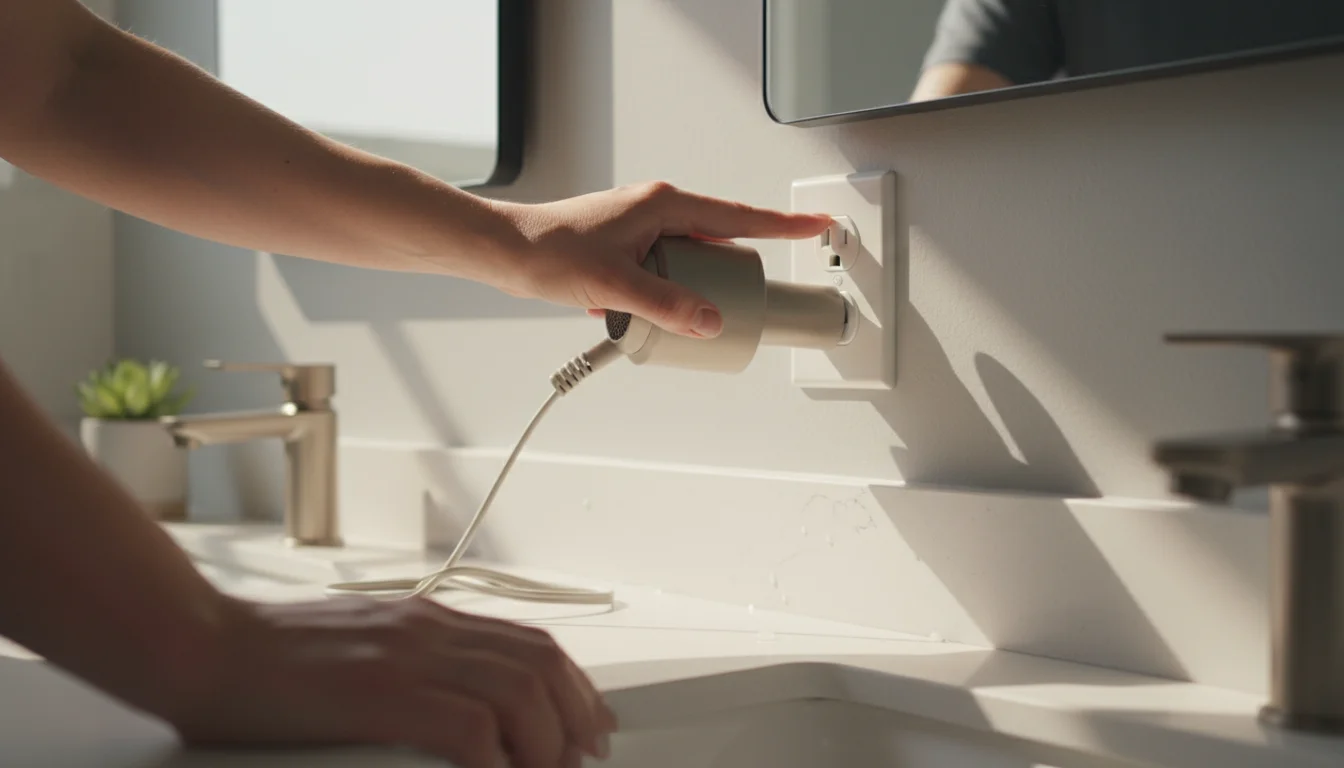
GFCI Outlets: Ground Fault Circuit Interrupters
GFCI outlets protect you from electrical shock, especially in areas near water like bathrooms, kitchens, laundries, and basements. Test them monthly to ensure they are functioning correctly. This takes less than 1 minute per outlet.
- Locate GFCI Outlets: These outlets have “test” and “reset” buttons.
- Press “Test”: Plug a lamp or small appliance into the GFCI outlet to confirm it has power. Then, press the “test” button. The power should immediately trip, and the lamp/appliance should turn off.
- Press “Reset”: Press the “reset” button. Power should be restored, and the lamp/appliance should turn back on.
If an outlet fails this test, it is defective and requires replacement by a qualified electrician. A faulty GFCI outlet leaves you vulnerable to serious electrical hazards.

Doors, Windows, and Entry Points: Sealing Your Home Against the Elements
Your doors and windows are not just entry points, they are critical barriers against weather, pests, and energy loss. Monthly checks on their seals and functionality can prevent drafts, water intrusion, and pest infestations. This task takes 5-10 minutes.
If you notice significant drafts during your monthly checks, you may need a complete weatherization guide to properly seal your home against extreme temperatures.
To further protect your entry points from water intrusion, follow a detailed gutter cleaning guide twice a year.
- Inspect Weatherstripping and Caulking: Walk around your home, checking the weatherstripping around all exterior doors and windows. Look for cracks, tears, or compression that compromises the seal. Check the caulking around window and door frames for gaps or deterioration. Poor seals allow drafts, which increase your energy bills and let moisture in.
- Check for Drafts: On a windy day, or by holding a lit incense stick or feather near closed windows and doors, you can visually identify drafts. If the smoke or feather moves, you have a leak.
- Pest Inspection: Look for signs of insect or rodent activity near entry points, such as droppings, gnaw marks, or nests. Addressing these early prevents widespread infestations. Seal any small cracks or gaps you find with appropriate caulk or expanding foam.
Pro tip: Re-caulking a window or door is a simple DIY task that costs very little but saves significantly on heating and cooling costs. It also prevents water damage to window sills and frames. For more in-depth guidance on maintaining these exterior elements, refer to resources like This Old House offers valuable resources for homeowners.

Crafting Your Personalized Monthly Home Care Checklist
A consistent `home care checklist` is only effective if you integrate it into your life. You do not need to dedicate an entire weekend to these tasks. Break them down. Assign a day, or even a specific hour, each month to tackle a few items. The goal is consistency, not perfection.

Building Your Routine
Here is how you can personalize your `preventive maintenance schedule`:
- Batch Similar Tasks: Group tasks that require similar tools or locations. For example, check all GFCI outlets in one go.
- Assign a “Maintenance Day”: Choose the first Saturday of the month, or the last Sunday afternoon. A regular slot builds a habit.
- Create a Digital or Physical List: Use a spreadsheet, a dedicated app, or a simple printout taped inside a cabinet door. Mark off tasks as you complete them. Seeing your progress provides motivation.
- Consider Seasonal Adjustments: While these are monthly tasks, your focus might shift slightly with the seasons. For instance, you might inspect gutter downspouts monthly during heavy rain seasons (though gutter cleaning itself is typically bi-annual). This integrates with your overall `seasonal home maintenance` plan.
Example Monthly Schedule Idea:
- First Weekend: HVAC filter change, inspect washing machine hoses, check all smoke/CO detectors. (Approx. 20 minutes)
- Second Weekend: Kitchen and bathroom drain maintenance, check all faucets and toilets for leaks. (Approx. 20 minutes)
- Third Weekend: Refrigerator coil cleaning, dishwasher filter cleaning. (Approx. 20 minutes)
- Fourth Weekend: Test all GFCI outlets, inspect weatherstripping on doors and windows. (Approx. 15 minutes)
This breaks down maintenance into manageable chunks, preventing overwhelm while ensuring all critical tasks receive attention. Remember, your goal is to make maintenance a routine part of homeownership, not a daunting chore.
Budget-Wise Solutions: DIY and When to Call a Professional
Many homeowners worry about the cost of maintenance, but the truth is, most monthly tasks are excellent DIY projects that require minimal tools and experience. The savings you realize from preventing major issues far outweigh any small costs for replacement parts like an HVAC filter or a toilet flapper. However, knowing your limits is crucial. You should not attempt repairs that involve complex electrical wiring, gas lines, or structural elements unless you are qualified.

Empowering Your DIY Skills
For most monthly tasks, you can confidently handle them yourself:
- HVAC filter replacement
- Drain cleaning with natural methods
- Appliance filter cleaning (refrigerator, dishwasher)
- Testing safety detectors and GFCI outlets
- Inspecting weatherstripping and caulking
- Tightening loose faucet connections
- Replacing a leaky toilet flapper
These tasks often require only basic hand tools, household cleaning supplies, or specific replacement items like filters, which are inexpensive and readily available.

When to Call a Professional
Recognize when a task exceeds your skill level or comfort. Here are situations where you should contact a licensed professional:
- Persistent plumbing leaks after basic tightening
- Electrical issues beyond GFCI testing (e.g., flickering lights, burning smells)
- HVAC system making unusual noises or failing to heat/cool effectively
- Suspected gas leaks (evacuate and call emergency services immediately)
- Significant water damage that indicates a larger issue
- Any task involving structural integrity, roofing, or major appliance repair if you lack specific expertise
Pro tip: Maintain a list of trusted, licensed professionals (plumber, electrician, HVAC technician) before you need them. Having these contacts ready saves valuable time during an emergency and helps you avoid rushed, potentially subpar work.
Budgeting for professional maintenance, such as an annual HVAC tune-up or a chimney inspection, is a smart long-term strategy. These scheduled visits often uncover minor issues before they become expensive failures, reinforcing the principle of `preventive maintenance schedule`.

Frequently Asked Questions
How often should I really change my HVAC filter?
You should replace your HVAC filter at least every month to three months. Factors like pets, allergies, how often you cook, and local air quality can necessitate more frequent changes. In my experience, a monthly check is wise. If it looks dirty, change it. Dirty filters are a leading cause of HVAC system inefficiency and failure.
Can I use chemical drain cleaners for stubborn clogs?
No, I strongly advise against using chemical drain cleaners. They are caustic and erode your pipes over time, leading to leaks. They also harm the environment and pose a safety risk. For stubborn clogs, try a drain snake or call a professional plumber. Prevention through regular monthly maintenance of your drains is the best approach.
What are the most common home maintenance tasks people overlook?
Based on my two decades in the field, people most often overlook HVAC filter replacement, cleaning refrigerator condenser coils, and regularly testing smoke and carbon monoxide detectors. These are simple, quick tasks with significant implications for safety, efficiency, and preventing expensive repairs. Incorporating them into a monthly `home care checklist` is crucial.
How do I remember to do all these monthly tasks?
The best way is to create a consistent routine. Pick a specific day each month, such as the first Saturday, and dedicate an hour or two to home maintenance. Use a digital calendar reminder or a printed checklist you can visibly mark off. Consistency builds habit, making these essential tasks feel less like chores and more like routine upkeep.
Is it worth investing in smart home monitoring for maintenance?
Absolutely. Smart home devices, such as water leak detectors, smart smoke/CO alarms, and even smart HVAC thermostats, can provide invaluable early warnings. They notify you of issues like leaks or low battery levels in detectors, allowing you to address problems immediately, often preventing significant damage. This complements your hands-on `preventive maintenance schedule` and offers an extra layer of protection.


Leave a Reply