Your kitchen cabinets are the unsung heroes of daily life, holding everything from your morning coffee mugs to your family’s favorite dinner plates. But after years of faithful service, do they feel a little… tired? A complete kitchen renovation often feels overwhelming and expensive, putting it out of reach for many busy homeowners and renters. However, a significant visual impact does not require a huge budget or extensive time commitment.
You can dramatically refresh the look and feel of your kitchen, transforming your cabinets from drab to fab, for around $50. Yes, you read that right: fifty dollars. The secret lies in updating your cabinet hardware. This simple DIY project offers an immediate return on your investment in terms of aesthetics and personal satisfaction, proving that practical and affordable home improvements are entirely possible.
Why a Hardware Update Matters
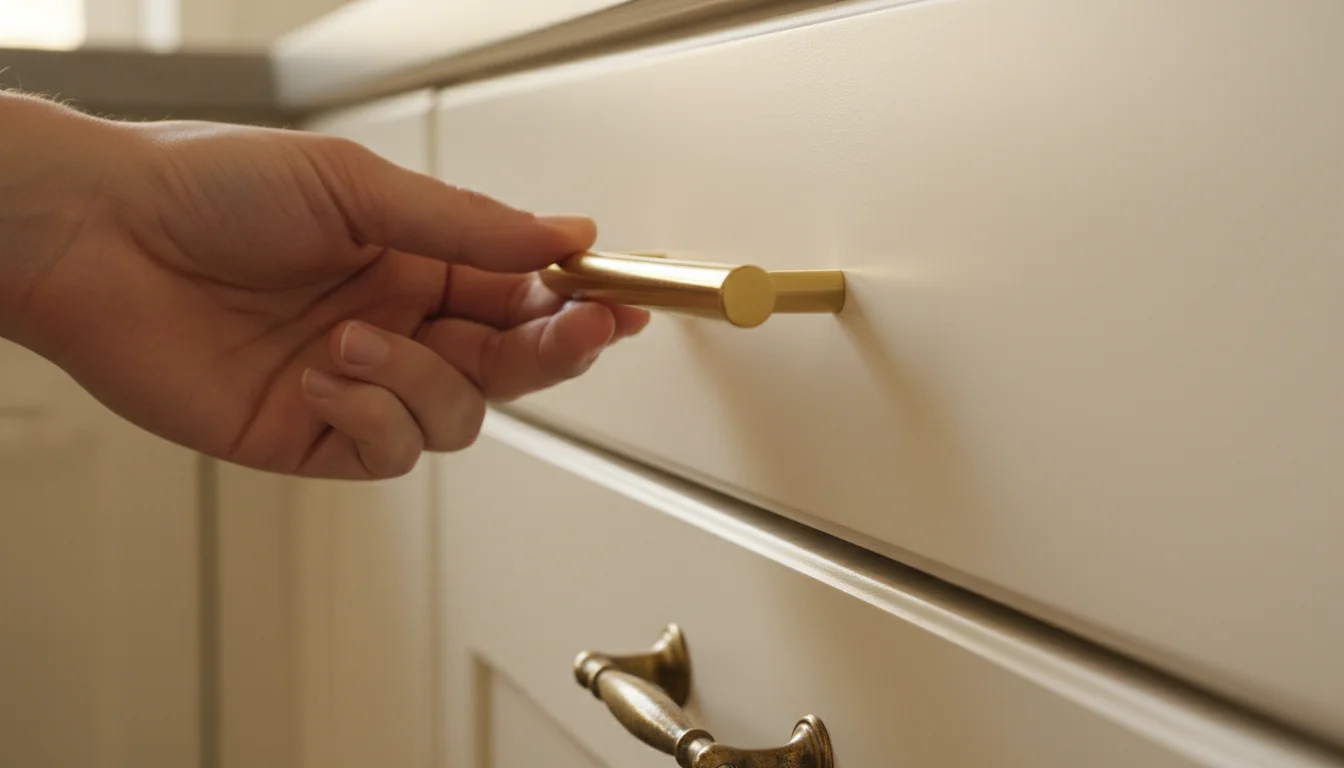
Think about the sheer number of times you open and close your kitchen cabinets and drawers each day. Your hands touch the knobs and pulls constantly, making them a functional necessity. But beyond their utility, cabinet hardware acts as the “jewelry” of your kitchen, reflecting light, adding texture, and defining the overall style of the space. Dated, tarnished, or ill-fitting hardware can make an otherwise clean kitchen feel old and neglected.
Updating your cabinet hardware offers several compelling benefits, especially for those seeking a quick and budget-friendly kitchen upgrade:
- Instant Visual Refresh: New hardware immediately catches the eye. It can transform a traditional kitchen into something more modern, or give a plain space a touch of classic elegance. This small change makes a big difference in how your kitchen looks and feels.
- Cost-Effective Renovation: Compared to painting cabinets, replacing countertops, or installing new flooring, updating hardware is incredibly inexpensive. You avoid the high costs of materials, specialized tools, and professional labor that larger renovations demand. This makes it an ideal budget kitchen project.
- High Impact, Low Effort: The time commitment for this DIY project is minimal. Most homeowners can complete a full kitchen hardware swap in a single afternoon or over a weekend, depending on the number of cabinets. The result is a noticeable improvement for very little effort.
- Personalization: Hardware comes in countless styles, finishes, and materials. You can express your personal taste and inject new personality into your kitchen without committing to a permanent design overhaul. You effectively get to “redecorate” with a few screws and a screwdriver.
- Increased Home Value (Subtle but Present): While not a major selling point like a full kitchen remodel, fresh, cohesive hardware contributes to a well-maintained and updated impression of your home. Potential buyers notice these small details, making your property feel more current and cared for. As experts at HGTV often highlight, minor updates enhance perceived value.
Planning Your Budget: The $50 Breakdown
Achieving a significant kitchen upgrade for $50 requires smart shopping and realistic expectations. The majority of your budget will go towards the hardware itself. Here’s how to maximize your dollars:
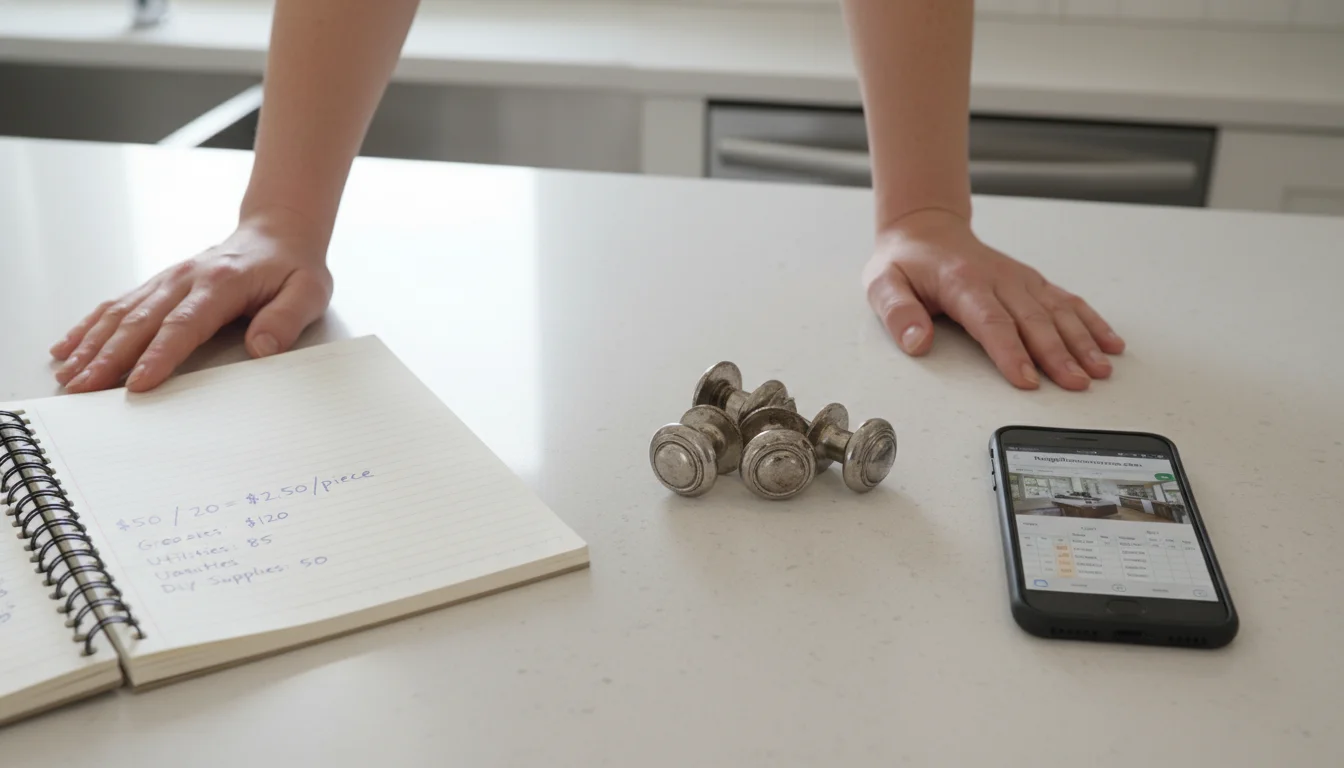
- Count Your Hardware: Start by counting every knob and pull in your kitchen. Remember to include pantry doors and any built-in desk areas if they share the same cabinetry. This number dictates how many pieces you need to buy.
- Set a Per-Piece Price: With your total count, you can calculate how much you can spend per knob or pull to stay within your $50 limit. For example, if you have 20 pieces of hardware, you can spend $2.50 per piece ($50 / 20 = $2.50).
- Where to Find Affordable Hardware:
- Big Box Stores: Retailers like Home Depot or Lowe’s often carry budget-friendly options, especially during sales or in multi-packs. Their house brands can offer excellent value.
- Online Retailers: Websites such as Amazon, Wayfair, or specialty hardware sites can have competitive pricing, particularly for bulk purchases or during promotional events. Always check shipping costs, as these can add up quickly.
- Discount Stores & Outlets: Stores like IKEA, Habitat for Humanity ReStores, or even local hardware liquidators can be goldmines for inexpensive or clearance items. Inventory varies widely, so frequent visits might be necessary. According to Bob Vila, clearance aisles are often overlooked sources for quality materials.
- Thrift Stores & Flea Markets: For a truly unique or vintage look, you might find individual pieces at rock-bottom prices. This approach works best if you need only a few pieces or want a mismatched, eclectic aesthetic.
- Consider Refurbishing: If your existing hardware has a good shape but a dated finish, consider spray painting it. High-quality metal spray paint (designed for hardware) can cost $5-$10 per can and completely change the look. This method requires careful preparation (cleaning, light sanding, priming) and proper ventilation but can save you from buying new pieces.
Focus on simple designs and finishes to keep costs down. Polished chrome, brushed nickel, and matte black are frequently available at lower price points because of their popularity and widespread manufacturing. Avoid intricate designs or exotic materials like brass, copper, or crystal if you are strictly adhering to the $50 budget.
Selecting the Perfect Hardware for Your Style
Choosing the right hardware elevates your kitchen’s aesthetic. Consider these factors when making your selections:
- Knobs vs. Pulls:
- Knobs: Require only one screw hole, making them incredibly easy to install or replace. They are versatile and suit many styles, from traditional to modern.
- Pulls (Handles): Require two screw holes (or more for longer pulls), offering a more substantial grip. They come in various lengths and styles, including bar pulls, cup pulls, and bail pulls. If you are replacing existing pulls, make sure the new pulls have the exact same “center-to-center” measurement (the distance between the two screw holes).
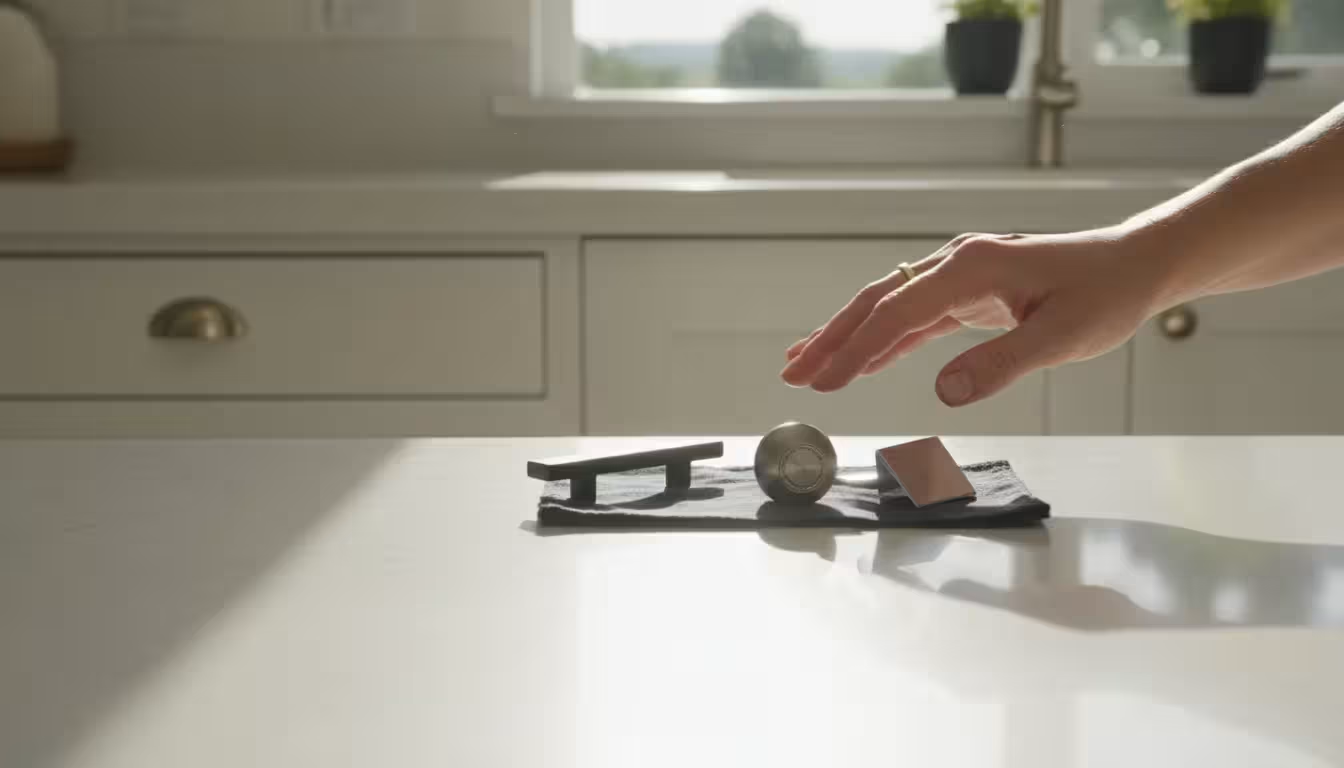
- Style and Finish:
- Modern: Opt for sleek bar pulls in brushed nickel, chrome, or matte black. Minimalist designs work best.
- Traditional: Choose classic round knobs or ornate pulls in oil-rubbed bronze, antique brass, or polished nickel.
- Farmhouse: Cup pulls, bin pulls, or simple black iron knobs and pulls create a rustic, welcoming feel.
- Transitional: This style blends traditional and modern. Consider sleek pulls with a slight curve or simple knobs in a brushed finish.
- Material: Most budget-friendly options use zinc, steel, or aluminum with various platings. These are durable and easy to maintain. Solid brass or copper tend to be more expensive.
- Ergonomics: Consider how the hardware feels in your hand. Do the pulls offer a comfortable grip? Are the knobs easy to grasp, especially if you have mobility issues? Practicality is paramount for everyday use.
- Matching Existing Decor: While you are updating, you still want cohesion. Look at your existing faucet, lighting fixtures, and appliance finishes. Does a brushed nickel hardware complement your stainless steel appliances, or would matte black create a striking contrast? Aim for a harmonious look, even if the finishes are not identical.
Measure Twice, Install Once: The Key to Success
Accurate measurement is the most critical step in this entire project. Rushing this can lead to misaligned hardware, extra holes, and frustration. If you are replacing existing hardware, the process is usually straightforward. If you are adding hardware to bare cabinets, you will need a template.
For Replacing Existing Hardware:
This is the easiest scenario. Your goal is to find new hardware that fits the existing holes perfectly.
- Remove One Existing Piece: Take off one knob and one pull (if you have both) from your cabinets.
- Measure Knobs: Knobs use a single screw hole. No specific measurement is needed for the knob itself, but note its position if you want to use a different placement for new knobs.
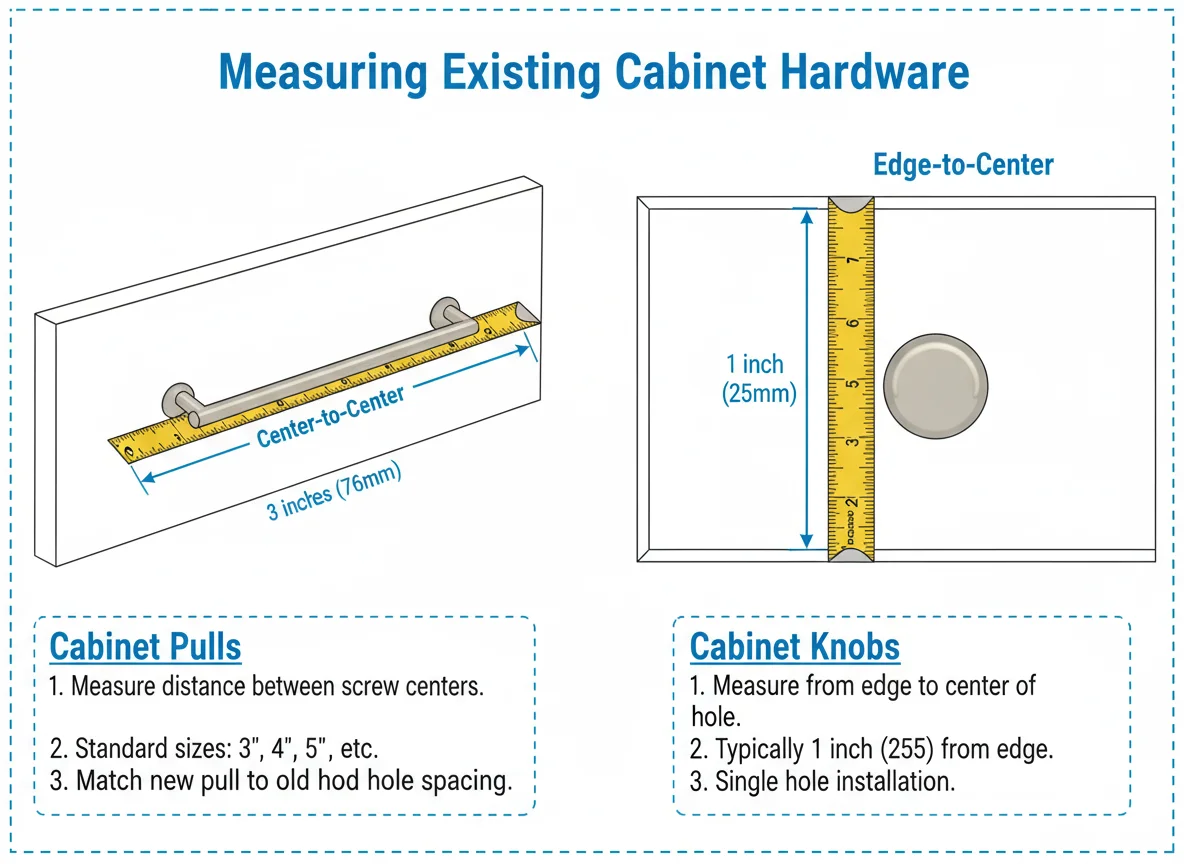
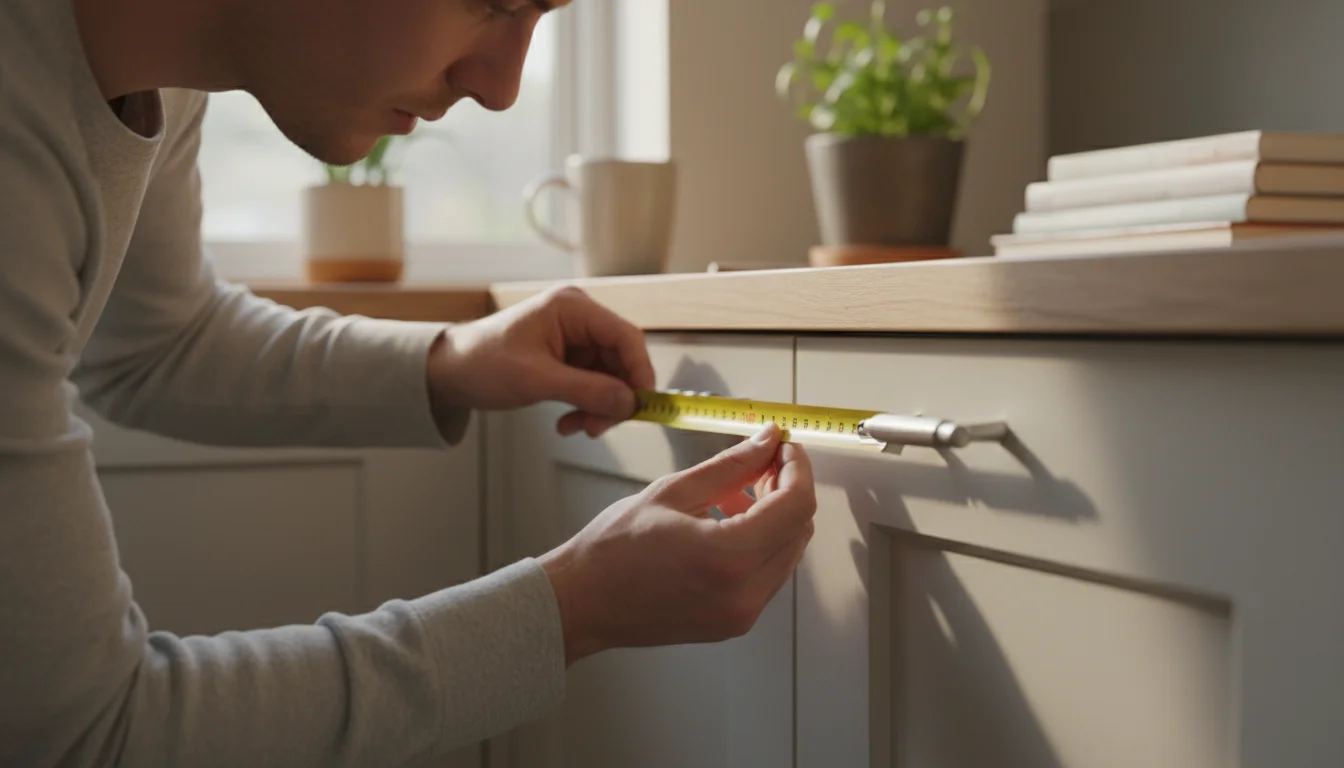
- Measure Pulls (Center-to-Center): This is crucial. Use a ruler or measuring tape to measure the distance between the center of one screw hole to the center of the other screw hole on your existing pull. This is called the “center-to-center” or “hole spacing” measurement. Standard sizes include 3 inches, 3.75 inches (96mm), 4 inches, and 5 inches (128mm), but many others exist. Write this measurement down precisely. Your new pulls *must* have the same center-to-center measurement to fit the existing holes.
For Adding Hardware to Bare Cabinets or Changing Hole Spacing:
If your cabinets currently have no hardware, or you want to change from knobs to pulls with different spacing, you will need to drill new holes. This requires more precision.
- Determine Placement:
- For Cabinet Doors: A common placement for knobs is 2-3 inches from the bottom corner (opposite the hinge side), centered on the vertical stile. For pulls, they can be placed vertically on the stile, or horizontally on a drawer.
- For Drawers: Knobs or pulls are typically centered both horizontally and vertically on the drawer front. For wide drawers, you might use two pulls.
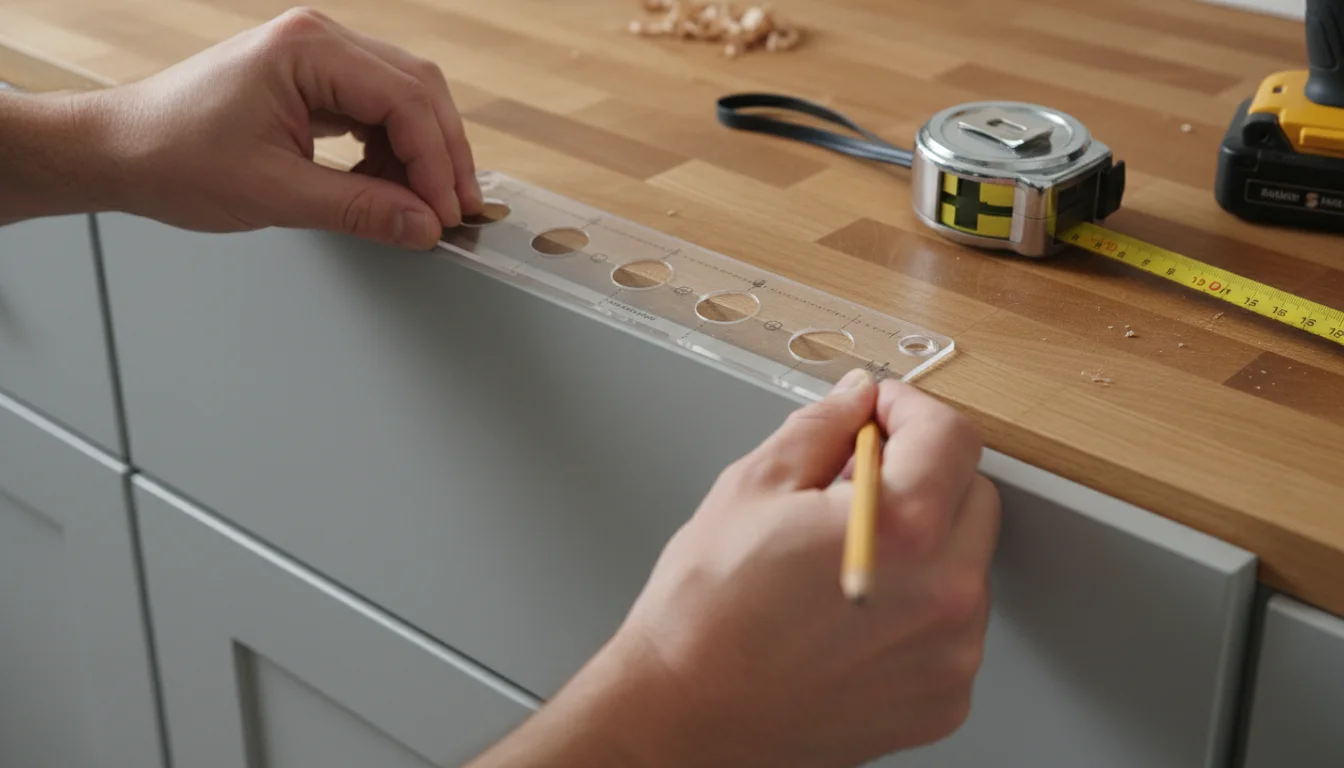
- Create a Template:
- You can buy inexpensive cabinet hardware templates at hardware stores, which have pre-drilled holes for common center-to-center measurements.
- Alternatively, make your own: Use a piece of cardboard or thin wood. Mark the exact placement for your first knob or pull (use the measurements from your chosen hardware). Drill pilot holes through the template.
- Test the Template: Use painter’s tape to attach your template to the back of a cabinet door or drawer front (where screw holes won’t show) or to an inconspicuous drawer. Stand back and ensure you like the placement. This step is crucial before drilling into your actual cabinets.
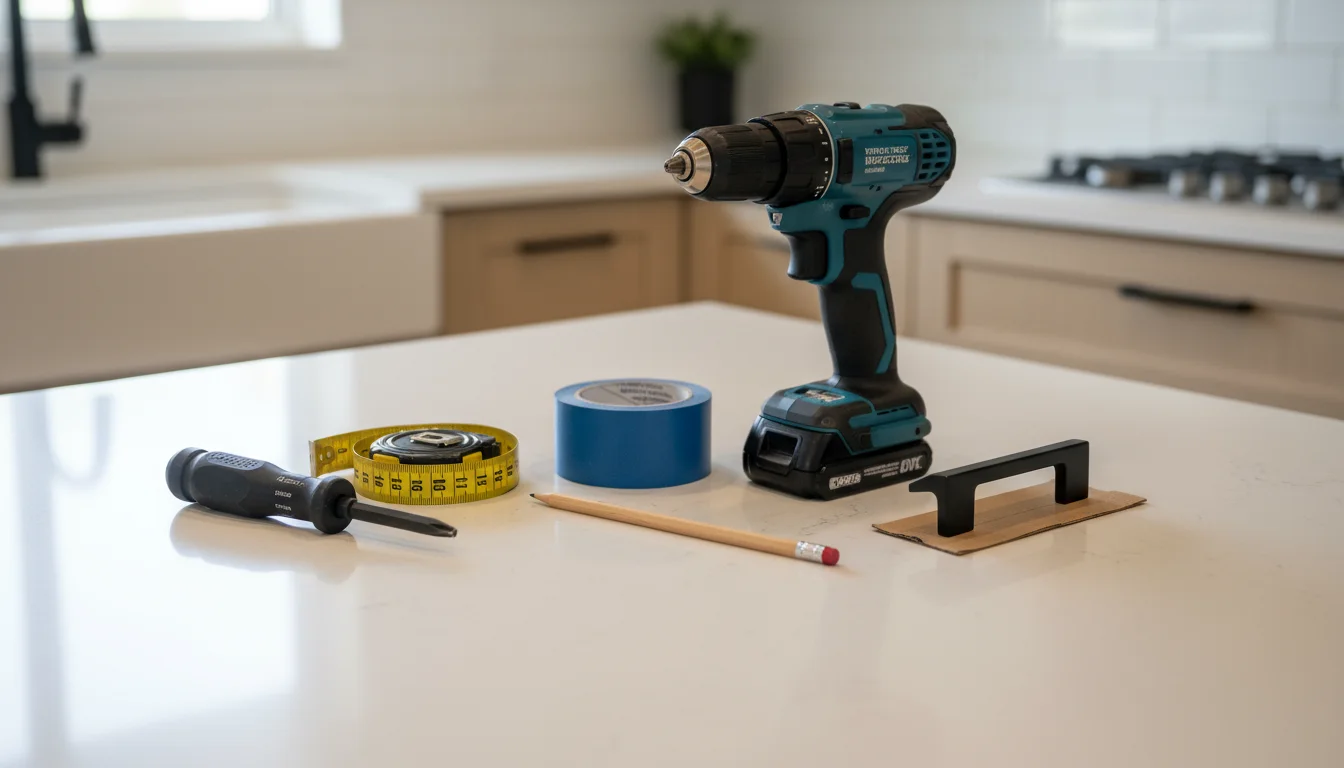
Your DIY Tool Kit: What You Need
This budget kitchen project requires minimal tools, which helps keep the overall cost down. You likely own most of these already:
- Screwdriver: A multi-bit screwdriver or a set of Philips head and flathead screwdrivers will handle most hardware screws.
- Measuring Tape or Ruler: Essential for accurate center-to-center measurements.
- Pencil: For marking drill points if you are adding new hardware.
- Painter’s Tape: Helpful for securing templates, marking drill spots, and preventing wood splintering when drilling.
- Drill (Optional but Recommended): If you are drilling new holes, a cordless drill with various drill bit sizes is invaluable. Start with a small pilot bit and gradually increase to the size needed for your hardware screws.
- Cabinet Hardware Template (Optional but Recommended): Speeds up marking and ensures consistency if you are drilling new holes. You can often find these for under $10.
- Safety Glasses: Always wear eye protection when drilling.
- Work Gloves (Optional): Protect your hands.
Remember, if you are simply swapping out existing hardware with the same hole spacing, you will only need a screwdriver and possibly a measuring tape to verify measurements. Keep it simple and focused to stay within your $50 budget.
Step-by-Step Installation: Refresh Your Cabinets
Once you have your new hardware and your tools ready, you are ready to transform your cabinets. Work systematically, one cabinet or drawer at a time, to ensure consistency.
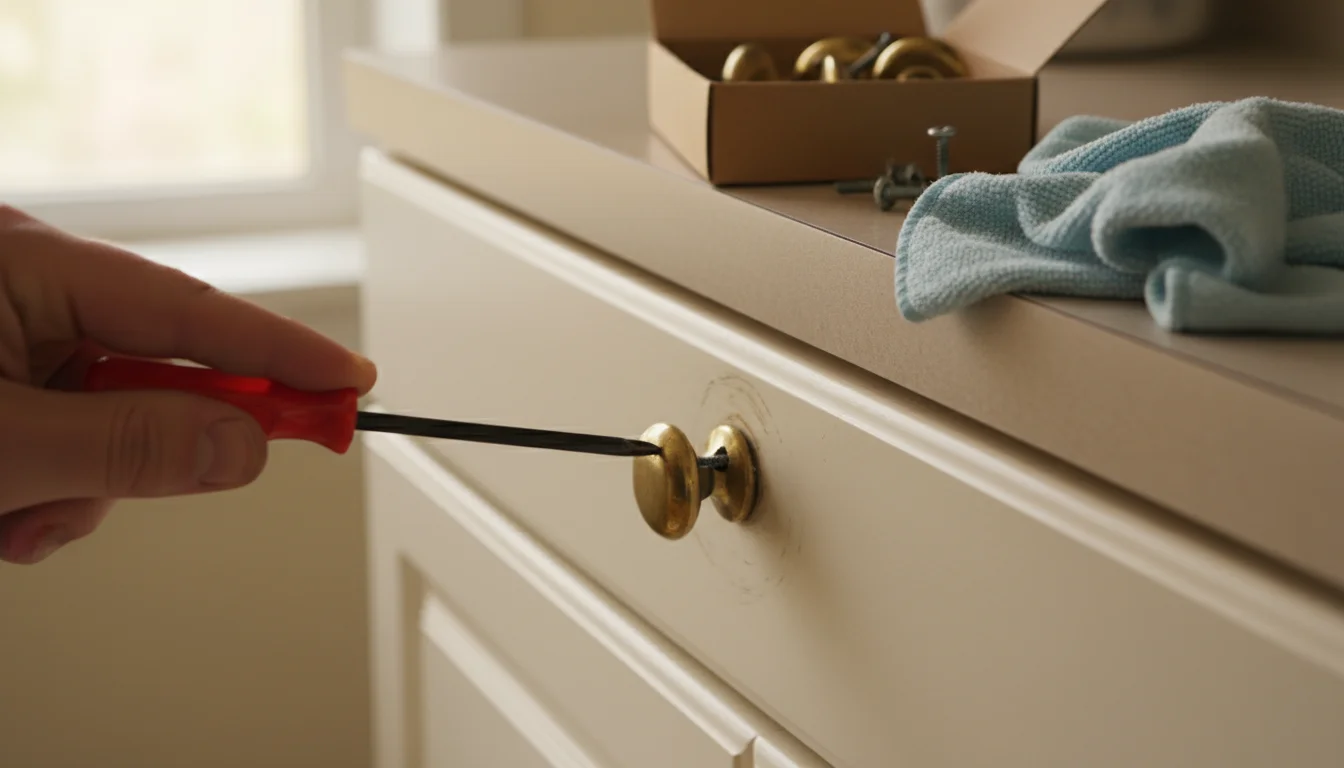
- Remove Old Hardware:
- Using your screwdriver, carefully unscrew and remove all existing knobs and pulls from your cabinet doors and drawers.
- Collect the old hardware and screws in a bag or container. You can donate or recycle these.
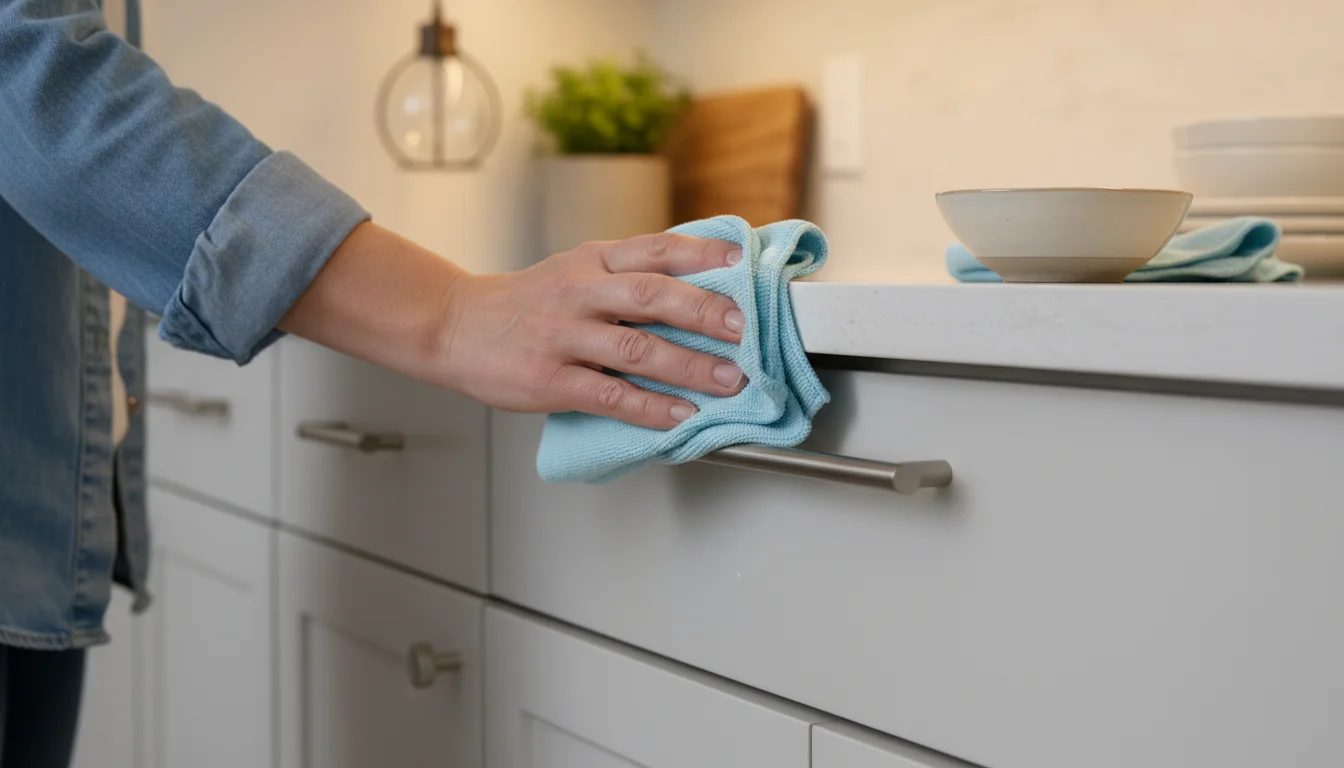
- Give your cabinets a quick wipe-down with a damp cloth to remove any dust or grime that was hidden beneath the old hardware. This is a great time for a mini-clean, according to the American Cleaning Institute, ensuring your new hardware goes onto a fresh surface.
- Prepare for New Hardware (If Drilling New Holes):
- If your new hardware requires different hole spacing or if you are adding hardware to bare cabinets, this step is crucial.
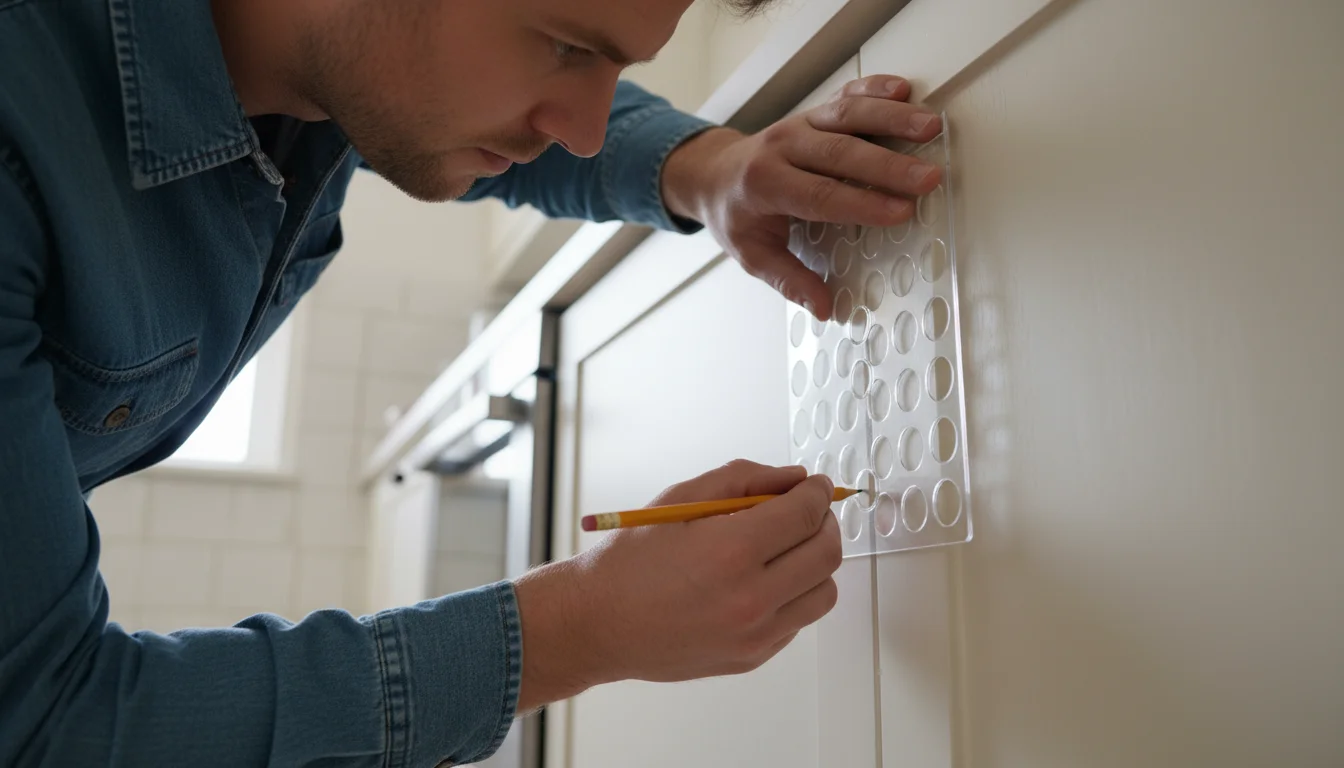
- Attach your cabinet hardware template (or your homemade template) to the first cabinet door or drawer front. Secure it firmly with painter’s tape. Ensure it is level and positioned exactly where you want the new hardware to sit.
- Using your pencil, mark the drill points through the template onto the cabinet surface.
- With your drill and the appropriate drill bit size (start small, usually 3/16 inch for most hardware screws), carefully drill pilot holes through your marked points. Always drill from the front of the cabinet door/drawer, through to the back, to minimize splintering on the visible side. Place a scrap piece of wood behind the cabinet where you are drilling to further prevent blowout.
- Install New Hardware:
- For each knob or pull, insert the screws through the back of the cabinet door or drawer.
- Align the new knob or pull on the front with the screw holes.
- Hand-tighten the screws with your screwdriver. Do not overtighten, as this can strip the screws or crack your cabinet material. The hardware should feel snug and secure, but not overly compressed.
- Repeat this process for all your cabinet doors and drawers, ensuring each piece is installed correctly and consistently.
- Final Check:
- After installing all the hardware, stand back and admire your work!
- Open and close each door and drawer to ensure the hardware is firmly attached and does not wobble.
- Wipe down any pencil marks or fingerprints.

Troubleshooting Common Challenges
Even simple DIY projects can present minor hurdles. Here are solutions to common issues you might encounter:
- Holes Do Not Line Up: This is the most common issue when replacing pulls. If your new pulls’ center-to-center measurement is slightly off, you have a few options:
- Minor Adjustment: If the difference is very small (less than 1/16 inch), you might be able to gently widen the existing holes with a drill bit or a small round file. Do this carefully to avoid visible damage.
- Backplate Solution: Purchase hardware with a backplate. A backplate is a decorative plate that sits behind the knob or pull. It can often cover existing holes that are slightly misaligned or hide old holes if you are changing placement.
- Wood Filler (Last Resort): If the holes are significantly misaligned or you want to switch from pulls to knobs (leaving two holes), you will need to fill the old holes with wood filler, sand them smooth, and then paint or stain the cabinet door to match. This adds more complexity and cost, potentially exceeding your $50 budget.
- Stripped Screws: If a screw head strips, making it impossible to unscrew, try these methods:
- Rubber Band: Place a wide rubber band over the screw head and then press your screwdriver firmly into it before twisting. The rubber can provide extra grip.
- Screw Extractor Kit: These inexpensive kits are designed to remove stripped screws. They drill into the screw head and then allow you to extract it.
- Hardware Feels Loose: Over time, screws can loosen. Simply retighten them with your screwdriver. If a screw repeatedly loosens, try adding a small amount of thread locker (available at hardware stores) to the screw threads before tightening.
- Uneven Placement (New Drills): If you find your newly drilled hardware is slightly off-center or uneven, refer back to your template. Re-measure and create a new template if necessary. For future projects, always verify template placement on a less visible area first.
Maintaining Your New Hardware
To ensure your new cabinet hardware looks great and functions properly for years to come, incorporate these simple maintenance practices:
- Regular Cleaning: Wipe down your knobs and pulls regularly with a soft, damp cloth. Use mild soap and water if needed, but avoid abrasive cleaners, harsh chemicals, or scouring pads, as these can damage the finish. Different finishes require specific care. For instance, according to This Old House, abrasive cleaners can quickly ruin the appearance of delicate finishes.
- Avoid Over-Tightening: When installing or re-tightening, do not overtighten screws. This can strip the screw threads, damage the hardware, or even crack the cabinet material. Snug is enough.
- Periodic Checks: Every few months, quickly go through your kitchen and gently wiggle each knob and pull. If any feel loose, grab your screwdriver and tighten the screws from the inside of the cabinet or drawer. This preventative measure avoids unexpected wobbles or hardware falling off.
- Protect Finishes: If you use aggressive kitchen cleaners for countertops or cabinet surfaces, be careful not to spray them directly onto your hardware. Wipe any splashes immediately. Some finishes, like oil-rubbed bronze, can naturally wear over time, developing a unique patina that many find desirable.

Frequently Asked Questions
Is it possible to paint existing cabinet hardware instead of buying new?
Yes, absolutely! Painting existing hardware is a fantastic way to save money and stay within your budget. Choose a high-quality metal spray paint specifically designed for hardware or objects that receive frequent handling. Thoroughly clean, lightly sand, and prime the hardware before painting for the best adhesion and durability. This method is particularly effective if you like the shape of your current hardware but dislike its finish.
What is “center-to-center” measurement, and why is it important?
“Center-to-center” measurement refers to the distance between the exact middle of one screw hole to the exact middle of the other screw hole on a cabinet pull or handle. This measurement is critically important because new pulls must match the existing holes on your cabinet doors and drawers to fit without drilling new holes. If the center-to-center measurements differ, you will either need to drill new holes or select different hardware.
Can I mix different styles of hardware in my kitchen?
Yes, you can certainly mix hardware styles! This is a popular design choice that adds visual interest and character to a kitchen. Common approaches include using knobs on cabinet doors and pulls on drawers, or mixing two complementary finishes. The key is to maintain some element of cohesion, such as using the same finish across all pieces, or selecting styles that share a similar design era or aesthetic to ensure the look feels intentional rather than haphazard.
Will updating my cabinet hardware actually make my kitchen look more expensive?
Yes, updating cabinet hardware provides a surprising amount of bang for your buck in terms of perceived value. Old or mismatched hardware often makes a kitchen feel dated and neglected. By contrast, new, stylish, and cohesive hardware creates a polished, updated look that suggests a higher level of attention to detail and care, making the entire kitchen feel more sophisticated and expensive than the actual cost of the upgrade.
Where should I place new hardware if my cabinets currently have none?
Standard placement for knobs on cabinet doors is typically 2-3 inches from the bottom corner (on the side opposite the hinges), centered on the vertical stile. For pulls on cabinet doors, they are usually placed vertically in the same general area. On drawers, knobs or pulls are centered both horizontally and vertically. For very wide drawers, using two pulls spaced evenly can be an attractive and functional choice. Using a template is highly recommended for consistent placement.
A simple hardware swap shows that an impactful kitchen upgrade does not require extensive renovation or a hefty budget. With careful planning, smart shopping, and a few basic tools, you can achieve a fresh, modern, and personalized kitchen for around $50. This project gives you immediate gratification, enhances your home’s appeal, and demonstrates how small changes make a big difference in creating a space you love.
For expert home organization guidance, visit
The Spruce — Home Organization,
Real Simple — Organizing and
Good Housekeeping — Organization.
Disclaimer: This article is for informational purposes only and is not a substitute for professional advice. Consult professional organizers or specialists for personalized recommendations.


Leave a Reply