
A leak the size of a pinhole can destroy drywall, soak insulation, and rot structural framing long before a water stain ever appears on your living room ceiling. Your roof functions as the primary defense system for your entire house, shielding everything inside from wind, rain, snow, and relentless sunlight. Yet, most homeowners treat the roof as an out-of-sight, out-of-mind fixture, only paying attention when an emergency forces them to grab a bucket.
Incorporating these checks into your routine alongside other home care tasks that prevent expensive repairs is the best way to maintain your property value.
Implementing a seasonal roof inspection checklist allows you to catch minor wear and tear before it escalates into catastrophic structural damage. Roof materials break down gradually. The intense ultraviolet rays of summer bake asphalt shingles, while the freezing temperatures of winter cause materials to contract and crack. By dedicating a few hours each season to evaluate your home’s exterior, you drastically extend the lifespan of your roof and save yourself thousands of dollars in unexpected repairs.
The Essentials: Quick Summary
- Inspect twice yearly minimum: A thorough review in the spring and fall helps you catch damage from extreme summer and winter weather.
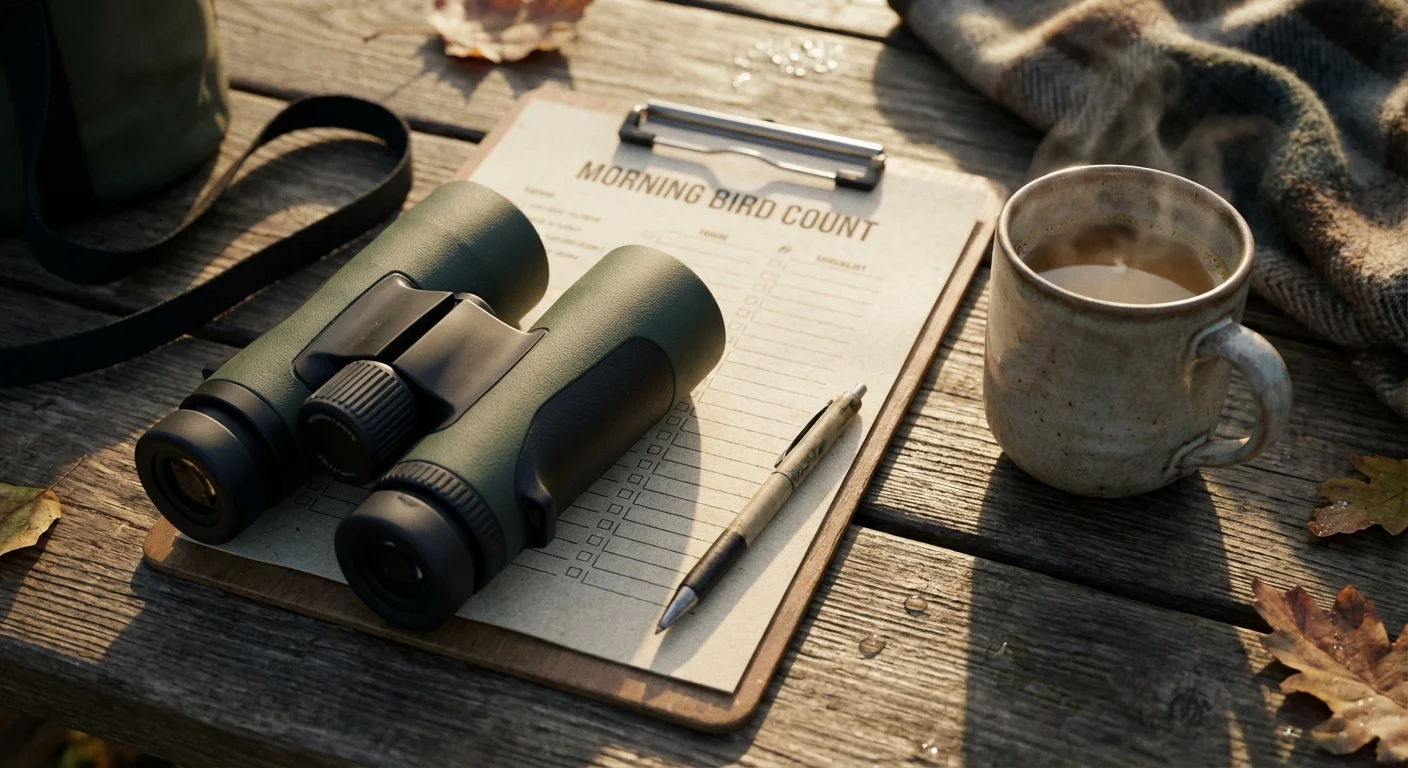
- Use binoculars first: You do not always need to climb a tall ladder; a good pair of binoculars allows you to spot missing shingles and failing flashing safely from the ground.
- Check the attic: The underside of your roof often reveals problems—like water stains, daylight peeking through, or mold—long before the exterior shows obvious damage.
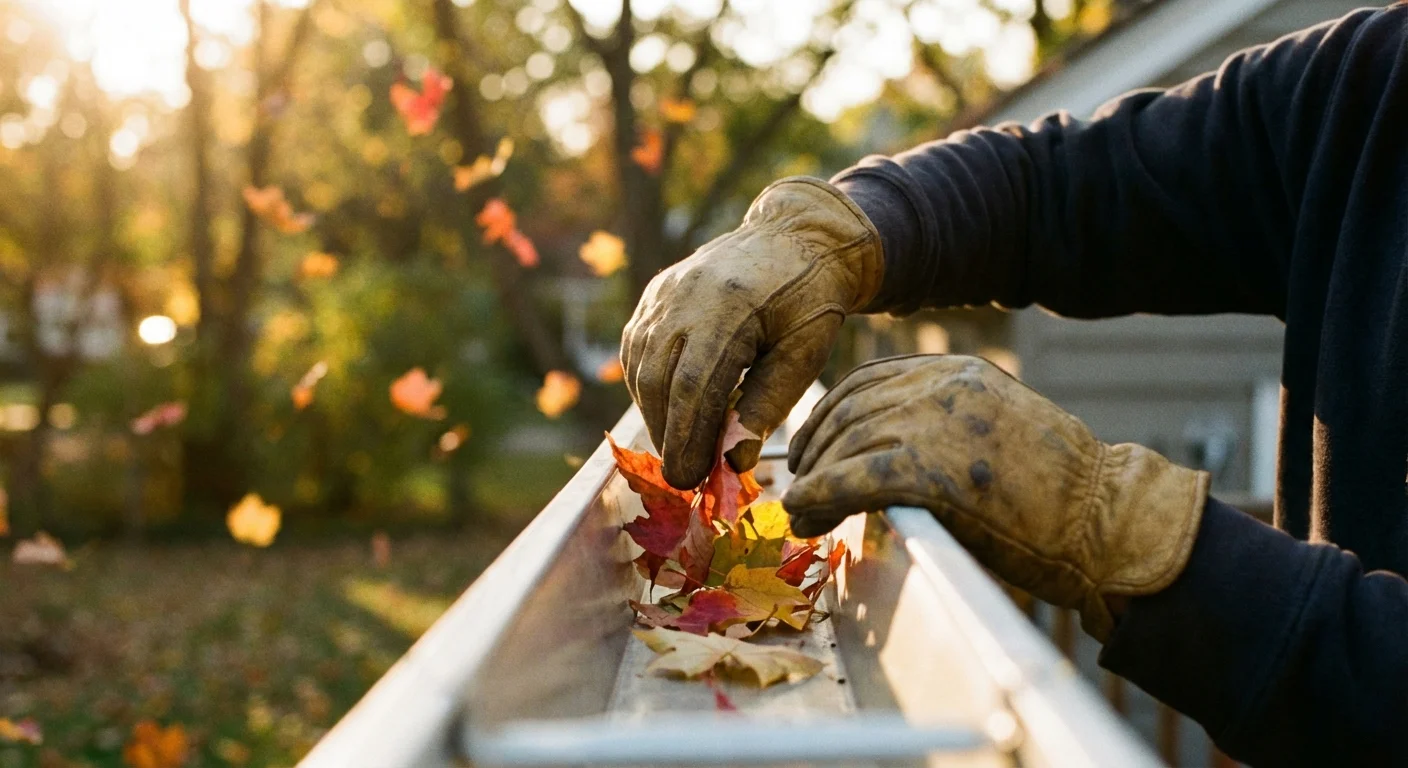
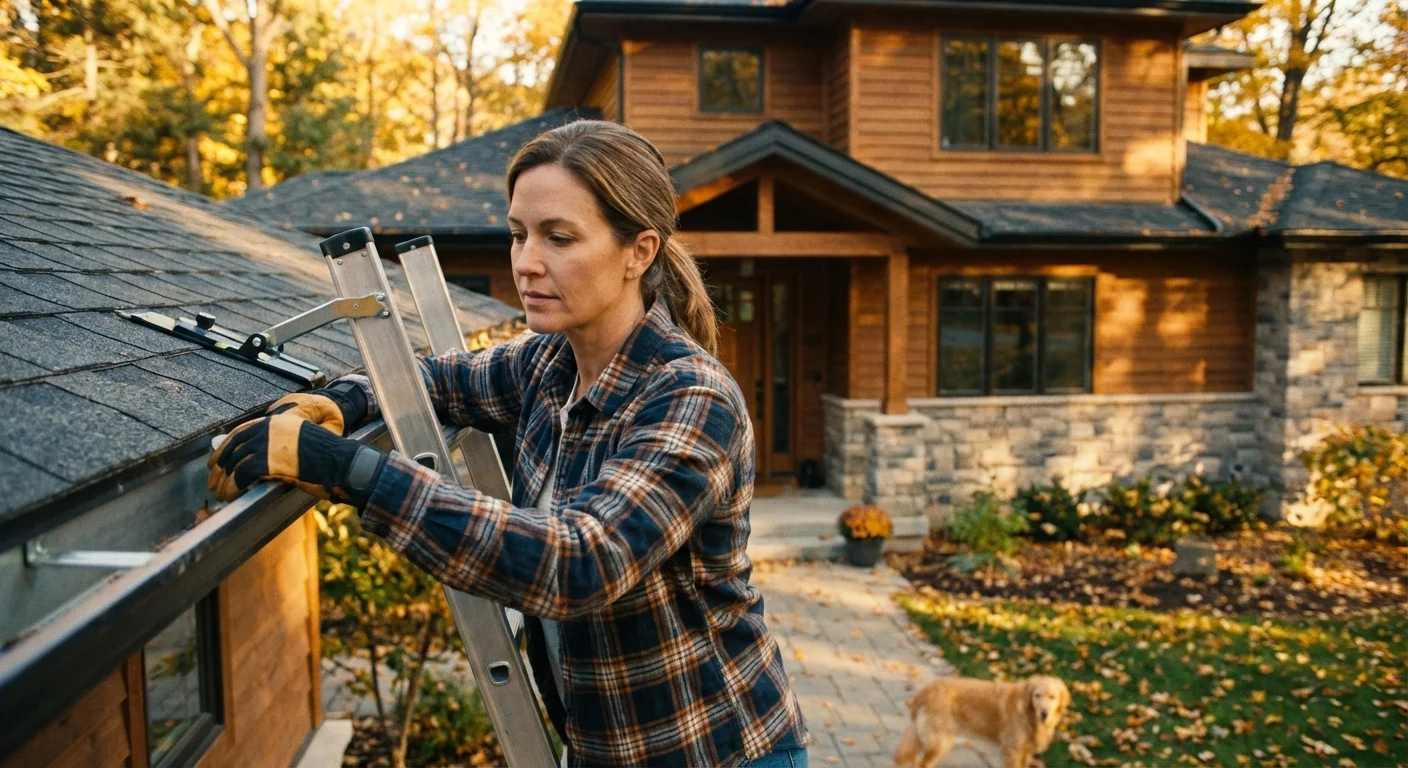
- Keep gutters clear: Blocked drainage causes water to back up under your shingles, rotting the roof deck and inviting pest infestations.
Why a Seasonal Roof Maintenance Routine Matters
Roofs do not exist in a static environment. They endure severe temperature fluctuations, harsh winds, heavy moisture, and biological threats like algae and moss. A single storm can lift a shingle just enough to break its adhesive seal, leaving it vulnerable to the next gust of wind. When you understand how different seasons impact building materials, you can proactively address vulnerabilities.
For those living in storm-prone regions, it is also essential to know how to prepare your home for hurricane season to ensure your roof can withstand high-velocity winds.
Incorporating these steps into a broader monthly home maintenance calendar ensures you address small vulnerabilities before they become major expenses.
“A roof is a complex system of interdependent parts. If one piece fails, whether it is a rusted flashing or a clogged gutter, the whole system is compromised. Regular maintenance is the only way to ensure those parts continue working together to protect your home.” — Building Science Experts
Performing a seasonal roof maintenance check does not mean you need to become a certified roofing contractor. It means learning the baseline condition of your home so you easily recognize when something changes. Catching a cracked plumbing vent boot costs a few dollars to fix; repairing the rotted roof decking caused by ignoring that cracked boot costs significantly more.
Spring: Assessing Winter’s Toll
Spring is the season of recovery. Ice, heavy snowpack, and relentless freeze-thaw cycles take a heavy toll on roofing systems. When water seeps into small crevices during the day and freezes at night, it expands, literally prying materials apart. Your spring roof inspection checklist should focus on identifying and repairing this winter damage before heavy seasonal rainstorms arrive.
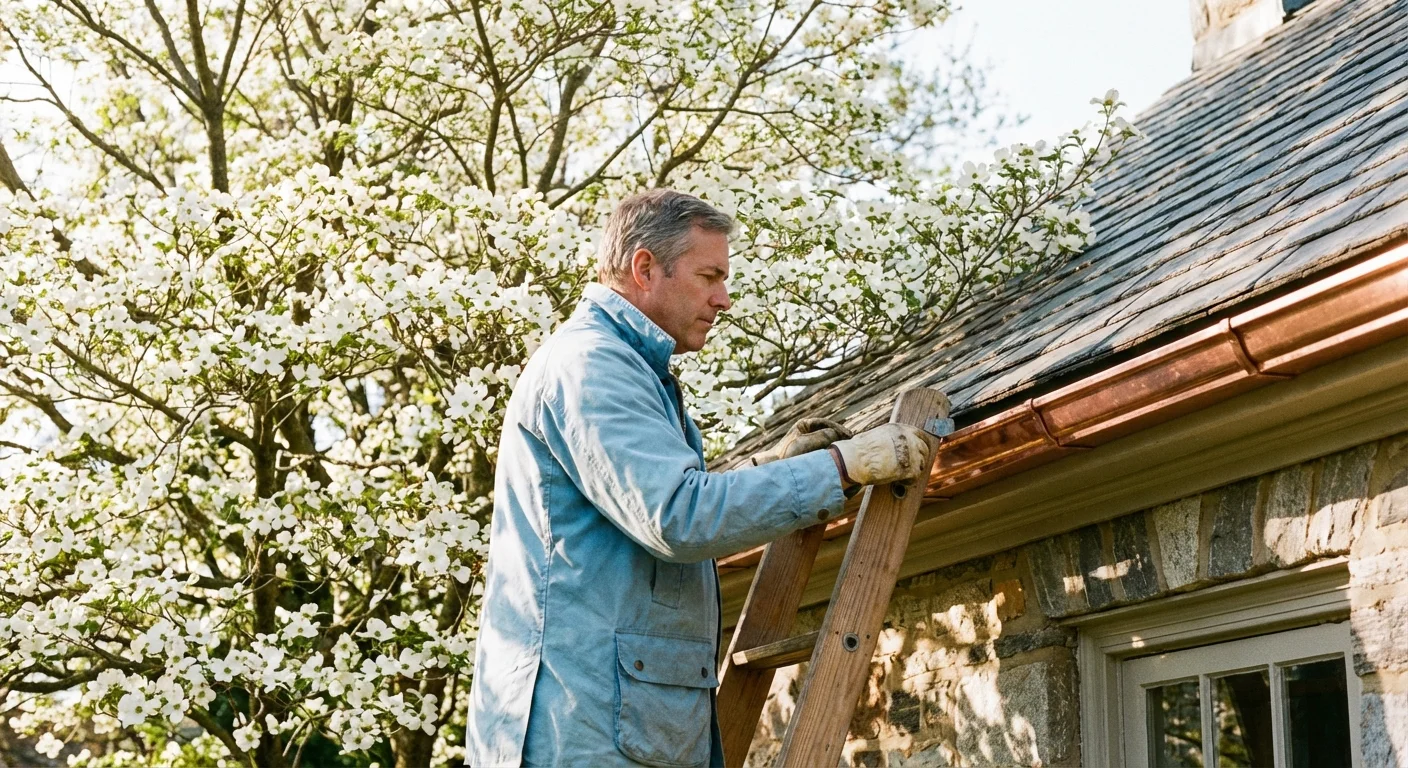
If you plan on doing this work yourself, be sure to follow a safe gutter cleaning guide to avoid accidents while working at heights.
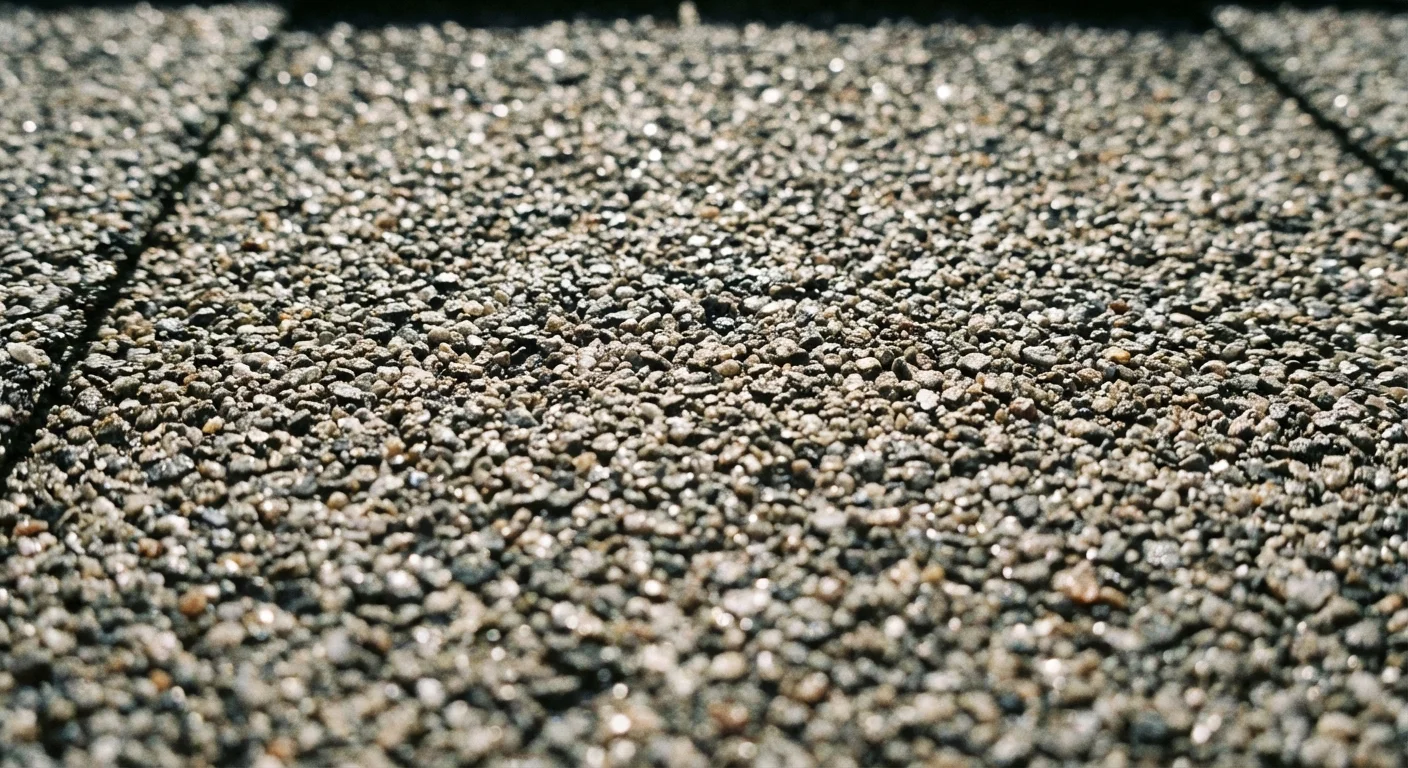
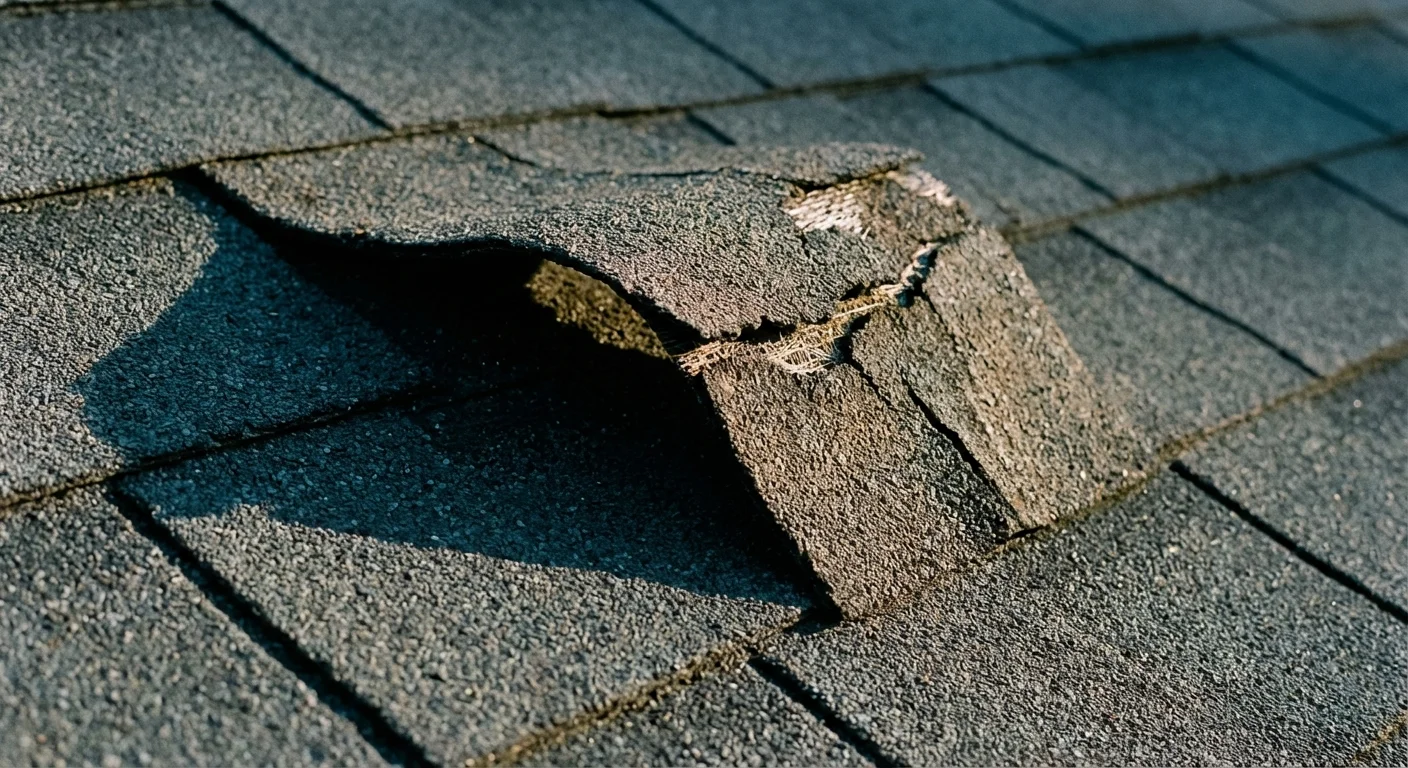
Examine Shingle Condition: Scan the main field of your roof for missing, cracked, curling, or buckled shingles. High winter winds often tear older, brittle shingles right off the roof deck. If you have an asphalt roof, check your gutters for excessive granule buildup. While a small amount of granule loss is normal, a heavy layer of grit in your gutters indicates your shingles are rapidly aging and losing their protective coating.
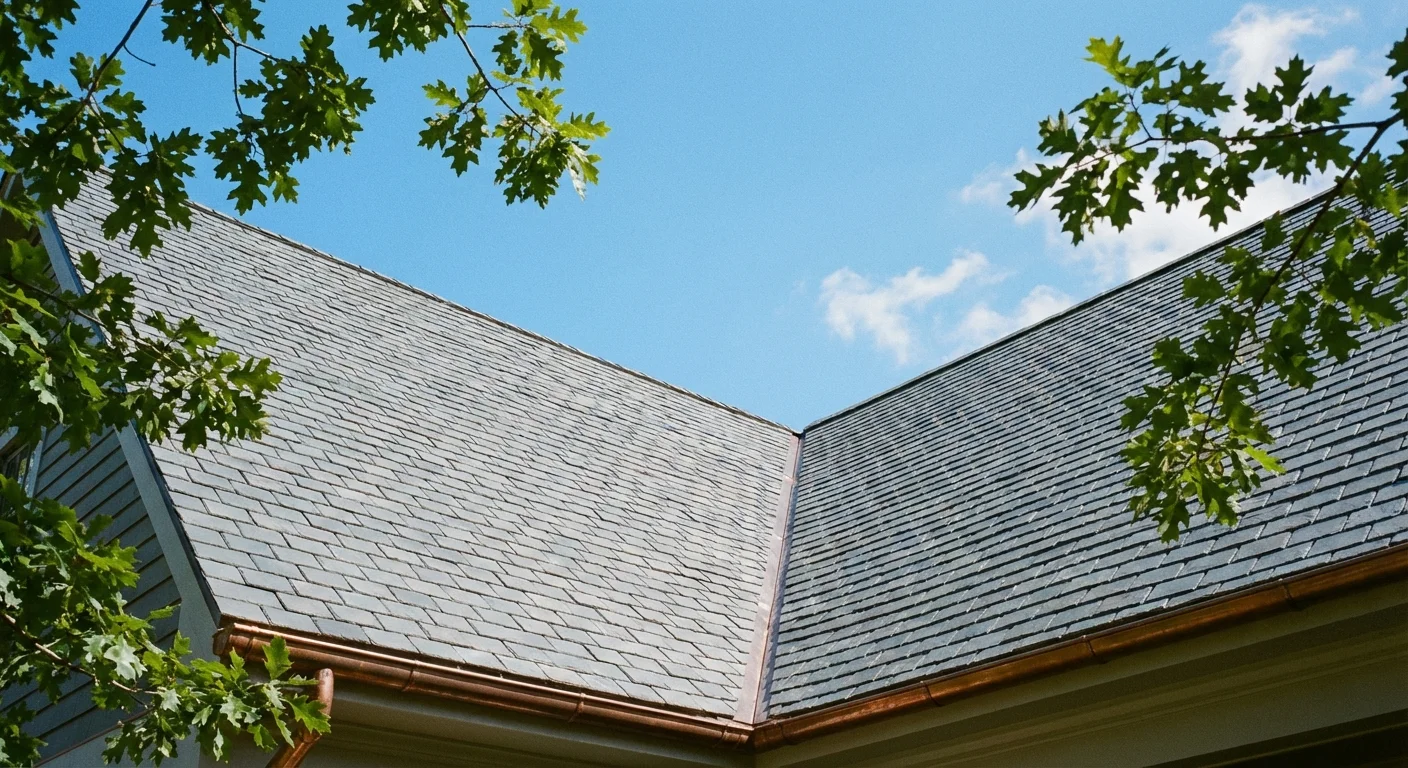
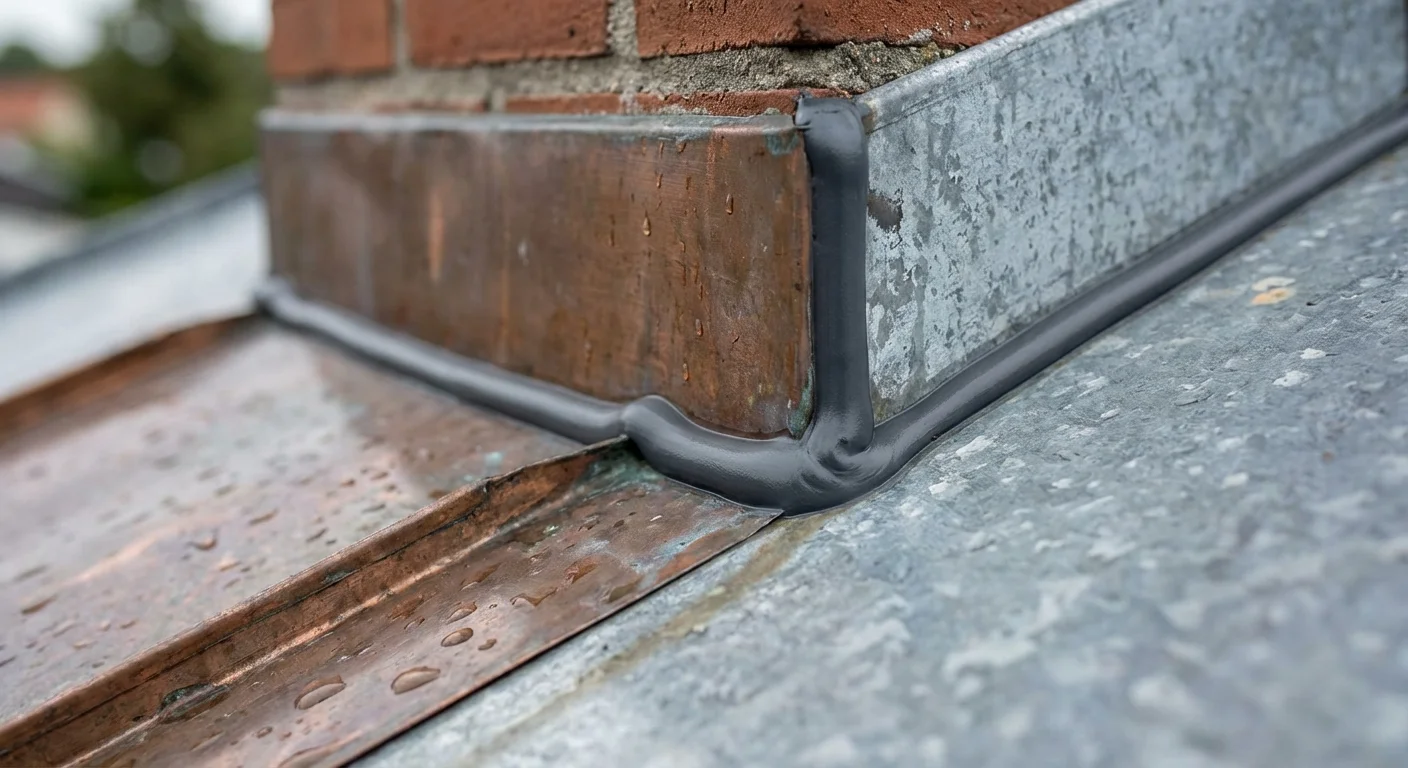
Inspect Flashing: Flashing consists of thin metal strips installed around roof penetrations and intersections—such as chimneys, skylights, dormers, and vent pipes—to direct water away from vulnerable seams. Winter ice frequently lifts or warps flashing. Ensure these metal pieces sit flat and tight against the roof. Look for rusted areas or places where the roofing sealant has dried out and cracked.
Check Chimney Masonry: Freeze-thaw cycles brutalize brick and mortar. Look for spalling, a condition where the face of the brick flakes off, or crumbling mortar joints. If the chimney lacks a rain cap, spring is the ideal time to install one to keep wildlife and water out of your flue.
Clear the Gutters: Spring brings heavy rains, and your gutters need a clear path to direct water away from your foundation. Remove twigs, lingering autumn leaves, and sediment. Check that the gutters have not pulled away from the fascia board under the weight of winter ice. For more thorough maintenance tips on structural integrity, resources from This Old House offer excellent guidance on preserving exterior features.
Summer: Beating the Heat and UV Damage
Summer presents a completely different set of challenges. High temperatures and intense ultraviolet radiation bake roofing materials. A poorly ventilated roof can reach temperatures exceeding 150 degrees Fahrenheit, causing asphalt to blister and adhesives to melt. Your summer inspection should prioritize heat management and biological growth.
A summer roof inspection is also the ideal time to check the structural integrity of your decking if you are considering installing solar panels for your home.
Look for Blistering and Cracking: Direct sun exposure dries out the volatile oils in asphalt shingles, causing them to become brittle. Look for small, pockmark-like blisters on the surface of the shingles. This bubbling occurs when trapped moisture inside the shingle heats up and expands. Once a blister pops, it leaves the underlying fiberglass mat exposed to the elements.
Address Algae, Moss, and Lichen: High summer humidity creates the perfect breeding ground for organic growth, particularly on the north-facing slopes of your roof that receive less direct sunlight. Algae creates black streaks that harm your home’s curb appeal, but moss and lichen pose a structural threat. Moss acts like a sponge, holding moisture against the roof surface, while lichen roots directly into the shingles, stripping away protective granules when removed. Treat these areas carefully with a dedicated roof cleaner, never a high-pressure washer.
Evaluate Roof Ventilation: Summer is the best time to ensure your attic breathes properly. Your roof requires intake vents (usually located in the soffits under the eaves) and exhaust vents (located near the roof ridge) to maintain constant airflow. If your attic feels like a sauna, your ventilation is likely inadequate. Poor ventilation not only drastically shortens the life of your roof but also forces your air conditioning system to work much harder. You can review guidelines on proper home ventilation and cooling efficiency through Energy Star.
Fall: Preparing for the Freeze
Fall maintenance focuses heavily on prevention. The goal is to prepare your home’s exterior to shed water and support the weight of incoming snow and ice. Ignoring your roof in the autumn guarantees headaches in the winter.
While you are outside checking the roof vents, don’t forget to prepare your plumbing for winter to prevent exterior spigots from freezing and bursting.
Clean Gutters and Downspouts Thoroughly: This is the most critical fall task. Leaves, pine needles, and twigs clog drainage systems rapidly. When gutters overflow, water runs down your home’s siding, damaging the fascia, soffits, and foundation. More importantly, clogged gutters hold standing water, which freezes solid in winter, creating massive ice dams that pry shingles apart.
Trim Overhanging Branches: Tree branches hovering over your roof pose multiple risks. Autumn winds scrape these branches against your shingles, acting like heavy-duty sandpaper that grinds away the protective surface. Furthermore, winter ice storms can snap heavy limbs, sending them crashing through your roof deck. Keep tree branches trimmed back at least ten feet from the roofline. For safe cutting techniques, Family Handyman provides practical tutorials on managing landscape hazards.
Reseal Vulnerable Penetrations: Check the rubber boots surrounding plumbing vent pipes. These rubber gaskets dry rot over time due to sun exposure. If the rubber is cracked or torn, water will run directly down the pipe into your attic. Replace damaged boots or apply a specialized roofing sealant to bridge small cracks before the snow flies.
Watch for Pest Intrusion: As temperatures drop, mice, squirrels, bats, and raccoons look for warm places to nest. Inspect the eaves, fascia boards, and gable vents for chewed wood, missing screens, or small gaps. Sealing these entry points in the fall prevents a noisy and destructive winter infestation.

Winter: Monitoring Ice and Snow
Climbing onto a snowy, icy roof is incredibly dangerous and should be avoided. Your winter roof inspection checklist relies primarily on observation from the ground and monitoring the interior of your home.
Monitoring for ice dams should be part of a broader winter weatherization plan to keep your home energy-efficient during the coldest months.
Monitor for Ice Dams: An ice dam forms when warm air from your living space escapes into the attic, warming the roof deck and melting snow. The melted water runs down the roof until it reaches the cold eaves, where it refreezes. Over time, this creates a solid wall of ice. Continually melting water backs up behind this dam, creeps under the shingles, and leaks directly into your home. If you see massive icicles forming along your gutters, you likely have an ice dam forming.
Manage Heavy Snow Loads: Most modern homes are engineered to handle significant snow loads, but exceptionally heavy or wet snow can stress the structural framing. If snow accumulates beyond a foot or two, carefully use a roof rake with a telescoping handle to pull snow off the lower edges of the roof while standing safely on the ground. Never pull snow down onto yourself.
Watch for Condensation Inside: Sometimes, what looks like a roof leak in the winter is actually attic condensation. When warm, moist air from your home rises into a poorly ventilated, freezing attic, the moisture condenses and freezes on the undersides of the roof deck and on roofing nails. When the attic eventually warms up, this frost melts and drips onto the insulation below. If you notice damp spots on your ceiling during a cold snap with no active rain, check your attic for frost buildup.
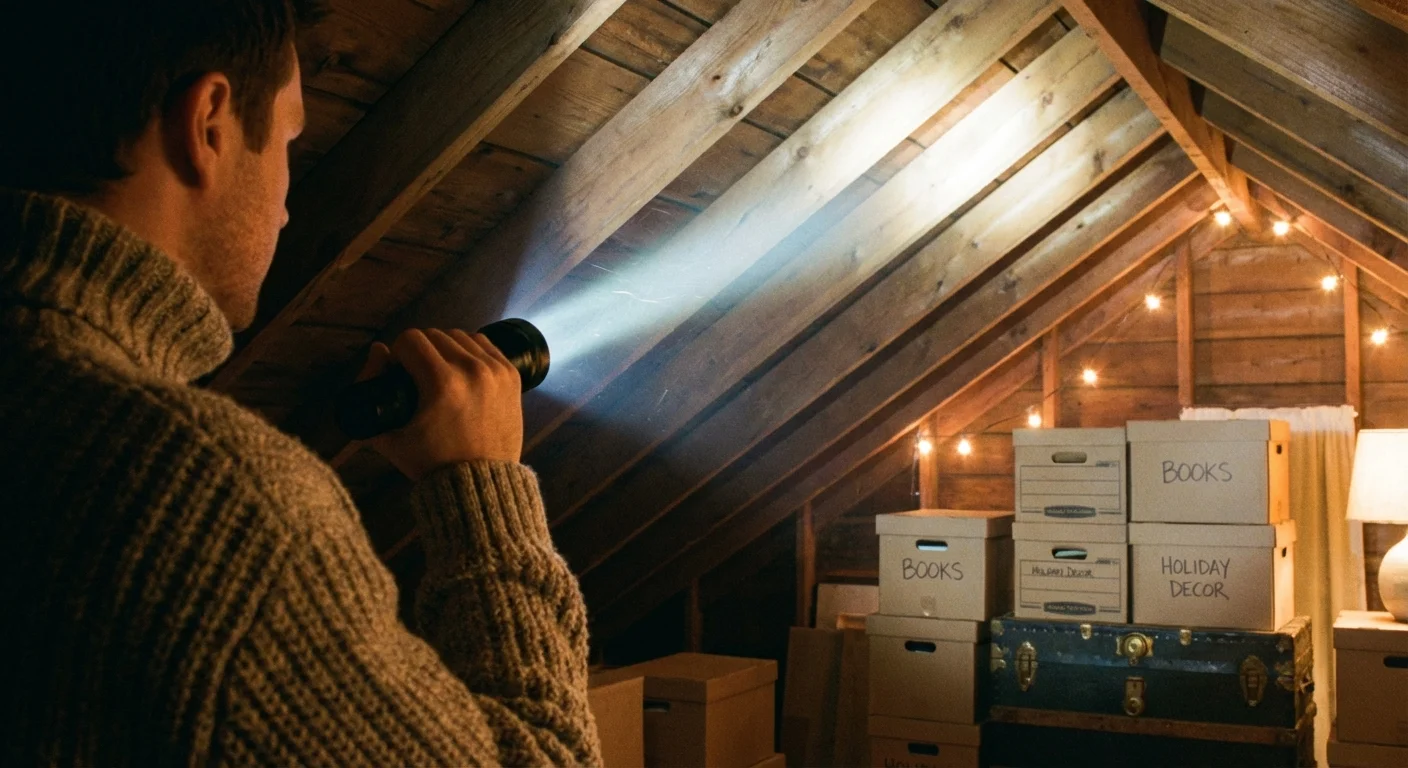
The Attic Inspection: The Inside Story
A comprehensive roof inspection does not end at the exterior. The condition of your attic provides undeniable clues about how well your roofing system is functioning. Grab a bright flashlight and head upstairs during the day to check these crucial indicators.
Look for Daylight: Turn off your flashlight and look up at the roof decking. If you see pinpricks of daylight shining through, water can get through, too. Pay special attention to the areas around chimneys, vent pipes, and the valleys where two roof planes meet.
Inspect for Water Stains: Scan the wooden rafters and roof sheathing for dark, discolored streaks. Water travels, so a leak at the peak of the roof might run down a rafter and drip onto the insulation near the edge of the house. Trace any water stains back to their highest point to find the source of the intrusion.
Check Insulation and Odors: Musty, damp odors usually indicate a prolonged moisture problem. Feel the insulation on the floor of the attic. If it is wet, compressed, or blackened with mold, you have an active leak or a severe ventilation issue that requires immediate attention.
Seasonal Inspection Focus Areas
To keep your maintenance routine organized, reference this breakdown of primary threats and necessary actions throughout the year.
| Season | Primary Threat | Main Focus Area | Recommended Action |
|---|---|---|---|
| Spring | Freeze-thaw damage, high winds | Shingles, flashing, gutters | Replace missing shingles; clear spring storm debris; re-secure lifted flashing. |
| Summer | UV degradation, high heat, humidity | Attic ventilation, organic growth | Check for attic overheating; treat algae/moss; inspect for blistered asphalt. |
| Fall | Falling debris, dropping temperatures | Gutters, tree branches, penetrations | Clear all gutters; trim branches back 10 feet; seal cracked vent boots. |
| Winter | Ice dams, snow weight, interior condensation | Eaves, roof deck, attic interior | Monitor for giant icicles; rake snow from eaves; check attic for frost. |
What Can Go Wrong
Even with the best intentions, DIY home maintenance carries risks. Taking the wrong approach to roof care can cause more harm than good. Keep these common pitfalls in mind when inspecting your exterior.
Walking Incorrectly on the Roof: Walking on asphalt shingles on a hot summer day can permanently damage them. The heat softens the asphalt, and heavy footsteps can smear the material and strip away the protective ceramic granules. On tile or slate roofs, walking in the wrong spots will crack the brittle materials under your weight. Whenever possible, conduct your inspections from the ground or from a securely footed ladder at the roof edge.
Using a Pressure Washer: Never point a high-pressure washer at an asphalt shingle roof to remove moss or dirt. The extreme water pressure blasts away the protective granules that shield the asphalt from UV rays, effectively ruining the shingles and voiding the manufacturer’s warranty. Use dedicated chemical treatments and a low-pressure garden hose instead.
Applying the Wrong Sealants: When homeowners spot a gap around a chimney, they often reach for standard bathroom silicone caulk or aerosol leak sealers. These materials fail rapidly when exposed to extreme roof temperatures and UV light. Always use exterior-grade, highly flexible roofing cement or polyurethane sealants designed specifically for roofing applications.

When to Call a Professional
While a seasonal roof inspection checklist empowers you to monitor your home’s health, certain situations require the expertise, safety equipment, and specialized knowledge of a licensed roofing contractor. You can learn more about finding reputable contractors through resources provided by the Bob Vila home improvement network.
Widespread Granule Loss or Bald Spots: If your asphalt roof looks patchy, shiny, or has widespread bald spots where the fiberglass mat is visible, the roof has reached the end of its functional life. Patches will no longer work; you need a professional to assess the structure for a full replacement.
Structural Sagging: A healthy roof line should be perfectly straight. If you notice dipping or sagging along the main ridge or in the middle of a roof plane, you have a severe structural issue. This usually indicates rotting decking, broken rafters, or a house shifting under heavy loads. Call a professional immediately to prevent a potential collapse.
Persistent Interior Leaks: Water is notoriously difficult to track. It can enter around a chimney, travel twenty feet down a rafter, and drip into a bedroom far away from the actual breach. If you have attempted minor sealant patches and the roof continues to leak during rainstorms, a professional contractor has the thermal imaging tools and experience to trace the water path.
Dangerous Roof Slopes: If your home features a steeply pitched roof, multiple complex valleys, or slick materials like metal or slate, do not attempt to climb it. The risk of a fatal fall heavily outweighs the cost of hiring a professional inspector who possesses the proper safety harnesses and fall-arrest gear.
Frequently Asked Questions
How often should a roof be inspected?
You should inspect your roof at least twice a year—ideally in the spring and the fall. Additionally, you should perform a quick visual assessment from the ground after any severe weather event, such as a hailstorm, hurricane, or period of excessively high winds, to check for immediate, acute damage.
Can I inspect my roof entirely from the ground?
You can accomplish about 80 percent of a routine inspection without ever stepping onto the shingles. Using a high-quality pair of binoculars allows you to see cracked vent boots, missing shingles, and loose flashing. However, checking the attic interior and physically clearing the gutters will require stepping inside the house and safely utilizing a ladder.
How long do asphalt shingles actually last?
While many architectural asphalt shingles carry 25-year or 30-year warranties, their actual lifespan depends heavily on your local climate, the quality of attic ventilation, and routine maintenance. In areas with severe weather and intense sun, an asphalt roof may only last 15 to 20 years. Proper seasonal care ensures you get the maximum possible life out of the material.
What is the difference between a roof repair and a roof replacement?
A repair addresses isolated damage—such as replacing a few wind-torn shingles or resealing a leaky skylight. A replacement involves tearing off all the old roofing materials down to the wooden deck and installing a brand-new system. If your roof is relatively young but suffered storm damage, a repair is usually sufficient. If the roof is over 20 years old and exhibits widespread wear, replacement is the more cost-effective long-term solution.
Staying on top of your home’s exterior maintenance does not have to be overwhelming. By breaking the tasks down into a seasonal roof inspection checklist, you transform a massive chore into a series of manageable, 30-minute evaluations. Block out a weekend morning this spring or fall to grab your binoculars, clear your gutters, and shine a flashlight into your attic. Your proactive efforts will keep your home dry, secure, and comfortable for years to come.
This is educational content based on general best practices. Individual results vary based on your home, budget, and circumstances. Always prioritize safety and consult professionals for major projects.
Last updated: February 2026


Leave a Reply