Look around your home right now. If your floors are crowded, your surfaces are overflowing, and you feel entirely out of space, you likely have a wealth of untapped real estate waiting to be claimed. People typically measure their living areas in two dimensions—thinking strictly in terms of square footage. By shifting your perspective to cubic footage and looking up, you unlock a completely new frontier of organization.
Most standard residential ceilings sit at eight or nine feet high, yet the average piece of furniture stops at about three or four feet. That leaves a massive void of empty air sitting completely unused. Filling that vertical space transforms a cluttered, claustrophobic room into an airy, highly functional environment. Effective vertical storage solutions draw the eye upward, making ceilings appear higher while simultaneously clearing the floor space below.

The Essentials: What You Will Learn
- How to evaluate the empty wall space in your home to find hidden storage zones.
- Practical wall mounted storage ideas for every room, from the kitchen to the garage.
- The exact hardware and mounting strategies you need to safely secure heavy items.
- Ways to customize vertical organization tips to fit both large homes and tight apartments.

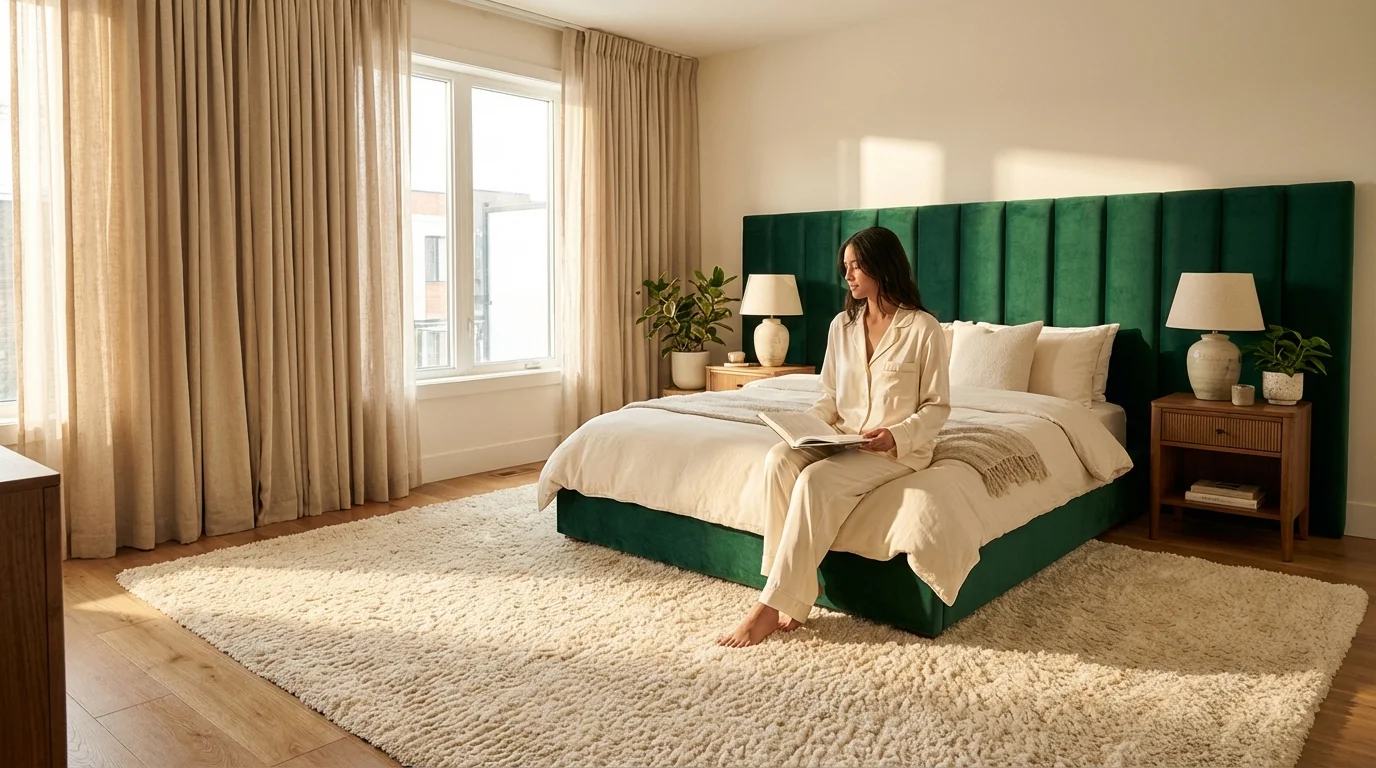
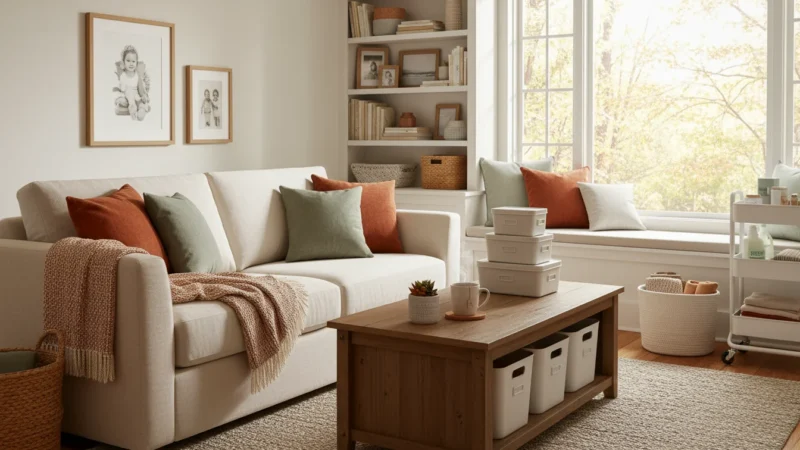
Living Rooms and Bedrooms: Maximizing Restful Spaces
Relaxation is nearly impossible when you are surrounded by visual noise. Your living room and bedroom should serve as restorative sanctuaries; however, they often become dumping grounds for books, electronics, and daily miscellany. Here is how you can implement smart build up storage to reclaim these vital areas.
To make the most of every corner, consider installing corner shelving to turn awkward angles into useful display areas.
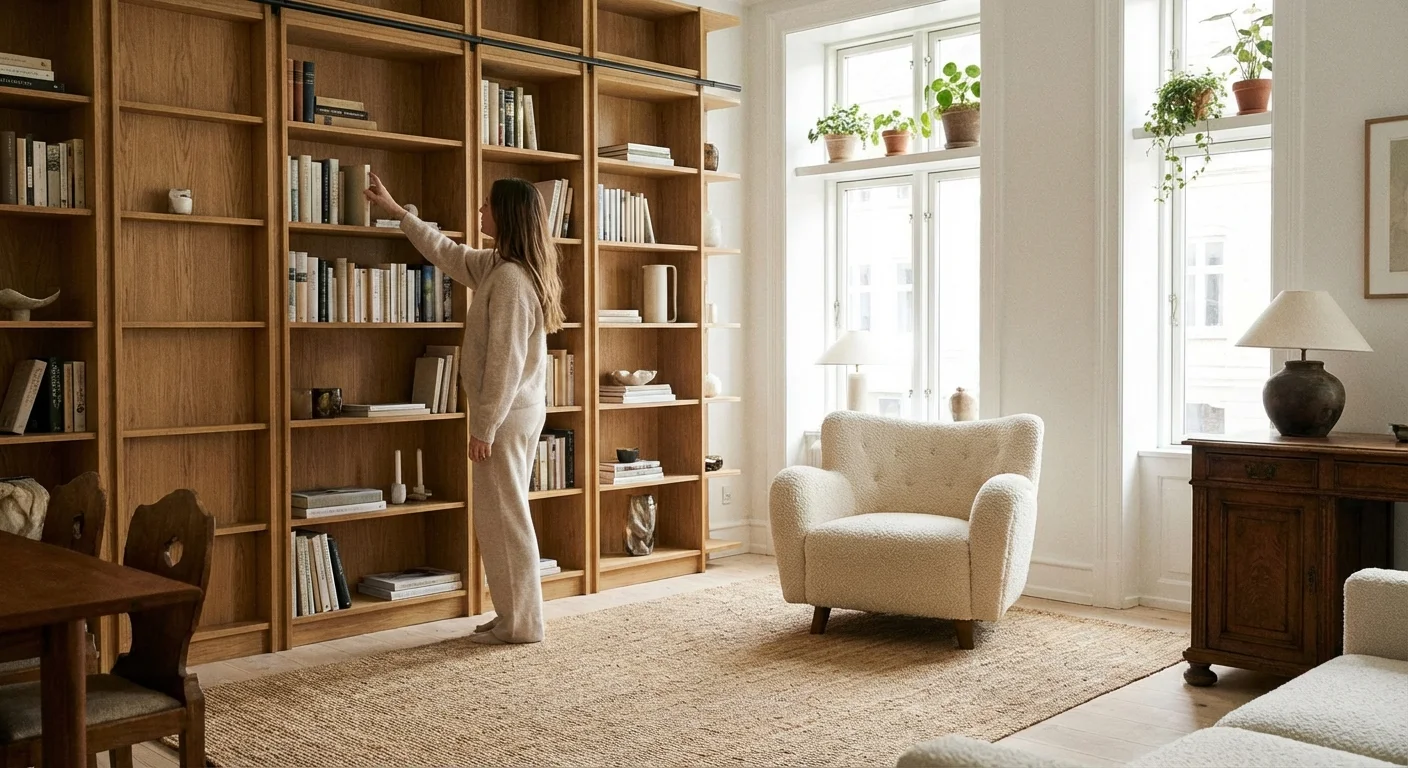
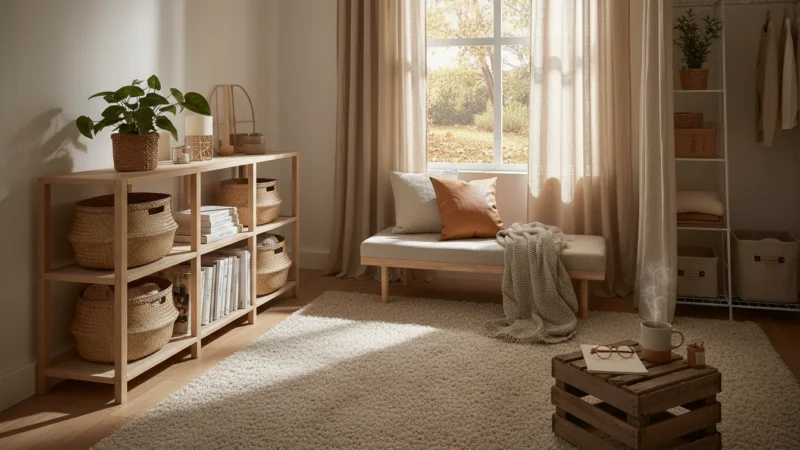
1. Floor-to-Ceiling Bookshelves
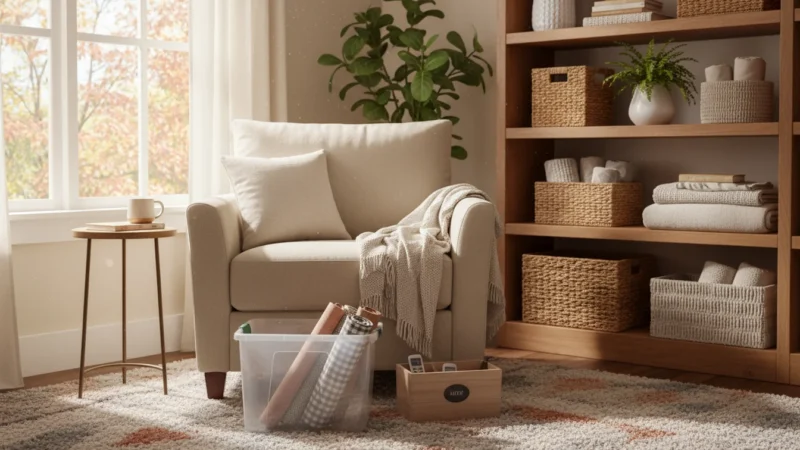
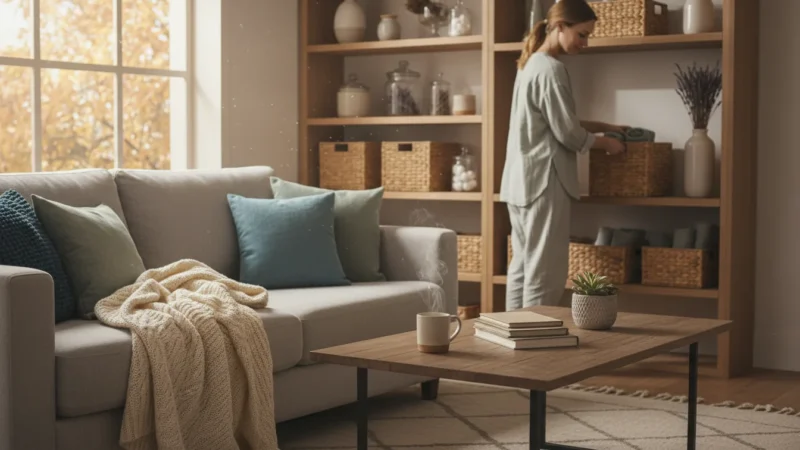
Nothing provides dramatic visual impact quite like a wall of floor-to-ceiling shelving. Standard bookcases leave awkward gaps at the top that eventually collect dust or random boxes. By taking your shelving all the way to the crown molding, you gain significant storage volume while creating a built-in, custom look. You can use the top shelves for decorative items or rarely read books, reserving the eye-level zones for your favorite volumes and lower shelves for enclosed baskets.
2. Floating Nightstands and Consoles
Furniture with legs eats up valuable floor space and breaks up the visual flow of a room. Swapping a traditional bedside table or media console for a floating, wall-mounted alternative instantly makes a small space feel larger. You can slide slippers or small storage baskets underneath a floating nightstand, making it one of the most effective small space shelving strategies for cramped bedrooms.
3. Picture Ledge Shelves for Layered Displays
Deep shelves can protrude awkwardly into narrow walkways. Picture ledges—which typically measure only three to four inches deep—offer a brilliant alternative. Originally designed for leaning framed art, these shallow ledges are perfect for displaying vinyl records, small books, essential oils, or collectibles. You can stack three or four ledges vertically on a narrow sliver of wall that would otherwise remain blank.
4. Wall-Mounted Drop-Leaf Desks
With remote work becoming a permanent fixture for many, finding space for a home office can be challenging. A wall-mounted drop-leaf desk provides a sturdy workspace when you need it and folds flat against the wall when you do not. Mount one beneath a window or on a short wall in your bedroom; you instantly gain a functional office without sacrificing walking clearance.
5. Over-the-Door Organizers (Reimagined)
The back of a door remains one of the most underutilized surfaces in any bedroom or closet. While traditional shoe organizers serve their purpose, modern over-the-door systems have evolved dramatically. Look for customizable track systems with interchangeable baskets. You can store rolled belts, purses, scarves, or even bulky winter sweaters perfectly out of sight.
“If you have a blank wall, you have an organization solution. Vertical space is the secret weapon of every organized home.” — Clea Shearer, Professional Organizer
The Kitchen and Pantry: Clearing the Counters
Kitchen counters attract clutter like a magnet. Appliances, utensils, and mail quickly devour your food preparation areas. Moving these items onto the walls restores your workspace and makes cooking enjoyable again. For additional inspiration on optimizing your cooking space, Real Simple offers excellent resources on minimalist kitchen layouts.
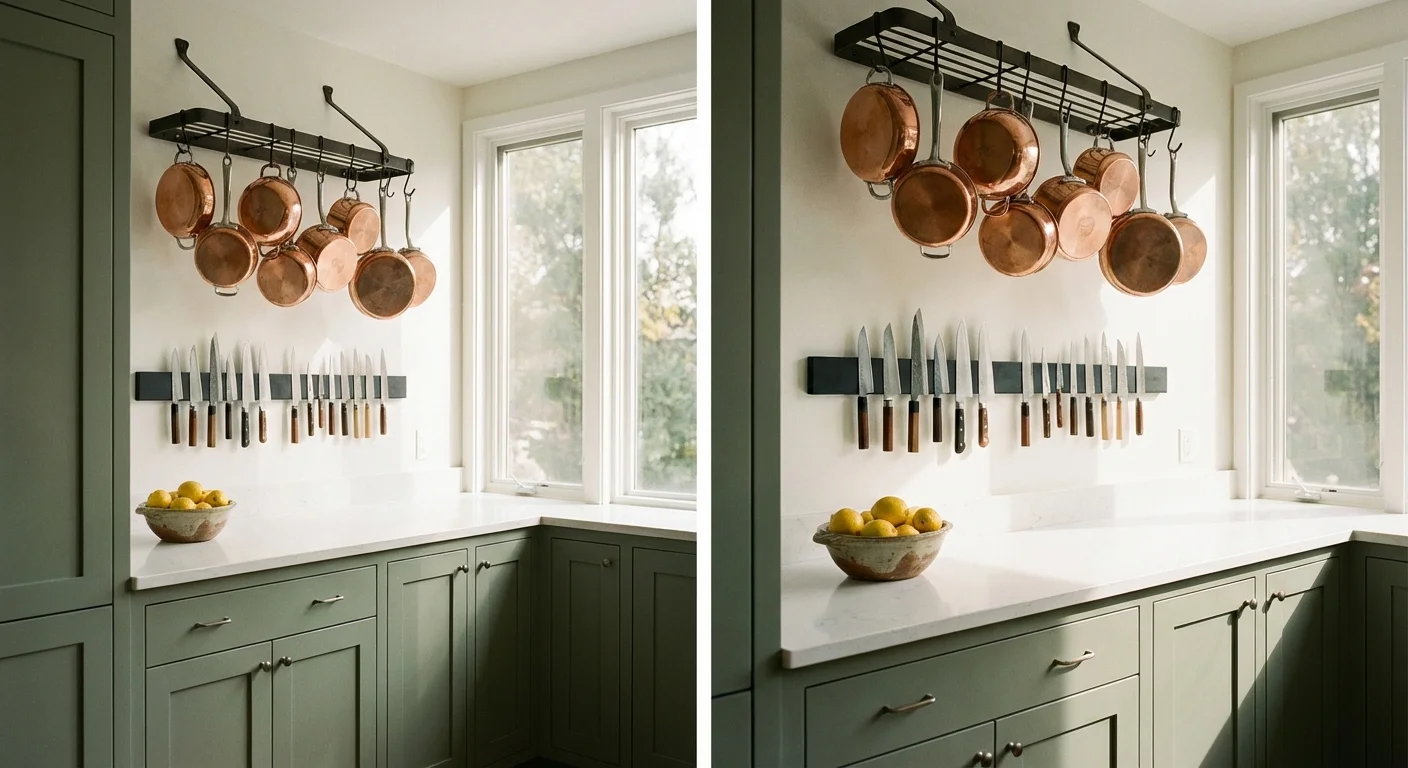
6. Magnetic Knife Strips and Spice Racks
Knife blocks consume prime countertop real estate and often harbor bacteria deep within their slots. Installing a heavy-duty magnetic strip directly on your backsplash keeps your knives accessible, clean, and completely out of the way. You can apply the exact same principle to spices by attaching small magnetic tins to a stainless steel wall panel or the side of your refrigerator.
7. Pot Racks Hanging from the Ceiling
Pots and pans require an immense amount of cabinet space because their bulky shapes and long handles resist neat stacking. If you have a kitchen island or a high ceiling, suspend a sturdy pot rack overhead. This classic vertical storage solution frees up entire lower cabinets for heavy appliances and keeps your most-used cookware within arm’s reach.
8. Under-Cabinet Stemware and Mug Hooks
The space between your upper cabinets and the countertop often goes entirely unused. By installing sliding racks beneath your upper cabinets, you can hang wine glasses upside down or suspend coffee mugs from small hooks. This not only protects delicate glassware from chipping but also clears valuable shelf space inside the cabinets themselves.
9. Tension Rod Dividers in Tall Cabinets
Baking sheets, cutting boards, and muffin tins create an avalanche every time you try to pull one from the bottom of a stack. Place vertical tension rods inside a tall, narrow cabinet to create custom slots. Storing these flat items vertically allows you to slide one out without disturbing the rest.
10. Tiered Lazy Susans for Pantry Corners
Pantry corners are notorious dark holes where expired canned goods go to die. While a lazy Susan is naturally a horizontal tool, choosing a tiered model maximizes the vertical distance between your pantry shelves. Use the bottom tier for heavy jars and the top tier for lightweight snacks or seasoning packets.
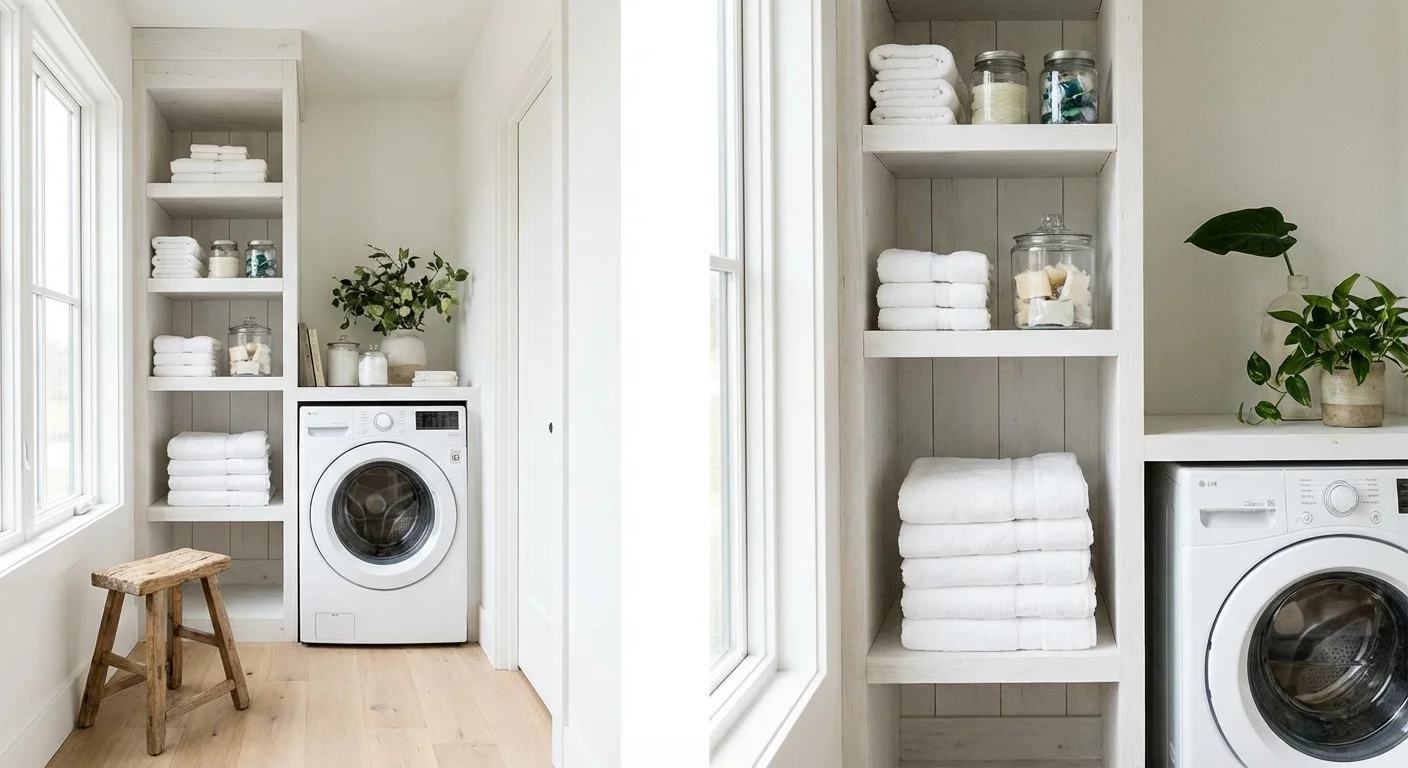
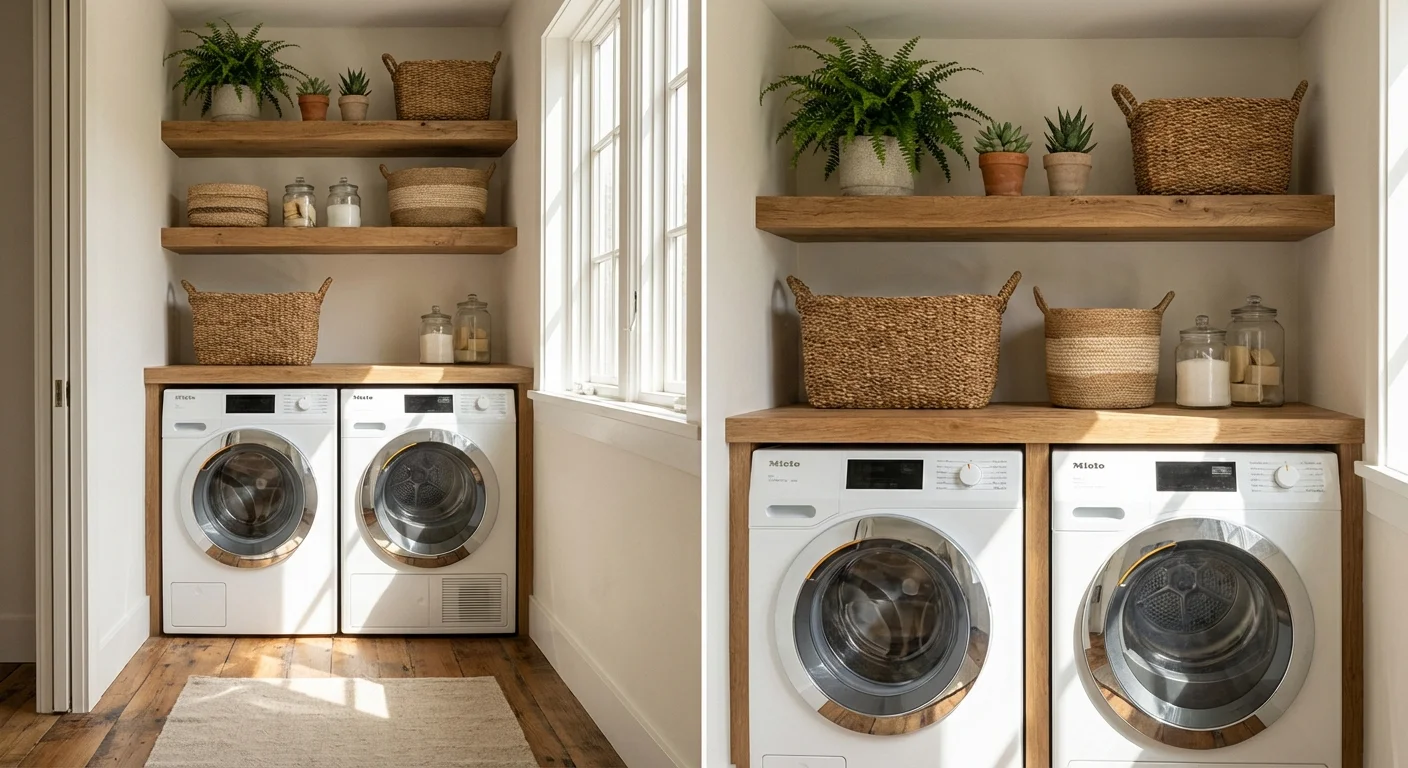
Bathrooms and Laundry Rooms: Taming the Clutter
Bathrooms and laundry rooms are typically the smallest rooms in a house, yet they must store a massive inventory of toiletries, towels, chemicals, and cleaning supplies. Effective vertical organization tips are crucial in these damp, high-traffic zones.
11. Over-the-Toilet Leaning Ladders
The wall space above a toilet is highly valuable, but drilling into bathroom tile or drywall surrounding plumbing can be intimidating. A leaning storage ladder provides multiple tiers of shelving without requiring permanent installation. Drape clean towels over the lower rungs and place woven baskets filled with toilet paper and toiletries on the upper shelves.
12. Recessed Medicine Cabinets and Niches
If you are undertaking a renovation, look into the walls rather than just on them. The space between wall studs is typically three and a half inches deep—perfect for a recessed medicine cabinet or a shower niche. Utilizing this hidden cavity gives you storage that does not intrude into the room’s footprint at all.
13. Wall-Mounted Drying Racks
Folding wooden drying racks take up massive amounts of floor space in a laundry room. Instead, install an accordion-style wall-mounted drying rack. You can pull it out when you need to air-dry delicates and push it completely flat against the wall when laundry day is over. For expert tips on managing laundry efficiency, Apartment Therapy frequently highlights ingenious compact utility rooms.
14. Stacking Washers and Dryers
If your laundry room feels cramped, check to see if your front-loading machines are stackable. Purchasing a specific manufacturer stacking kit allows you to safely place the dryer securely on top of the washer. This instantly opens up roughly four square feet of floor space, which you can use for a tall rolling cart or a utility sink.
Entryways, Garages, and Closets: Organizing the Chaos
Transitional spaces endure heavy abuse. We drop our belongings the moment we walk through the door, leading to a sprawling mess of shoes, coats, and tools. Bringing order to these spaces requires robust, heavy-duty vertical solutions.
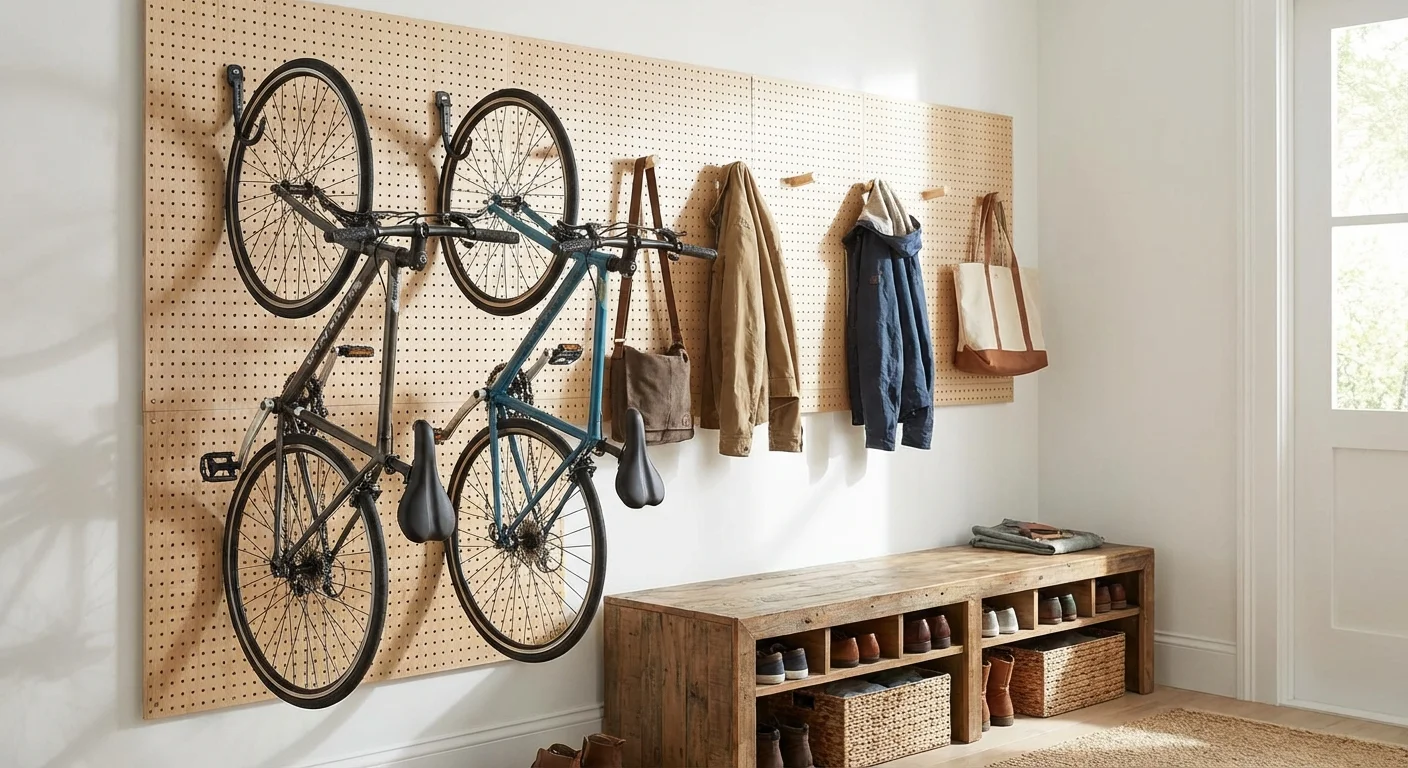
15. Pegboard Organization Stations
Pegboards are not just for workshops anymore; they represent the ultimate customizable wall mounted storage ideas. Install a painted pegboard in an entryway to hold keys, sunglasses, and dog leashes. In the garage, a massive pegboard wall allows you to outline exactly where every hammer, wrench, and garden tool belongs. Just remember to use spacers during installation so the hooks can slide freely behind the board.
16. Ceiling-Mounted Overhead Garage Racks
Garages often hold items we only need once a year: holiday decorations, camping gear, and seasonal tires. Ceiling-mounted racks utilize the massive empty space above your garage door tracks. By hoisting these heavy, rarely used bins toward the ceiling, you reclaim the floor space needed to actually park your car.
17. Double-Hang Closet Rods
Most standard builder-grade closets feature a single wooden rod positioned about five feet off the floor. Unless you exclusively wear long gowns or trench coats, half of your closet’s vertical space is completely wasted. Install a secondary hanging rod approximately three feet below the primary one. You immediately double your hanging capacity for shirts, jackets, and folded trousers.
18. High-Perimeter Shelving
Take a look at your closet or garage walls about one foot below the ceiling. Adding a continuous perimeter shelf around the very top of a room provides the perfect staging area for labeled plastic bins. Because this shelf sits above standard eye level, it keeps visual clutter to a minimum while securely storing off-season items.

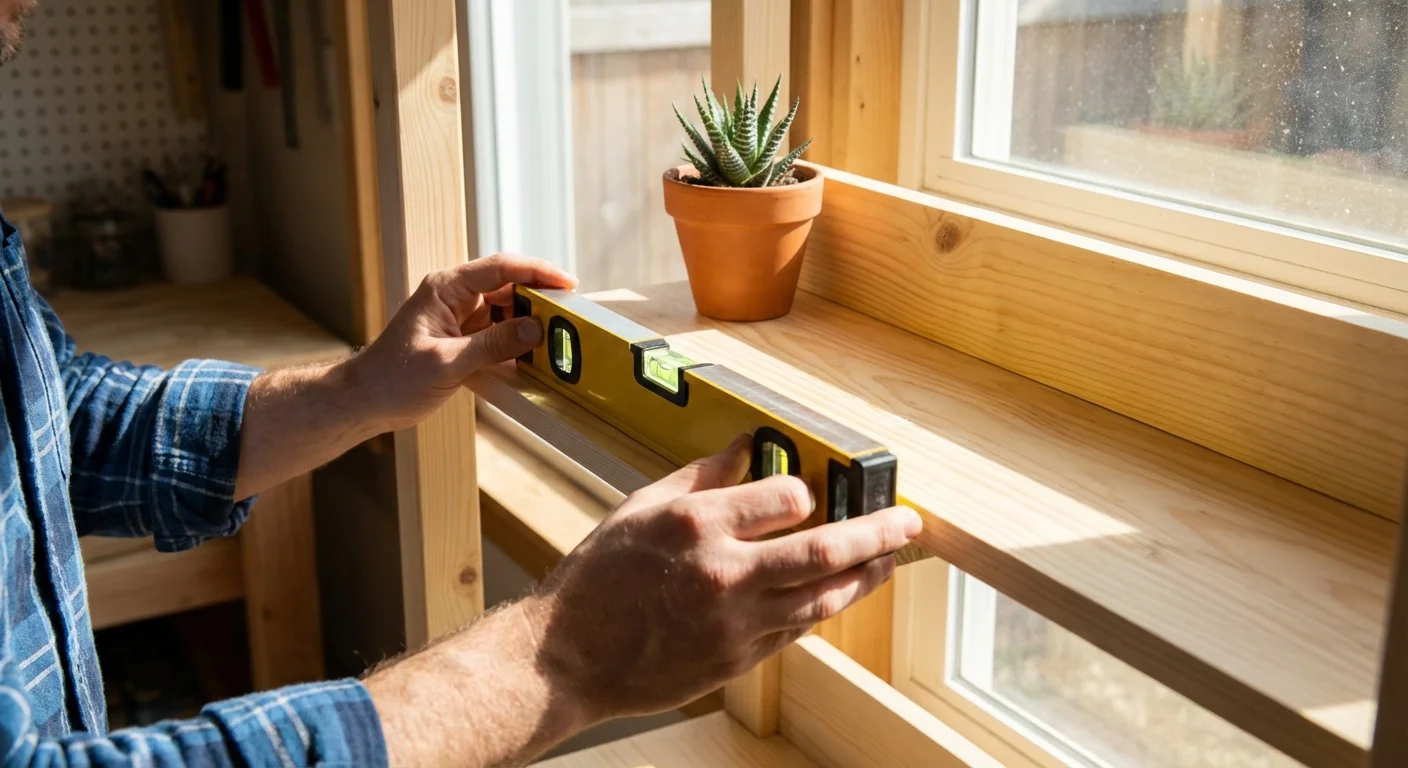
Choosing the Right Hardware for the Job
When you shift the weight of your possessions from the floor to the walls, your hardware choices become critical. A bookshelf sitting on the floor relies on gravity; a shelf hanging on the wall fights against it. Understanding your mounting options ensures your vertical storage remains safely on the wall.
| Hardware Type | Best Used For | Weight Capacity (Approx.) | Important Considerations |
|---|---|---|---|
| Plastic Expansion Anchors | Light pictures, small wire baskets | 10–15 lbs | Prone to pulling out if item is pulled frequently. |
| Threaded Drywall Anchors | Towel bars, medium shelves, mirrors | 40–50 lbs | Easy to install with a standard screwdriver; highly reliable in thick drywall. |
| Toggle Bolts | Heavy shelves, floating nightstands | Up to 100 lbs | Requires drilling a larger hole; wings expand behind the drywall for maximum grip. |
| Wood Screws directly into Studs | Cabinets, pegboards, garage racks | 100+ lbs | The absolute safest method. Use a stud finder to guarantee a secure connection. |
What Can Go Wrong: Avoiding Common Installation Mistakes
Embracing vertical storage requires drilling into your walls, which naturally carries some risk. Making assumptions about what lies behind your drywall can lead to costly repairs.
The most common mistake homeowners make is relying entirely on drywall anchors for heavy, dynamic loads. A static shelf holding decorative vases might survive on drywall anchors, but a coat rack bearing the weight of heavy winter jackets pulled off forcefully every day will eventually rip massive holes in your wall. Always aim to anchor at least one side of a heavy shelf directly into a wooden wall stud.
Furthermore, failing to check for plumbing or electrical lines can turn a weekend project into a disaster. Plumbers and electricians typically run pipes and wires vertically alongside studs. Before you drive a three-inch screw into a wall—especially in bathrooms, kitchens, or walls shared with these rooms—use a high-quality electronic stud finder equipped with AC wire and pipe detection. If you are ever unsure, Family Handyman provides comprehensive guides on safely locating wall studs and avoiding hidden utilities.

When to Call a Professional
While many of these vertical organization tips make perfect weekend DIY projects, certain scenarios warrant bringing in a professional carpenter or contractor:
- Installing ceiling-mounted garage racks: Suspending hundreds of pounds of gear over your vehicles requires precise securing directly into ceiling joists. A failure here could damage your car or cause severe injury.
- Building custom floor-to-ceiling built-ins: If you want seamless integration with your existing baseboards and crown molding, a finish carpenter will ensure the final product looks like original architecture rather than an afterthought.
- Mounting heavy items on masonry or plaster: Historic homes with lath and plaster walls, or industrial lofts with exposed brick, require specialized masonry drill bits, specific anchors, and careful technique to prevent the wall material from shattering.
Frequently Asked Questions
How deep should a floating shelf be?
The ideal depth depends entirely on the room’s function. In a narrow hallway, stick to shelves no deeper than 4 to 6 inches to ensure you do not bump your shoulders as you walk past. For displaying books and standard decorative items in a living room, 10 to 12 inches is standard. For kitchen plates or heavy appliances, you will need sturdy shelves between 12 and 15 inches deep.
Can I use vertical storage in a rental apartment without losing my deposit?
Absolutely. You can lean tall shelving units against walls, utilize tension rods inside cabinets and window frames, and maximize over-the-door organizers. If you do want to hang lightweight items, adhesive hooks have advanced significantly and can securely hold up to 15 pounds when applied correctly. For comprehensive apartment-friendly strategies, The Spruce details many damage-free hanging methods.
Do vertical storage units make a room look cluttered?
They can, but only if poorly managed. The secret to visual peace is purposeful grouping. Use uniform baskets or opaque bins on the higher shelves to hide brightly colored packages or mismatched items. Leave roughly twenty percent of your shelf space completely empty to allow the room to breathe. Negative space is just as important as the storage itself.
Taking the Next Step
Transforming your home from a cluttered maze into an organized haven does not require expanding your floor plan or moving to a larger house. By simply looking up and utilizing your blank walls, you create space where none seemingly existed. Start small this weekend. Pick one specific problem area—perhaps the chaotic entryway or the crowded kitchen counter—and implement just one of these vertical storage solutions. Once you experience the relief of clearing that first horizontal surface, you will likely find yourself eyeing every blank wall in your home with fresh, organizational enthusiasm.
The tips in this article are meant as general guidance. Your specific situation—including your home’s age, layout, and local building codes—may require different approaches. When in doubt, consult a professional.
Last updated: February 2026


Leave a Reply