
Traditional kitchen renovations demand significant financial investment, professional contractors, and weeks of daily disruption. Tearing out old drywall, mixing messy mortar, and operating a wet saw inside your home rarely aligns with a busy modern lifestyle. Today, you can completely transform the visual landscape of your cooking space in a single afternoon using a peel and stick backsplash. Manufacturers have drastically improved the materials, adhesives, and textures of these products over the past decade, moving them from temporary dorm-room fixes to legitimate design elements for permanent homes and rentals alike.
Whether you want to cover outdated beige ceramic squares from the early 2000s or protect the bare drywall behind your stove, self-adhesive options offer a practical route to high-end aesthetics. Finding the best stick on backsplash requires understanding the nuances of different materials, assessing your current wall surface, and recognizing exactly how these clever panels perform under daily kitchen stress.
The Essentials: What You Need to Know
- Material dictates longevity: Vinyl and polyurethane gel provide budget-friendly flexibility, while aluminum and stone veneers offer premium durability.
- Surface preparation is non-negotiable: Even the strongest adhesive will fail if applied to greasy, dusty, or heavily textured walls.
- Heat zones require caution: Standard removable backsplash tiles must remain at least 8 to 12 inches away from open flames unless you use specific heat-resistant metal or glass options.
- Removal requires technique: Applying heat with a standard hairdryer softens the adhesive, allowing you to pull the tiles away without destroying the drywall underneath.
Why Removable Backsplash Tiles Transformed Kitchen Design
For decades, homeowners faced a difficult choice when updating their kitchens: spend thousands of dollars on professional tile installation or learn the messy, exacting trade of masonry themselves. The introduction of high-quality adhesive tiles completely disrupted that paradigm. A budget kitchen backsplash no longer equates to a cheap or temporary aesthetic. Modern manufacturing techniques allow these tiles to mimic the exact light-reflecting properties of glass, the varied texture of tumbled stone, and the sleek finish of brushed metal.
These tiles are particularly effective for maximizing style in small kitchens where every square inch of visual real estate counts.
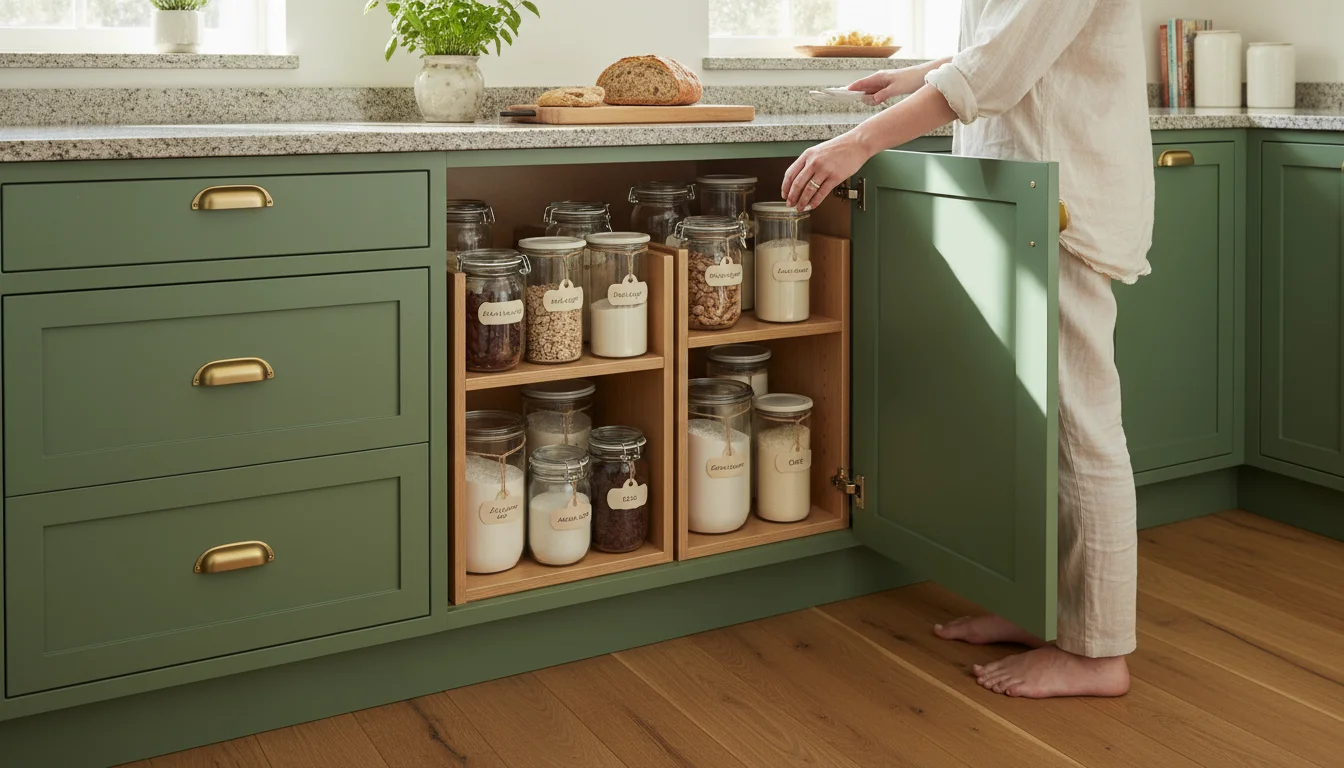
This project works exceptionally well when paired with other low-cost kitchen cabinet updates for a cohesive, high-end transformation.
The appeal extends far beyond the financial savings. Opting for a kitchen backsplash DIY project gives you absolute control over your timeline. You can install a section on a Tuesday evening after work, pause your progress, and finish the rest on the weekend. There is no mixing grout, no waiting for thinset to cure, and no renting expensive cutting equipment. For renters, this flexibility is even more valuable. Upgrading a landlord’s builder-grade kitchen safely is entirely possible because these materials can be warmed and peeled away when your lease ends, leaving the original surface intact.
“A well-designed home is a reflection of who you are and how you live. Small changes in high-traffic areas create the most significant emotional impact.” — Nate Berkus, Interior Designer
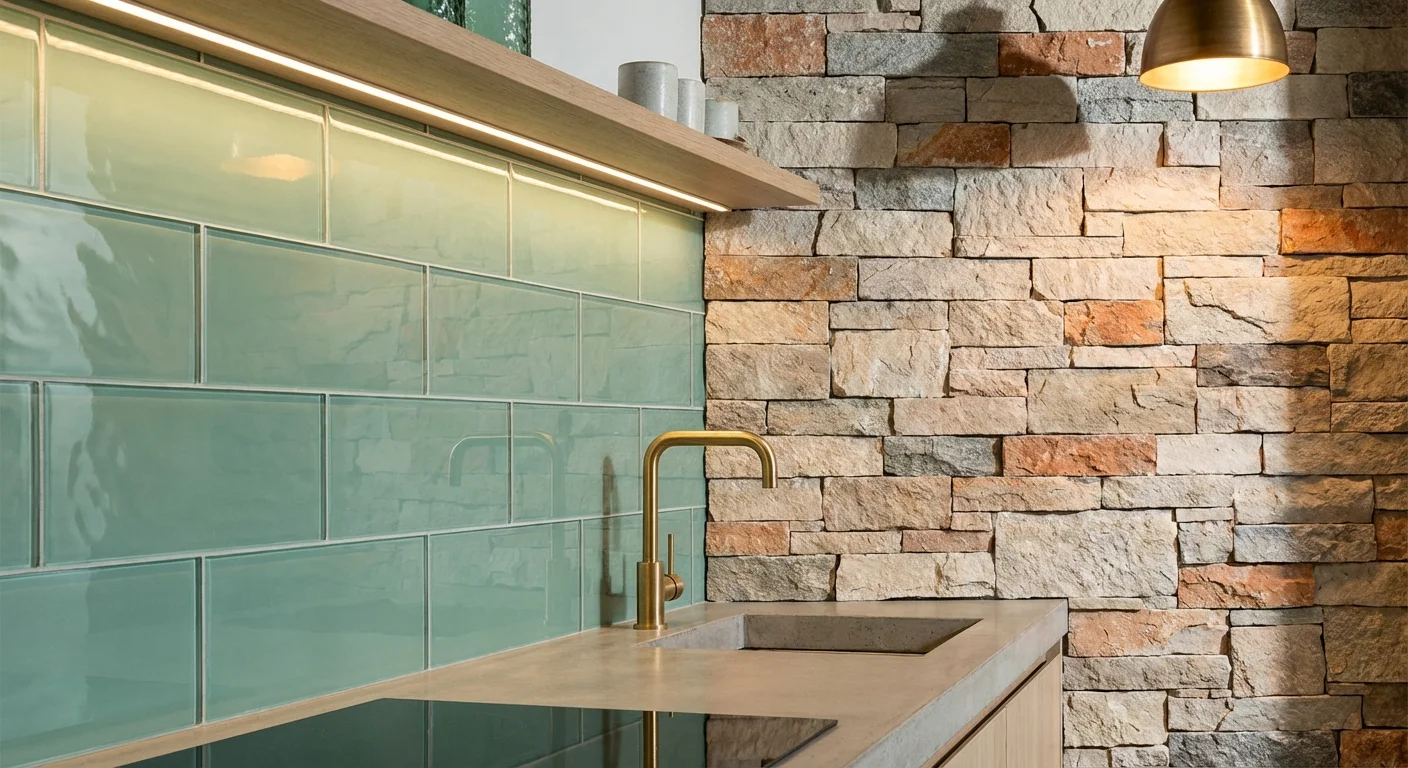
Furthermore, committing to a bold design choice feels much less intimidating when the installation does not involve cement. If you decide that a vibrant emerald green subway tile does not suit your style three years down the road, you can easily swap it out for a classic white herringbone pattern. This low-stakes design freedom encourages creativity and allows your home to evolve alongside your personal tastes.
Evaluating Your Material Options
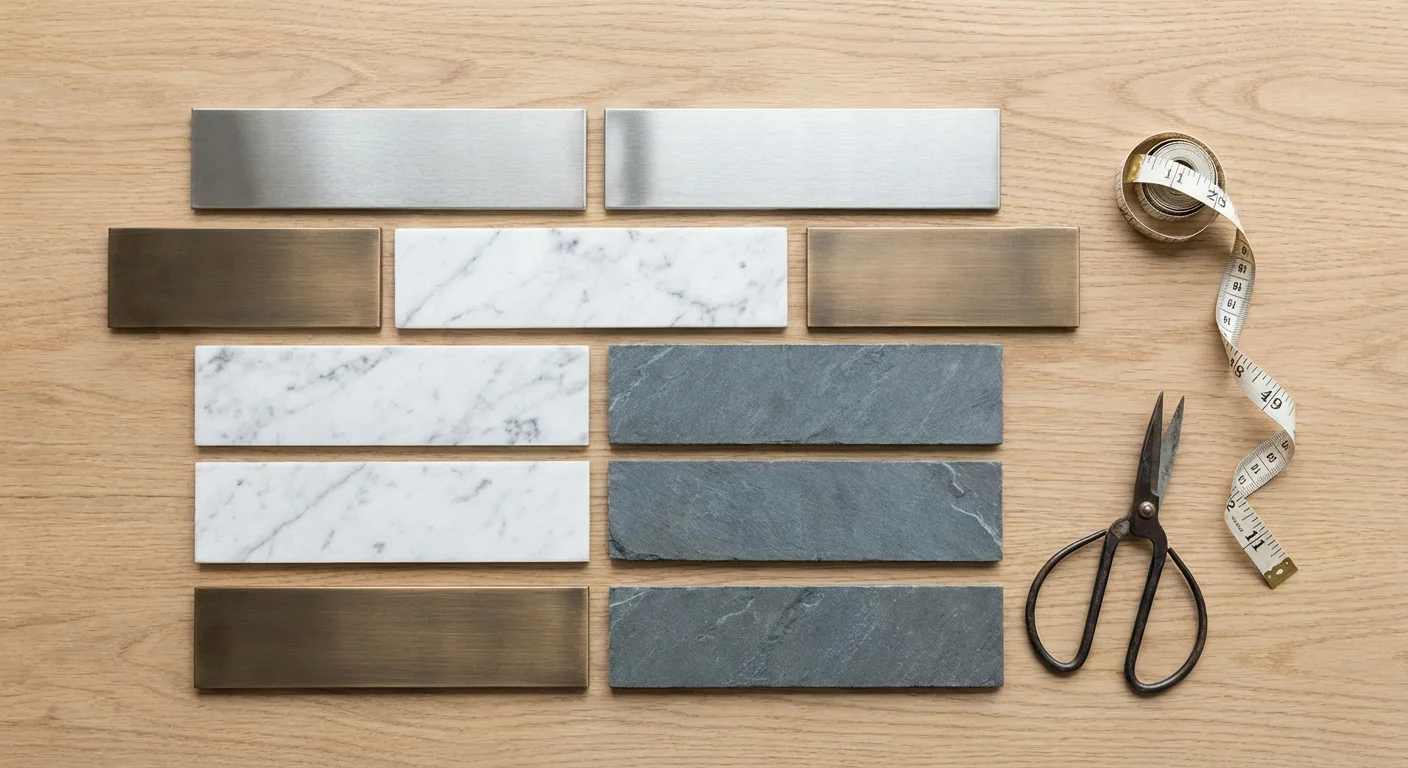
Not all adhesive tiles operate under the same specifications. To determine the best stick on backsplash for your specific environment, you must evaluate the core material. Each type brings unique advantages and specific limitations to your kitchen workspace.
Vinyl and Polyurethane (PU) Gel
Vinyl and gel tiles dominate the market due to their extreme flexibility and vast array of available patterns. Manufacturers construct these tiles by topping a high-tack adhesive backing with a printed vinyl layer, which they then cap with a 3D polyurethane gel. This gel creates the illusion of depth, mimicking the raised profile of traditional ceramic or glass. These tiles cut easily with standard household scissors or a sharp utility knife, making them exceptionally forgiving around electrical outlets, window sills, and tight corners. However, standard gel tiles remain vulnerable to direct, high heat and can discolor over time if exposed to constant direct sunlight. They are best suited for areas surrounding sinks, prep counters, and standard electric ranges with built-in control panels that block direct heat.
Aluminum and Metal Composites
If you desire an industrial, modern, or highly sophisticated aesthetic, metal composite tiles provide a massive structural upgrade over gel. These products typically feature a thin sheet of actual brushed aluminum or stainless steel fused to an adhesive polymer core. Metal peel-and-stick tiles offer superior heat resistance, making them a much safer choice for installation directly behind gas slide-in ranges. Because they utilize real metal, they resist staining perfectly and clean up effortlessly with standard kitchen degreasers. The primary drawback involves the installation process; you cannot cut these panels with standard scissors. You will require tin snips, a Dremel tool, or a heavy-duty utility knife to score and snap the material.
Real Stone and Glass Veneers
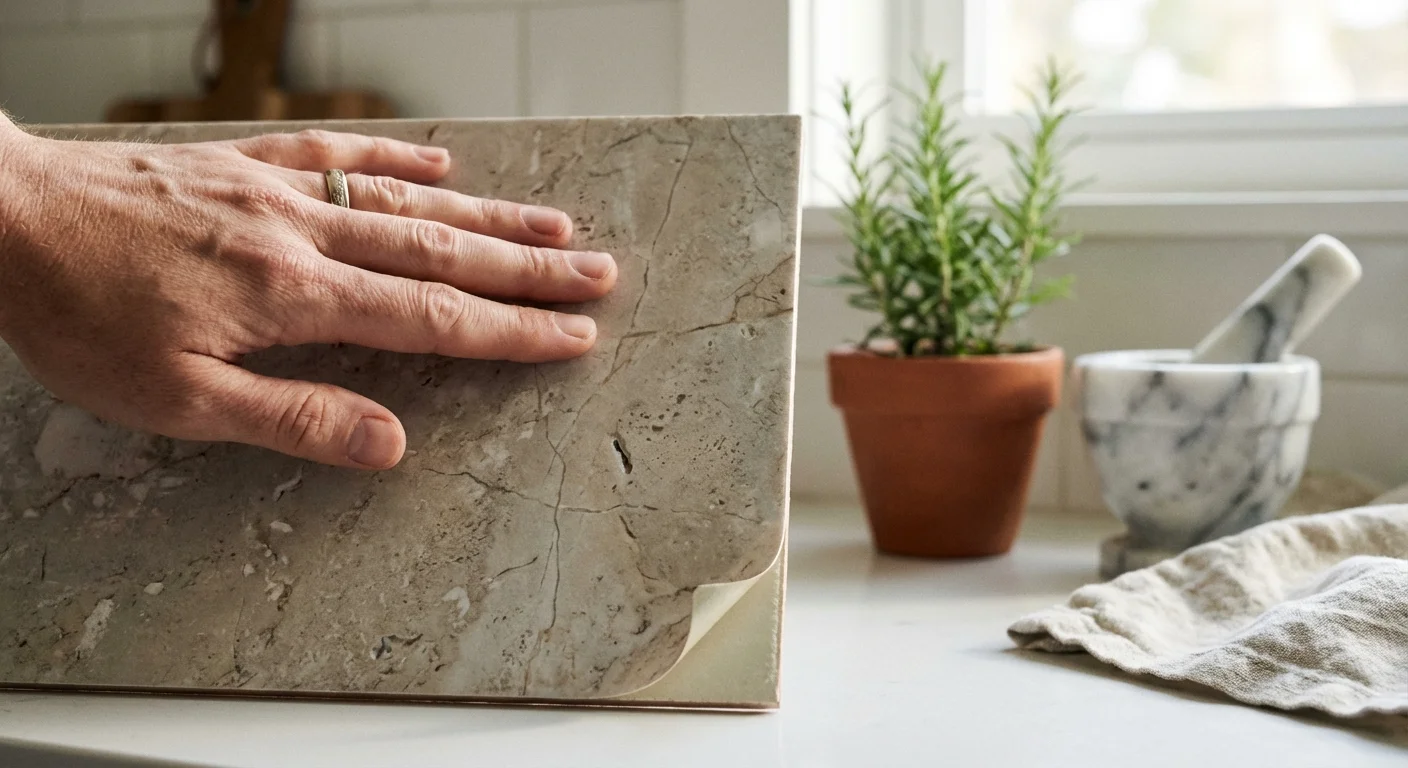
The premium tier of the peel and stick backsplash market utilizes authentic materials shaved down to a fraction of their standard thickness. You can find genuine mother-of-pearl, thin-cut marble, and real tempered glass backed with industrial-grade foam adhesive. These options provide the exact cold-to-the-touch feel and heavy light refraction of a professional masonry job. From a distance, and even up close, it is nearly impossible to distinguish a real stone adhesive tile from one installed with mortar. Naturally, these are the most expensive options per square foot and require careful, precise cutting with a wet saw or specialized glass scoring tools.
Comparing Backsplash Materials
Choosing the right material requires balancing your budget against your desired lifespan and available installation tools. Consider the following breakdown when planning your project.
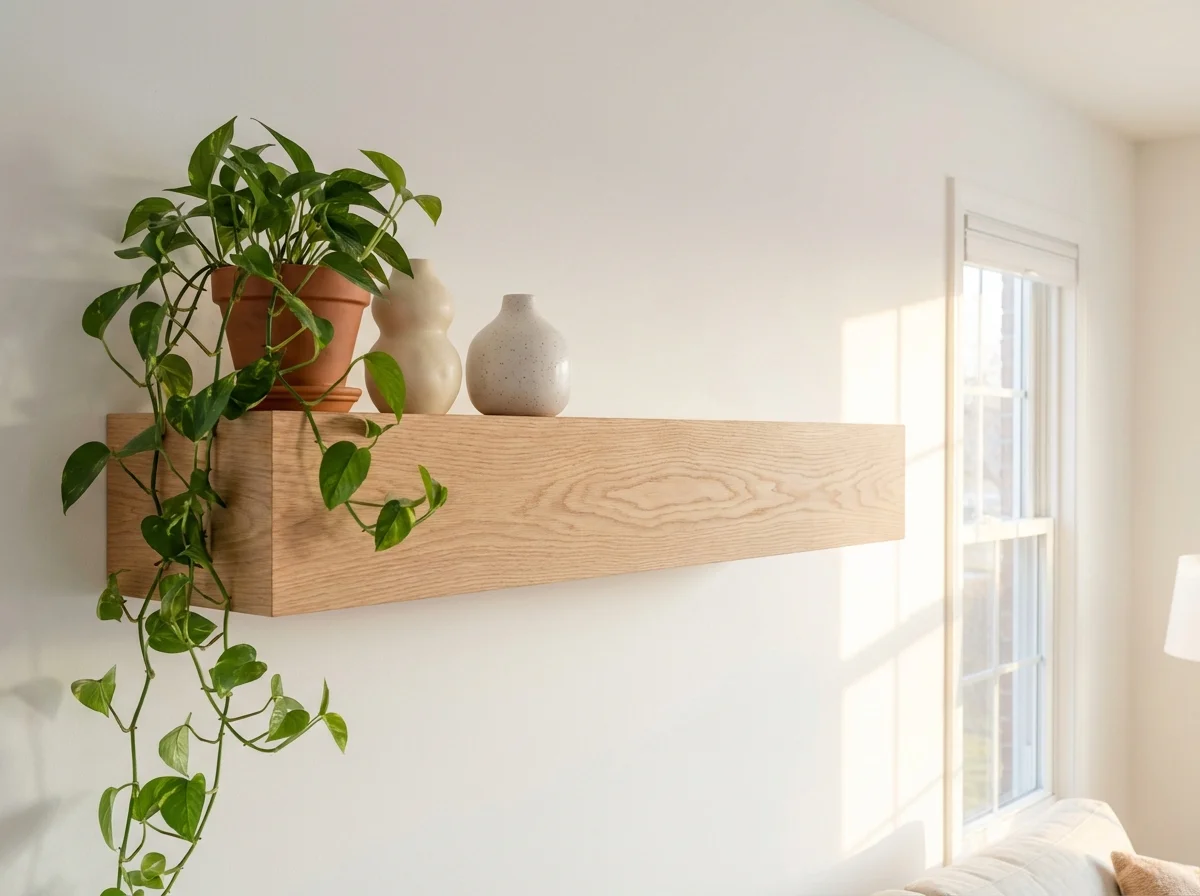
If you want to add more storage above your new backsplash, learning how to install floating shelves can help you utilize that vertical space beautifully.
| Material Type | Visual Depth | Heat & Moisture Resistance | Required Cutting Tools | Average Lifespan |
|---|---|---|---|---|
| PU Gel / Vinyl | Moderate (3D Gel effect) | High moisture, moderate heat | Scissors, standard utility knife | 3–5 years |
| Metal Composite | Low (Flat, sleek profile) | High moisture, high heat | Tin snips, heavy-duty blade | 7–10 years |
| Stone / Glass Veneer | High (Authentic texture) | High moisture, high heat | Wet saw, tile scorer | 10+ years |
| Thick PVC Foam | High (Rigid, textured) | High moisture, moderate heat | Heavy-duty utility knife | 5–8 years |
For excellent guidance on mixing and matching these textures within modern home layouts, you can explore professional design galleries at Apartment Therapy, which frequently showcase innovative ways to integrate temporary materials into high-end aesthetics.

Preparation: The Secret to a Flawless Kitchen Backsplash DIY
The single greatest factor determining the success or failure of your installation has nothing to do with the brand of tile you purchase. The longevity of any adhesive product relies entirely on the condition of the receiving wall. Many homeowners skip the preparation phase in their eagerness to see the final result, only to watch their new tiles peel away from the wall a week later.
Assessing the Surface
Peel-and-stick adhesives require a smooth, sound, and fully cured surface to create a lasting bond. Painted drywall, existing smooth ceramic tile, glass, and smooth wood panels serve as excellent substrates. Conversely, heavily textured surfaces—such as popcorn walls, heavy orange peel drywall, unpainted plywood, or porous brick—will reject the adhesive backing. If your kitchen features heavily textured walls, you must smooth them over with drywall compound and apply a coat of high-quality primer before beginning your tile project.
Deep Cleaning the Wall
Kitchen walls harbor an invisible layer of aerosolized cooking grease, dust, and dish soap residue. Even if the wall looks clean, this microscopic film will prevent the tile backing from adhering to the paint. Wash the entire installation area with a heavy-duty degreaser or a Trisodium Phosphate (TSP) substitute. Scrub the wall thoroughly with a damp sponge, focusing specifically on the areas directly above the stove and the sink. Once you finish washing, wipe the wall down with plain water to remove any lingering chemical residue, and allow the drywall to dry completely for at least 24 hours.
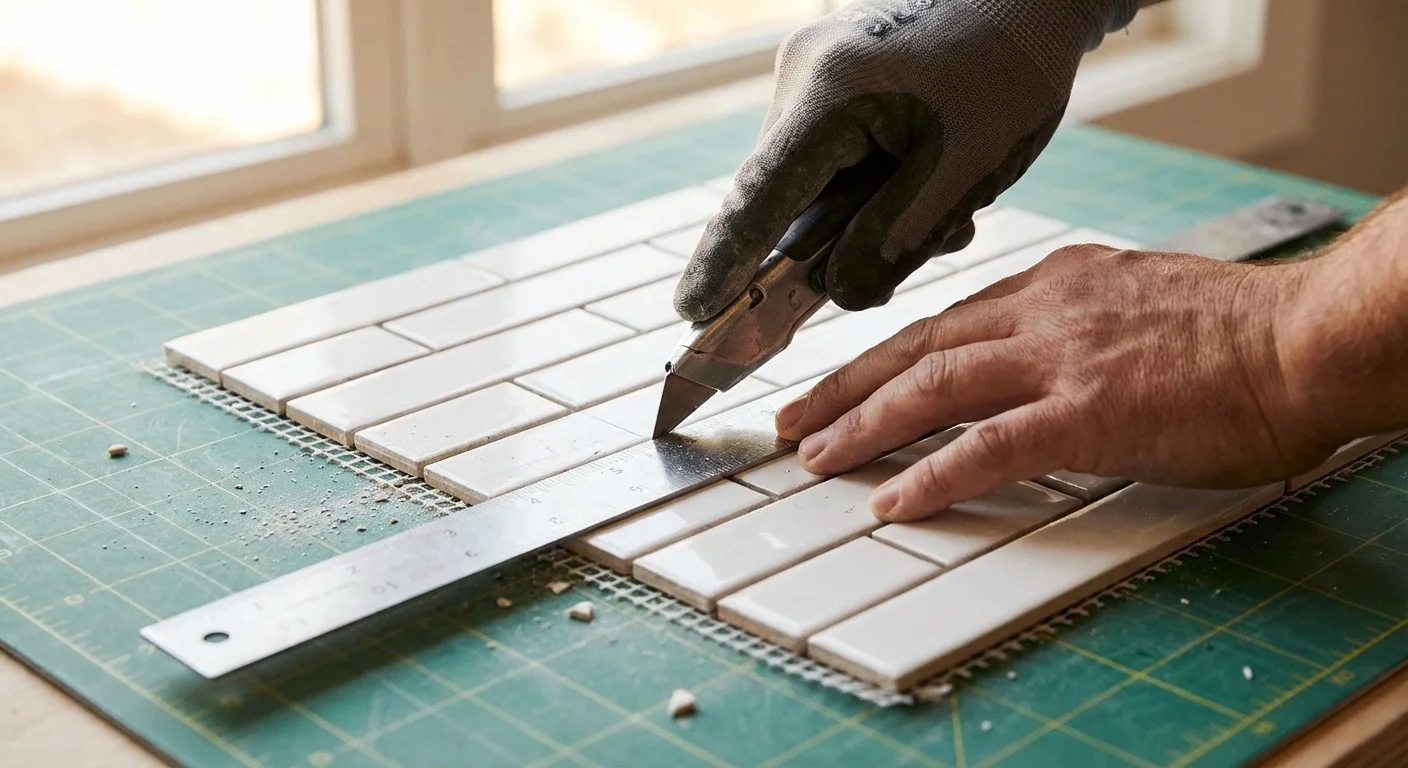
Gathering the Right Tools
A successful kitchen backsplash DIY requires precision. While the marketing materials often show smiling homeowners applying tiles with their bare hands, you will need a few standard items to achieve professional results. Gather a metal straightedge or cork-backed ruler, a sharp utility knife with plenty of extra replacement blades, a small level, a tape measure, and a cutting mat to protect your countertops. Having a chalk line or a laser level on hand will dramatically improve your ability to keep the pattern straight across long walls.
For more detailed advice on selecting the right tools for home renovations, consult the comprehensive guides available at This Old House.
Step-by-Step Installation Guide
Once you have prepped your surface and gathered your materials, the physical application process can begin. Patience and methodical pacing will yield the best visual outcome.
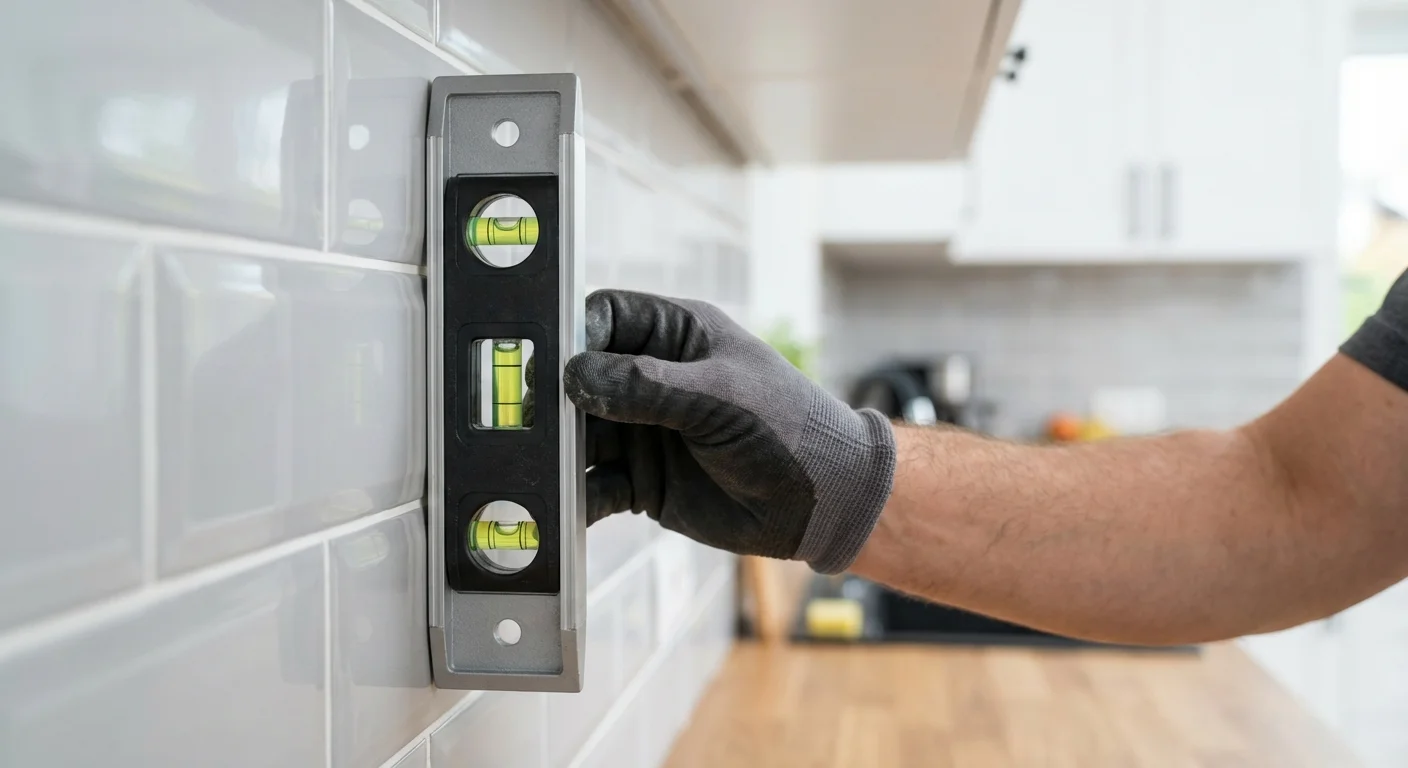
Step 1: Establish Your Baseline
Do not assume your kitchen counters are perfectly level; most homes experience slight settling over time. Use your level to find the lowest point of your countertop. Draw a faint, level pencil line across the wall starting from that point. You will use this line, rather than the countertop itself, as your guide for the first row of tiles. If the gap between the counter and your level tile line is noticeable, you can easily cover it with a thin bead of kitchen caulking later.
Step 2: Plan the Layout
Before removing any adhesive backing, dry-fit your tiles across the wall. Start from the most visible corner or the focal point of the kitchen—typically the space directly behind the range or the main sink. Work your way outward from this focal point. Planning your layout helps you avoid ending up with tiny, awkward slivers of tile at the visible edges of your cabinetry.
Step 3: Cut the Jagged Edges
Most gel and vinyl tiles feature jagged, interlocking edges designed to create seamless grout lines. For the very first tile you place against a corner or a straight wall edge, you must cut off the overlapping tabs to create a perfectly flush vertical line. Lay the tile flat on your cutting mat, align your metal ruler, and press firmly with your utility knife to slice away the excess material.
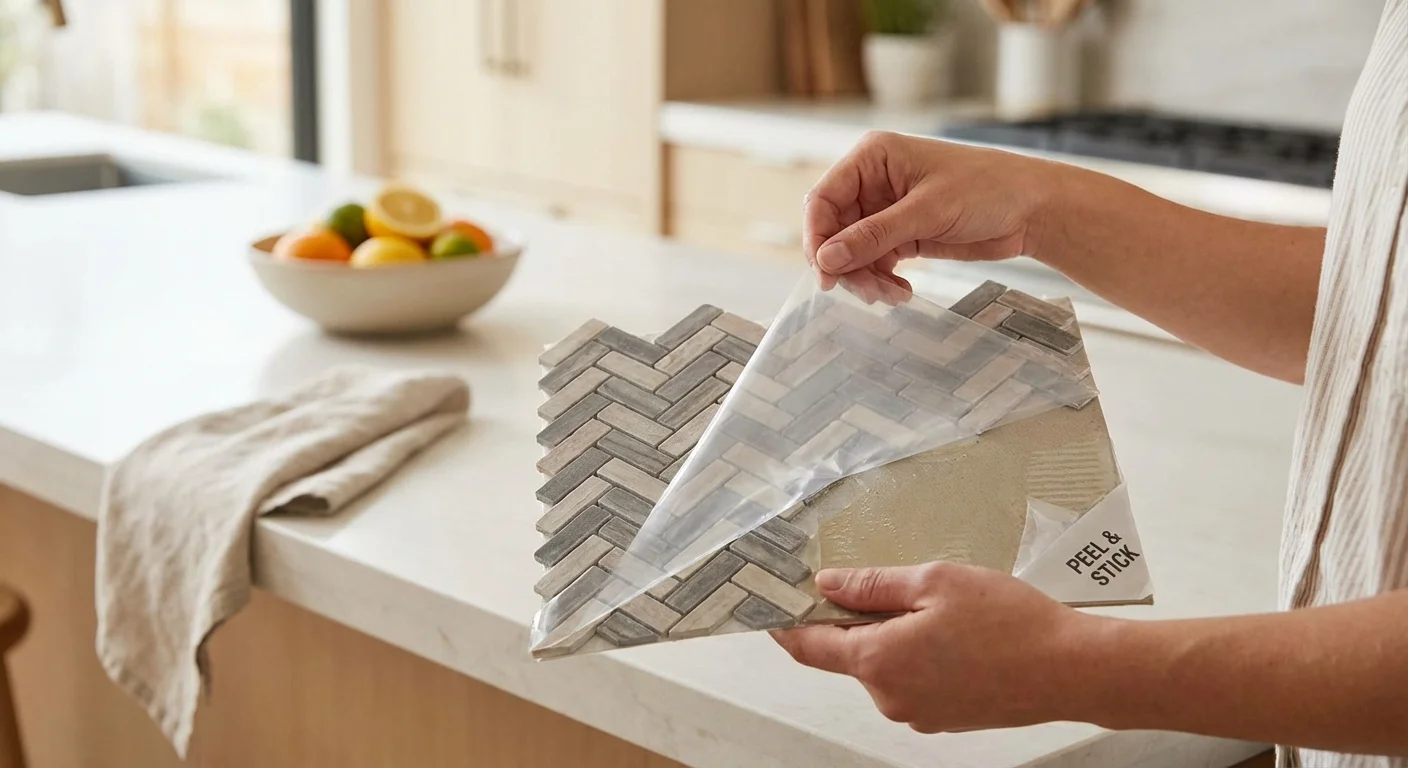
Step 4: Peel, Align, and Press
Peel back just the top two inches of the protective backing. Align the top edge of the tile with your level pencil line, ensuring it sits perfectly flush against the starting corner. Once you are confident in the positioning, slowly pull the rest of the backing downward while simultaneously pressing the tile against the wall with your other hand. Use a smooth, firm motion—similar to applying a screen protector to a smartphone—to push out any trapped air bubbles.
Step 5: Overlap and Lock
Take the second tile and carefully overlap its overlapping tabs onto the designated “grout” line of the first tile. The tiles are designed to lock together, hiding the seams. Take your time with this step; if the second tile sits even a millimeter higher than the first, that error will compound across the entire wall, resulting in a noticeably crooked backsplash.
Step 6: Navigate Outlets and Switches
When you encounter a receptacle, turn off the power at the breaker and remove the plastic faceplate. Hold a piece of paper over the outlet and gently trace the rectangular opening to create a template. Transfer this template to your tile and carefully cut out the rectangle. Apply the tile right up to the edge of the electrical box, and reinstall the faceplate over the tile to hide the cut edges.
Avoiding Common Errors
Even the most experienced home organizers and DIY enthusiasts make mistakes when working with adhesive materials. Recognizing these pitfalls before you start peeling will save you significant frustration and money.
Ignoring the Heat Zone
The most dangerous and common error involves running standard polyurethane gel tiles directly behind a gas stove without a backguard. Gas burners generate intense, radiating heat that travels up the wall. If standard vinyl or gel tiles sit too close to this heat source, they will warp, melt, discolor, or even present a fire hazard. Always maintain a minimum clearance of 8 to 12 inches from open flames, or switch to a heat-rated metal or glass adhesive tile for that specific cooking zone. You can review safety guidelines for kitchen materials through resources provided by Better Homes & Gardens.
Stretching the Material
Vinyl and gel possess inherent elasticity. When trying to align a tricky seam, you might feel tempted to pull and stretch the tile to make it fit perfectly against its neighbor. Resist this urge. If you stretch the material during application, the tile will inevitably attempt to shrink back to its original shape over the next few weeks. This contraction will pull the adhesive off the wall and create highly visible gaps between your faux grout lines. Always lay the tiles flat and let them rest naturally.
Inadequate Acclimation
Adhesives react to temperature and humidity. If your tiles arrive in a box left outside in freezing weather or sitting on a hot delivery truck, do not install them immediately. Bring the boxes inside, lay them flat on a table, and allow them to acclimate to your kitchen’s ambient temperature for 48 hours. Applying cold, stiff adhesive to a warm kitchen wall will result in immediate adhesion failure.
Frequently Asked Questions
Are removable backsplash tiles truly safe for renters?
Yes, provided you remove them correctly. If you try to rip a tile off the wall like a bandage, you risk pulling off layers of paint or drywall paper. To safely remove them, apply direct, high heat from a standard hairdryer for about 30 to 60 seconds. This softens the adhesive, allowing you to slowly peel the tile away at a 45-degree angle. Any leftover sticky residue can be wiped away with an adhesive remover or warm soapy water.
Can you install peel-and-stick tiles over existing ceramic tile?
Absolutely. Applying a budget kitchen backsplash directly over outdated, smooth ceramic tile is one of the most effective ways to upgrade a space. However, you must thoroughly degrease the old tiles first. Additionally, pay attention to the existing grout lines. If the old grout lines are exceptionally deep or wide, they may show through thinner vinyl tiles as an indentation. In such cases, choosing a thicker, rigid PVC or metal composite tile will easily bridge the gaps without telegraphing the texture underneath.
How do you clean and maintain a stick on backsplash?
Maintenance is incredibly straightforward. Because these panels do not use actual porous cement grout, they will not absorb pasta sauce stains or coffee splatters the way traditional tile might. Simply wipe the surface down with a damp microfiber cloth and a mild dish soap solution. Avoid using highly abrasive scouring pads, steel wool, or harsh chemical bleach, as these can scratch the polyurethane gel coating or dull the finish on metal composite tiles.
Can these tiles be used in a bathroom or shower?
While they perform beautifully behind a bathroom sink vanity, standard peel-and-stick tiles are not designed for the interior of a shower. The constant exposure to direct, cascading water and heavy steam will eventually break down the adhesive backing. Always check the manufacturer’s specific waterproof rating, but generally, stick to areas where the tiles will only encounter occasional splashes rather than full immersion.
Refreshing Your Space With Confidence
Updating your kitchen does not have to be an overwhelming endeavor that drains your savings account and tests your patience. The modern peel and stick backsplash offers a brilliant intersection of high-impact design and practical, weekend-warrior execution. By taking the time to properly clean your walls, measure meticulously, and choose a material that aligns with your household’s cooking habits, you can achieve a flawless finish that looks identical to professional masonry.
Your environment drastically impacts your daily mood, and the kitchen remains the operational center of your home. Taking control of that space and injecting it with your personal style using removable backsplash tiles is an empowering project. Gather your supplies, plan your layout, and enjoy the immediate gratification of watching your kitchen transform one panel at a time.
This is educational content based on general best practices. Individual results vary based on your home, budget, and circumstances. Always prioritize safety and consult professionals for major projects.
Last updated: February 2026


Leave a Reply