
The fever has finally broken, the coughing fits have subsided, and the mountain of crumpled tissues has stopped growing. When an illness finally leaves your household, it leaves behind a lingering footprint. The air feels heavy and stagnant, surfaces harbor unseen germs, and you likely feel an overwhelming urge to open every window and scrub every surface. Transitioning your space from a sick ward back to a healthy sanctuary requires more than just a quick wipe down with a damp cloth.
Knowing exactly how to clean house after sick family members recover protects everyone else under your roof from catching the exact same bug. However, blindly spraying harsh chemicals on every surface wastes time, damages your belongings, and rarely achieves the germ-free environment you desire. A strategic approach ensures you target the highest-risk areas effectively while protecting your indoor air quality. This comprehensive home disinfection guide walks you through the exact steps, products, and techniques needed to restore health and harmony to your living space.
The Essentials: What You Need to Know Before You Start
If you only have a few minutes to grasp the basics of a post illness deep clean, focus on these fundamental principles. Following these four steps ensures you eliminate the highest concentration of household pathogens without exhausting yourself in the process.
- Ventilate immediately: Open windows and doors to dilute indoor airborne viral particles before you begin stirring up dust.
- Clean before you disinfect: Dirt, oils, and organic matter shield viruses from chemical disinfectants. You must remove the grime before applying the germ-killer.
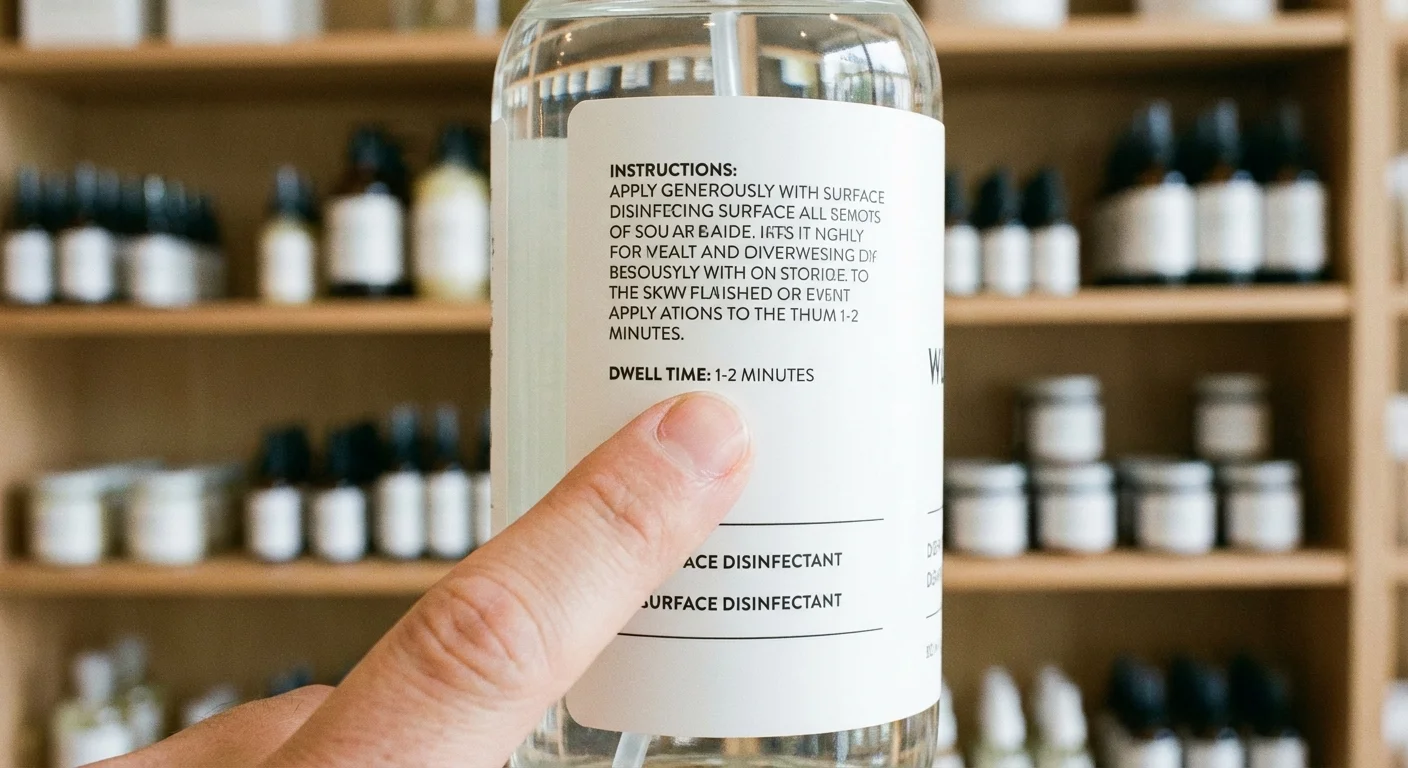
- Respect the dwell time: Disinfectants do not work on contact. The surface must remain visibly wet for the time specified on the product label—usually between three and ten minutes.
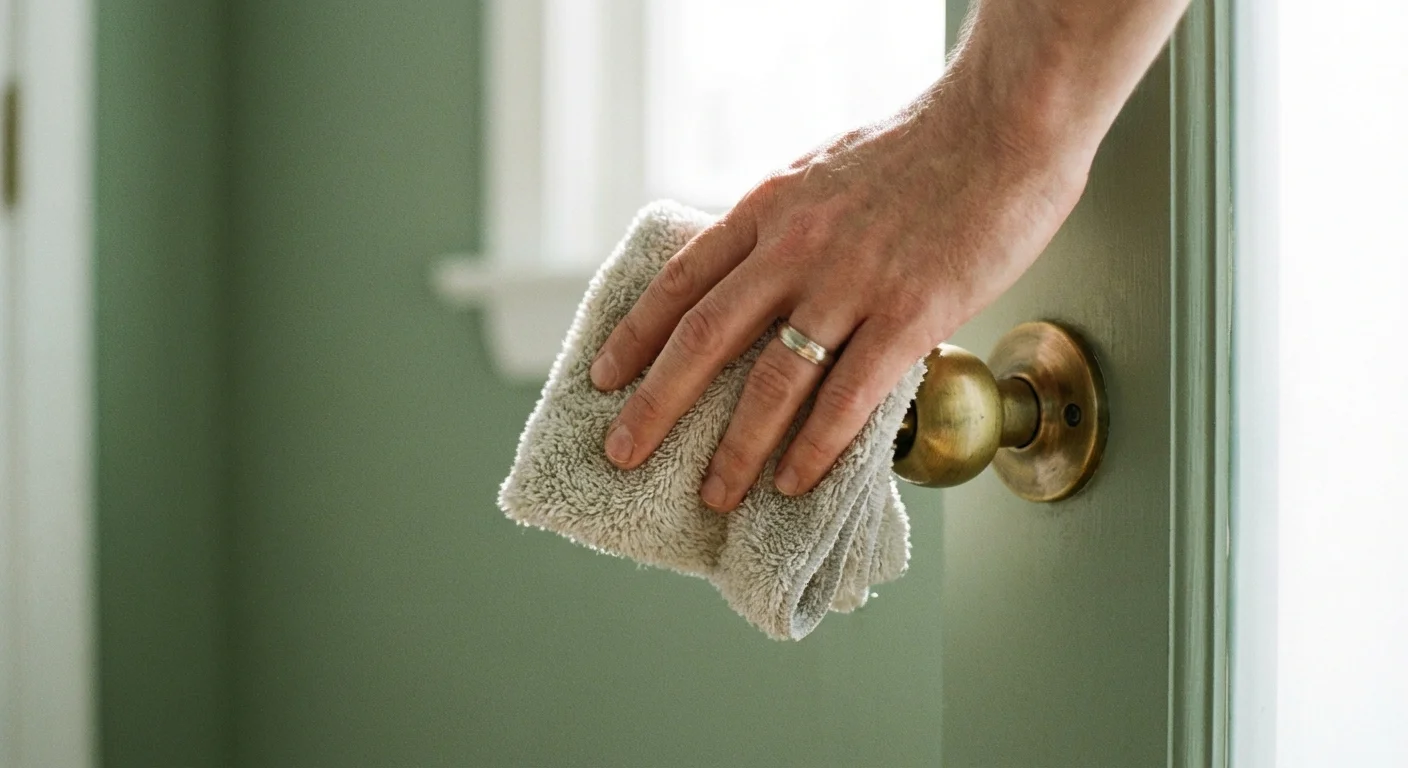
- Target high-touch zones: Focus your energy on the items people touch constantly: doorknobs, light switches, remote controls, and bathroom faucets.
Understanding the Difference: Cleaning vs. Sanitizing vs. Disinfecting
Most people use these three terms interchangeably, but they represent entirely different chemical and physical processes. Understanding these distinctions dictates which products you pull from under your sink and how you apply them. If you skip straight to disinfecting a dirty counter, you leave behind an invisible layer of active pathogens.
| Action | Definition | When to Use It | Best Products |
|---|---|---|---|
| Cleaning | The physical removal of dirt, crumbs, oils, and some germs from surfaces. It does not kill germs; it just moves them to a sponge or cloth. | Always the first step. Use daily for general upkeep and right before sanitizing or disinfecting. | Soap and warm water, all-purpose cleaners, microfiber cloths. |
| Sanitizing | Lowers the number of germs on surfaces to a safe level as judged by public health standards. Usually kills 99.9% of bacteria (but not necessarily viruses). | Food contact surfaces, children’s toys, kitchen counters, and daily bathroom maintenance. | Diluted bleach solutions, food-safe commercial sanitizers. |
| Disinfecting | Uses chemicals to kill effectively 100% of germs, bacteria, and viruses on a surface. Does not necessarily clean dirty surfaces. | After an illness, handling raw meat, or dealing with bodily fluids. Reserve for high-touch, hard surfaces. | EPA-registered disinfectants, hydrogen peroxide, isopropyl alcohol (70%+). |
To safely disinfect home after illness outbreaks, you must execute a two-step process. First, wipe away the physical grime using a standard household cleaner. Next, apply your chosen disinfectant and let it sit. The American Cleaning Institute consistently emphasizes this two-step protocol as the only reliable way to break the chain of infection in a residential setting.
“To effectively eliminate germs, you must first remove the layer of dirt and organic matter that shields them. Disinfectants cannot penetrate heavy soil.” — Brian Sansoni, American Cleaning Institute
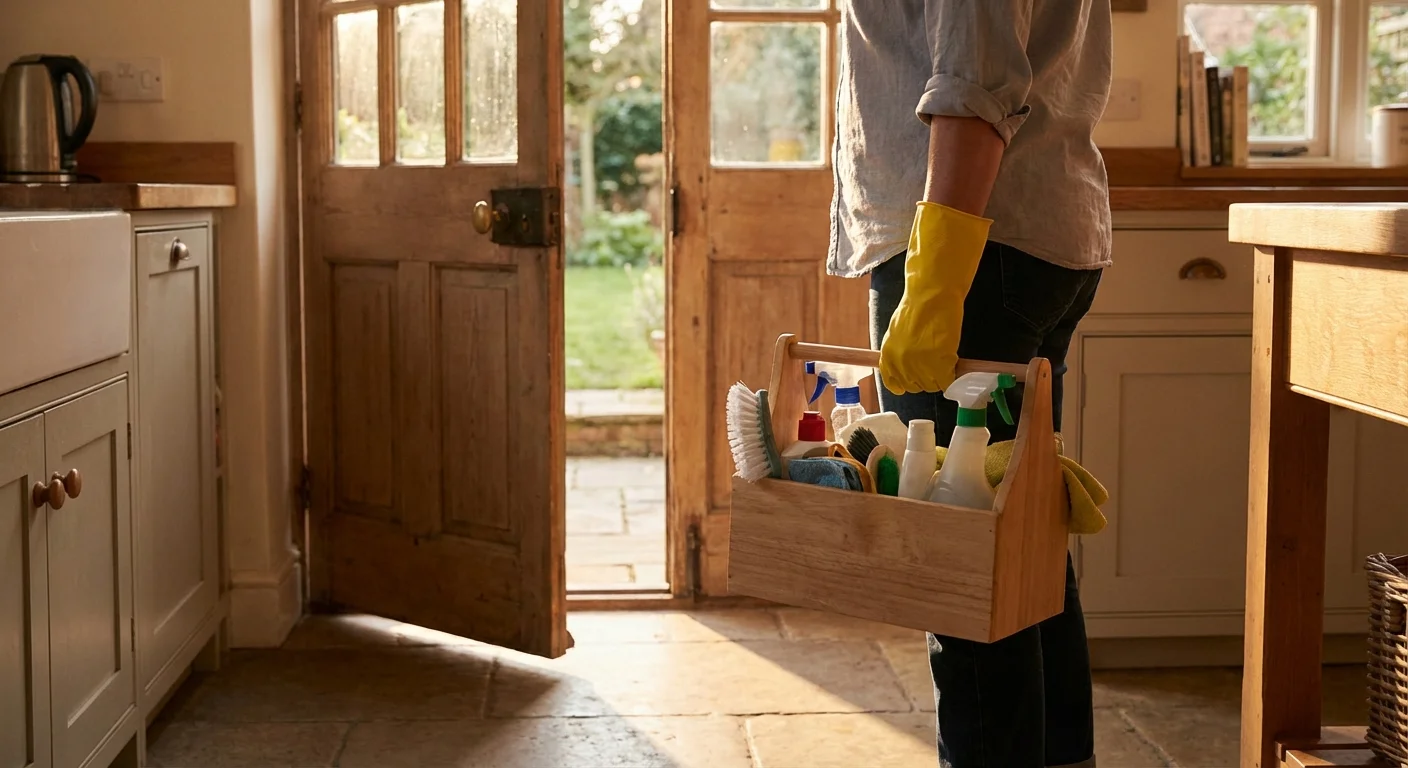
Preparation: Gear Up and Air Out
Before you uncap a single bottle of bleach, prepare your environment and yourself. Fighting microscopic battles requires the right protective equipment and optimal air circulation. When someone sneezes or coughs, microscopic droplets float in the air long after the person leaves the room. If you immediately begin vacuuming or dusting, you risk inhaling these particles or redistributing them throughout the house.
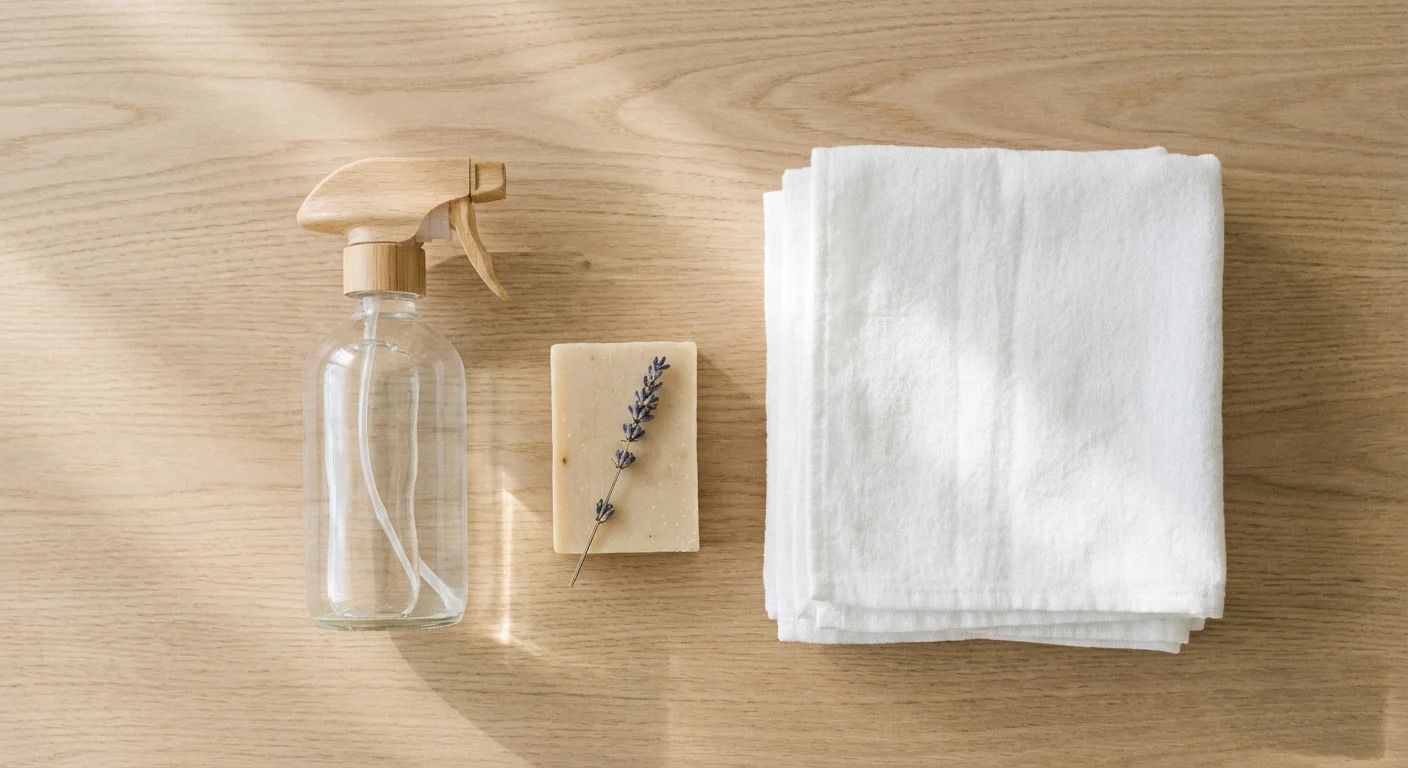
If you are concerned about harsh fumes, you can integrate non-toxic cleaning products into your routine while still maintaining a sanitary environment.
Start by improving your indoor ventilation. Open windows on opposite sides of your home to create a cross-breeze. Even cracking a window a few inches for twenty minutes significantly reduces the concentration of airborne pathogens. The EPA Indoor Air Quality guidelines suggest that increasing ventilation with outdoor air remains one of the most effective ways to clear contaminated indoor air.
Next, gather your supplies. You need disposable gloves—preferably nitrile or latex—to protect your skin from both the germs and the harsh chemicals. Grab a stack of clean microfiber cloths. Microfiber possesses a unique star-shaped fiber structure that physically traps bacteria and viruses far better than standard cotton rags or paper towels. Finally, select an EPA-registered disinfectant. Read the back label entirely. Look for the “kill claims” to ensure the product specifically targets the virus that invaded your home, whether it was influenza, rhinovirus, or norovirus. Note the “dwell time” or “contact time” listed in the microscopic print; this tells you exactly how many minutes the surface must stay wet to successfully kill the pathogens.

The Post-Illness Deep Clean: A Room-by-Room Strategy
Attempting to sanitize an entire house at once easily leads to burnout. Instead, compartmentalize the project. Start with the sick room—the epicenter of the illness—and systematically work your way outward through the bathrooms, kitchen, and shared living spaces. This methodical approach prevents you from tracking germs from a highly contaminated zone into a freshly cleaned area.
The Bedroom: Ground Zero
The bedroom where the sick person rested harbors the highest concentration of viral particles. Begin by carefully stripping the bed. Do not hug the soiled linens to your chest, and do not shake them out. Shaking out contaminated sheets releases millions of viral particles back into the air, completely undoing your ventilation efforts. Roll the sheets inward, trapping the germs inside, and place them directly into a laundry basket lined with a washable bag.
Once you strip the bed, turn your attention to the bedside table. This surface caught every cough, used tissue, and spilled cough syrup. Clear off all items. Wash water glasses and mugs in the dishwasher on the highest heat setting. Throw away half-empty water bottles or disposable tissue boxes. Clean the nightstand surface with a multi-purpose spray, then apply your disinfectant. Wipe down the lampshade, the lamp switch, and any charging cables resting on the table.
Empty the room’s trash can immediately. Because tissues carry a heavy viral load, you should always line bedside trash cans with plastic bags during an illness. Tie the bag tightly before pulling it out of the bin. Spray the inside and outside of the empty trash can with a heavy-duty disinfectant and allow it to air dry completely before replacing the liner.
The Bathroom: The Moisture Trap
Bathrooms pose a unique challenge during a post illness deep clean. The warm, humid environment allows certain bacteria and viruses to survive much longer than they would on a dry living room table. Furthermore, gastrointestinal illnesses like norovirus spread aggressively through bathroom surfaces.
Remove all soft goods first. Gather the bath mats, hand towels, and washcloths, and send them to the laundry. Next, address the toothbrushes. If the sick person used a manual toothbrush, throw it away. The bristles trap bacteria, and it is simply not worth the risk of reinfection to save a three-dollar piece of plastic. If they use an electric toothbrush, replace the removable head and thoroughly wipe down the motorized base with a cloth dampened in 70% isopropyl alcohol.
Move to the sink area. Sinks endure a massive amount of contamination from handwashing and spitting. Clean the basin with a mildly abrasive cleaner to remove toothpaste splatter and soap scum. Follow up with a potent disinfectant spray, paying special attention to the faucet handles. The handles act as a bridge for germs; dirty hands touch them to turn the water on, and newly cleaned hands touch them to turn the water off.
For the toilet, aggressive disinfection proves mandatory, especially after a stomach bug. Clean the bowl with a standard toilet cleaner and a dedicated brush. Then, use a hospital-grade disinfectant or a diluted bleach solution on the exterior. Thoroughly soak the flush handle, the top of the tank, the seat, both sides of the lid, and the base where the toilet meets the floor. Remember your dwell time—let the chemical sit for at least five to ten minutes before wiping it away.
The Kitchen: Protecting Your Food Supply
When sick family members wander into the kitchen for soup or tea, they leave a trail of fingerprints on highly trafficked surfaces. Protecting the kitchen requires a meticulous focus on hard, non-porous touchpoints.
Start with the refrigerator. Wipe down the main door handle, the freezer handle, and the edges of the doors where fingers naturally grip. Move to the cabinets and drawers, disinfecting the hardware on the pantry door and the drawers containing silverware and cups. Disinfect the microwave keypad, the oven handle, and the controls on your coffee maker or electric kettle.
Kitchen sponges notoriously harbor staggering amounts of bacteria. If you used a sponge to clean dishes while someone in the house was sick, throw it in the garbage immediately. Sponges possess too many microscopic porous cavities to effectively disinfect at home. Replace it with a fresh one. Run all dishes, mugs, and utensils used by the sick person through the dishwasher using the “sanitize” cycle, which utilizes water hot enough to destroy residual pathogens.
Shared Living Spaces: The High-Touch Hunt
In your living room and hallways, conduct a “high-touch hunt.” Stand in the center of the room and visualize exactly what a person touches when they walk in. Light switches top the list. Do not spray disinfectant directly onto a light switch panel, as the liquid can seep behind the plastic plate and cause an electrical short. Instead, spray your disinfectant onto a microfiber cloth until it is damp, and firmly wipe the switch and the surrounding wall plate.
Doorknobs require the same attention. Wipe the knob, the locking mechanism, and the edge of the door where hands frequently push it open. Do not forget the handles on sliding glass doors or the pulls on hallway closets.
Entertainment devices represent another major vector for germs. A sick person likely spent hours holding the television remote, gaming controllers, or a tablet. Electronic devices require a delicate touch. Unplug everything first. Use wipes that contain at least 70% isopropyl alcohol, which evaporates quickly and avoids damaging internal circuitry. Gently wipe down the entire surface of the remote control, paying close attention to the crevices between the rubber buttons. Experts at Good Housekeeping frequently recommend keeping a dedicated stash of alcohol wipes in the living room specifically for sanitizing electronics.

Tackling Soft Surfaces and Laundry
Disinfecting hard surfaces feels straightforward, but dealing with couches, rugs, and bedding requires a completely different approach. You cannot wipe down a fabric sofa with bleach. When researching sanitize home tips, soft surfaces often cause the most confusion because chemical disinfectants simply soak into the fibers without achieving the necessary dwell time.
For clothing, bedding, and towels, heat provides your best defense. Wash all contaminated laundry in the hottest water setting safe for the fabric. Add a laundry sanitizer to the rinse cycle if you want an extra layer of protection. These specialized liquids use quaternary ammonium compounds to kill bacteria trapped in the weave of the fabric. Transfer the wet laundry immediately to the dryer. The high heat of a standard tumbling cycle eliminates almost all remaining household viruses. Ensure the items dry completely; damp spots allow surviving bacteria to multiply.
For items you cannot fit in a washing machine—like couches, mattresses, and decorative throw pillows—steam proves highly effective. A garment steamer or a dedicated upholstery steam cleaner reaches temperatures above 212°F (100°C). Slowly passing the steam head over your upholstery physically destroys the outer shell of viruses and bacteria. If you do not own a steam cleaner, use a fabric-safe sanitizing spray. Look for aerosol sprays designed specifically for upholstery. Spray the fabric in a sweeping motion until slightly damp, and let it air dry completely before anyone sits on the furniture.
HVAC and Air Quality Maintenance
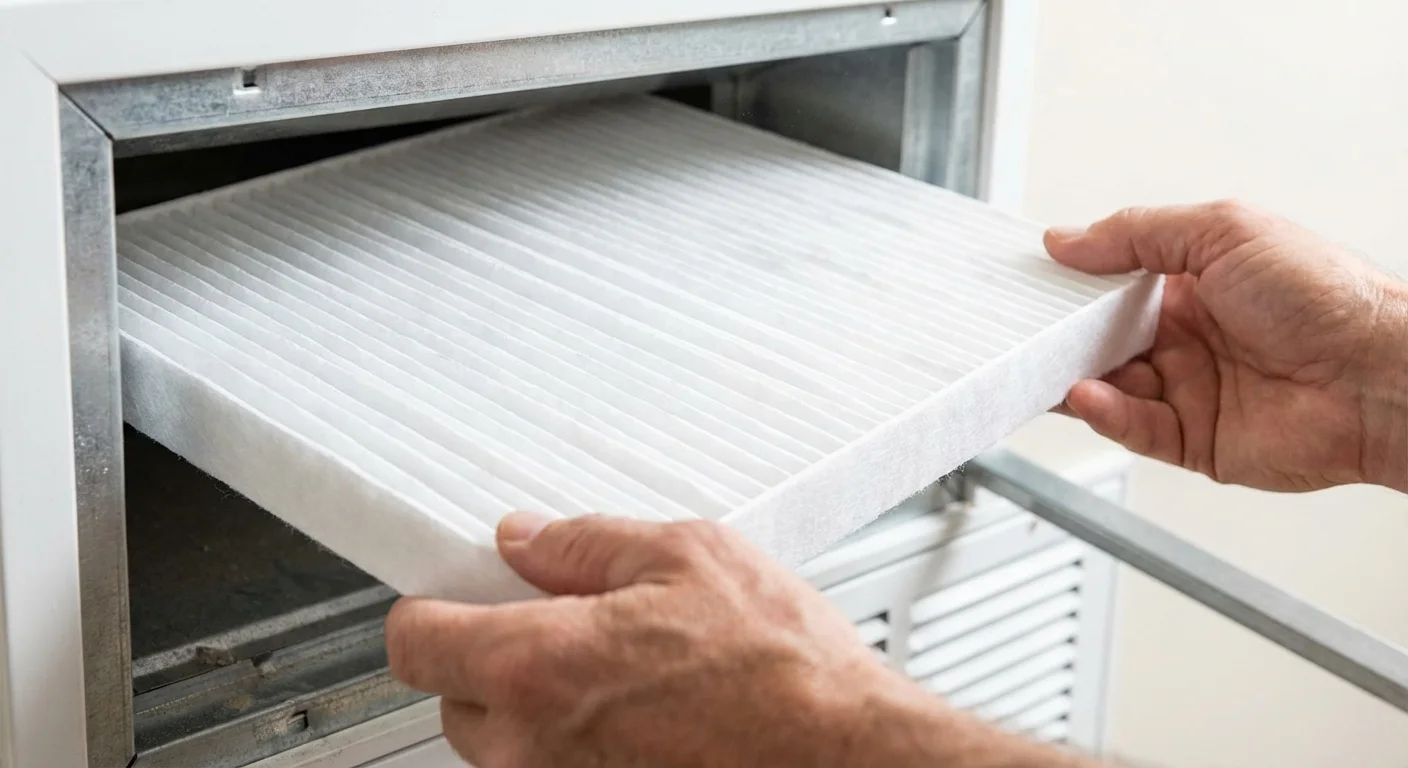
Cleaning the surfaces in your home only addresses half the equation; you must also address the air circulating through your ductwork. Respiratory illnesses spread through airborne droplets that easily get pulled into your return vents and distributed throughout the house.
Once the illness passes, check your HVAC filter. If you currently use a standard fiberglass filter, consider upgrading to a pleated filter with a MERV rating of 11 or 13. High-MERV filters possess tightly woven fibers capable of trapping microscopic viral particles and bacteria. If someone suffered from a severe respiratory infection, replace the HVAC filter entirely once they recover, even if the filter is only a few weeks old. Wear a mask when changing the filter, slip the old filter directly into a plastic garbage bag, and take it to the outdoor trash bin immediately.
Running a standalone HEPA (High-Efficiency Particulate Air) purifier in the sick room and main living areas also accelerates the removal of lingering airborne contaminants. HEPA filters physically capture 99.97% of particles that are 0.3 microns in size, making them incredibly efficient at clearing the air after a bout of the flu or COVID-19.
What Can Go Wrong: Avoiding Disinfection Disasters
In the rush to eradicate germs, homeowners often make well-intentioned but dangerous mistakes. Mishandling cleaning chemicals not only ruins your belongings but can severely compromise your respiratory health.
Ignoring the Dwell Time
The most common mistake people make is the “spray and immediately wipe” technique. Disinfectants require time to break down the cellular walls of bacteria and viruses. If you spray a quartz countertop with a disinfecting spray and immediately dry it with a paper towel, you have merely achieved a surface cleaning. You have not disinfected anything. Read the label. If it says “leave visibly wet for five minutes,” you must wait the full five minutes. In dry climates, you may even need to reapply the spray to keep the surface wet for the required duration.
Creating Toxic Chemical Cocktails
Never mix different cleaning products. The drive to create a “super cleaner” often results in highly toxic chemical reactions. The most dangerous combination involves mixing chlorine bleach with any product containing ammonia (commonly found in glass cleaners) or acids (like vinegar or toilet bowl cleaners). Mixing bleach and ammonia creates chloramine gas, which causes severe respiratory distress, chest pain, and in high concentrations, can be fatal. Always use products exactly as the manufacturer intended.
Cross-Contamination with Tools
Using the same sponge or microfiber cloth to clean the entire house defeats the purpose of your deep clean. If you wipe down the toilet rim and then use that exact same cloth to wipe down the bathroom sink faucet, you just manually transported fecal bacteria to the place where you wash your hands. Use a color-coded system for your cloths: blue for glass, green for the kitchen, and yellow for the bathroom. Change cloths frequently within the same room. Once a cloth wipes a highly contaminated surface, throw it straight into the laundry bag.
Ruining Delicate Surfaces
Bleach and hydrogen peroxide excel at killing germs, but they ruthlessly destroy porous surfaces. Spraying harsh disinfectants on unsealed granite, marble, or natural wood strips the finish, causes discoloration, and etches the stone. For natural stone countertops, use isopropyl alcohol mixed with water, or seek out a commercial disinfectant specifically formulated and pH-balanced for natural stone.

When to Call a Professional
While a thorough DIY deep clean handles the vast majority of standard household illnesses—like colds, the flu, or stomach bugs—certain scenarios require specialized equipment and training.
- Post-Biohazard Situations: If the illness resulted in significant amounts of blood, bodily fluids, or severe biological contamination that saturated carpets, mattresses, or drywall, standard household cleaners will not suffice. Professional remediation companies possess the enzymes and industrial extraction equipment needed to safely handle biohazards.
- Severe HVAC Contamination: If a family member with a highly contagious, airborne illness isolated in a room with a direct HVAC return vent for an extended period, the ductwork may harbor substantial particulate matter. A professional duct cleaning service utilizing negative air pressure and HEPA vacuums can safely clear the system.
- Lingering Odors and Mold: If an extended illness prevented regular house maintenance and you discover mold growth in bathrooms or pervasive odors trapped in carpets, bring in a professional cleaner. Mold requires specific mitigation strategies that go beyond surface wiping.
Frequently Asked Questions
How long do viruses actually live on household surfaces?
The lifespan of a virus depends entirely on the type of virus and the material of the surface. Cold and flu viruses generally survive on hard, non-porous surfaces (like metal doorknobs and plastic remotes) for 24 to 48 hours. However, hardier pathogens like norovirus can survive on hard surfaces for days or even weeks if not properly disinfected. Viruses typically die much faster on soft, porous surfaces like clothing and tissue paper.
Do natural cleaners like vinegar and baking soda kill viruses?
While white vinegar and baking soda serve as excellent natural cleaners for removing grime, hard water stains, and odors, they are not registered disinfectants. Vinegar kills some strains of bacteria, but it is highly ineffective against dangerous pathogens like influenza, COVID-19, or norovirus. When you need to genuinely disinfect a home after an illness, you must rely on EPA-registered chemical disinfectants, isopropyl alcohol (70%+), or hydrogen peroxide.
Can I just use disinfecting wipes for the entire house?
Disinfecting wipes offer great convenience for small, targeted tasks like a doorknob or a single light switch. However, they dry out quickly. If the wipe does not leave the surface visibly wet for the required dwell time (usually 3 to 4 minutes), it fails to disinfect. Attempting to clean an entire kitchen counter with a single wipe usually results in spreading germs around rather than killing them. For large surface areas, liquid sprays or properly diluted bleach solutions work far more effectively.
Should I open windows while disinfecting?
Yes, absolutely. Opening windows serves a dual purpose. First, it introduces fresh outdoor air, which dilutes and disperses any lingering airborne viral particles. Second, it ventilates the fumes from your cleaning chemicals. Breathing in aerosolized bleach or quaternary ammonium compounds in a closed room irritates your lungs and eyes. Always ensure good airflow when executing a deep clean.
Moving Forward with a Healthy Home
Executing a proper post-illness deep clean requires time, elbow grease, and strict attention to detail. By focusing your efforts on high-touch surfaces, respecting the dwell time of your products, and systematically working room by room, you successfully break the chain of infection. You do not need to sterilize your home to hospital standards; you simply need to systematically reduce the viral load so your family’s immune systems can handle the rest safely.
Once you finish, take out all the trash, immediately wash your hands and arms with soap and warm water, and step outside for a breath of fresh air. Your home is clean, the air is clearing, and your space is ready to support health and recovery once again. This guide provides general home improvement information. Every home is different—what works in one space may need adaptation in yours. For structural changes or electrical/plumbing work, consult a licensed professional.
Last updated: February 2026


Leave a Reply