
You turn up the thermostat, hear the furnace roar to life, and yet—somehow—a persistent chill still dances across the floorboards. Drafty rooms and skyrocketing energy bills are not just inevitable facts of the colder seasons; they are symptoms of a house that is leaking the very heat you are paying to generate. Learning how to winterize your home effectively transforms your living space from a drafty liability into a comfortable, energy-efficient sanctuary.
Heating accounts for roughly half of the average home’s utility costs. When cold wind slips through loose window sashes and warm air escapes into an under-insulated attic, your heating system works overtime to compensate. Tackling this challenge does not always require a massive remodeling budget or a team of contractors. By systematically moving through your house and addressing the vulnerabilities in each room, you can drastically reduce energy consumption and boost your daily comfort.
This room-by-room methodology ensures you catch the subtle air leaks and insulation gaps that a disorganized approach might miss. Grab a notepad, a flashlight, and a stick of incense—the perfect DIY tool for tracking down elusive air currents—and let us walk through the process of sealing, insulating, and preparing your property for the freezing months ahead.

The Living Room: Stopping Drafts at the Source
Your living room likely serves as the primary gathering space when the temperature plummets. Unfortunately, it is also typically home to the largest windows and, in many cases, a fireplace—two of the biggest culprits for energy loss.
In addition to sealing leaks, you can use budget-friendly ways to make your living room cozier as the seasons change.
Start your inspection with the windows. On a windy day, light a stick of incense and slowly move it around the perimeter of the window frames. Wherever the smoke wavers horizontally, you have located a draft. Addressing these gaps immediately reduces the chill in your seating areas. Heavy thermal curtains offer an excellent line of defense, adding a thick layer of fabric that traps cold air against the glass before it can spill into the room. Keep these curtains open during sunny days to harness free solar heat, then pull them tightly shut as soon as the sun dips below the horizon.
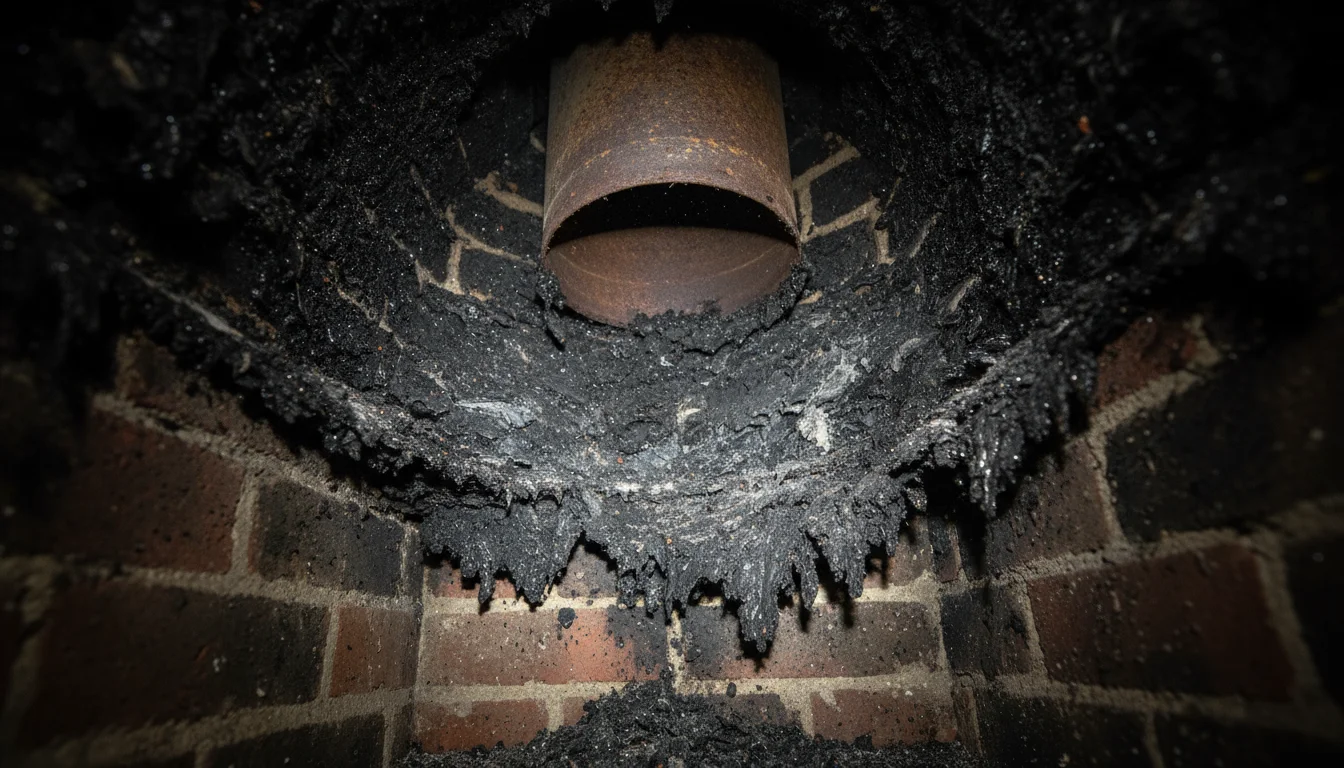
If you have a fireplace, it requires special attention. A traditional wood-burning fireplace is essentially an open tunnel to the outdoors. When the fireplace is not actively burning, a poorly sealed damper allows your expensive heated air to rush straight up the chimney—a phenomenon driven by the stack effect. Ensure your damper is completely closed. If your damper is warped or missing, consider installing a chimney balloon or an inflatable draft stopper. These devices sit just above the firebox and inflate to create an airtight seal, though you must remember to remove them before lighting your next fire.
Do not forget the floors. Hardwood and tile floors conduct cold efficiently, pulling heat away from your body. Laying down thick, plush area rugs adds a layer of insulation to your living room floor, keeping your feet warm and helping to prevent heat loss home-wide by creating a thermal break between the living space and the cold subfloor below.
The Kitchen: Managing Airflow and Moisture
The kitchen presents unique winterization challenges because it is a high-moisture environment filled with plumbing and exterior-venting appliances. While you want to keep the cold out, you must also manage the humidity generated by boiling water and running the dishwasher to prevent condensation and mold on cold exterior walls.
Regularly checking vents and seals is part of the monthly home care tasks that keep a kitchen running smoothly through winter.
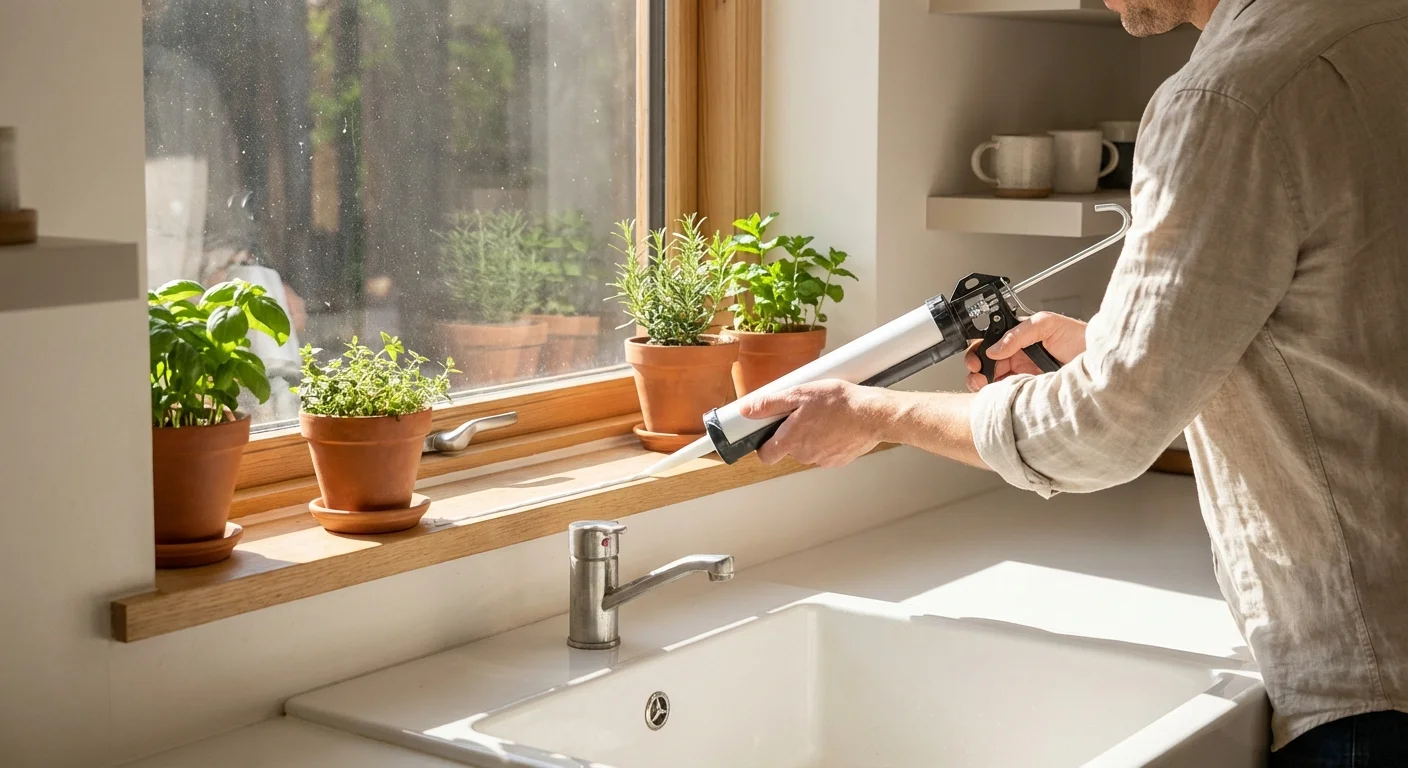
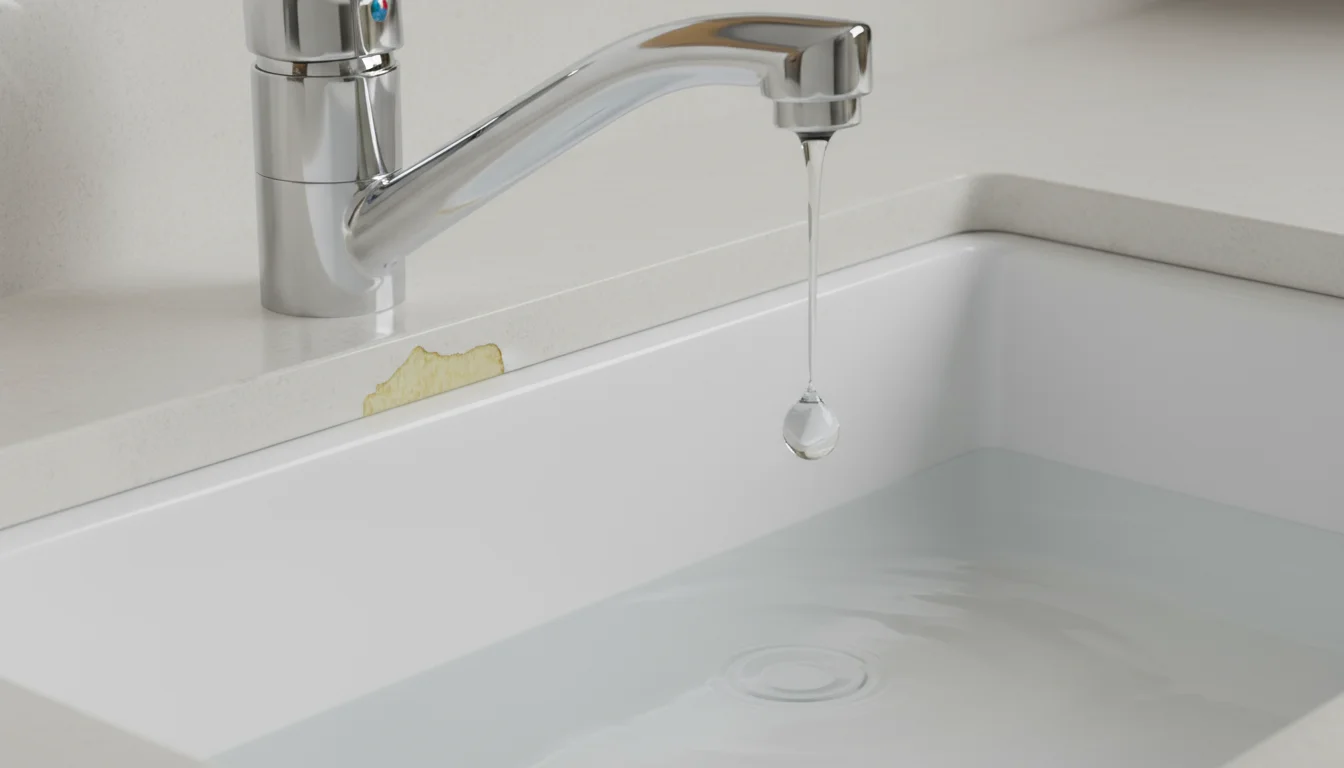
Your range hood is a prime suspect for air leaks. Many range hoods vent directly through an exterior wall or the roof. If the exterior flapper valve is stuck open with grease or debris, freezing air will pour down the duct and into your kitchen. Inspect the exterior vent hood to ensure the flap closes securely when the fan is off. Inside, check the caulking around the kitchen window—especially the one situated over the sink, which experiences frequent temperature shifts and moisture exposure. Scrape away any cracked or yellowing caulk and apply a fresh bead of high-quality silicone.
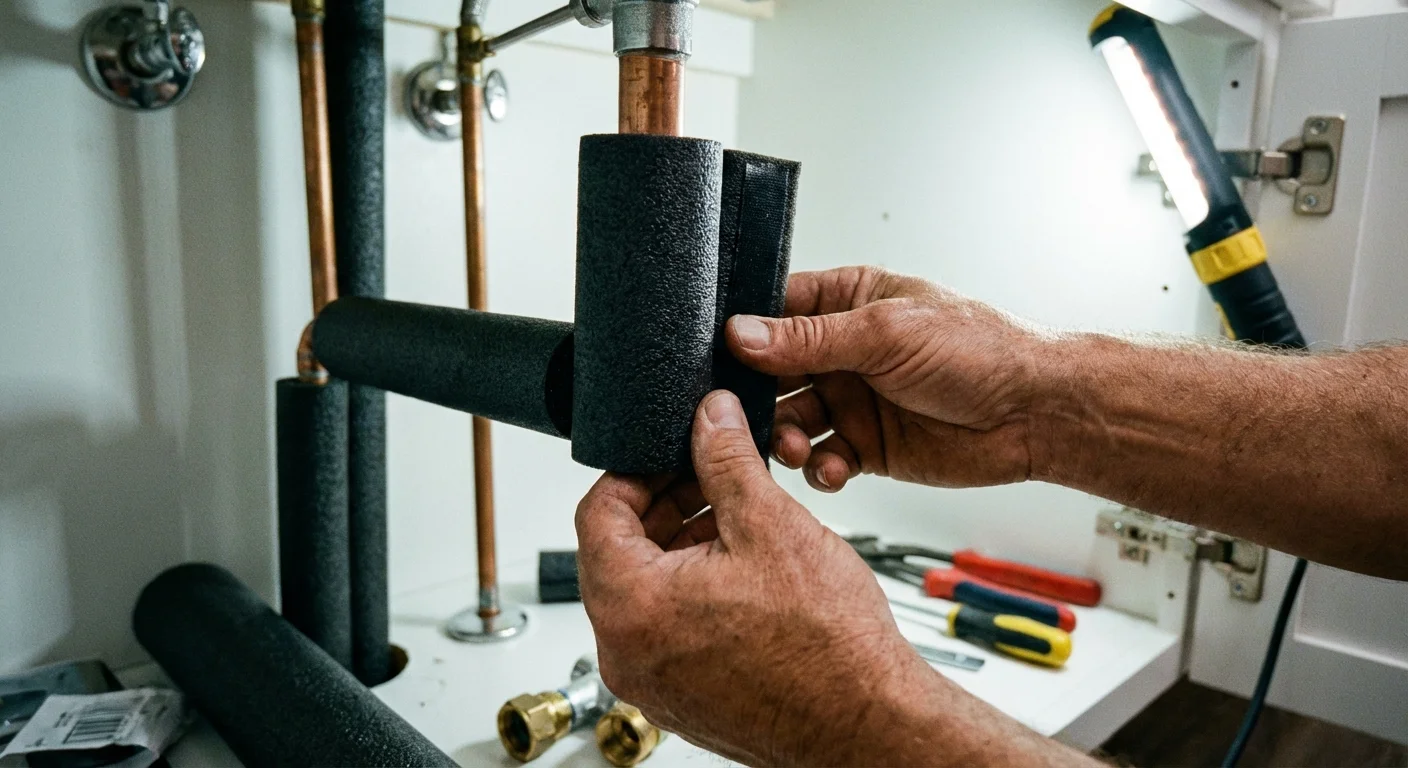
Plumbing requires a proactive approach. If your kitchen sink sits against an exterior wall, those pipes are highly susceptible to freezing during a severe cold snap. Wrap exposed pipes inside the cabinets with foam pipe insulation. When temperatures drop below freezing, get into the habit of leaving your lower cabinet doors slightly ajar overnight; this simple trick allows ambient room heat to circulate around the pipes, significantly reducing the risk of a disastrous burst.
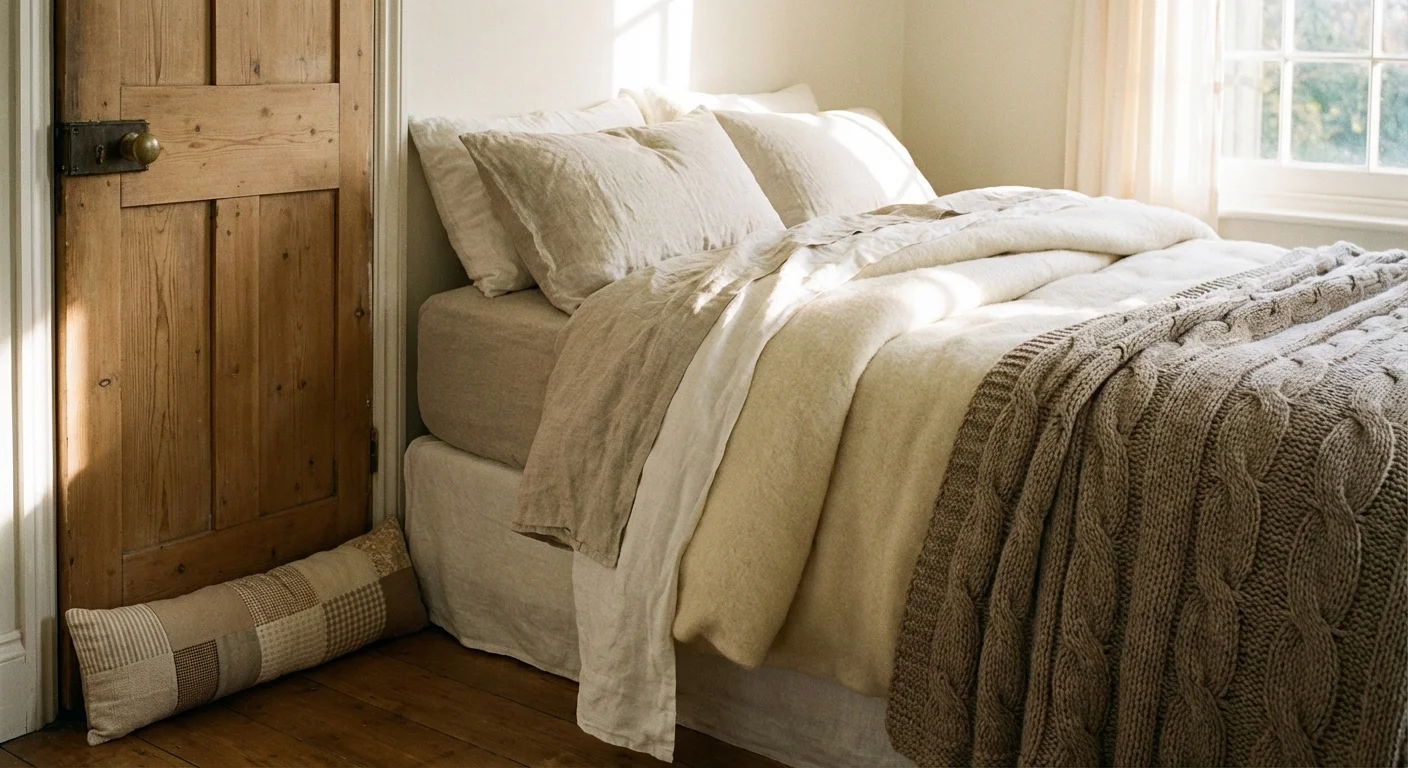
Bedrooms: Layering for Warmth and Efficiency
Creating a cozy bedroom environment is about strategic layering—not just on your bed, but across the room’s architecture. The goal is to maintain a comfortable sleeping temperature without forcing your furnace to run continuously through the night.
Don’t forget to perform simple seasonal HVAC maintenance tasks like changing filters to maintain airflow.
In addition to structural seals, there are many decor-focused ways to make any room feel warmer during the coldest months.
Take a look at your ceiling fan. Most homeowners utilize ceiling fans exclusively for summer cooling, but they are equally vital for winter home preparation. Warm air naturally rises, pooling near the ceiling where it does you absolutely no good. By flipping the directional switch on the motor housing, you can set the fan blades to rotate clockwise. Run the fan on its lowest speed setting; this creates a gentle updraft that pushes the trapped warm air out toward the walls and down into the living space, effectively mixing the room’s air without generating a chilling breeze.
Evaluate your bedroom furniture placement. A surprisingly common mistake is positioning a heavy bed frame, a long dresser, or floor-length curtains directly over a heating register or in front of a baseboard heater. Furniture absorbs the heat before it can circulate into the room, forcing your HVAC system to work harder. Rearrange your bedroom layout to ensure all vents have at least two feet of clear, unobstructed airspace.
Bathrooms: Protecting Plumbing and Ventilation
Much like the kitchen, the bathroom requires a delicate balance between sealing out the cold and allowing humid air to escape. Without proper ventilation, winter moisture condenses on cold window panes and exterior walls, quickly leading to mildew.
Ensure your bathroom exhaust fan is functioning correctly and is properly ducted to the outside—not into the attic. A fan venting into a cold attic will dump warm, moist air directly onto your roof deck, creating frost that eventually melts and rots the wood. EPA Indoor Air Quality guidelines emphasize the importance of properly functioning local exhaust ventilation to manage indoor moisture, especially during tightly sealed winter months. Run the fan during your shower and for about twenty minutes afterward, but turn it off promptly to avoid sucking all the warm air out of your house.
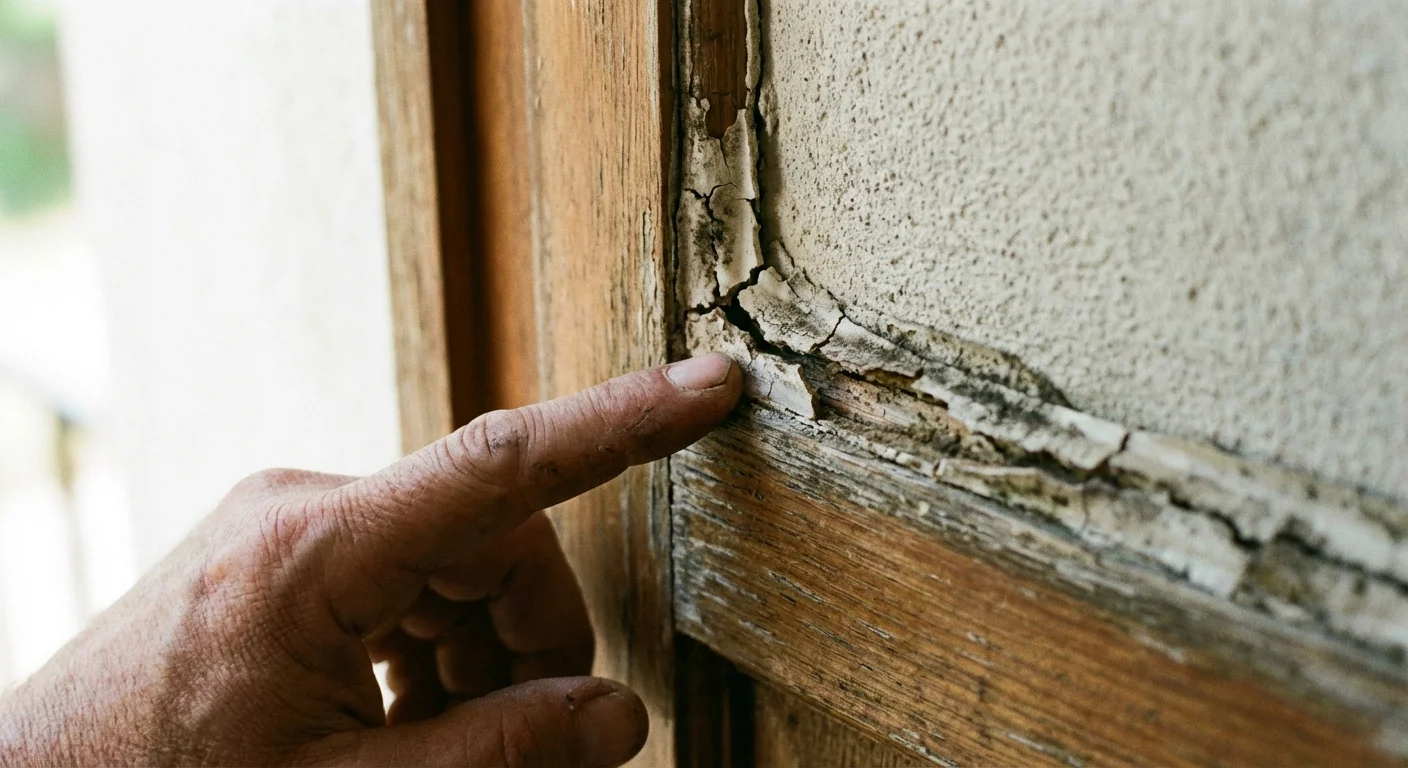
Inspect the caulking around the bathtub and shower surround. Winter air is exceptionally dry, which can cause older, brittle caulk to shrink and crack. Replacing deteriorated caulk not only protects your drywall from water damage but also seals microscopic air drafts that might be pulling cold air from the wall cavities.
If your bathroom is heated by hot water radiators, early winter is the time to bleed them. Trapped air inside the radiator prevents hot water from fully circulating, leaving the top half of the radiator cold. Use a radiator key to slightly open the bleed valve at the top until you hear a soft hissing sound. Hold a rag underneath to catch the drips; the moment a steady stream of water appears, tighten the valve. Your radiator will instantly return to peak efficiency.
The Attic and Basement: The Insulation Frontline
The living areas of your home are sandwiched between the attic and the basement (or crawlspace), making these unfinished zones the most critical battlegrounds for winterization. Building scientists refer to the “stack effect”—the process by which warm air escapes through the top of the house (the attic), creating negative pressure that pulls cold, dense air in through the bottom (the basement). Disrupting this cycle is the most effective way to lower your heating bills.
Adding these checkups to your monthly home maintenance calendar ensures that insulation and air sealing remain effective year after year.
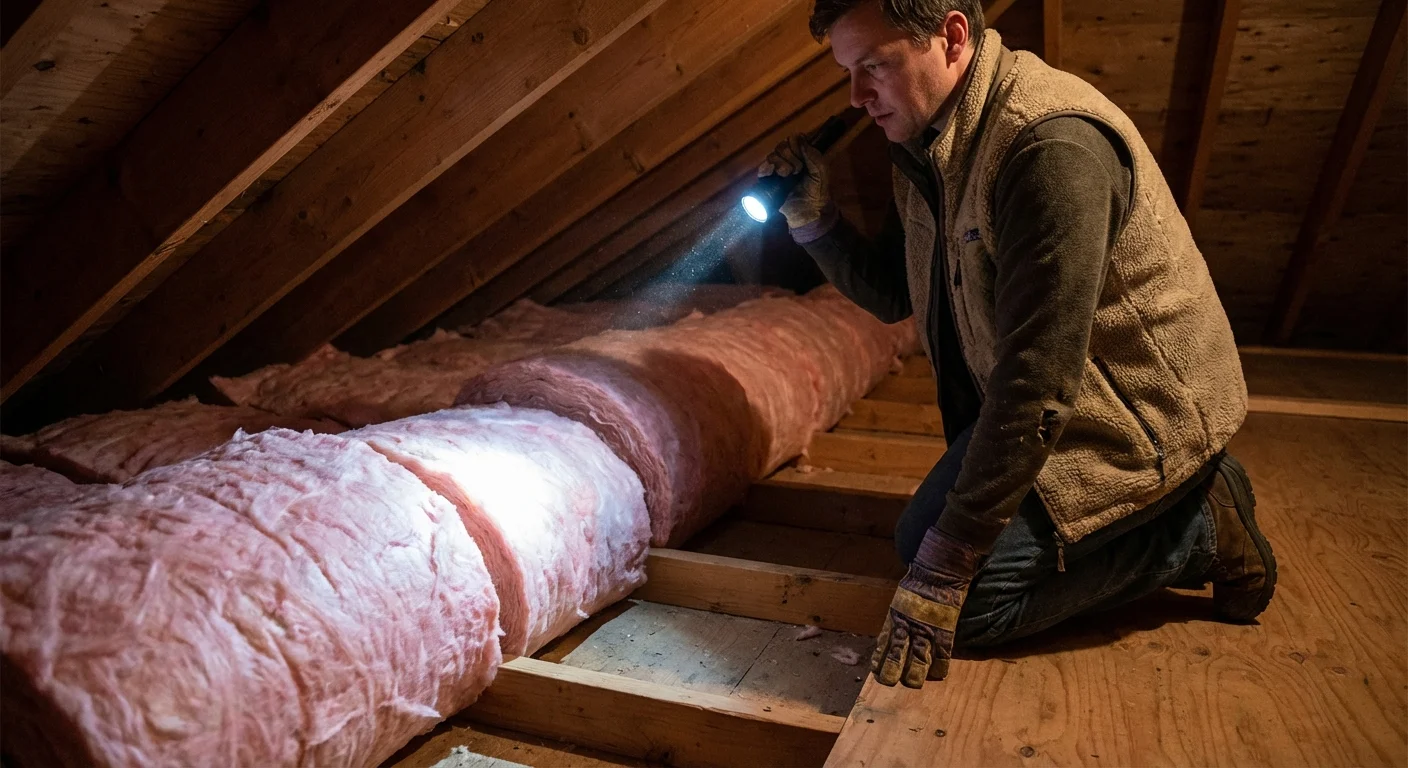
In the attic, insulation is your primary defense. The easiest way to check if you have adequate insulation is to look across your attic floor. If you can clearly see the wooden floor joists, you do not have enough insulation. Adding an extra layer of unfaced fiberglass batts or blown-in cellulose over the existing insulation can yield dramatic energy savings. Pay special attention to the attic access hatch or pull-down stairs; this is often an uninsulated square of thin plywood. Affixing rigid foam board to the back of the hatch and installing weatherstripping around its perimeter creates an essential thermal seal.
Down in the basement, turn your attention to the rim joist—the perimeter where the wooden house framing rests on the concrete foundation. This joint is notoriously leaky. Cutting blocks of rigid foam insulation to fit into these joist bays and sealing the edges with expanding spray foam will drastically cut down on freezing drafts sweeping across your ground floors.
While you are in the basement, give your heating infrastructure some attention. Following expert insulation tips winter after winter includes wrapping your hot water heater in an insulated fiberglass blanket (checking manufacturer guidelines first to ensure you don’t block combustion air for gas models). Furthermore, wrap any hot water pipes radiating from the tank with foam sleeves to prevent standby heat loss before the water even reaches your faucets.
“The cheapest energy is the energy you don’t use. Air sealing and insulating are the most cost-effective ways to improve your home’s comfort and energy efficiency.”
— Energy Star Guidelines
The Exterior: Gutters, Roofs, and Outdoor Faucets
Winterizing the outside of your home is primarily about water management. Freezing water expands with immense force, capable of tearing apart plumbing, masonry, and roofing materials.
While protecting your indoor pipes, take the time to complete other essential lawn and garden winterization chores before the ground freezes.
Keeping up with a comprehensive fall home maintenance checklist ensures your property is protected from the elements outside.
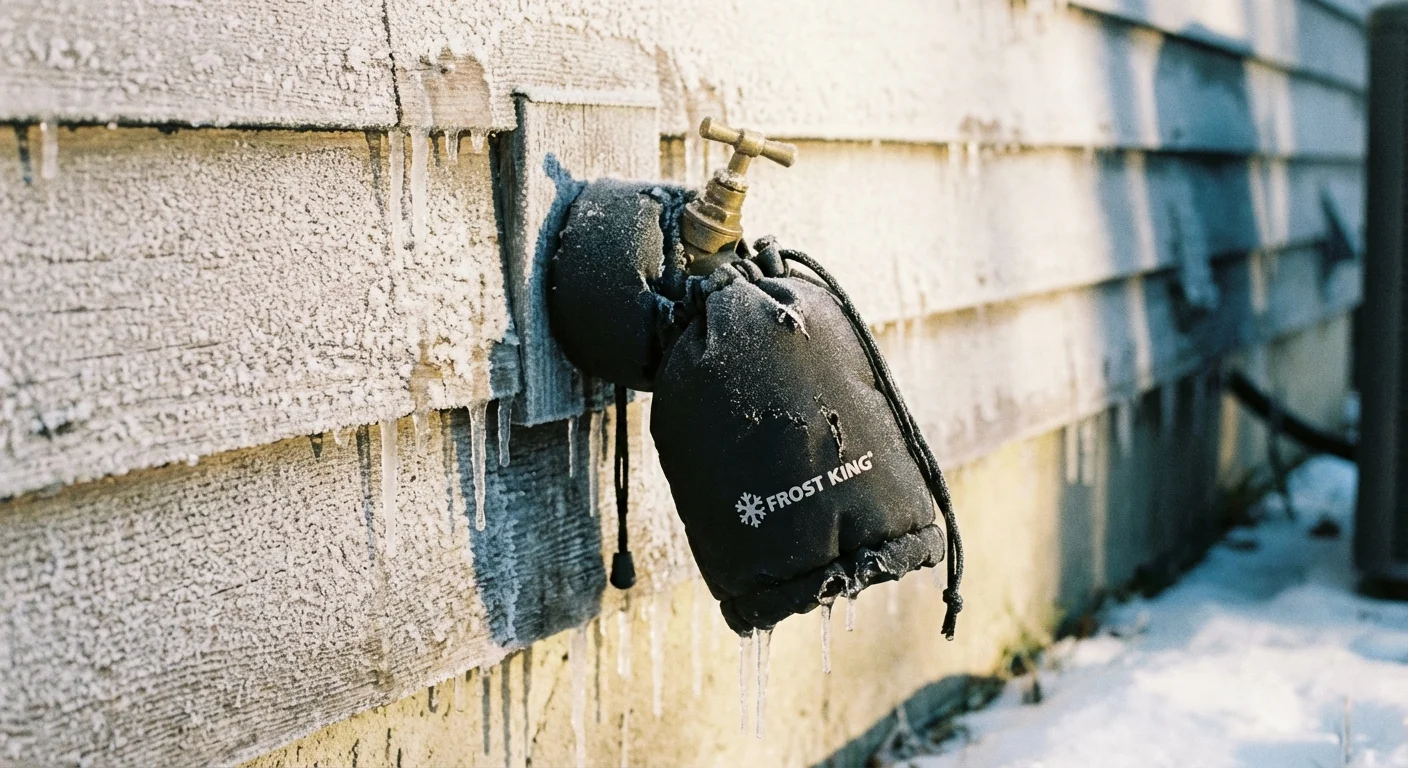
Begin with the exterior plumbing. Disconnect, drain, and store all garden hoses. If a hose remains attached to a spigot, water trapped inside can freeze, expanding backward into the pipe inside your walls and causing a catastrophic rupture. If you do not have frost-proof sillcocks installed, locate the interior shut-off valves for your outdoor faucets, turn off the water supply, and open the exterior spigot to drain any remaining water. Cover the spigots with insulated foam covers for an extra layer of protection.
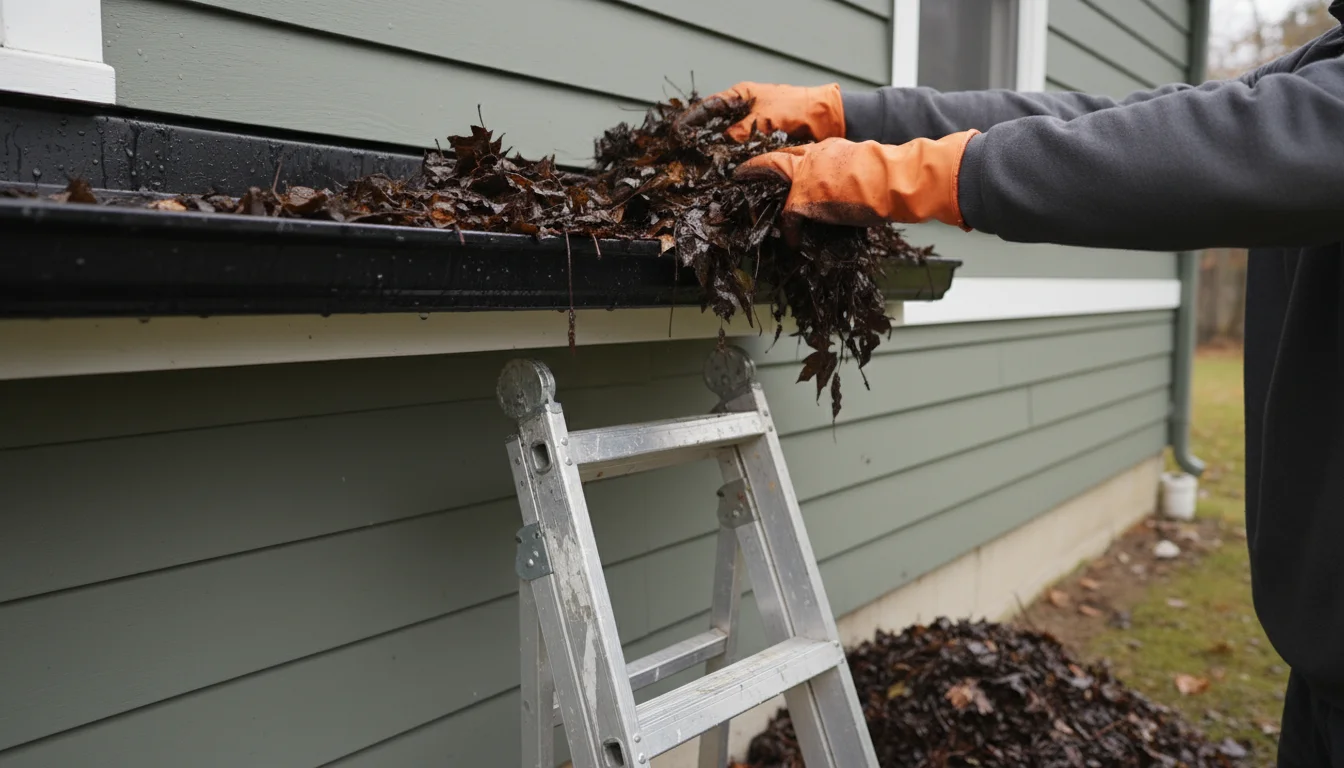
Gutter maintenance is a mandatory late-fall chore. Gutters packed with wet leaves and debris will quickly freeze solid. When snow on your roof melts, the water hits this blockage and pools along the eaves, eventually freezing into an ice dam. Ice dams force melting water to back up under your roofing shingles and pour into your ceilings and walls. Clean the gutters thoroughly and ensure the downspouts are actively directing water at least five feet away from your foundation.
Walk the perimeter of your house and inspect the foundation for cracks or gaps where utility lines (gas, electric, cable) enter the building. Mice and other rodents seek warmth as the weather cools, and they can squeeze through openings as small as a dime. Pack larger holes with steel wool—which rodents cannot chew through—and seal over them with exterior-grade caulk.
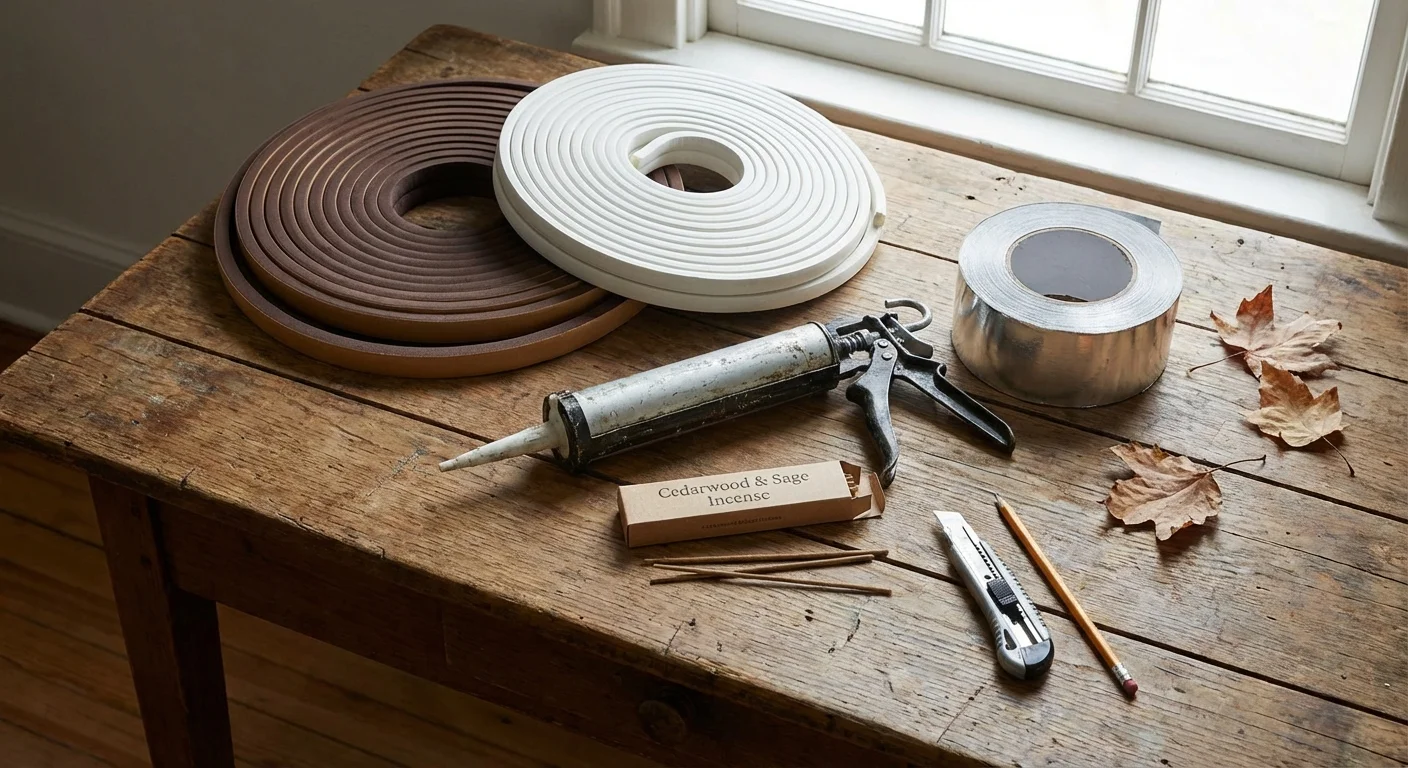
Comparing Weatherproofing Materials
When sealing the living space, mastering weatherstripping doors windows is an essential skill. Not all weatherstripping is created equal, and choosing the correct material for the specific application dictates how long the repair will last.
| Material Type | Best Application | Durability | Ease of Installation |
|---|---|---|---|
| Foam Tape (Adhesive Backed) | Window sashes, door frames with irregular gaps | Low to Medium (1-3 years) | Very Easy (Peel and stick) |
| V-Strip (Tension Seal) | Sides of double-hung or sliding windows, tight door frames | High (5+ years) | Moderate (Requires careful measuring and tacking) |
| Felt | Fixed windows, door jambs with low friction | Low (1-2 years, breaks down when wet) | Easy (Staple or tack into place) |
| Tubular Rubber or Vinyl | Base of exterior doors, large gaps | High (5+ years) | Moderate (Requires screws or nails) |
| Door Sweeps (Metal/Rubber) | Bottom of exterior doors dragging across thresholds | Very High (10+ years) | Moderate (Requires cutting metal to width and drilling) |
For high-traffic exterior doors, invest in durable tubular rubber or a dedicated mechanical door sweep. Save the inexpensive foam tape for windows that you plan to keep locked shut until spring. Proper preparation of the surface is critical; wipe down the door jamb or window frame with rubbing alcohol and let it dry completely before applying any adhesive-backed weatherstripping, or it will simply peel off at the first sign of condensation.
Pitfalls to Watch For
While sealing your home is crucial, aggressive winterization can sometimes backfire if you do not understand the mechanics of your house. Keep these common mistakes in mind:
- Over-sealing the house: Older homes were built to “breathe.” If you seal every possible gap without providing mechanical ventilation, you trap moisture, volatile organic compounds (VOCs), and carbon monoxide inside. According to Energy Star, a home must maintain a balance of fresh air exchange. If your windows are constantly streaming with condensation on the inside, your house is likely too tight and lacks sufficient ventilation.
- Blocking combustion air: Gas furnaces and water heaters require a steady supply of fresh oxygen to burn fuel safely. Never block the air intake vents in your mechanical room or pile storage boxes around your furnace. Starving these appliances of air can cause them to draw exhaust gases back into the house.
- Closing vents in unused rooms: It seems logical to close heating registers in empty guest rooms to force warm air into the spaces you actually use. However, modern forced-air systems are balanced for the square footage of the entire house. Closing too many vents increases static pressure in the ductwork, which strains the blower motor and can lead to premature system failure.

Getting Expert Help
While installing weatherstripping and adding pipe insulation are excellent weekend DIY projects, certain aspects of winterizing your home require specialized tools and professional training.
- HVAC Servicing: Have a licensed technician inspect and tune up your heating system before the first major cold snap. They will check the heat exchanger for dangerous cracks, calibrate the thermostat, and ensure the gas pressure is optimal.
- Comprehensive Energy Audits: If your home is persistently cold despite your best efforts, hire a certified energy auditor. They use specialized equipment, such as blower doors and infrared thermography cameras, to pinpoint exactly where heat is bleeding through your walls and roof, taking the guesswork out of insulation upgrades.
- Roof and Chimney Maintenance: Walking on a steeply pitched, potentially icy roof is highly dangerous. If your chimney needs pointing, your flashing is damaged, or you suspect you need better attic ventilation to prevent ice dams, resources like This Old House recommend bringing in professional roofers or masons who possess the proper fall-protection gear.
Frequently Asked Questions
When should I start my winter home preparation?
The ideal time to begin winterizing is early to mid-fall, long before the first freeze. Caulks and adhesives require temperatures above 50°F (10°C) to cure properly, and exterior tasks like gutter cleaning are much safer before ice and snow arrive.
How can I prevent heat loss in a home with vaulted ceilings?
Vaulted ceilings naturally trap massive amounts of heat high above your living space. The most effective strategy is installing a large ceiling fan on a long downrod. Reversing the fan’s direction pushes that trapped warm air down the walls, significantly improving ground-level comfort. Additionally, ensure recessed lighting fixtures in the ceiling are sealed “IC-rated” (Insulation Contact) housings to prevent them from acting as mini-chimneys.
Does plastic window film actually work?
Yes. While it may not win any interior design awards, shrink-wrap window film is highly effective for older, single-pane windows. The film creates a sealed pocket of stagnant air between the plastic and the glass, which acts as a thermal buffer to slow heat transfer and eliminate chilling drafts.
What are the best insulation tips for winter on a tight budget?
If you cannot afford to upgrade attic insulation, focus heavily on draft mitigation. Draft stoppers (fabric tubes filled with sand or rice) placed at the bottom of exterior doors block massive amounts of cold air. Foam outlet gaskets—placed behind the cover plates of switches and outlets on exterior walls—are incredibly cheap and stop invisible leaks. Finally, insulating your hot water pipes costs only a few dollars but provides immediate efficiency gains.
Taking the time to weather-ready your property pays dividends all season long. You will notice the difference the moment the wind howls and your interior spaces remain quiet, calm, and perfectly warm. Work your way methodically from the living room to the attic, checking off tasks weekend by weekend.
The tips in this article are meant as general guidance. Your specific situation—including your home’s age, layout, and local building codes—may require different approaches. When in doubt, consult a professional.
Last updated: February 2026


Leave a Reply