
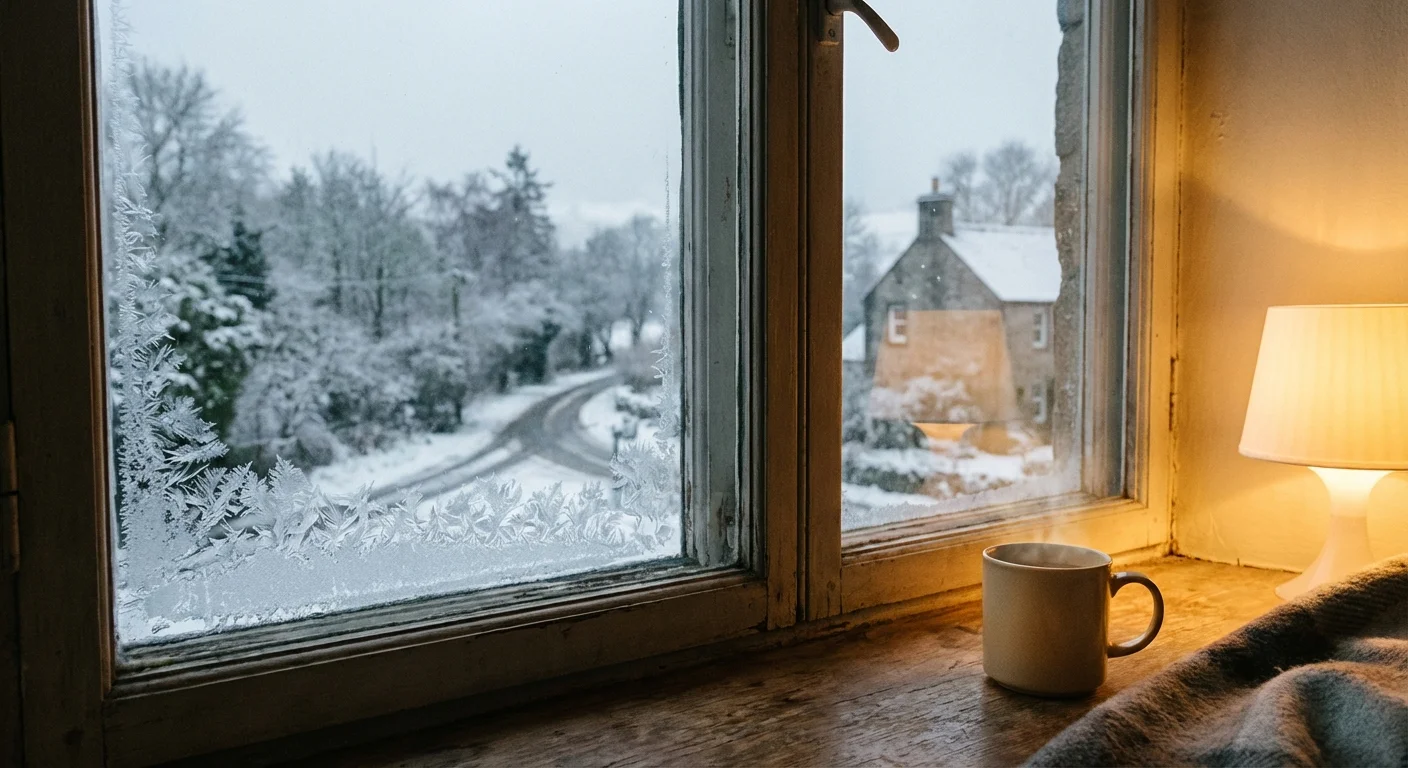
The first crisp morning of autumn signals more than just a wardrobe change; it serves as a structural warning bell for your property. When temperatures plummet, your house transitions from a breezy summer shelter to a fortress defending against freezing winds, heavy snow loads, and destructive moisture. Neglecting to prepare your home for winter often leads to uncomfortable drafts, skyrocketing energy bills, and costly emergency repairs in the dead of January.
To complement this structural list, you might also find our room-by-room guide to winterizing your home helpful for detailed interior preparation.
Routine upkeep preserves the integrity of your property. Addressing small vulnerabilities now prevents them from compounding into massive structural or mechanical failures later. A methodical approach to autumn home tasks ensures you cover every square foot of your property efficiently, giving you peace of mind before the first frost arrives.
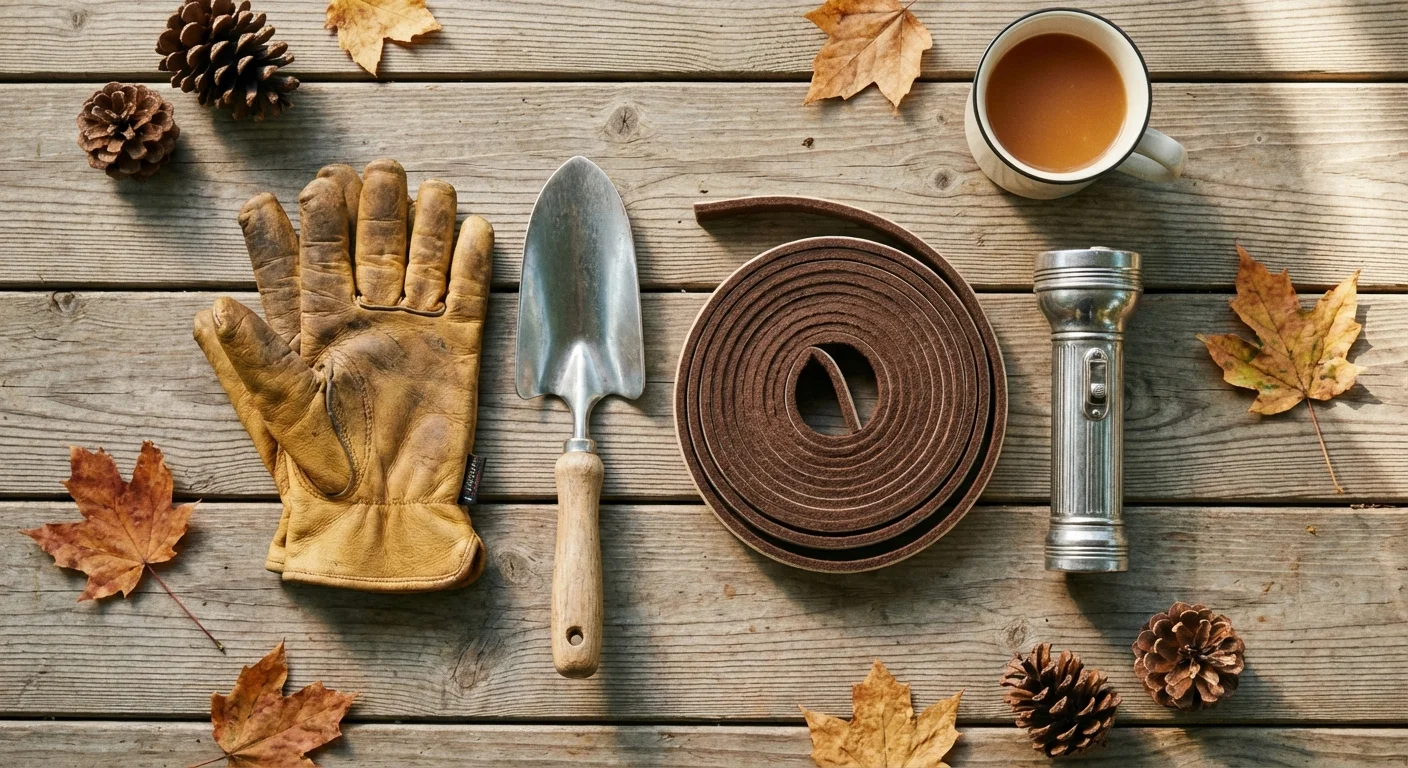
At a Glance: The Essentials
To make this comprehensive fall home maintenance checklist manageable, we divide the workload into five distinct phases. Tackle one phase per weekend starting in late September, and you will secure your entire home well before winter sets in:
- Phase 1: Exterior and Roof — Securing the building envelope against water and ice.
- Phase 2: Landscaping and Yard — Putting green spaces and outdoor tools into hibernation.
- Phase 3: Heating and HVAC — Optimizing indoor climate control for safety and efficiency.
- Phase 4: Windows, Doors, and Insulation — Eliminating drafts and trapping heat.
- Phase 5: Plumbing and Safety — Preventing pipe bursts and testing emergency systems.
Phase 1: Securing the Exterior and Roof
Your roof and exterior walls form the primary defense against the elements. Winter weather exploits the smallest cracks, turning minor leaks into major water damage through relentless freeze-thaw cycles.
Remember that addressing these issues now will make your spring home maintenance checklist much shorter when the seasons change.
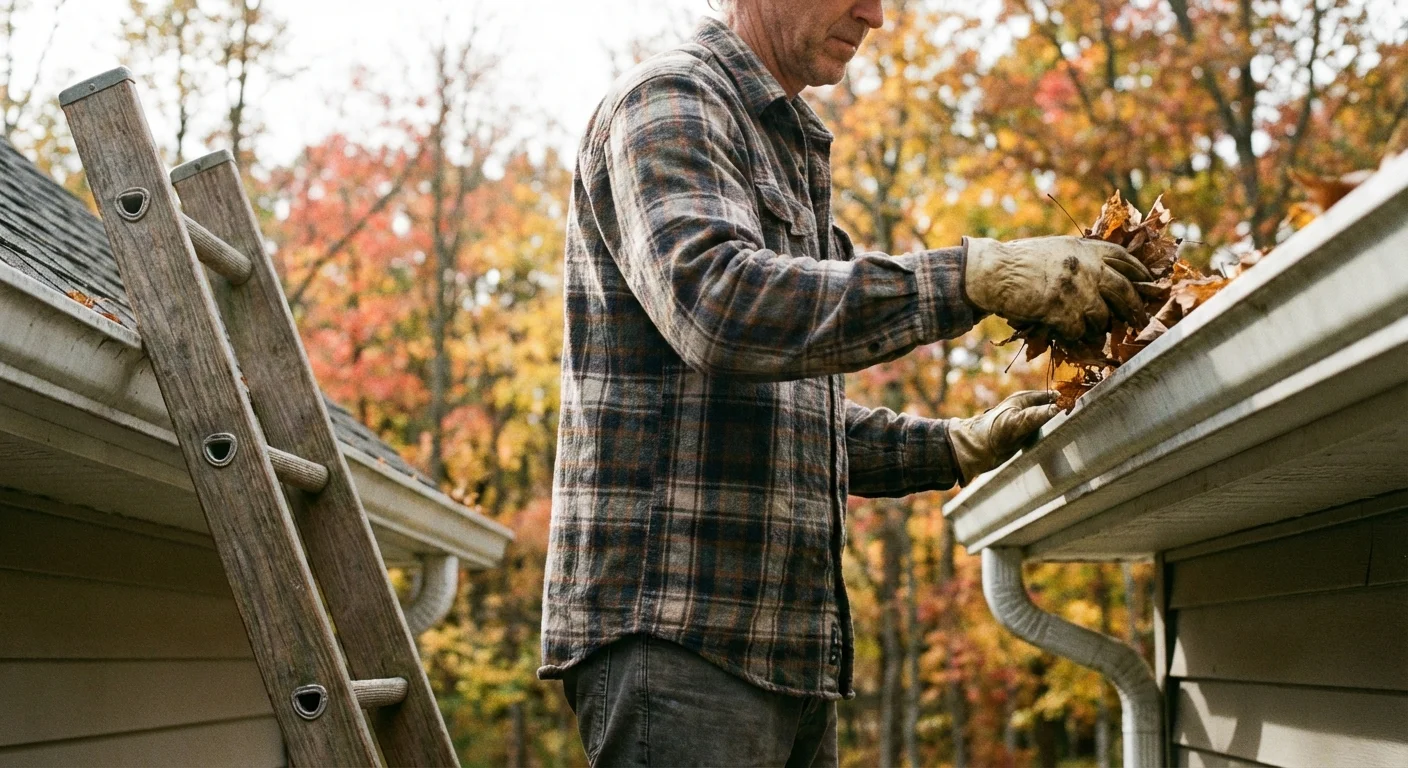
- Execute a thorough gutter cleaning fall routine. Pine needles, dead leaves, and roof grit accumulate rapidly in autumn. Scoop out the debris using a sturdy trowel and flush the remaining dirt with a high-pressure hose. Clogged gutters trap water, which freezes into heavy blocks of ice that can tear the aluminum right off your fascia boards.
- Flush and test downspouts. Ensure water flows freely from the gutters down to the ground. Add downspout extensions to direct water at least five feet away from your foundation; pooling water near the base of your home leads to flooded basements and cracked concrete.
- Inspect the roof for damaged shingles. Grab a pair of binoculars and scan your roof from the ground. Look for curling, missing, or cracked shingles, as well as degraded flashing around chimneys and vent pipes. High winter winds will easily rip compromised shingles away.
- Clear debris from roof valleys. Leaves naturally congregate in the valleys where two roof pitches meet. Sweeping these areas clean prevents moisture retention that accelerates shingle decay and wood rot.
- Seal driveway and walkway cracks. Inspect your concrete or asphalt driveway for fissures. Apply a specialized masonry or asphalt crack filler. If water penetrates these gaps and freezes, the expanding ice will force the pavement apart, creating massive potholes by spring.
- Examine exterior siding and trim. Walk the perimeter of your house looking for peeling paint, rotting wood, or gaps in the siding. Scrape away flaking paint and apply a fresh coat of exterior primer and paint to seal the wood against winter moisture.
- Check the foundation for structural cracks. Small hairline cracks are normal, but any crack wider than a pencil requires immediate sealing with masonry caulk. Moisture infiltration here causes devastating foundational heaving during deep freezes.
- Install or inspect gutter guards. If your property sits beneath heavy tree cover, installing micro-mesh gutter guards drastically reduces your maintenance workload while keeping debris out of the drainage system.
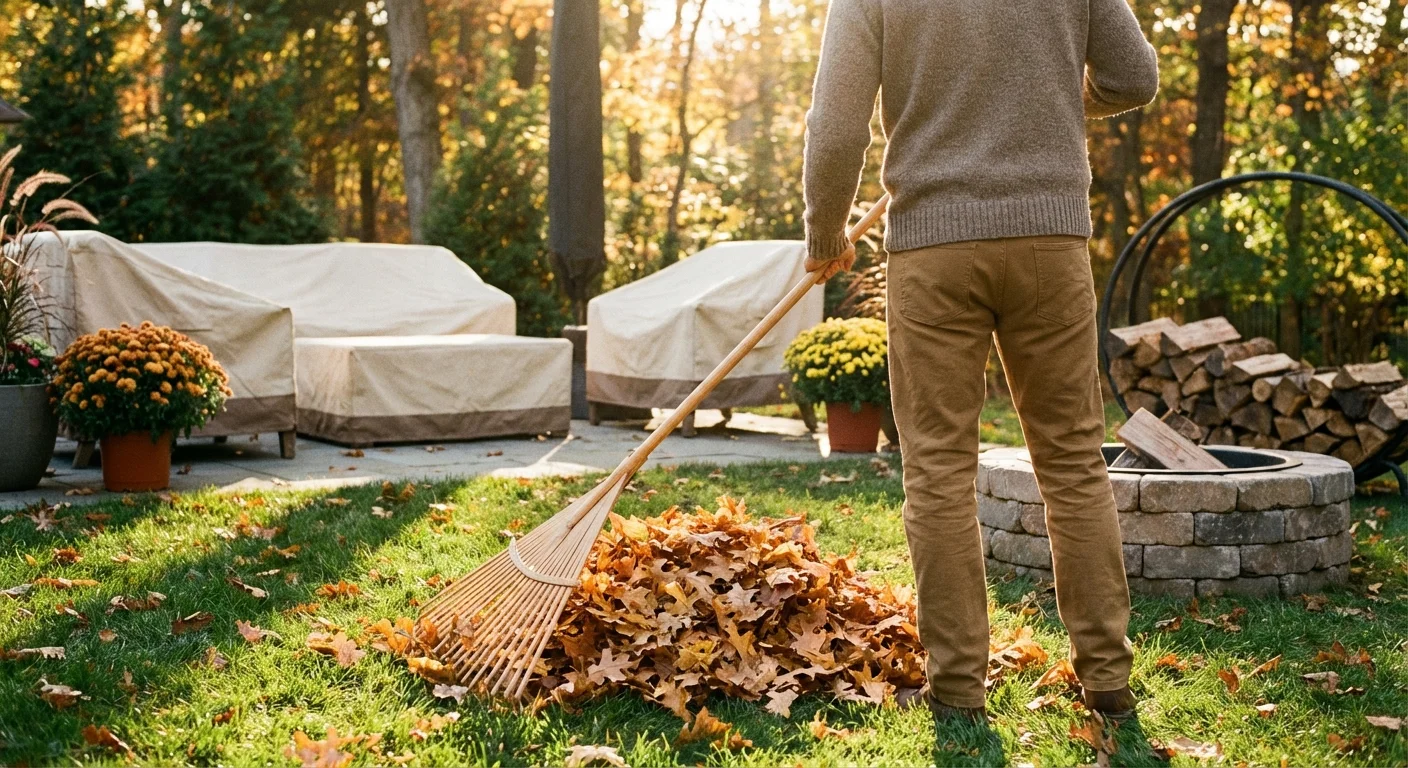
Phase 2: Landscaping and Yard Prep
Protecting your outdoor investments ensures they survive the dormant season and bounce back vibrantly when spring arrives.
Properly winterizing your lawn and garden ensures your outdoor spaces survive the dormant season and thrive next spring.
- Drain and disconnect all garden hoses. Remove hoses from exterior spigots, drain them completely, and coil them for indoor storage. Leaving a hose attached traps water in the pipe leading into your house, creating a high risk for a burst pipe inside your walls.
- Shut off exterior water valves. Locate the interior shut-off valves for your outdoor faucets. Close the valves, then go back outside and open the spigots to drain any remaining water in the line. Leave the exterior spigots open throughout the winter to allow for expansion.
- Winterize sprinkler and irrigation systems. Hire a professional to blow out your underground irrigation lines with an air compressor, or follow the manufacturer’s draining instructions. Subterranean pipes will shatter if water freezes inside them.
- Clean and store patio furniture. Wash outdoor chairs, tables, and cushions with a mild detergent. Allow them to dry completely to prevent mold growth, then store them in a shed, garage, or dry basement.
- Service your lawn equipment. Run your lawnmower until the gas tank is completely empty, or add a fuel stabilizer to the tank and run the engine for five minutes. Drain the oil, replace the spark plug, and clean the undercarriage so it is ready for immediate use next year.
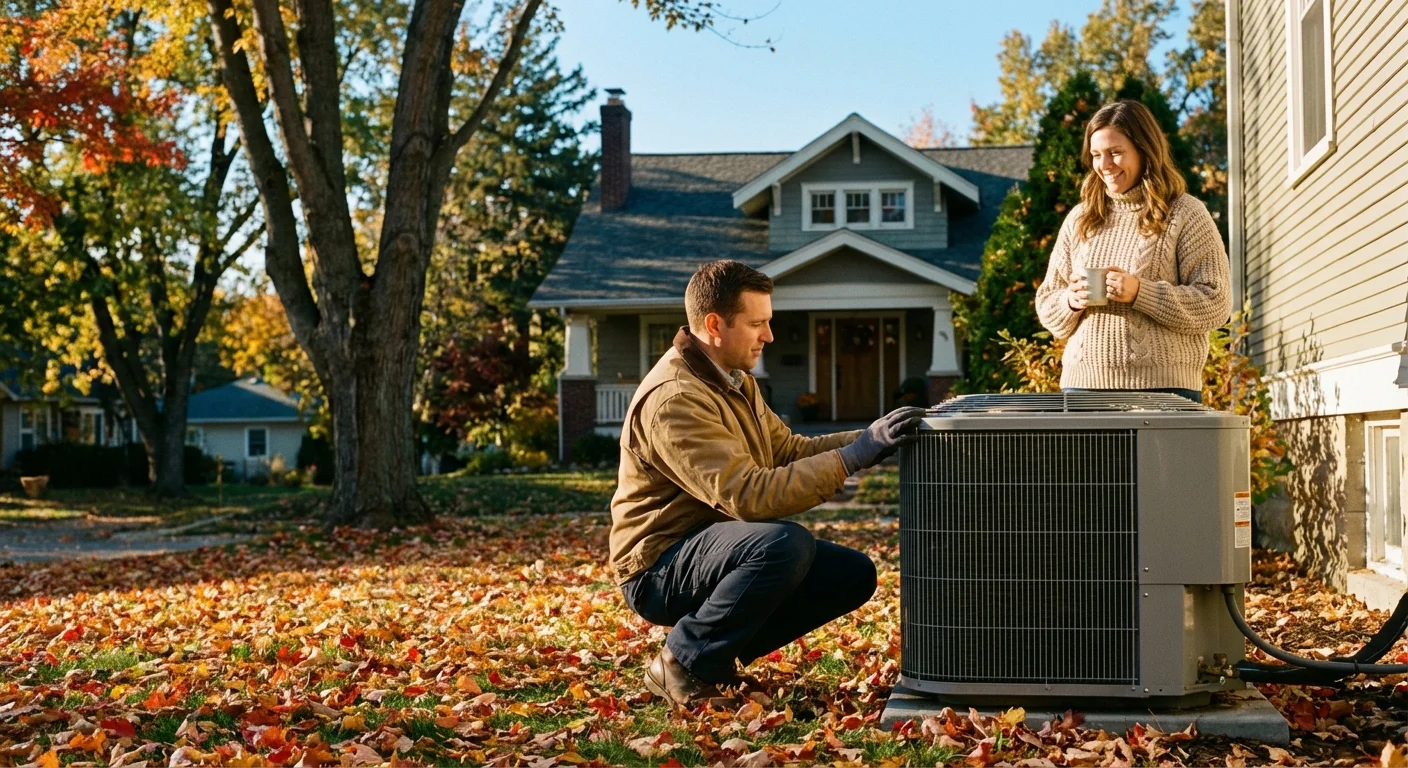
Phase 3: Heating and HVAC Systems
Your furnace works overtime from November through March. Preparing it now ensures reliable warmth and protects your family from hazardous malfunctions.
- Schedule professional fall HVAC maintenance. Hire a certified technician to tune up your furnace or heat pump. They will clean the burners, test the heat exchanger for dangerous carbon monoxide leaks, and ensure the blower motor operates at peak efficiency. Relying on Energy Star’s guidelines for heating efficiency can help you understand what a comprehensive tune-up should include.
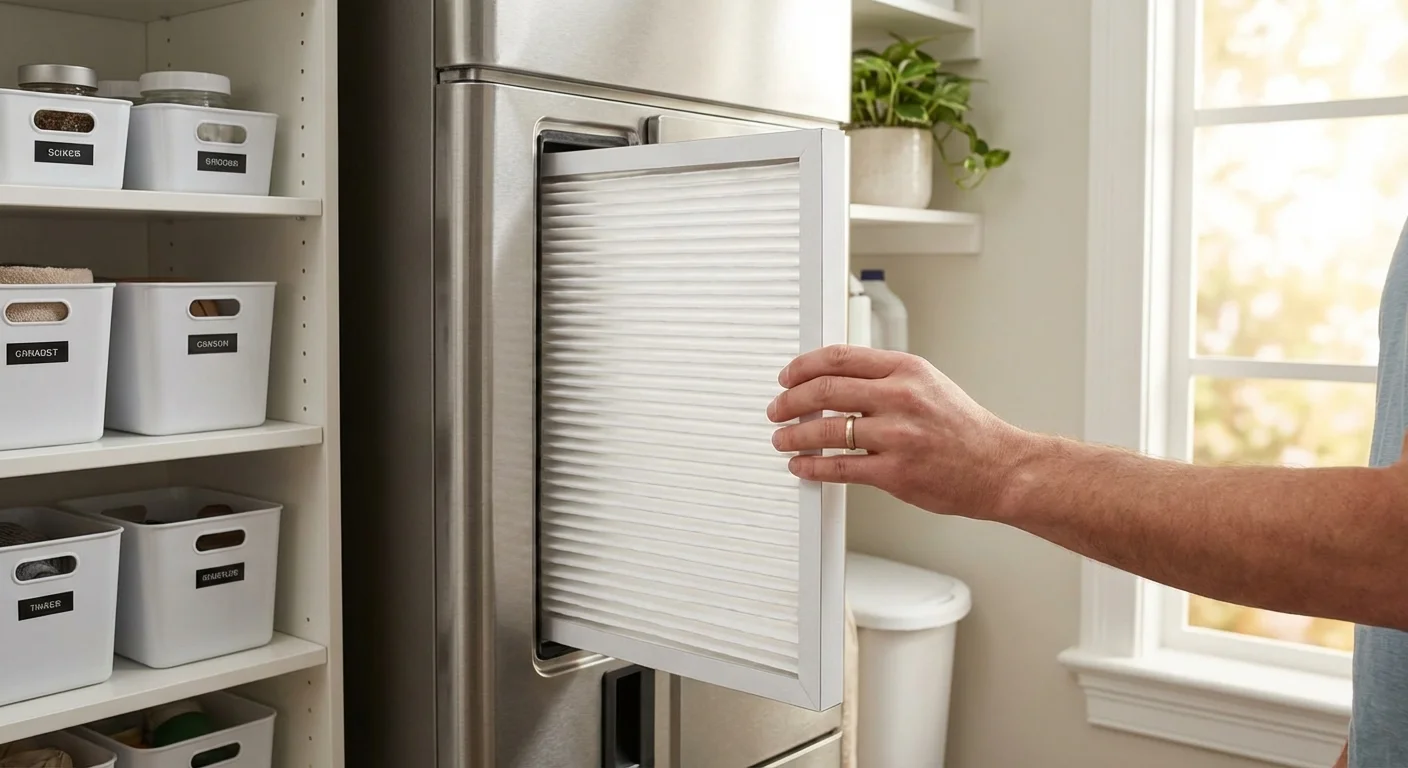
- Replace the furnace filter. Swap out your HVAC filter before turning the system on for the season. A clogged filter restricts airflow, forcing the blower motor to work harder, which increases your energy bills and shortens the lifespan of the unit. Replace the filter every 30 to 90 days throughout the winter.
- Test and calibrate the thermostat. Turn the heat on early in the season to ensure the system engages properly. Consider upgrading to a smart thermostat; these devices learn your schedule and automatically adjust temperatures to save money while you are asleep or away from home.
- Clean air vents and baseboard heaters. Vacuum the dust and pet hair from your supply and return registers. Move furniture or rugs that might block airflow to ensure your heating system distributes warm air evenly across every room.
- Inspect the chimney and fireplace. Creosote buildup in a chimney flue causes devastating house fires. Hire a certified chimney sweep to inspect the brickwork, clean the flue, and verify that the damper opens and closes securely.
- Reverse your ceiling fans. Locate the switch on the motor housing of your ceiling fans and reverse the blade direction so they spin clockwise. Run them on a low speed to gently push trapped warm air down from the ceiling into your living space.
“A home is a living, breathing entity. Preventative maintenance is the most reliable way to protect your investment and ensure your family’s comfort through the harshest seasons.” — Bob Vila, Home Improvement Expert
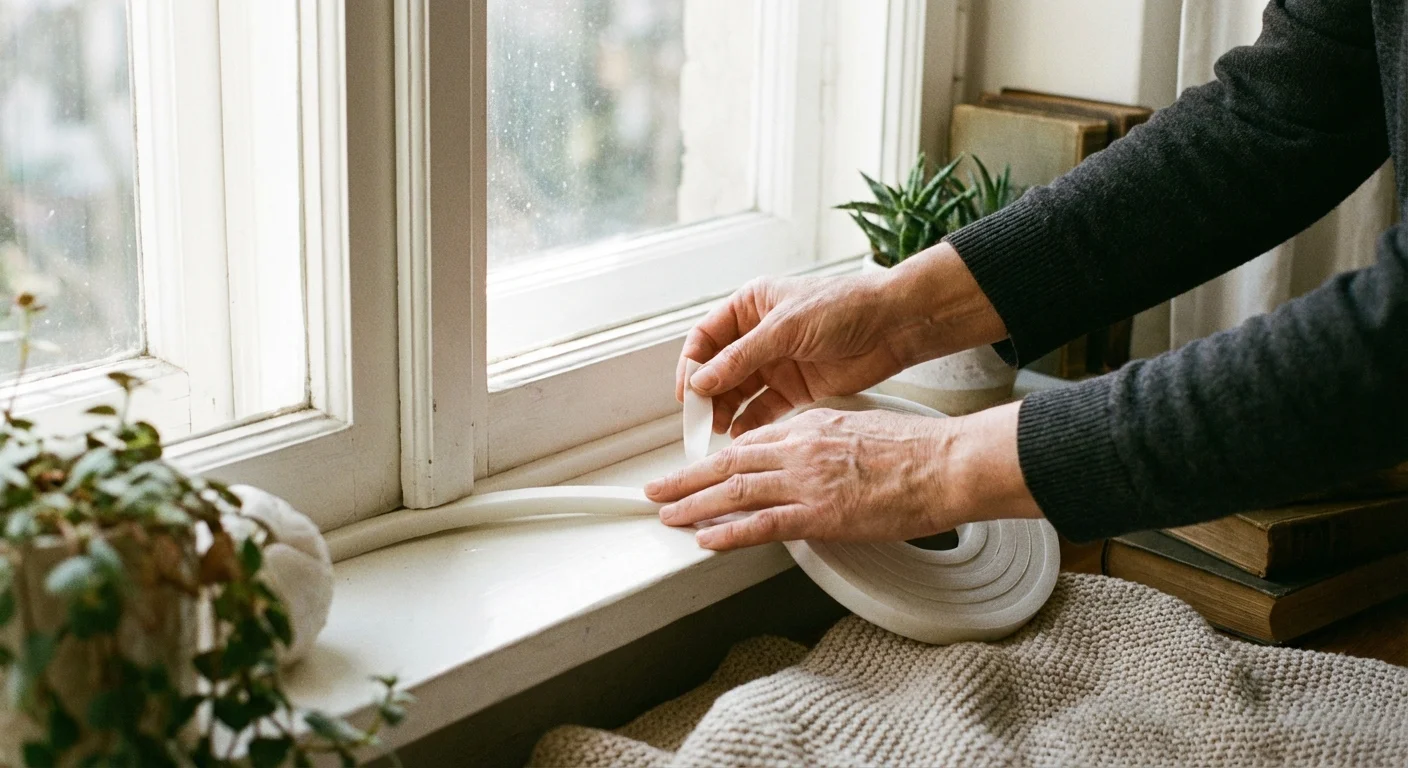
Phase 4: Sealing Windows, Doors, and Insulation
According to building experts, a tiny 1/8-inch gap underneath a standard exterior door lets in as much freezing air as a 2.4-inch hole punched directly through your wall. Draft-proofing is the most cost-effective way to improve indoor comfort.
Beyond keeping the cold out, sealing these exterior gaps is a vital part of fall pest prevention to keep rodents and bugs from seeking warmth inside.
While you are sealing out drafts, consider making your living room cozier to create a warm sanctuary for the coming months.
- Apply fresh weatherstripping to doors. Peel away worn, compressed weatherstripping around the door frames. Apply self-adhesive foam or V-strip weatherstripping to create an airtight seal when the door closes.
- Install door sweeps. Attach heavy-duty door sweeps to the bottom of all exterior doors to block cold drafts from sweeping across your floors.
- Caulk around exterior window frames. Inspect the perimeter of your windows on the outside of the house. Scrape away cracked or missing caulk and apply a continuous bead of exterior-grade, paintable silicone caulk to seal out moisture and wind.
- Swap screen doors for storm doors. Remove the mesh screens from your storm doors and windows, clean them, and store them. Install the heavy glass storm panels to create a secondary thermal barrier against freezing winds.
- Inspect and upgrade attic insulation. Peak your head into the attic. If you can clearly see the tops of the floor joists, your insulation levels are too low. Adding a layer of unfaced fiberglass batts or blown-in cellulose drastically reduces the amount of heat escaping through your roof.

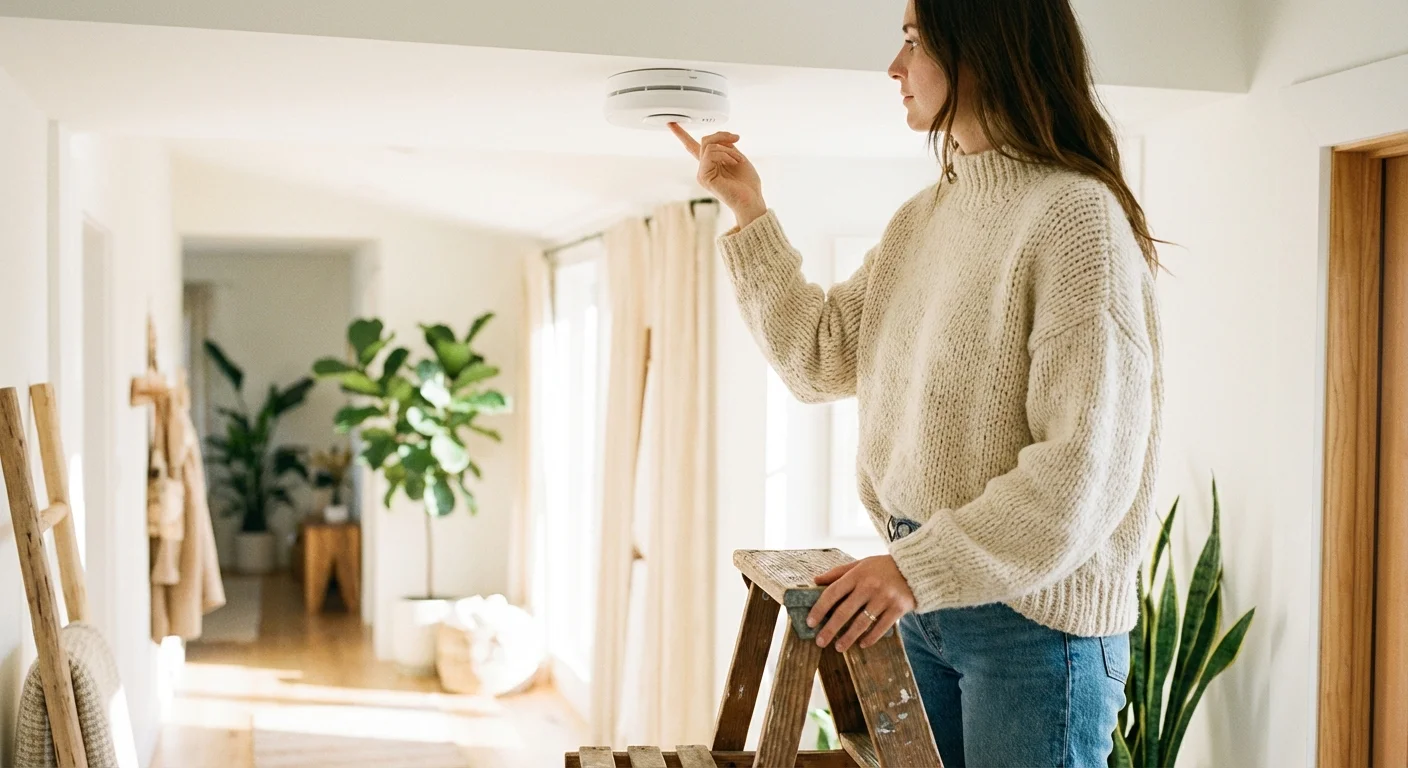
Phase 5: Plumbing Health and Home Safety
The final phase focuses on internal systems that safeguard your property against catastrophic water damage and protect your family in emergencies.
- Insulate exposed plumbing pipes. Wrap pipes located in unheated areas—such as basements, crawlspaces, attics, and garages—with foam pipe insulation sleeves. Secure the seams with duct tape. This simple task prevents the catastrophic damage caused by burst pipes. For detailed techniques, review This Old House plumbing winterization guides.
- Flush the hot water heater. Connect a hose to the drain valve at the bottom of your water heater and flush a few gallons into a floor drain or bucket. This removes sediment buildup that reduces heating efficiency and damages the tank lining over time.
- Test the sump pump. Pour a five-gallon bucket of water into the sump pit to verify the pump activates, drains the water rapidly, and shuts off automatically. A failed sump pump during a winter thaw guarantees a flooded basement.
- Test smoke and carbon monoxide detectors. Press the test button on every alarm in the house. Because windows remain tightly closed and furnaces run constantly during winter, the risk of carbon monoxide poisoning spikes drastically. Review the EPA recommendations on indoor air quality to understand proper detector placement.
- Replace detector batteries. Regardless of whether the alarms chirp, install fresh batteries in all smoke and carbon monoxide detectors. Write the date on the battery with a marker so you know exactly when it was changed.
- Clean the dryer lint trap and exhaust vent. Disconnect the flexible exhaust hose behind your clothes dryer and vacuum out the accumulated lint. A restricted dryer vent not only wastes electricity by prolonging drying times but also serves as a severe fire hazard.

Comparing Maintenance Strategies: DIY vs. Professional
While an ambitious homeowner can handle most fall home maintenance checklist tasks, certain jobs require specialized tools or carry significant safety risks. Use this comparison table to decide where to invest your sweat equity versus when to open your wallet.
| Maintenance Task | DIY Cost Range | Professional Cost Range | Skill/Risk Level |
|---|---|---|---|
| Gutter Cleaning | $10 – $30 (Gloves, bags) | $150 – $250 | Moderate Risk (Ladder use) |
| HVAC Tune-Up | $15 – $25 (Filter only) | $100 – $200 | High Skill (Requires certification) |
| Chimney Sweeping | $40 – $80 (Brushes) | $150 – $300 | High Risk (Roof access, technical knowledge) |
| Weatherstripping & Caulking | $20 – $50 (Materials) | $150 – $400 | Low Risk (Very DIY-friendly) |
| Irrigation Blowout | N/A (Requires large compressor) | $75 – $150 | Moderate Skill (Risk of pipe damage) |
What Can Go Wrong: The Cost of Skipping Maintenance
Ignoring autumn home tasks rarely results in an immediate crisis; instead, the damage creeps up silently over the winter months. One of the most destructive consequences of deferred maintenance is the formation of ice dams. When attic insulation is poor and gutters are clogged with debris, heat escaping through the roof melts the bottom layer of snow. This water trickles down to the cold eaves and refreezes, creating a solid dam of ice. Subsequent melting water backs up under the roofing shingles, pouring directly into your ceilings and wall cavities.
Similarly, failing to detach a simple garden hose can cause water to freeze deep inside the spigot pipe. The expanding ice creates immense pressure until the copper or PEX tubing splits open. You often won’t notice the rupture until the frozen pipe thaws in the spring, sending hundreds of gallons of water flooding into your finished basement or drywall.
When to Call a Professional
Your safety and the structural integrity of your home must always come first. Recognize your limits and call a licensed professional under these circumstances:
- Steep or Multi-Story Roofs: If your roof has a pitch steeper than 6/12, or if your home is taller than two stories, do not attempt to inspect shingles or clean gutters yourself. Fall injuries are severe and common.
- Electrical or Gas Appliance Issues: Never attempt to repair the internal components of a gas furnace, boiler, or electrical panel. These systems carry extreme risks of fire, electrocution, or gas leaks.
- Structural Foundation Cracks: While sealing hairline surface cracks is a standard DIY task, any foundation crack that is wider than a quarter-inch, runs horizontally, or features uneven edges requires an immediate inspection by a structural engineer.
- Extensive Chimney Damage: If you spot crumbling bricks, missing mortar, or heavy, glazed creosote buildup inside your chimney flue, stop using the fireplace entirely until a mason or certified sweep executes repairs.
Frequently Asked Questions
When is the best time to start my fall home maintenance checklist?
Begin your exterior tasks in late September or early October, shortly after the first major leaf drop but well before freezing temperatures arrive. Tackle interior tasks like HVAC maintenance and insulation checks in late October or November.
How often do I really need to schedule fall HVAC maintenance?
Heating systems require an annual inspection. Even if the unit appears to be running perfectly, professional tuning catches microscopic cracks in heat exchangers, tests safety limit switches, and prevents the unit from overworking during the coldest months.
Do I need to clean my gutters if I don’t have tall trees near my house?
Yes. While leaves are the primary culprits for blockages, gutters also accumulate asphalt grit from roof shingles, bird nests, wind-blown dirt, and tennis balls. Inspect them at least once a year, regardless of your landscaping.
Should I completely cover my outdoor AC condenser unit for winter?
Avoid wrapping your entire AC unit in a plastic tarp, as this traps ground moisture inside the housing, accelerating rust and inviting rodents to build winter nests. Instead, place a flat piece of plywood weighted with a brick over the top fan grate to prevent falling icicles and heavy debris from damaging the fan blades.
Completing this comprehensive checklist transforms your house from a vulnerable structure into a resilient, efficient home ready to face the winter months. By investing a few weekends into strategic upkeep, you secure your property’s value, optimize your energy usage, and guarantee a warmer, safer environment for your family.
This is educational content based on general best practices. Individual results vary based on your home, budget, and circumstances. Always prioritize safety and consult professionals for major projects.
Last updated: February 2026


Leave a Reply