
You crank up the thermostat, wrap yourself in a heavy fleece blanket, and yet a persistent chill still seems to creep across the living room floor. If you constantly battle drafts in the winter or struggle to keep your house cool during the summer months, your heating and cooling systems are likely working overtime to compensate for a weak thermal envelope. The reality is that up to 30 percent of a home’s heating and cooling energy escapes through poorly insulated roofs, walls, and floors. Upgrading your thermal barrier is one of the single most effective investments you can make to lower your utility bills and radically improve your daily comfort.
For a broader look at seasonal maintenance, check out our room-by-room guide to winterizing your home before the first frost hits.
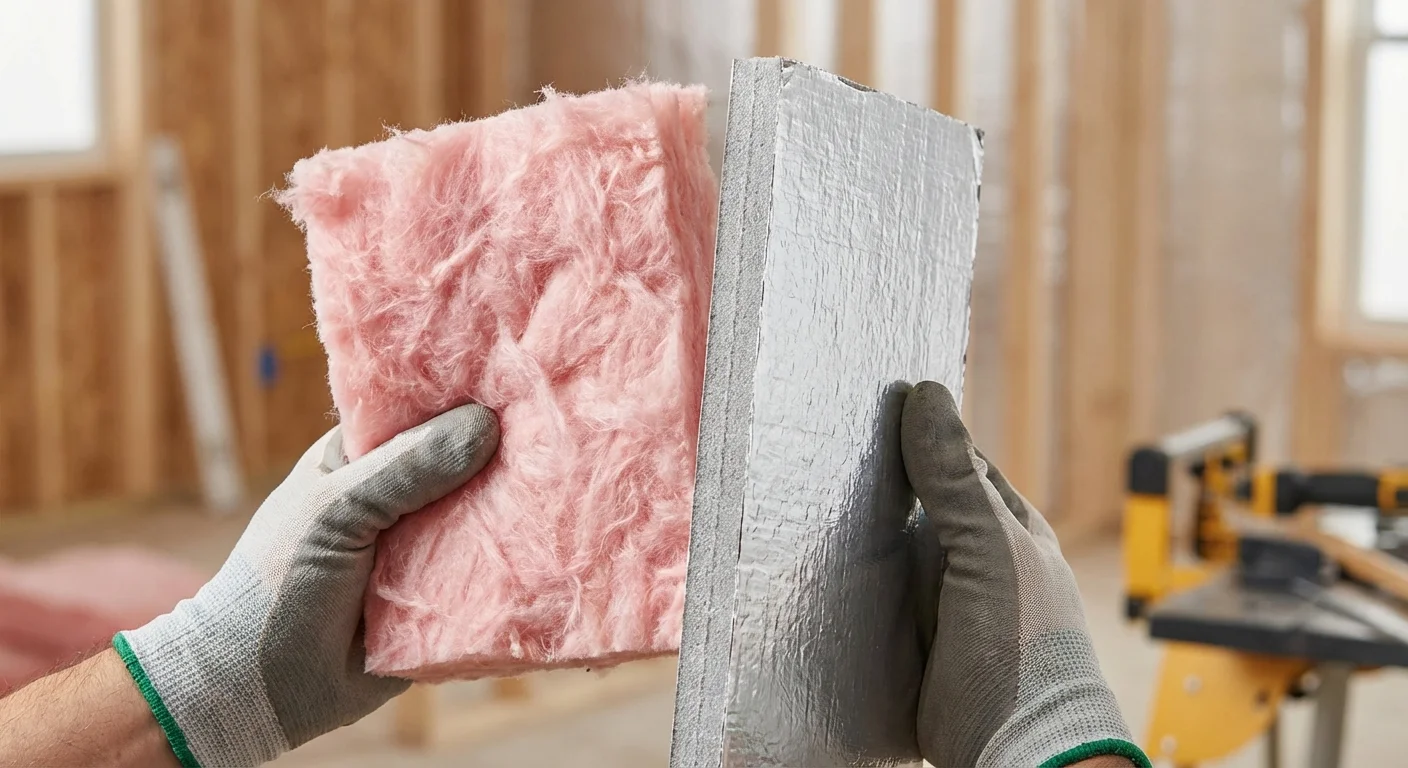
Approaching a whole-house insulation project can feel overwhelming when you are staring at endless rolls of pink fiberglass at the hardware store. However, tackling the project methodically makes it entirely manageable. This comprehensive home insulation guide breaks the process down so you understand exactly where to start, what materials to choose, and how to execute the upgrades effectively.

The Essentials: What You Will Learn
- Understand the metrics: Learn how to decode R-values and select the right materials for your specific climate zone.
- Target the biggest leaks: Discover why the attic should always be your first priority for energy efficient insulation.
- Air seal before you insulate: Uncover the professional secret that stops drafts dead in their tracks before laying down a single batt of fiberglass.
- Navigate room by room: Follow a structured room-by-room insulation plan to create a continuous thermal barrier around your living space.
Decoding Insulation: R-Values and Materials
Before you rip open a wall or climb into the attic, you need to understand how the industry measures insulation performance. The effectiveness of any insulating material is measured by its R-value—a metric that indicates the material’s resistance to heat flow. The higher the R-value, the greater the insulating power. The ideal R-value for your home depends heavily on your geographic location; homes in freezing northern climates require significantly higher R-values than those in mild southern regions. You can consult the Energy Star climate zone maps to determine the exact requirements for your zip code.
If your rooms still feel chilly after sealing leaks, you can also learn how to make any room feel warmer without touching the dial.
Selecting the best insulation for homes involves balancing your budget, your DIY comfort level, and the specific application area. There is no universal perfect material—each type serves a distinct purpose within the home.
| Insulation Type | Typical R-Value (per inch) | Best Application Areas | Pros & Cons |
|---|---|---|---|
| Fiberglass Batts & Rolls | R-2.9 to R-3.8 | Exposed wall cavities, attic floors, unfinished basement ceilings | Pros: Affordable, easy for DIY installation. Cons: Loses effectiveness if compressed; irritating to skin and lungs. |
| Blown-in Cellulose | R-3.1 to R-3.8 | Finished walls, irregularly shaped attics, low-clearance areas | Pros: Excellent coverage around obstructions; eco-friendly (recycled paper). Cons: Settles over time; requires renting a blower machine. |
| Rigid Foam Board | R-4.0 to R-6.5 | Basement walls, foundation exteriors, unvented low-slope roofs | Pros: High insulating value with minimal thickness; acts as a vapor barrier. Cons: Must be custom cut to fit gaps; requires a fire-rated covering. |
| Spray Polyurethane Foam (Closed-Cell) | R-6.0 to R-7.0 | Rim joists, hard-to-reach cavities, total home envelopes | Pros: Superior air sealing and high R-value; completely blocks moisture. Cons: Expensive; typically requires professional installation. |
The Attic: Your First Line of Defense
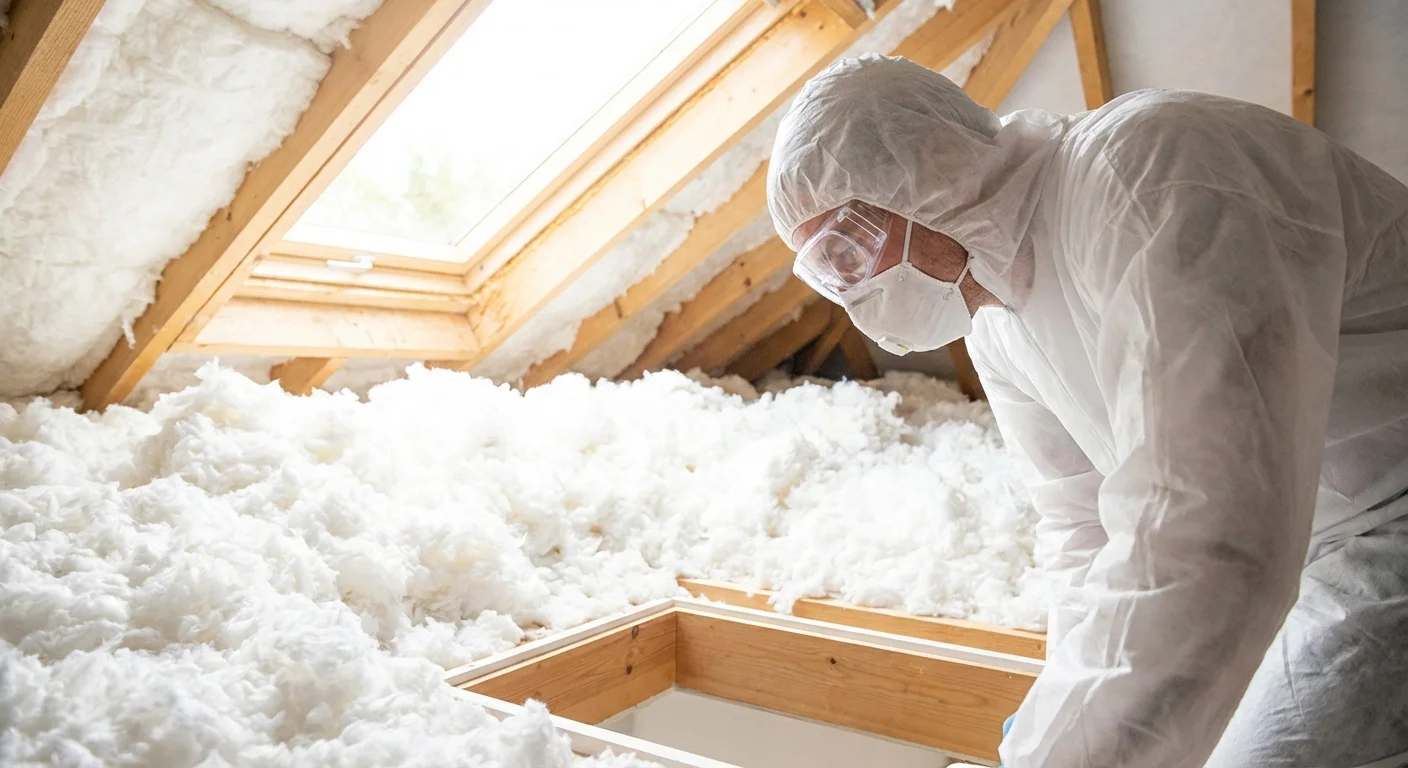
If you only have the budget to insulate one space in your home, make it the attic. Because heat naturally rises, a poorly insulated attic acts like an open chimney, pulling expensive heated air up through the ceiling and venting it directly outside. Conversely, during the summer, extreme heat bakes your roof deck and radiates downward into your living quarters.
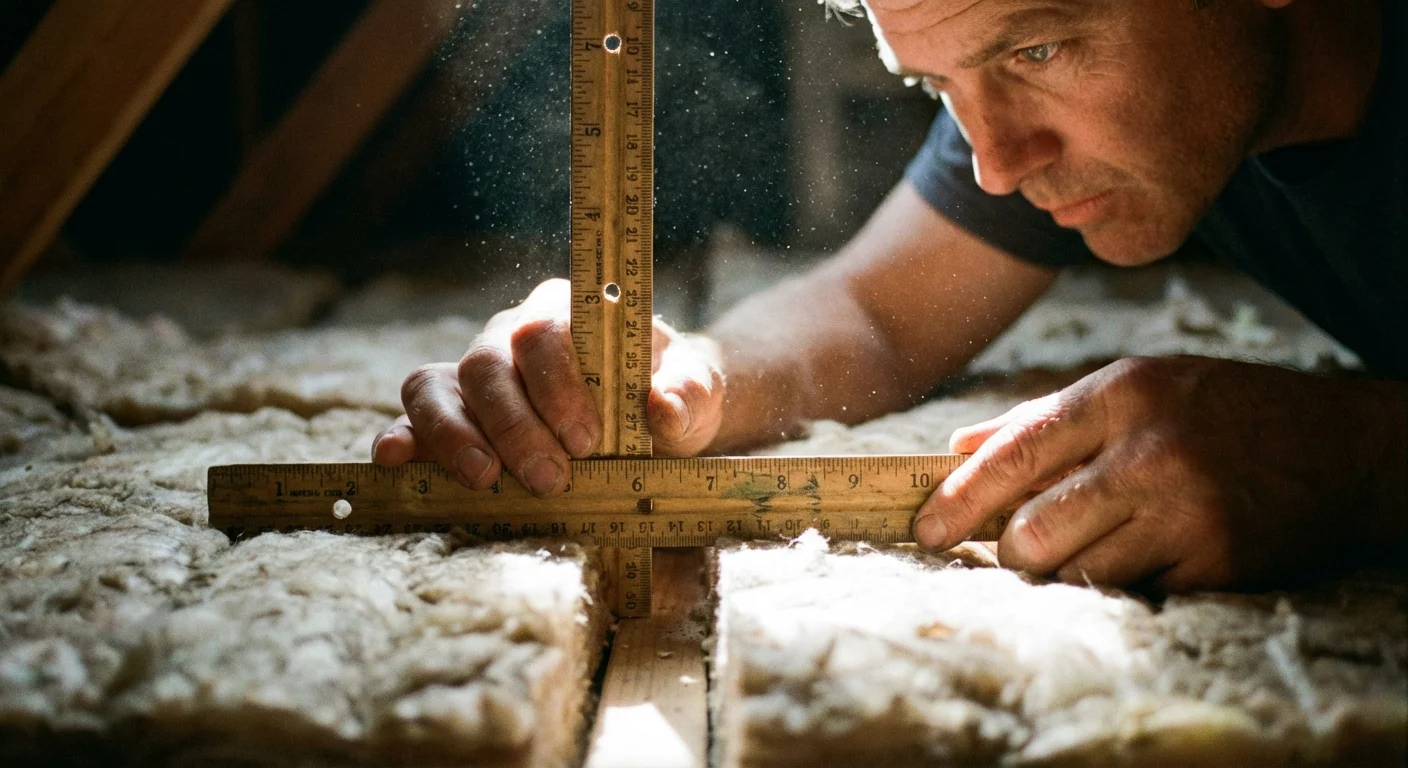
To determine if you need more attic insulation, simply look across your unfinished attic floor. If the insulation sits below or exactly level with the wooden floor joists, you need to add more. Ideally, you should not be able to see the joists at all. A well-insulated attic typically requires anywhere from 10 to 14 inches of insulation to achieve a rating of R-38 to R-60, depending on your climate.
Before adding a single layer of fiberglass or blowing in cellulose, you must address air leaks. Insulation filters the air, but it does not stop it from moving. Grab a few cans of expanding foam sealant and target the gaps around plumbing vent pipes, electrical wires, and recessed lighting fixtures that penetrate the ceiling below. Be cautious around older recessed lights—unless they are rated “IC” (Insulation Contact), you must keep insulation at least three inches away to prevent fire hazards. Once the gaps are sealed, you can roll unfaced fiberglass batts over your existing insulation perpendicular to the joists to build up your thermal barrier.
“A well-insulated and air-sealed home is your best defense against high utility bills and uncomfortable drafts. You cannot out-heat or out-cool a leaky house.” — Richard Trethewey, Plumbing and Heating Expert
Exterior Walls: Wrapping the House
Figuring out how to insulate house walls without tearing down your interior drywall can seem like a daunting puzzle. If your home was built before the 1970s, there is a strong chance your exterior walls are entirely empty. You can check this by turning off the power, removing an outlet cover on an exterior wall, and shining a flashlight into the cavity beside the electrical box.
For empty walls, the most practical solution is dense-packed blown-in cellulose. Professionals—or highly ambitious DIYers—can drill small holes in the exterior siding or interior drywall between each wall stud. They then insert a long hose and blow loose-fill cellulose into the cavity until it forms a dense, solid mat. This method not only provides excellent thermal resistance but also significantly reduces noise transmission from the street. If you are already planning a major renovation that involves gutting the walls down to the studs, upgrading to closed-cell spray foam or high-density fiberglass batts will yield exceptional results.

Basements and Crawl Spaces: Stopping the Chill
Cold floors on the main level of your home almost always point to an uninsulated basement or crawl space. These subterranean spaces are notorious for harboring moisture and funneling frigid air upward. The approach you take depends entirely on whether your basement is finished or unfinished.
If you have an unconditioned, unfinished basement, your primary focus should be the rim joists—the perimeter area where the wooden house frame rests on the concrete foundation. This joint is a massive source of air infiltration. Cut pieces of rigid foam board to fit snugly against the rim joist between each floor joist, and seal the edges with expanding spray foam. This simple weekend project delivers an immediate, noticeable reduction in first-floor drafts.
For crawl spaces, modern building science recommends encapsulating the space. This involves laying a heavy-duty vapor barrier across the dirt floor, sealing it tight, and insulating the foundation walls with rigid foam board rather than stuffing fiberglass between the floor joists. According to experts at This Old House, sealing the crawl space transforms it into a conditioned zone, protecting your plumbing from freezing and preventing humid summer air from rotting your floor framing.
Drafty Doors and Windows: The Quick Fixes
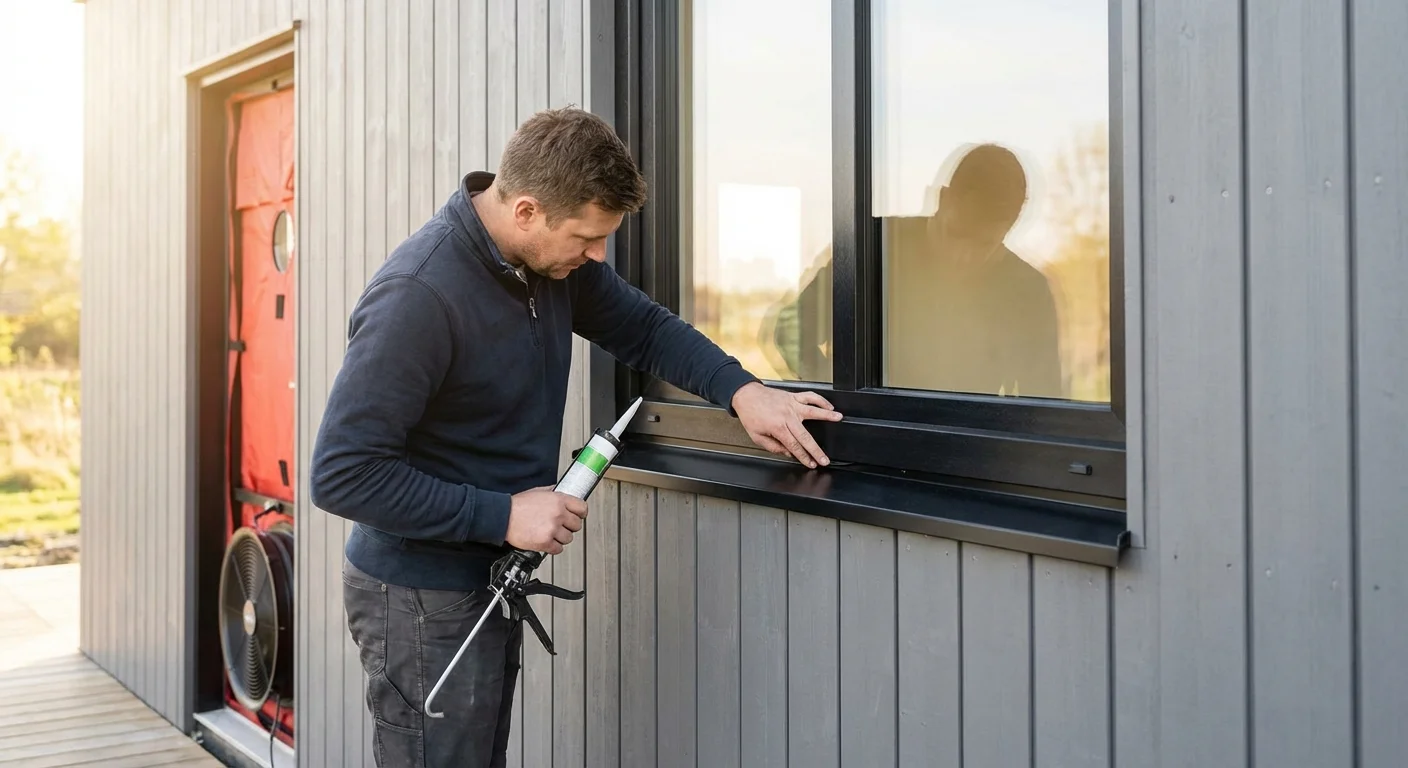
While installing replacement windows is a massive expense, addressing the areas around your existing windows and doors provides an excellent return on investment. Even the highest-quality glass will feel drafty if the frame surrounding it is improperly sealed.
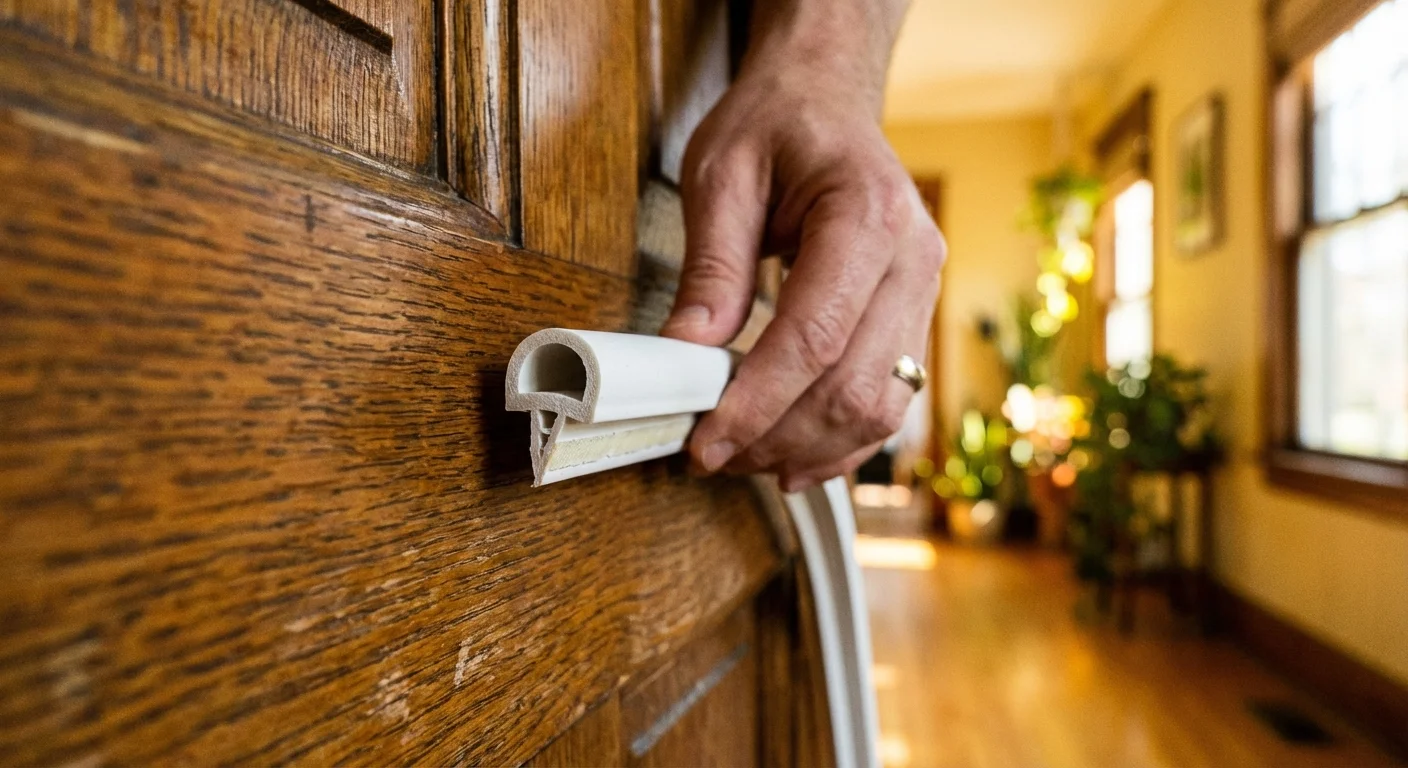
These simple door and window seals are part of a complete weatherization strategy to protect your property from the elements.
Start by checking the exterior perimeter of your window frames and door casings. Over time, exterior caulk dries, shrinks, and cracks, allowing wind to drive right past the siding. Scrape away the old material and apply a fresh bead of high-quality exterior grade silicone or polyurethane caulk. On the inside, apply adhesive-backed V-strip weatherstripping to the window sashes so they compress tightly when locked. For exterior doors, install a sturdy door sweep at the bottom threshold to block winter winds; this simple upgrade takes less than ten minutes but instantly stops the draft that freezes your toes in the hallway.

Floors and Garages: Overlooked Energy Drains
Homeowners frequently forget about the unique architectural features that expose floors to outside temperatures. If you have a bedroom situated over an unheated garage, or a living room that cantilevers over the foundation, you are dealing with exposed floors. When the temperature in the garage drops to freezing, the floor of the bedroom above it acts like an ice block.
To fix this, you need to treat the garage ceiling exactly like an exterior wall. If the ceiling is unfinished, fill the joist bays with fiberglass batts, ensuring the paper vapor barrier faces upward toward the warm living space. To maximize the effect, consider securing rigid foam board directly across the bottom of the joists before installing drywall; this creates a thermal break that stops cold from transferring through the wooden joists themselves.
Avoiding Common Errors
Even the most enthusiastic DIYers can inadvertently sabotage their insulation efforts if they do not understand how the materials behave within a home’s ecosystem. Keep an eye out for these frequent mistakes:
- Blocking soffit vents: When adding attic insulation, it is incredibly easy to accidentally shove fiberglass batts into the eaves, blocking the soffit vents. Your roof needs constant airflow to prevent moisture buildup and ice dams. Always install plastic foam baffles in the eaves before laying insulation to keep the air pathways open.
- Compressing fiberglass: Fiberglass insulation traps tiny pockets of air to slow heat transfer. If you cram a 6-inch thick batt into a 4-inch wall cavity, you squeeze out the air pockets, drastically reducing its R-value. Always use the correctly sized material for the space.
- Installing multiple vapor barriers: Moisture must be able to escape your walls. If you layer new kraft-faced insulation over old kraft-faced insulation in your attic, you create a moisture trap between the two layers that will inevitably lead to mold and wood rot. Only use faced insulation for the first layer against the conditioned space; use unfaced batts for all subsequent layers.

When DIY Isn’t Enough
While rolling out fiberglass is a manageable weekend task, certain situations pose serious safety risks and require professional intervention. Call a certified contractor if you encounter any of the following scenarios:
- Vermiculite insulation: If your older home has attic insulation that looks like grayish-brown, lightweight pebbles, stop immediately. Much of the vermiculite installed before 1990 contains asbestos. Do not disturb it; hire an abatement professional to test and safely remove it.
- Knob and tube wiring: Homes built before the 1950s often feature knob and tube electrical wiring. Burying these active, uninsulated wires under modern insulation prevents them from dissipating heat, creating an extreme fire hazard. An electrician must replace the wiring before you can insulate.
- Significant water damage: If your roof is actively leaking or your basement walls are crumbling from hydrostatic pressure, adding insulation will only accelerate the rot. You must resolve the water intrusion and structural damage before attempting to weatherize the space.
Frequently Asked Questions
What is the cheapest way to insulate an old house?
The most cost-effective method is to prioritize air sealing and attic insulation. Expanding foam sealant, caulk, and weatherstripping cost very little but offer massive energy returns by stopping drafts. Once sealed, laying unfaced fiberglass batts over your existing attic insulation is highly affordable and provides the best return on investment compared to opening up walls.
Does internal wall insulation cause dampness?
It can, but only if installed incorrectly. If a vapor barrier is placed on the wrong side of the insulation, or if existing moisture issues in the masonry exterior are ignored, condensation can become trapped inside the wall cavity. Always consult local building codes to ensure your vapor barrier faces the correct direction for your climate zone (typically facing the heated interior in cold climates).
How long does insulation last?
Modern fiberglass and mineral wool insulation can last up to 100 years if kept perfectly dry. Cellulose typically performs well for 20 to 30 years but may settle and require a top-up. However, if any insulation material becomes waterlogged from a roof leak or plumbing failure, it loses its insulating properties and must be removed and replaced immediately.
Is spray foam really worth the extra cost?
For specific applications, yes. Closed-cell spray foam acts as both an insulator and an impenetrable air and vapor barrier. While it is significantly more expensive than fiberglass, it is the best insulation for homes in extreme climates or for treating notoriously leaky areas like basement rim joists and vaulted ceilings where traditional batts fail to provide an adequate seal.
Taking Control of Your Home’s Climate
Mastering room by room insulation is not about achieving perfection in a single weekend; it is about making strategic, incremental improvements that compound over time. Start by venturing into your attic to assess your baseline, armed with a tape measure and a flashlight. Once you address the major thermal leaks at the very top and bottom of your house, you will immediately notice the furnace cycling less frequently and the morning drafts fading away.
Whether you decide to spend your Saturday sealing window casings with fresh caulk or scheduling a contractor to blow cellulose into your exterior walls, every step you take brings you closer to a cozier, more efficient living space. The tips in this article are meant as general guidance. Your specific situation—including your home’s age, layout, and local building codes—may require different approaches. When in doubt, consult a professional to ensure your home remains safe, dry, and perfectly comfortable year-round.
Last updated: February 2026


Leave a Reply