Your kitchen cabinets endure daily use, spills, and trends. Over time, they can make your entire kitchen feel dated or worn. A full kitchen renovation often carries a hefty price tag, typically ranging from $15,000 to $50,000 or more, making it a distant dream for many homeowners and renters. However, you do not need to embark on a major overhaul to transform your space. Small, strategic changes can create a dramatic impact, leaving your kitchen looking like it had a professional makeover, all without breaking your budget.
Incorporating vertical storage ideas on nearby walls can also help clear clutter from your newly updated countertops.
If you are working with a limited floor plan, combining these cosmetic updates with tiny kitchen organization can make your cooking area feel much more spacious.
This article provides practical, actionable insights for five high-impact kitchen cabinet updates you can achieve for under $100 each. These budget home upgrades focus on enhancing both aesthetics and functionality, helping you create a kitchen you love without financial strain. We will walk through each update, detailing what you need, how to do it, and what to expect, ensuring you feel confident in tackling these projects yourself.
Why Kitchen Cabinet Updates Matter Beyond Aesthetics
Your kitchen functions as the heart of your home. It serves as a place for cooking, gathering, and often, homework or casual dining. Outdated or poorly maintained cabinets can detract from this central space, impacting both its visual appeal and your daily efficiency. Upgrading your kitchen cabinets goes beyond superficial changes, it significantly influences your home’s overall atmosphere and your personal comfort.
To keep your kitchen and the rest of your home in peak condition, it is helpful to follow a monthly home maintenance calendar for regular upkeep.
Functionality stands as a primary benefit. When your cabinets look good, you often feel more motivated to keep them organized. Disorganized cabinets, on the other hand, lead to wasted time searching for items and a general sense of chaos. Even small budget home upgrades can inspire you to declutter and optimize your storage, creating designated areas or “zones” for specific activities. For example, a baking zone might include all your flours and sugars in one cabinet, while pots and pans reside near the stove.
The psychological impact also proves considerable. A fresh, clean kitchen environment reduces stress and enhances your mood. Imagine starting your day in a bright, updated kitchen versus a drab, outdated one. Studies suggest that organized spaces contribute to improved focus and a greater sense of calm. These cheap kitchen cabinet updates contribute directly to that positive feeling, improving your daily experience without the stress of a full renovation.
Finally, these updates offer a fantastic return on investment, particularly if you plan to sell your home in the future. While full renovations yield a high return, smaller, impactful updates deliver a strong visual appeal to potential buyers without the associated high costs. A refreshed kitchen often becomes a significant selling point, making your home more attractive and potentially increasing its market value. Even if selling is not your immediate goal, you gain immense enjoyment from an updated, functional space.
Setting Realistic Expectations for Budget Upgrades
Embarking on any home improvement project, even small ones, requires setting clear expectations. While these five updates promise a significant visual upgrade for under $100 each, they will not magically transform a structurally unsound kitchen into a brand-new space. Your goal with these budget home upgrades is to enhance what you already have, making it look and function better, not to rebuild it from the ground up.
If you enjoy the satisfaction of these quick kitchen wins, you might also want to organize your entryway in under an hour to improve your home’s daily flow.
Understand that “under $100” refers to the material cost for each individual project, assuming you possess basic tools like screwdrivers, sandpaper, and a utility knife. If you need to purchase specialized tools, this might slightly increase your initial investment. However, most of these updates require minimal tools that you might already own or can borrow. Focus on maximizing your resources, consider buying materials in bulk for better value, or look for sales and discounts.
Time commitment also plays a role. While quick, some projects, like painting kitchen cabinets, require patience and multiple steps. Do not rush the process. Allow adequate drying times and follow instructions carefully to achieve professional-looking results. Rushing often leads to mistakes that require more time and money to fix.
Recognize the limitations of your existing cabinetry. If your cabinets suffer from severe water damage, broken frames, or crumbling particleboard, cosmetic updates will only go so far. These solutions work best for cabinets that are structurally sound but aesthetically dated. For deeper structural issues, you might need to save for more extensive repairs or consider professional help. Our focus remains on impactful, accessible changes that deliver maximum visual return for minimal cost.
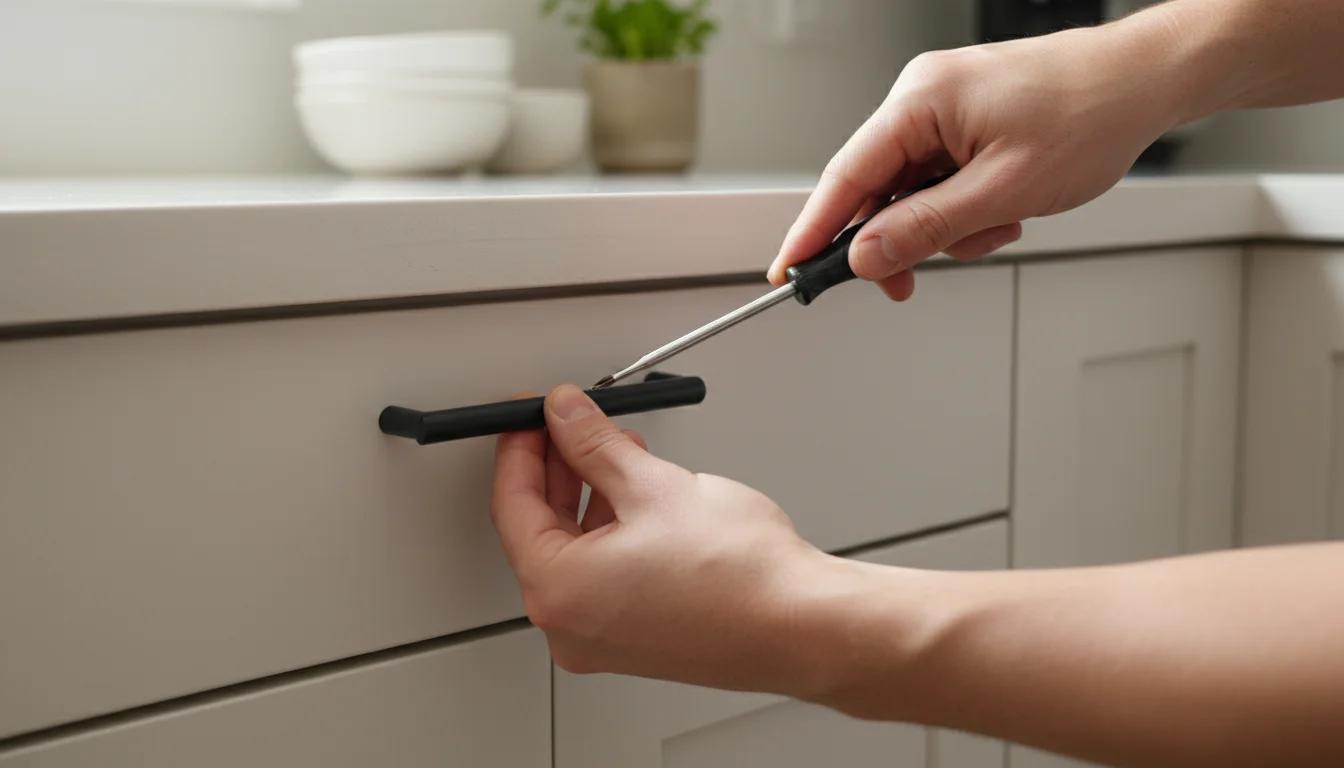
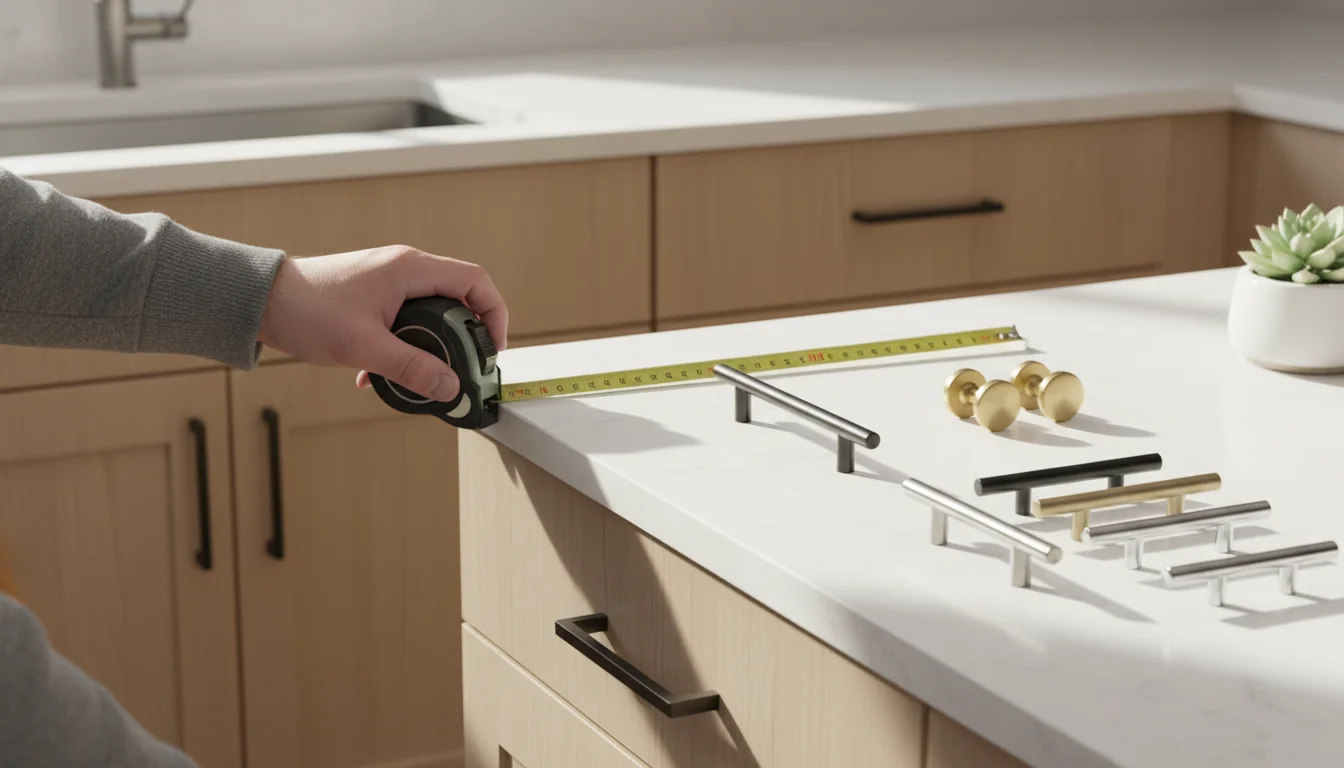
Update 1: Replacing Cabinet Hardware
Changing out your kitchen cabinet hardware stands as one of the fastest, easiest, and most impactful cheap kitchen cabinet updates you can make. New knobs and pulls instantly refresh your cabinets, giving them a modern, classic, or entirely new personality. This small detail can dramatically alter the feel of your entire kitchen. You can achieve this cabinet hardware replacement for well under $100, especially if you shop smart.
The impact of new hardware isn’t limited to the kitchen; maximizing closet space in a small bedroom often starts with similar simple swaps and storage adjustments.
For those with awkward cabinet layouts, corner shelving ideas can provide additional solutions to maximize every inch of your storage space.
Swapping out knobs and pulls is also a clever way to make a small bathroom feel bigger and more modern without a full remodel.
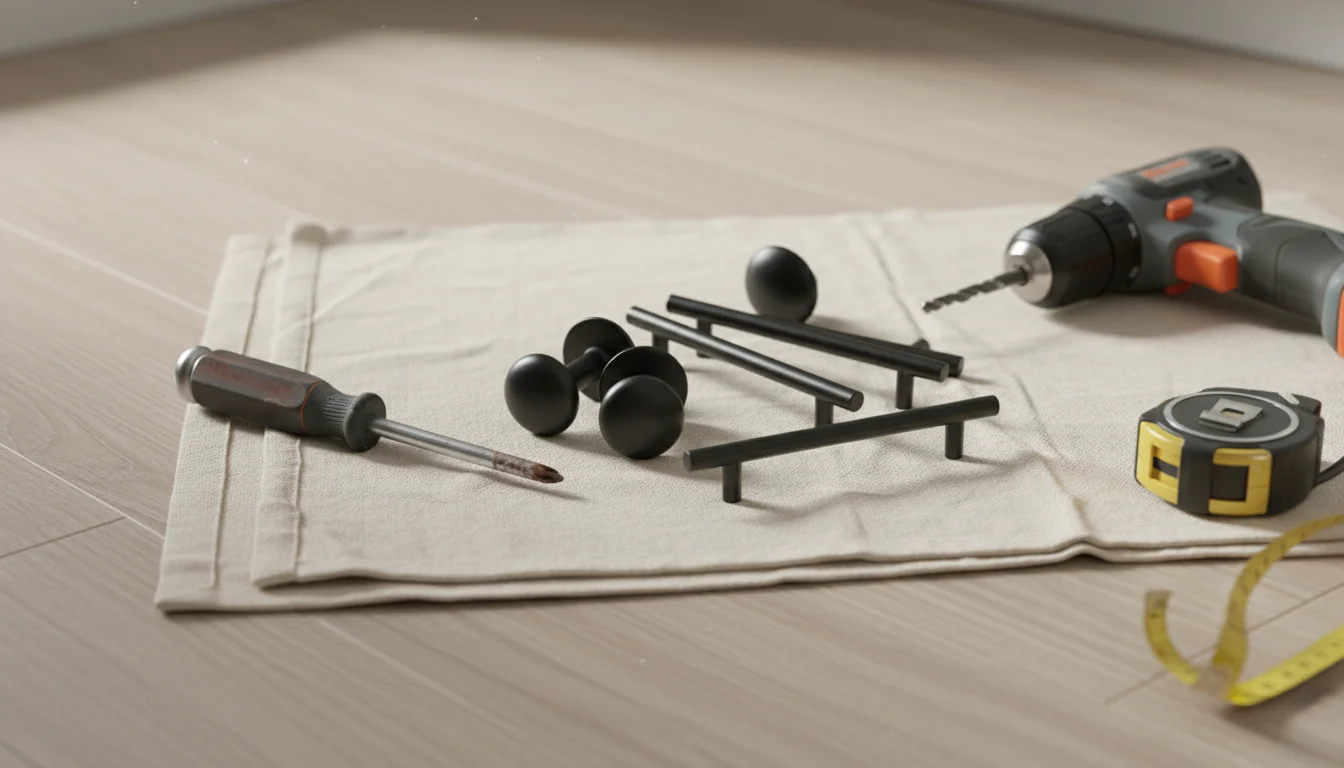
What You Need:
- New cabinet knobs or pulls (count how many you need first!)
- Screwdriver (Phillips or flathead, depending on your current hardware)
- Measuring tape (optional, but helpful for consistent placement)
- Drill with a small bit (only if changing hole spacing or adding new holes)
How to Do It:
- Count Your Hardware: Before you buy anything, count every knob and pull on your cabinets and drawers. This ensures you purchase the correct quantity.
- Measure Hole Spacing (for pulls): If you currently have pulls, measure the distance between the center of the two screw holes. Most pulls come in standard sizes, for example 3-inch, 3.75-inch, or 5-inch. If you select new pulls with different spacing, you will need to drill new holes, which adds complexity. For a simpler update, choose new pulls that match your existing hole spacing. Knobs typically require only one screw hole, so matching existing holes is much easier.
- Choose Your Style: Explore various finishes and styles, such as brushed nickel, matte black, polished brass, or contemporary chrome. Consider your kitchen’s existing finishes, like faucets and appliances, to create a cohesive look.
- Shop Smart: Look for multipacks of hardware at home improvement stores, online retailers, or even discount stores. Often, buying in larger quantities reduces the per-piece cost. Many brands offer stylish options within a budget range. For example, a pack of 10 modern pulls might cost $25-$40, making a full kitchen update very affordable.
- Remove Old Hardware: Use your screwdriver to carefully remove all existing knobs and pulls. Store the old hardware in a bag, in case you need them later or want to revert the change.
- Install New Hardware: Attach the new knobs and pulls. For knobs, simply insert the screw from the inside of the cabinet door or drawer front and tighten the knob from the outside. For pulls, insert the two screws from the inside and tighten the pull. Do not overtighten, as this can strip the screw or damage your cabinet.
Pro Tip: If you are transitioning from pulls to knobs, or if your new hardware requires different hole placements, you can fill the old holes with wood filler, sand smooth, and paint before drilling new ones. This adds a step, but still falls within the budget and significantly improves the finish.
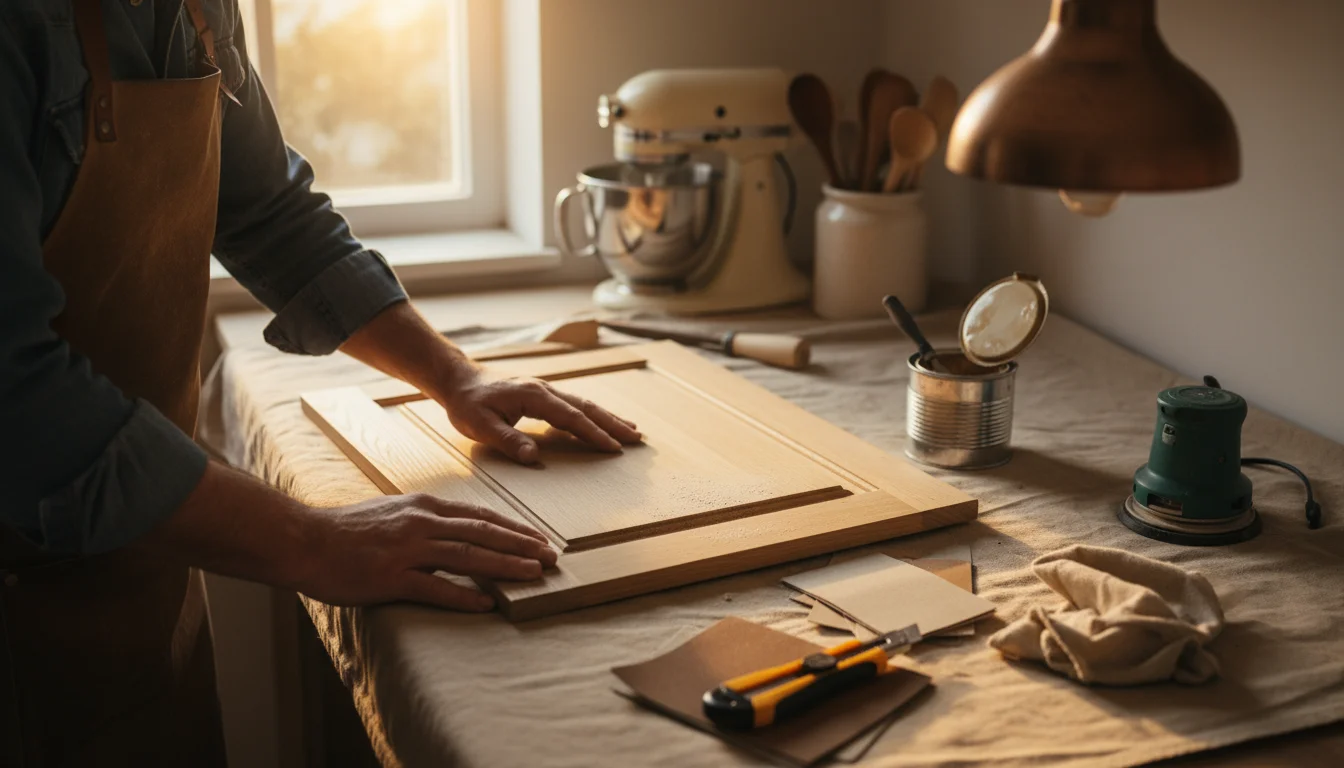
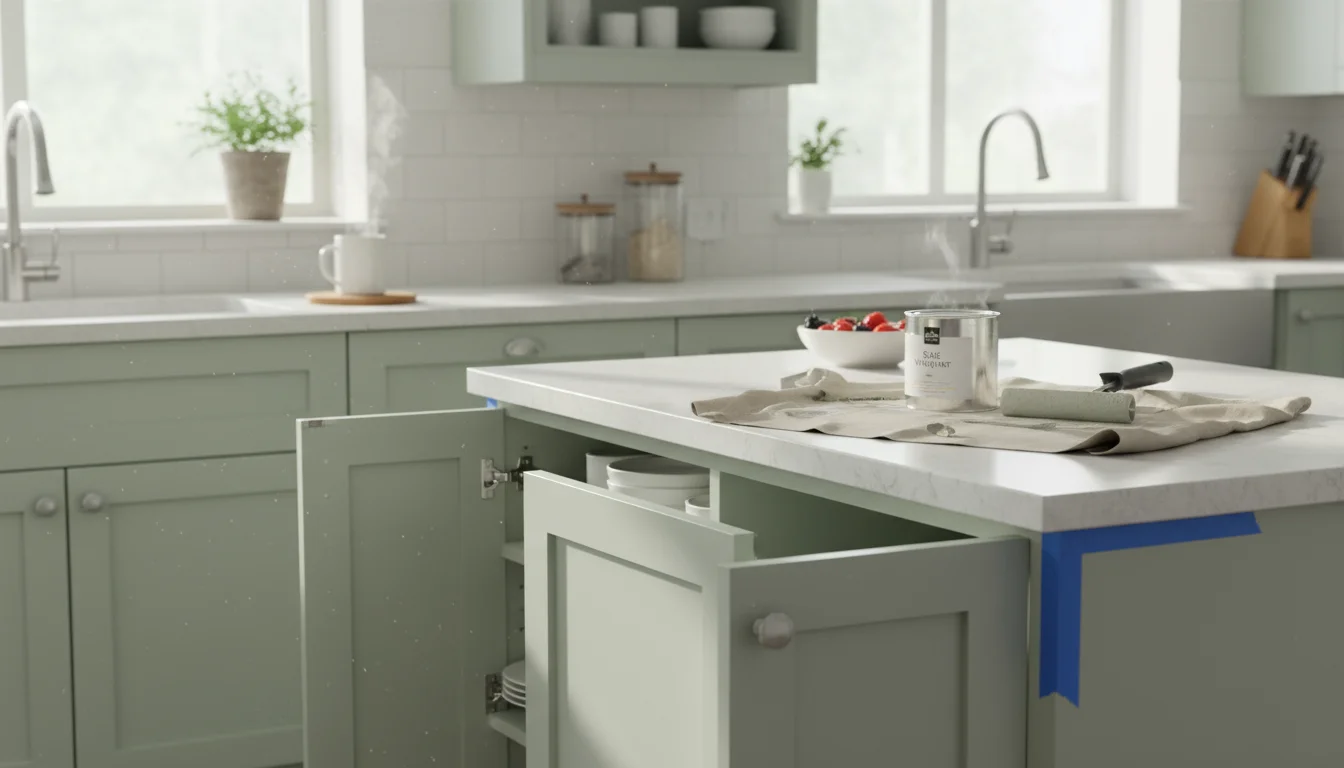
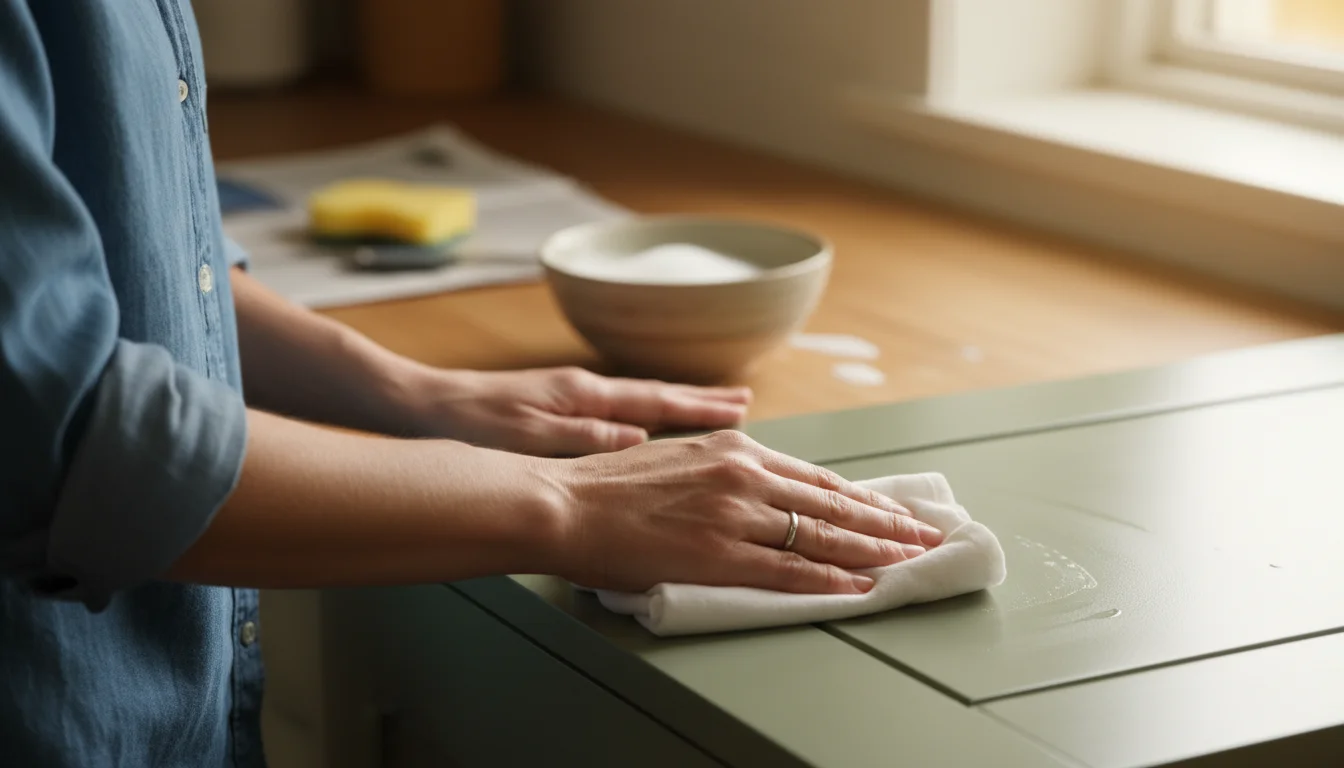
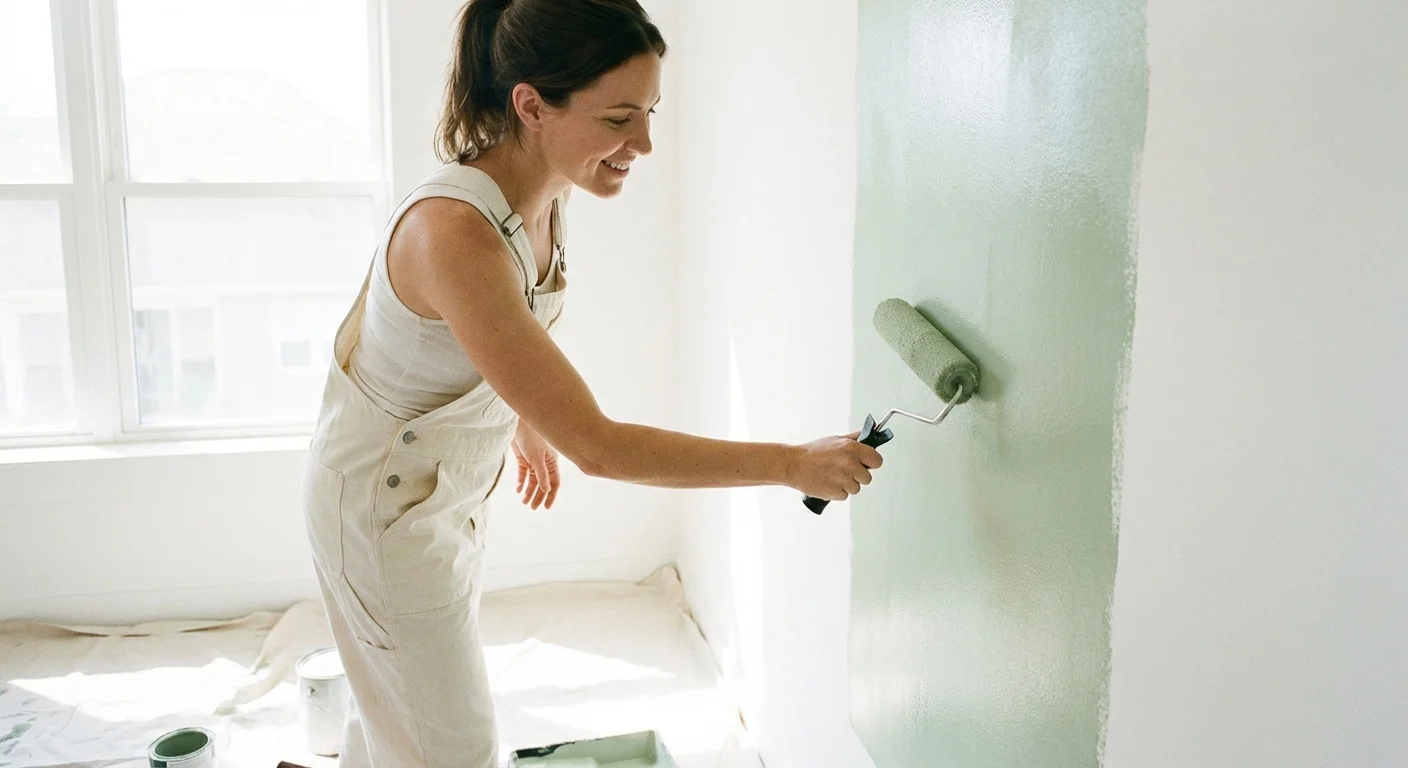
Update 2: Painting Your Cabinets for a Fresh Look
Few budget home upgrades deliver as dramatic a transformation as painting kitchen cabinets. A fresh coat of paint can brighten your space, modernize an outdated kitchen, and completely change its aesthetic. While this update requires more time and effort than swapping hardware, the visual impact justifies the investment. You can easily achieve this for under $100 if you choose your materials wisely.
Painting is a great project to tackle alongside a spring cleaning room-by-room guide, ensuring your kitchen feels truly refreshed inside and out.
Before reaching for the paintbrush, you must prep the surface using effective natural cleaning products to remove any stubborn kitchen grease.
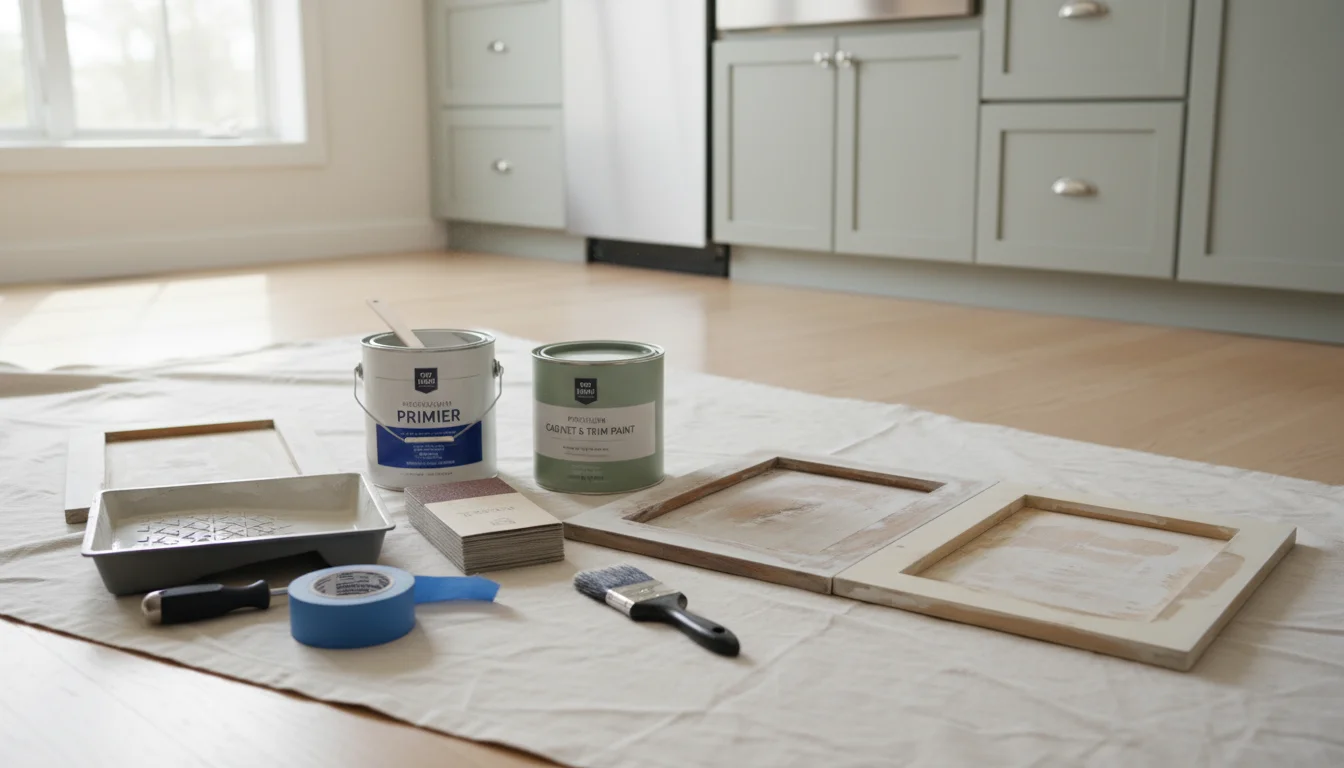
What You Need:
- Degreaser cleaner (e.g., TSP substitute)
- Screwdriver
- Painter’s tape
- Drop cloths or old sheets
- Sandpaper (120-180 grit and 220 grit fine-grit)
- Tack cloth
- High-quality primer (e.g., Zinsser B-I-N Shellac-Base Primer or Kilz Adhesion)
- High-quality cabinet paint (semi-gloss or satin finish for durability, ideally a water-based enamel or hybrid paint)
- Paintbrushes (angled brush for corners)
- Small foam rollers with roller frames (for smooth finish on flat surfaces)
- Small paint trays
How to Do It:
- Prepare Your Workspace: Choose a well-ventilated area. Lay down drop cloths to protect your floors and countertops.
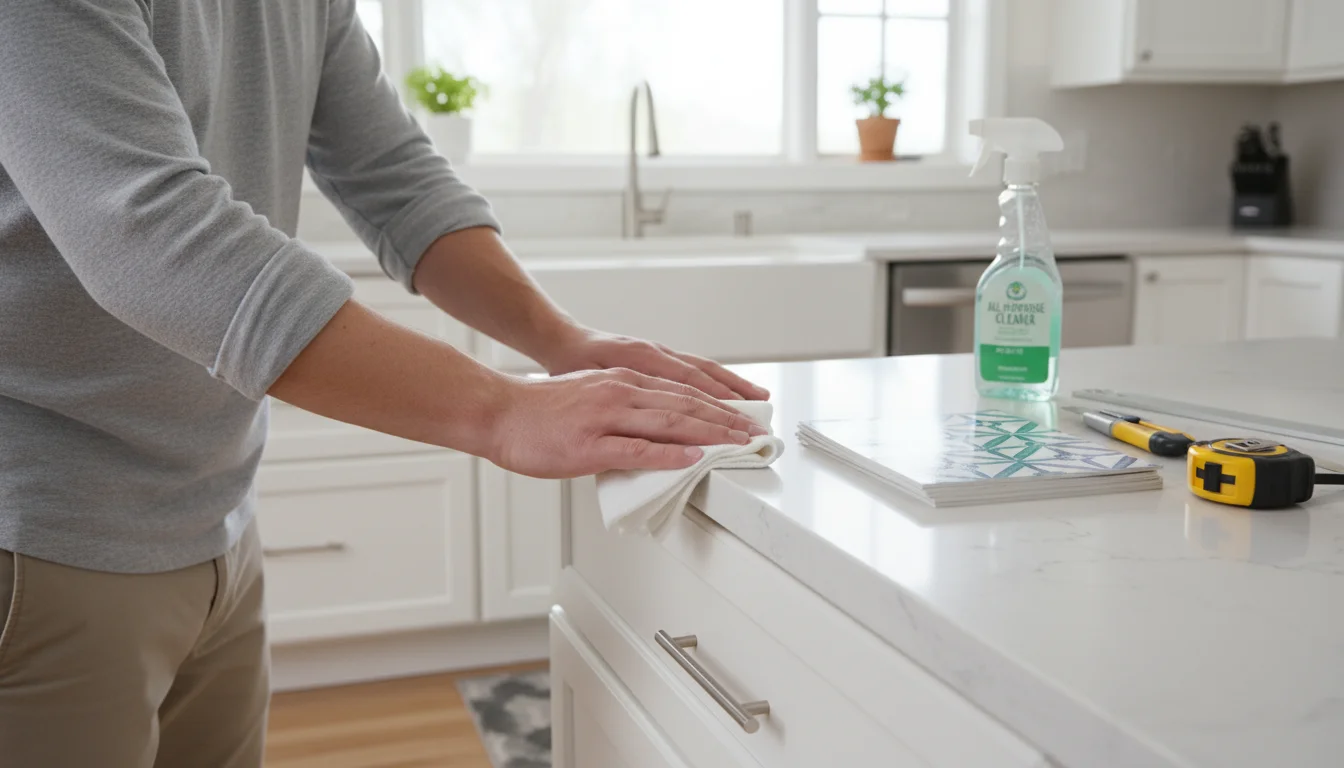
- Remove Doors and Hardware: Use a screwdriver to remove all cabinet doors, drawer fronts, and existing hardware. Label each door and its corresponding hinges with painter’s tape to ensure you reattach them in the correct spots. This step is crucial for an even finish and easier painting.
- Clean Thoroughly: Kitchen cabinets accumulate grease and grime. Use a strong degreaser cleaner to thoroughly clean all surfaces, including the cabinet frames, doors, and drawer fronts. Rinse with clean water and allow to dry completely. Any residual grease will prevent paint adhesion.
- Sand Lightly: Lightly sand all surfaces with 120-180 grit sandpaper. This step “roughs up” the surface, allowing the primer to adhere better. If your cabinets have a glossy finish, you might need a slightly coarser grit initially. Do not aim to remove all the existing finish, only to scuff it. Wipe away all sanding dust with a tack cloth.
- Apply Primer: Apply one to two thin, even coats of high-quality primer. Primer blocks stains, promotes adhesion, and creates a uniform surface for your paint. Allow adequate drying time between coats, as recommended by the primer manufacturer.
- Lightly Sand After Primer: After the primer dries, lightly sand with 220-grit fine sandpaper to smooth any imperfections. Wipe clean with a tack cloth.
- Apply Cabinet Paint: Apply two to three thin, even coats of your chosen cabinet paint. Use an angled brush for recessed panels and corners, and a foam roller for flat surfaces to achieve a smooth, brushstroke-free finish. Allow ample drying time between each coat, typically 4-6 hours, but check your paint can for specific instructions. Applying thin coats prevents drips and ensures a durable finish.
- Reinstall Hardware and Doors: Once the paint has fully cured, this can take several days to a week, though it may be dry to the touch much sooner. Reattach your hardware and carefully reinstall the cabinet doors and drawer fronts using your labels as a guide.
Budget Insight: You can often find “oops” paints or discounted high-quality primers at your local hardware store. Opting for a quality water-based enamel paint specifically designed for cabinets, often called “cabinet and trim” paint, provides a more durable and professional finish than standard wall paint, even if it costs slightly more per can. One gallon of quality paint and one quart of primer often suffice for a small to medium-sized kitchen, keeping your project under $100.
For more detailed painting techniques, resources like This Old House offer excellent guides on cabinet painting. Ensure you follow all safety precautions, including wearing a mask in well-ventilated areas.
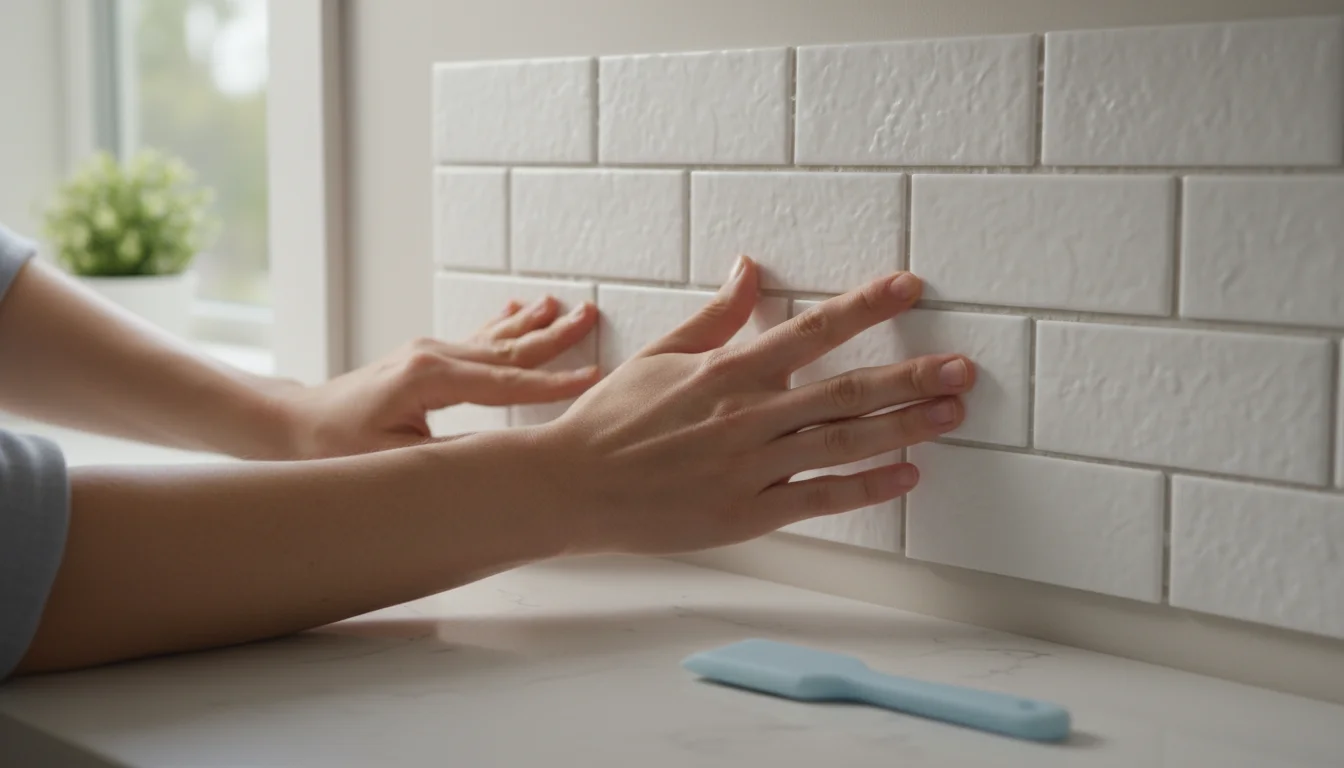
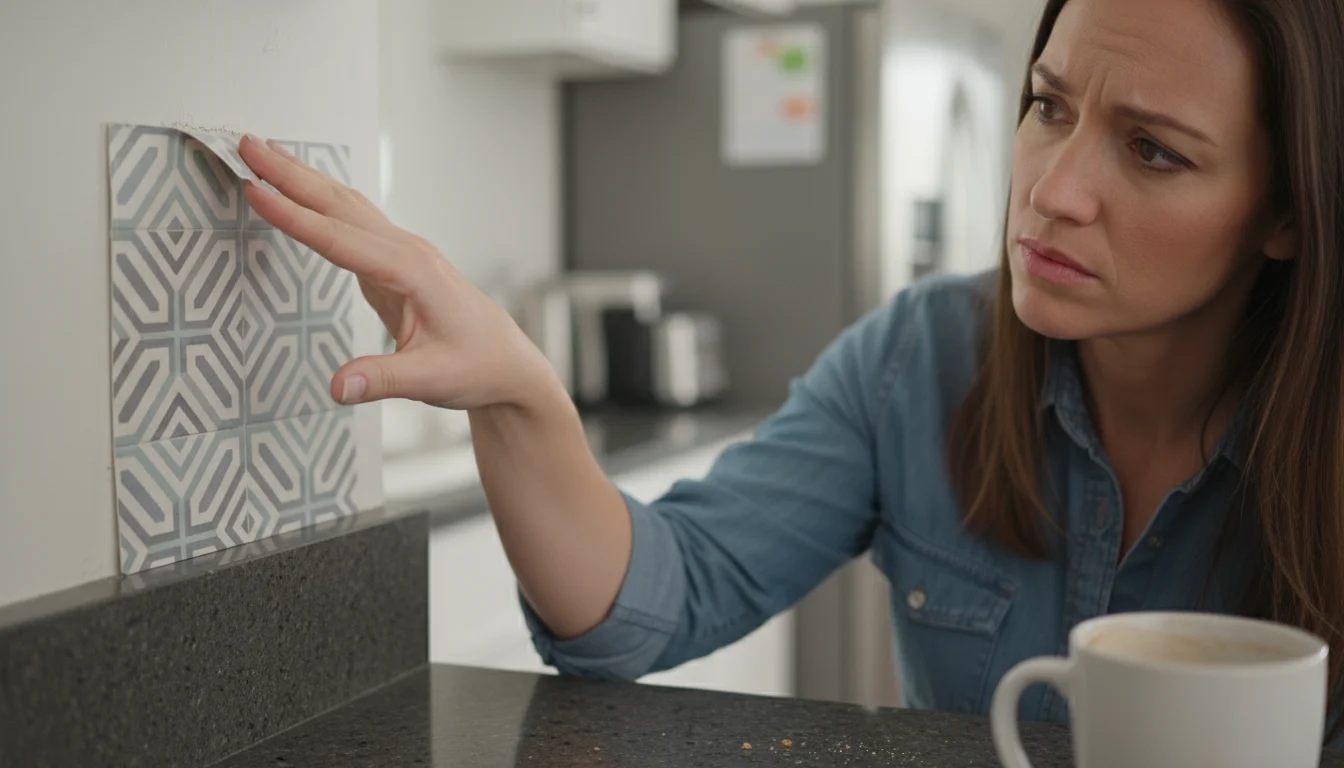
Update 3: Installing a Peel and Stick Backsplash
An outdated or non-existent backsplash leaves your kitchen looking unfinished and detracts from your cabinet updates. A peel and stick backsplash offers a fantastic, budget-friendly solution that mimics the look of real tile without the mess, tools, or expense of traditional installation. This cheap kitchen cabinet update immediately elevates your kitchen’s aesthetic, often for less than $50-$100 depending on the size of your kitchen.
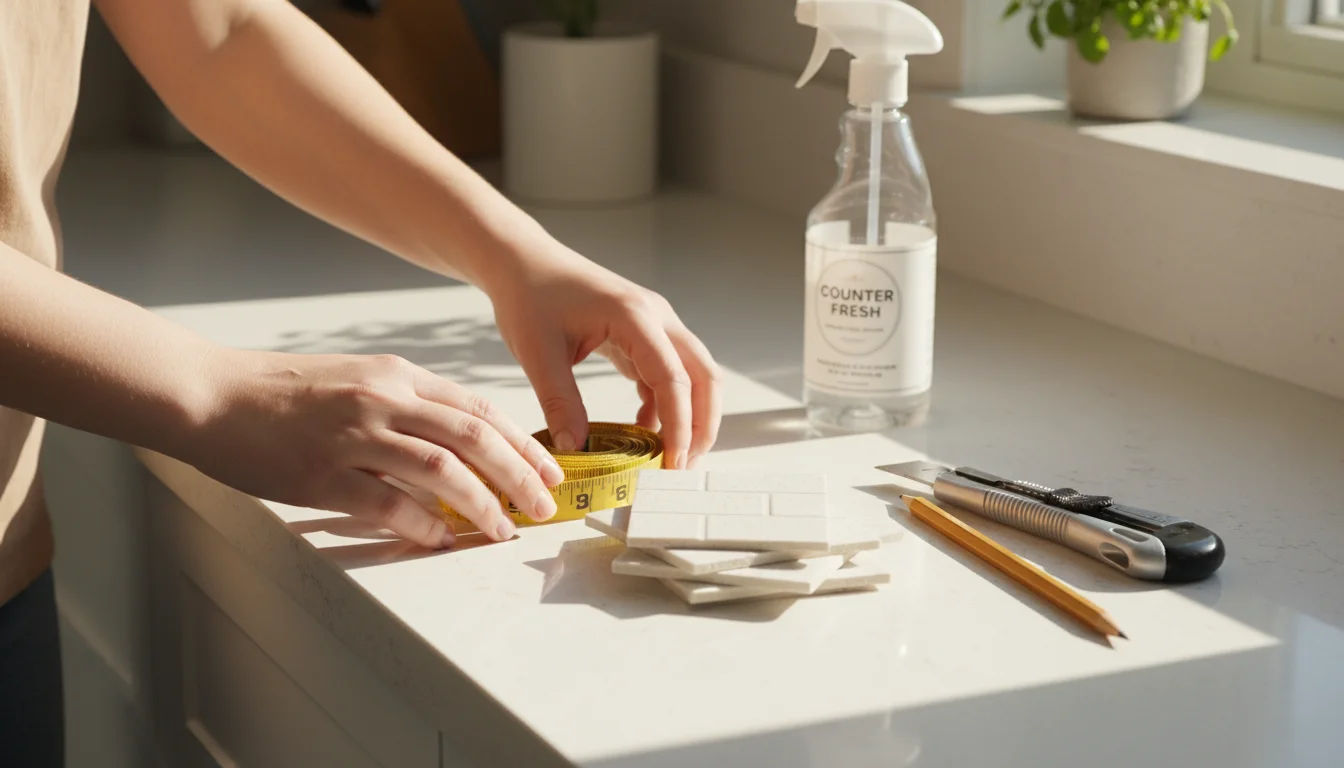
What You Need:
- Peel and stick tile sheets (measure your backsplash area carefully to determine quantity)
- Measuring tape
- Utility knife or sharp scissors
- Straightedge or level
- Pencil
- Clean cloth and all-purpose cleaner
How to Do It:
- Clean Your Walls: Ensure your backsplash area is clean, dry, and smooth. Wipe down the walls with an-all purpose cleaner to remove grease and grime. Any bumps or residue will show through the tiles.
- Measure and Plan: Measure the width and height of your backsplash area. It helps to draw a rough sketch and plan where each sheet will go. Start in an inconspicuous corner or a less visible area if you are new to this.
- Establish a Level Line: Use a level and pencil to draw a straight, horizontal reference line across your wall. This ensures your first row of tiles goes on straight, which is critical for a professional look.
- Cut Tiles as Needed: Most peel and stick tiles are easy to cut. Place the tile face-up on a cutting mat or protected surface. Use a straightedge and a utility knife to score along your pencil line, then snap the tile. For intricate cuts around outlets, measure carefully, mark, and use your utility knife or strong scissors.
- Peel and Stick: Peel off a small portion of the backing paper from your first tile sheet. Align it with your reference line or the edge of your countertop, pressing firmly from one side to the other to remove air bubbles. Slowly peel off the rest of the backing paper as you press the tile into place.
- Continue Laying Tiles: Work your way across and up the wall, overlapping the “grout lines” if your tiles are designed to interlock. Take your time, ensuring each tile aligns properly with the last.
- Smooth Out Bubbles: If you see any air bubbles, use a credit card or a plastic smoothing tool to gently press them out towards the edges.
- Finish Edges: For a clean finish, you can use caulk or trim pieces along the top edge or where the backsplash meets cabinets, though many modern peel and stick options offer a clean edge on their own.
Key to Success: Patience is paramount with peel and stick applications. Work slowly, align carefully, and press firmly. Brands like Tic Tac Tiles, Art3d, and Aspect offer a wide variety of styles, from subway tile to mosaic, all within budget. Many reviewers on popular retail sites provide installation tips and photos of their finished projects, offering inspiration and practical advice.
Update 4: Adding Under-Cabinet Lighting
Under-cabinet lighting offers both aesthetic appeal and practical functionality, transforming your kitchen’s ambiance and improving task visibility. It eliminates shadows cast by upper cabinets, making food prep safer and more enjoyable. Modern battery-operated or plug-in LED strip lights and puck lights offer an incredibly affordable way to achieve this effect, often for less than $75.
What You Need:
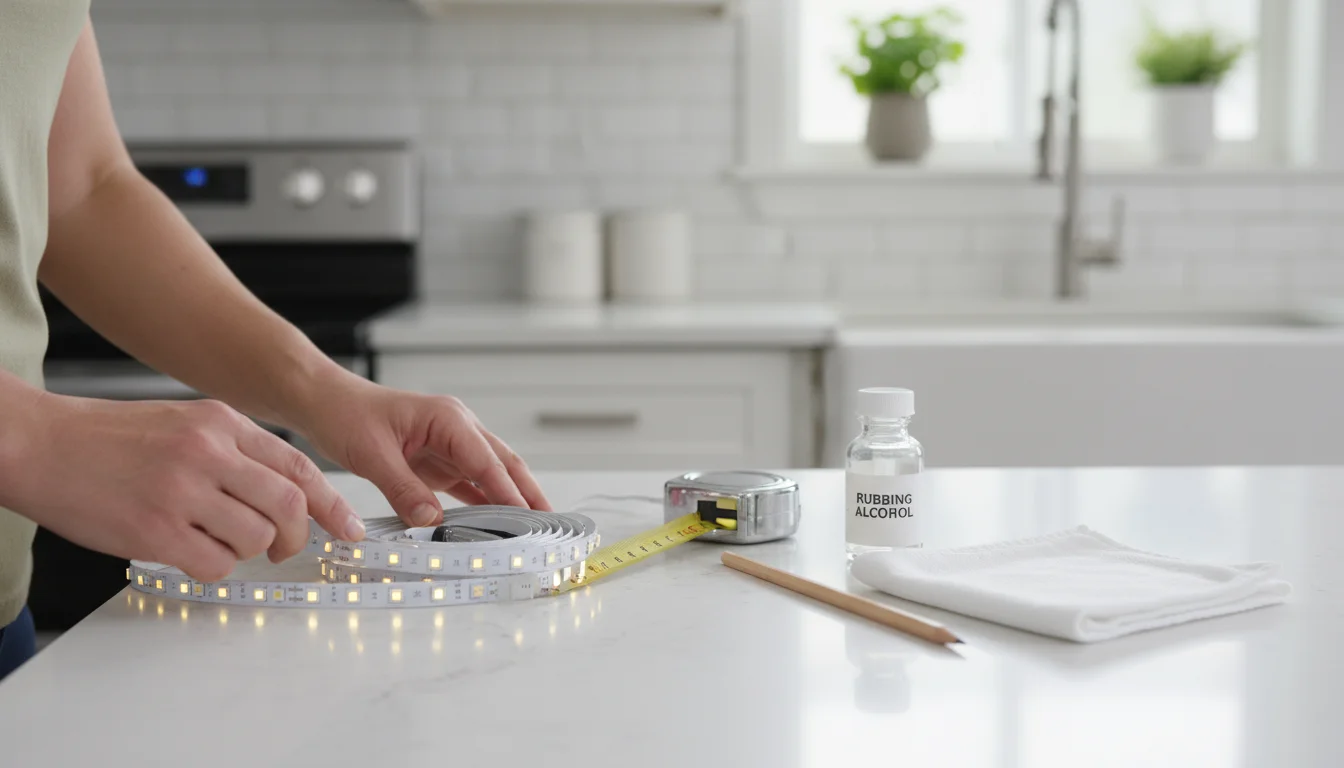
- Battery-operated or plug-in LED strip lights or puck lights (check length/number needed)
- Measuring tape
- Pencil
- Rubbing alcohol and a clean cloth
- Optional: Command strips or additional adhesive (if lights do not come with strong enough adhesive)
How to Do It:
- Measure Your Cabinets: Determine the total length of lighting you need. Measure the underside of your upper cabinets where you want the light to shine. Decide if you want continuous strips or individual puck lights.
- Clean the Surface: Wipe the underside of your cabinets with rubbing alcohol to ensure a clean, grease-free surface. This allows the adhesive on the lights to stick securely. Let it dry completely.
- Plan Placement: Decide exactly where you want to place the lights. For strip lights, you usually want them towards the front edge of the cabinet underside, pointing slightly backward to illuminate the counter without shining directly into your eyes. For puck lights, space them evenly. Use a pencil to mark your starting and ending points.
- Install the Lights:
- For LED Strips: Peel off the adhesive backing from the strip light. Carefully align it with your marked line and press firmly along the entire length. Some strips are cuttable, allowing you to customize the length.
- For Puck Lights: Peel off the adhesive backing from each puck light and firmly press it into place according to your planned spacing.
- Conceal Wires (if plug-in): If you choose plug-in lights, use small adhesive clips or cable ties to neatly tuck away any visible wires along the underside of the cabinet or behind appliances. Battery-operated lights avoid this step, offering maximum simplicity.
- Test the Lights: Turn on your new under-cabinet lights. Assess the illumination and make any minor adjustments to placement if needed. Many battery-operated options include remote controls or touch sensors, adding to their convenience.
Benefit Beyond Light: Under-cabinet lighting not only improves functionality during cooking, it also creates a warm, inviting ambiance for evening entertaining or quiet moments. The subtle glow highlights your backsplash and countertops, making your kitchen feel more luxurious and thoughtfully designed, a true high-impact addition among cheap kitchen cabinet updates.

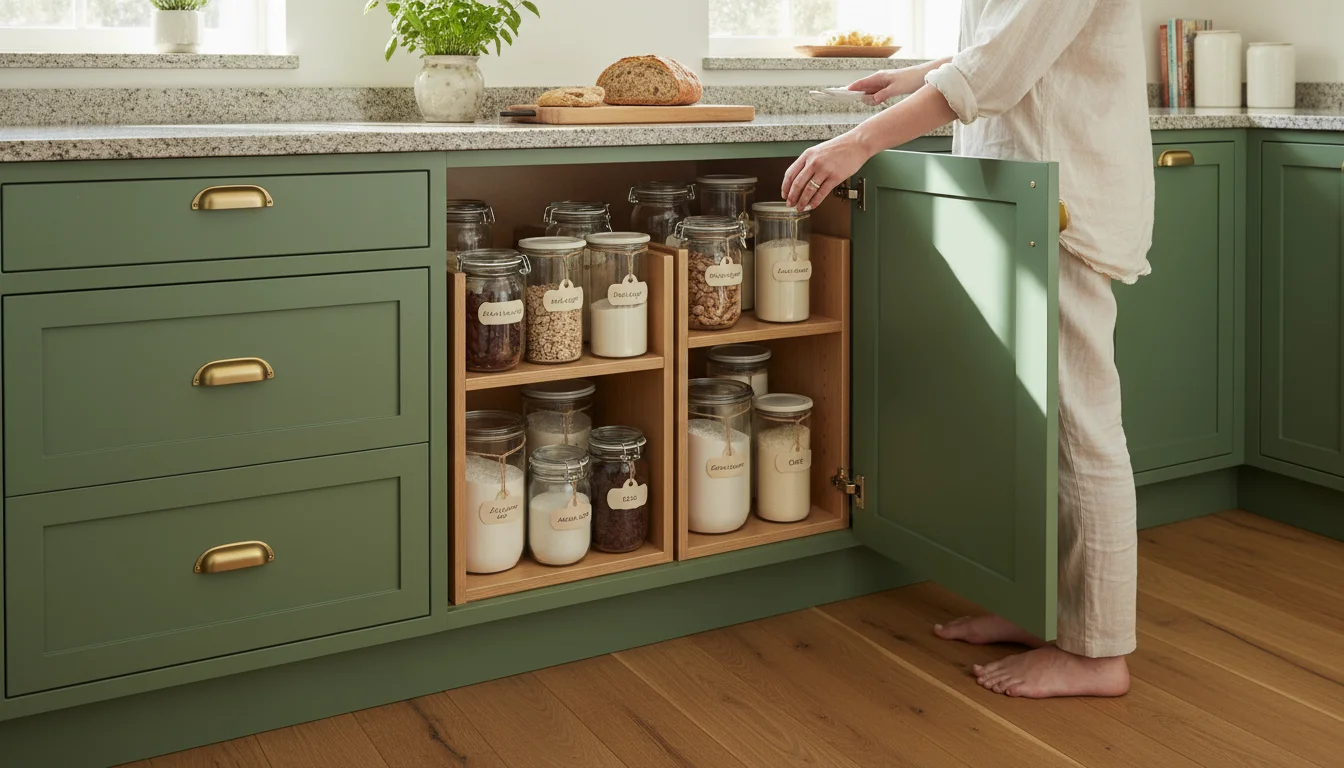
Update 5: Upgrading Storage with Smart Organizers
No matter how beautiful your cabinets look on the outside, their true functionality lies within. Cluttered, inefficient storage wastes space and frustrates daily routines. Upgrading the internal organization of your cabinets with smart, budget-friendly organizers dramatically improves usability and makes your kitchen feel more sophisticated. This investment in functional budget home upgrades pays dividends every time you open a cabinet.
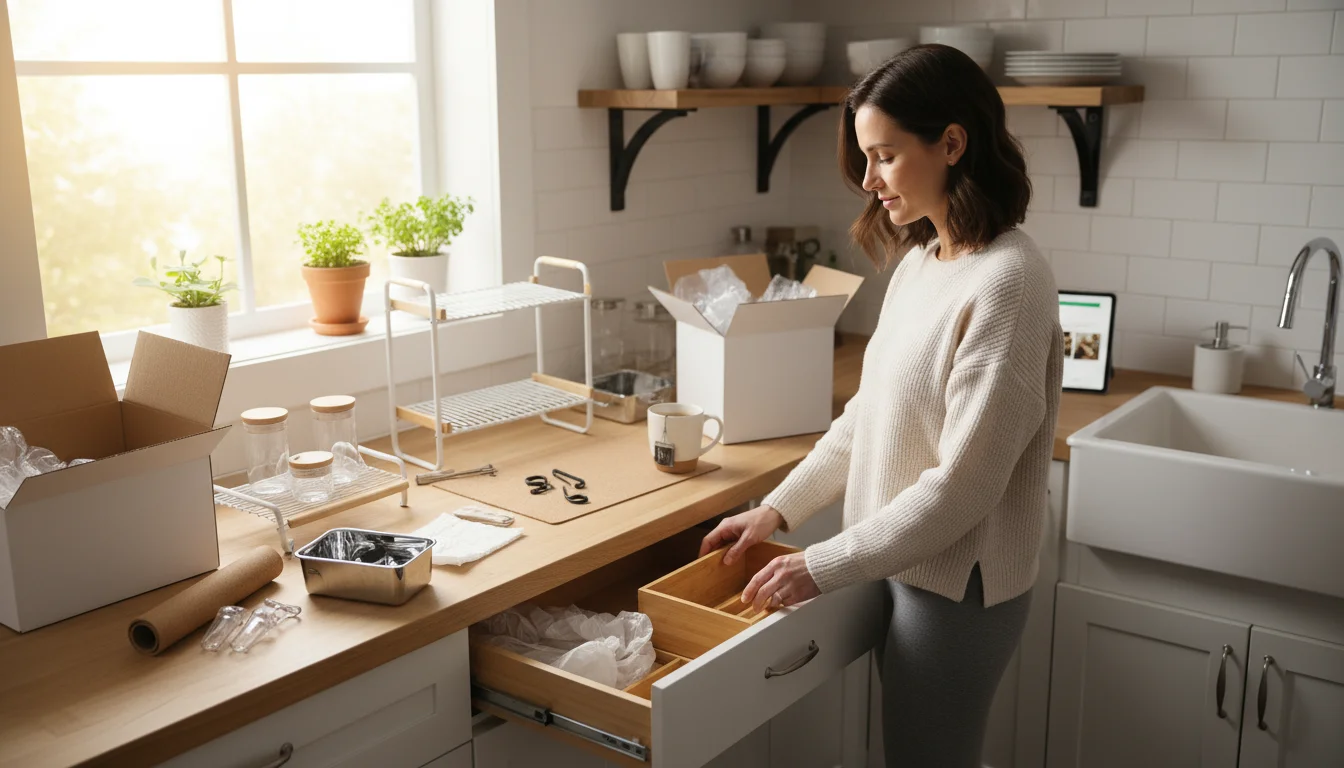
What You Need (choose based on your specific needs):
- Stackable shelves or risers
- Drawer dividers
- Pull-out bins or baskets
- Pot and pan organizers
- Spice racks (in-drawer or tiered)
- Over-the-door cabinet organizers (for cleaning supplies or cutting boards)
How to Do It (General Approach):
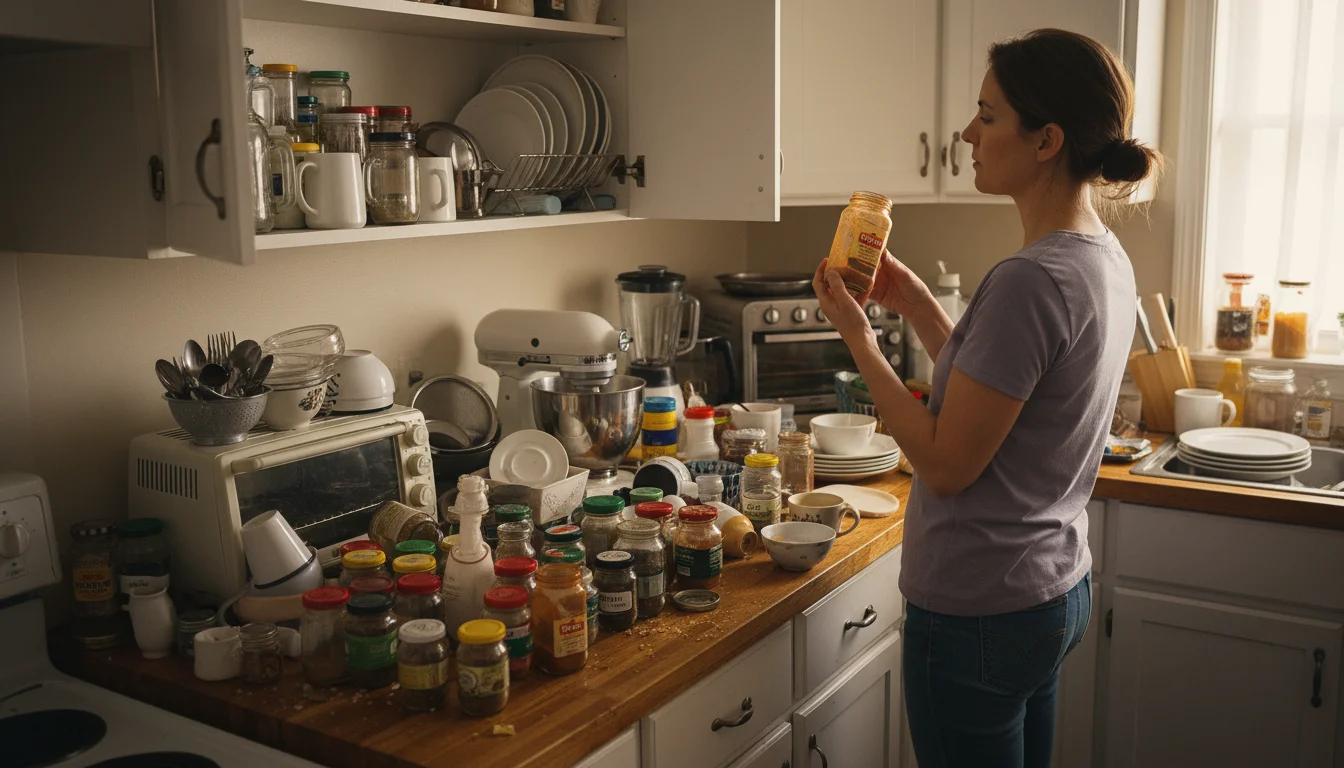
- Declutter First: Before you buy any organizers, completely empty your cabinets and drawers. Get rid of anything expired, broken, unused, or redundant. This is the crucial first step to effective organization. You cannot organize clutter, you only move it around.
- Assess Your Needs: As you put items back, consider how you use your kitchen.
- What items cause frustration?
- Which areas are constantly messy?
- Do you have empty vertical space in your cabinets?
- Do items get lost at the back of deep cabinets?
This assessment guides your organizer purchases.
- Categorize and Zone: Group similar items together. Designate specific “zones” for different categories. For example, all baking supplies in one area, cooking oils and spices near the stove, dishes near the dishwasher.
- Measure Carefully: Before purchasing any organizers, measure the internal dimensions of your cabinets and drawers. Pay attention to width, depth, and height. This ensures your organizers fit perfectly and maximize space.
- Implement Solutions:
- Stackable Shelves: Use these to double your vertical storage space for plates, bowls, or canned goods.
- Drawer Dividers: Perfect for cutlery, utensils, and small gadgets. They prevent items from shifting and creating chaos.
- Pull-Out Bins: Ideal for deep pantry cabinets or under-sink storage. They bring items at the back of the cabinet to the front, eliminating the “black hole” effect.
- Pot and Pan Organizers: Vertical racks or drawer inserts keep lids and pans separated and easily accessible, preventing noisy, frustrating searches.
- Spice Racks: A tiered rack allows you to see all your spices at a glance, preventing duplicates and expired ingredients.
- Maintain the System: Once organized, commit to returning items to their designated spots. Regular, quick tidies prevent clutter from building up again.
Budget Tip: Stores like IKEA, The Container Store, and even dollar stores offer a wide array of functional and affordable kitchen organizers. You can find high-quality drawer dividers, stackable bins, and clear containers for under $10-$20 each, allowing you to update multiple cabinet interiors for under $100. For instance, a basic pot lid organizer might cost $15, a set of drawer dividers $10, and a few stackable shelves another $20-$30, all well within budget. Organizing your cabinets effectively improves your kitchen’s efficiency and makes it a more enjoyable place to work.
Maintenance and Longevity for Your Budget Updates
Successfully implementing cheap kitchen cabinet updates is only half the battle. To ensure your refreshed kitchen maintains its appeal and functionality, proper maintenance becomes crucial. Small, consistent efforts will protect your investment and extend the lifespan of your budget home upgrades.
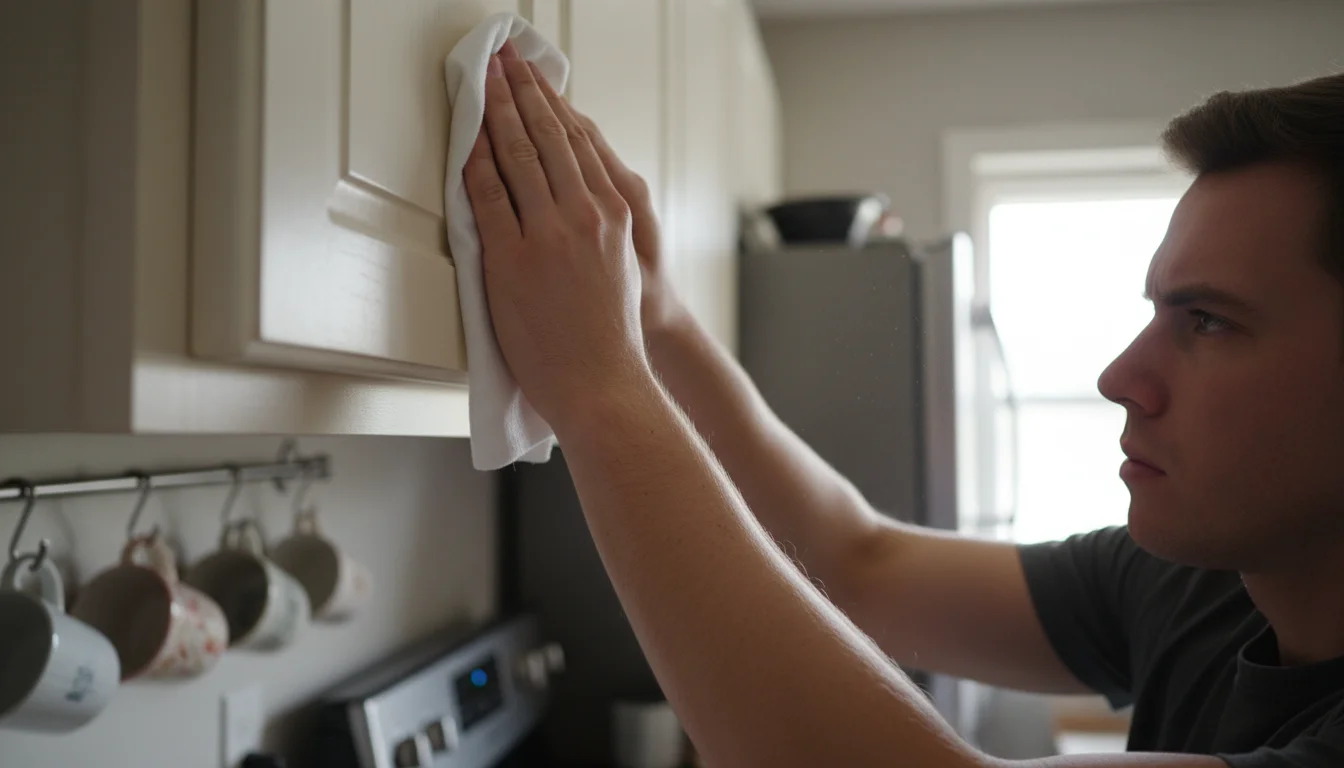
For Painted Cabinets:
- Gentle Cleaning: Use a soft cloth dampened with mild soap and water for daily cleaning. Avoid abrasive cleaners, harsh chemicals, or scrub brushes, as these can dull the finish or remove paint over time.
- Address Spills Promptly: Wipe up spills, especially acidic ones like tomato sauce or lemon juice, immediately. These can etch or stain painted surfaces.
- Touch-Ups: Keep a small amount of your original cabinet paint for touch-ups. Minor nicks or scratches are inevitable. A quick touch-up keeps your cabinets looking pristine.
- Ventilation: Use your range hood while cooking to minimize grease and steam buildup, which can degrade paint finishes over time.
For New Hardware:
- Regular Tightening: Screws on knobs and pulls can loosen over time with repeated use. Periodically check and tighten them with a screwdriver to prevent them from falling off or damaging the cabinet.
- Proper Cleaning: Clean hardware according to its finish. For example, a brass cleaner for polished brass, but a simple damp cloth for most matte or brushed finishes. Harsh chemicals can strip protective coatings.
For Peel and Stick Backsplashes:
- Wipe Gently: Clean with a soft, damp cloth and mild soap. Avoid scrubbing too hard, especially on textured or raised designs, to prevent lifting edges.
- Edge Inspection: Occasionally check the edges of the tiles. If you notice any lifting, press them firmly back into place or apply a small amount of adhesive specific for peel and stick tiles to re-secure.
- Avoid Direct Heat: While most are heat resistant, avoid placing extremely hot pots or appliances directly against the backsplash, which could soften the adhesive.
For Under-Cabinet Lighting:
- Battery Replacement: If using battery-operated lights, replace batteries as needed to maintain consistent brightness. Consider rechargeable batteries for cost savings.
- Wire Management: For plug-in lights, ensure wires remain securely tucked away to prevent hazards and maintain a clean look.
For Cabinet Organizers:
- Routine Decluttering: Even with organizers, clutter can creep back. Perform a quick decluttering session every few months to remove unused items and ensure everything has its place.
- Clean Organizers: Periodically remove organizers and clean them, especially those holding food items. This prevents crumbs and spills from accumulating.
By integrating these simple maintenance routines into your cleaning schedule, you ensure your kitchen remains a bright, organized, and inviting space, truly maximizing the impact of your affordable updates.
Common Mistakes to Avoid
Even with simple budget home upgrades, certain pitfalls can derail your efforts and leave you with less-than-stellar results. Being aware of these common mistakes helps you avoid them, ensuring your cheap kitchen cabinet updates look professional and last longer.
- Skipping Preparation: This stands as the number one mistake for almost any DIY project, especially painting or installing a peel and stick backsplash. Failing to thoroughly clean, degrease, and lightly sand surfaces before painting leads to poor adhesion, peeling, and a bumpy finish. Likewise, a dirty or uneven wall will compromise your peel and stick tiles. Investing time in preparation saves headaches later.
- Rushing the Process: Patience is a virtue in DIY. Rushing through steps like drying times between paint coats, or quickly applying a peel and stick tile without proper alignment, guarantees a messy outcome. Always follow manufacturer instructions for drying and curing times.
- Using Low-Quality Materials: While these are budget updates, “cheap” does not mean sacrificing quality. A $5 can of wall paint will not hold up on cabinets the way a $40 can of cabinet-specific enamel will. Inferior hardware can break or chip quickly. Spending a little more on the right primer, paint, or tile can significantly impact the longevity and appearance of your project.
- Not Measuring Accurately: Whether it is cabinet hardware hole spacing, the length of an LED strip, or the square footage for a backsplash, inaccurate measurements lead to wasted materials, frustration, and a less polished look. Measure twice, cut once.
- Over-Complicating Designs: For under $100 updates, stick to simpler designs. Trying to incorporate intricate patterns with peel and stick tiles or attempting complex paint techniques on your first try might lead to disappointment. Focus on clean lines and solid colors for maximum impact with minimal fuss.
- Ignoring Safety Precautions: Working with paints, cleaners, or utility knives requires caution. Ensure good ventilation when painting, wear gloves when handling harsh cleaners, and always cut away from your body with a utility knife. Your safety is paramount.
- Forgetting About Future Changes: If you are renting, ensure your updates are reversible. Peel and stick tiles are generally renter-friendly, but painting might require landlord approval. Consider the long-term implications of your choices.
- Buying Organizers Before Decluttering: This common mistake leads to purchasing organizers that do not fit your actual needs or, worse, that you do not even use. Always declutter and assess your remaining items before buying any storage solutions.
By being mindful of these common pitfalls, you equip yourself to achieve stunning, durable results for your kitchen cabinet updates, proving that a big impact does not require a big budget.

Frequently Asked Questions
Is it really possible to update kitchen cabinets for under $100?
Yes, absolutely. This article demonstrates five distinct ways you can achieve significant improvements for under $100 per project. The key lies in strategic material selection, DIY effort, and focusing on high-impact cosmetic changes rather than structural overhauls. For example, a quality set of new cabinet pulls can cost $30-$70, while enough paint and primer for a small kitchen can be sourced for under $100 by looking for sales or “oops” paint. Peel and stick backsplash tiles similarly fall into this budget range for average kitchen sizes.
How long do these budget kitchen cabinet updates typically last?
The longevity of your budget updates depends heavily on the quality of materials you choose and your diligent preparation and maintenance. Well-prepped and properly painted cabinets, using high-quality cabinet enamel, can last for 5-7 years or more before needing a refresh. Quality cabinet hardware lasts indefinitely. Peel and stick backsplashes typically offer a lifespan of 3-5 years, depending on moisture levels and cleaning methods. Under-cabinet lighting, especially LED, is designed for long-term use, often lasting tens of thousands of hours. Regular cleaning and care significantly extend the life of all these updates.
Can I do these updates if I live in a rental apartment?
Many of these updates are rental-friendly, but always check your lease agreement and, ideally, discuss with your landlord first. Replacing cabinet hardware is often acceptable, as you can store the original hardware and reinstall it when you move. Peel and stick backsplashes are generally removable without damaging the wall, but test a small, inconspicuous area first. Painting cabinets is usually not allowed without explicit permission, as it is a permanent alteration. Under-cabinet lighting that uses batteries or plugs into an outlet and attaches with non-damaging adhesive, like Command strips, is usually fine. Cabinet organizers are perfectly renter-friendly, as they are completely removable and cause no damage.
What is the most impactful update for the least amount of effort?
Replacing cabinet hardware offers the highest impact for the least amount of effort. It requires minimal tools, no special skills, and can be completed in a few hours, even for a full kitchen. The visual change from old, worn hardware to sleek, new pieces immediately updates the entire look of your cabinets and, by extension, your kitchen. It is a quick win that provides instant gratification.


Leave a Reply