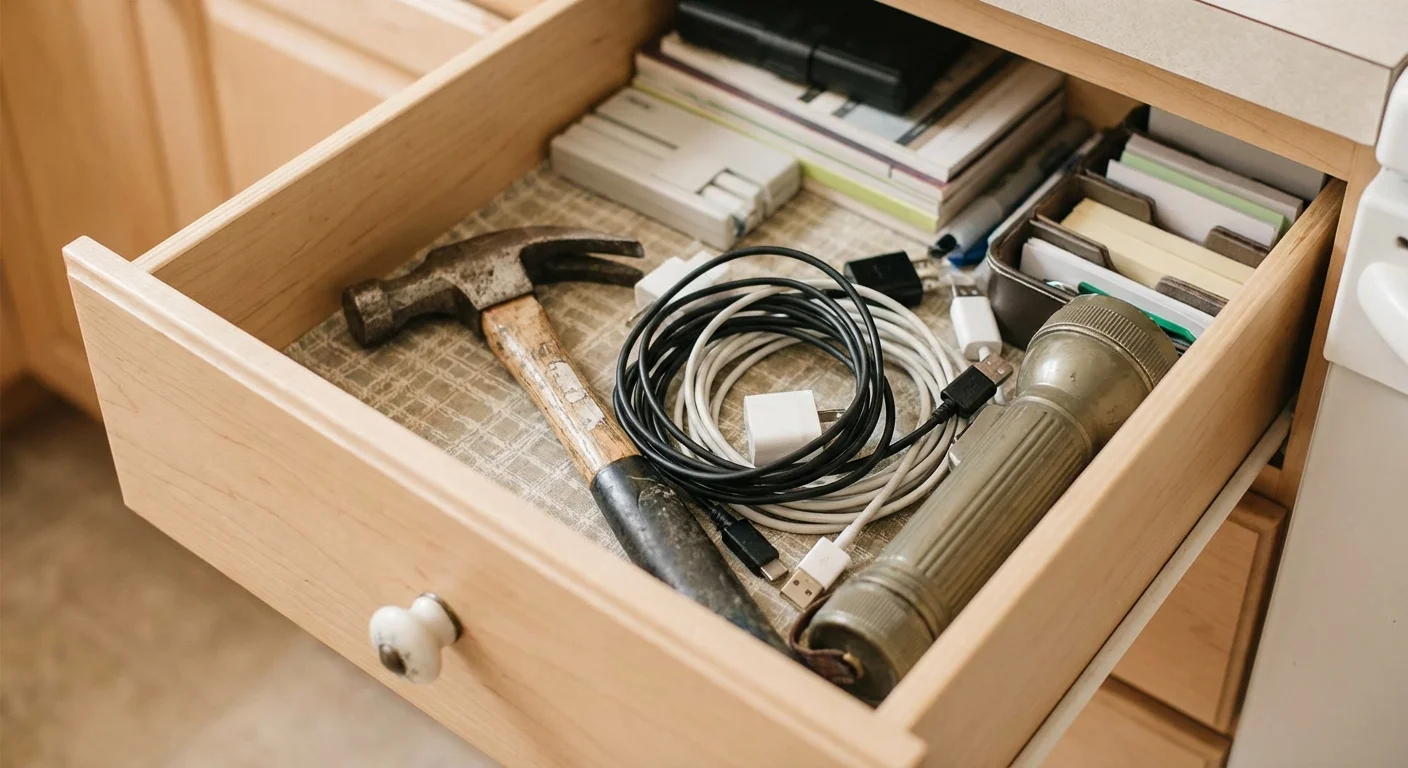
Pull the handle on the drawer nearest your kitchen sink or entryway console, and you will likely find a chaotic mix of rubber bands, dead batteries, dried-out pens, takeout menus from three years ago, and a single, mystery screw. We all have one. The catch-all space is an inevitable byproduct of daily life; it serves as a holding pen for the tiny, random items that do not neatly fit into the broader categories of your home.
Yet, the very drawer designed to hold your most frequently used everyday tools is often the hardest space to navigate. Digging past crumpled receipts to find a working flashlight during a power outage is a frustrating experience. A disorganized drawer costs you time, damages your belongings, and adds a subtle layer of stress to simple household tasks.
You do not need to eliminate your catch-all space. Instead, you need to elevate it. By implementing a systematic approach, you can transform a chaotic mess into a highly functional utility space. Let us walk through the exact steps to organize a junk drawer from top to bottom, ensuring every paperclip, charging cable, and pair of scissors has a dedicated home.
The Essentials: What You Will Learn
If you are ready to tackle this project right now, here is the core roadmap for your organization session:
- The Audit: Completely emptying the drawer to assess the volume of clutter.
- The Purge: Sorting items into logical categories and discarding actual trash.
- The Geometry: Measuring your space to select the proper junk drawer organizer.
- The Zoning: Arranging items based on how often you reach for them.
- The Maintenance: Establishing micro-habits to stop clutter before it returns.

Redefining the Space: From Junk to Utility
Words matter. When you label a space a “junk drawer,” you unconsciously give yourself permission to fill it with literal junk. Wrappers, broken items, and expired coupons gravitate toward this space because the name invites thoughtless dumping.
Try renaming it your “utility drawer,” “essentials drawer,” or “command center.” This simple psychological shift forces you to evaluate what truly belongs inside. A utility drawer holds useful, functional tools required for the daily operation of your household. If an item holds no utility, it no longer qualifies for this prime real estate.
“The objective of cleaning is not just to clean, but to feel happiness living within that environment.” — Marie Kondo, Organizing Consultant and Author
Think about the items you actually need on a Tuesday evening when you are opening a package, replacing a remote control battery, or writing a quick note. Those are your utility items. Everything else is just taking up valuable space.
Step 1: The Complete Empty and Cleanse
Do not attempt to organize a junk drawer while the items are still inside it. Shuffling clutter from the left side of the drawer to the right side accomplishes nothing. You must start with a completely blank slate.
Starting with a blank slate is the same approach we recommend for organizing your linen closet to ensure every item has a purposeful home.
Grab a large towel or baking sheet and spread it out on your kitchen counter or table. Pull the drawer out entirely and dump the contents onto your staging area. If the drawer cannot be removed, scoop every last item out until you are staring at the bare bottom.
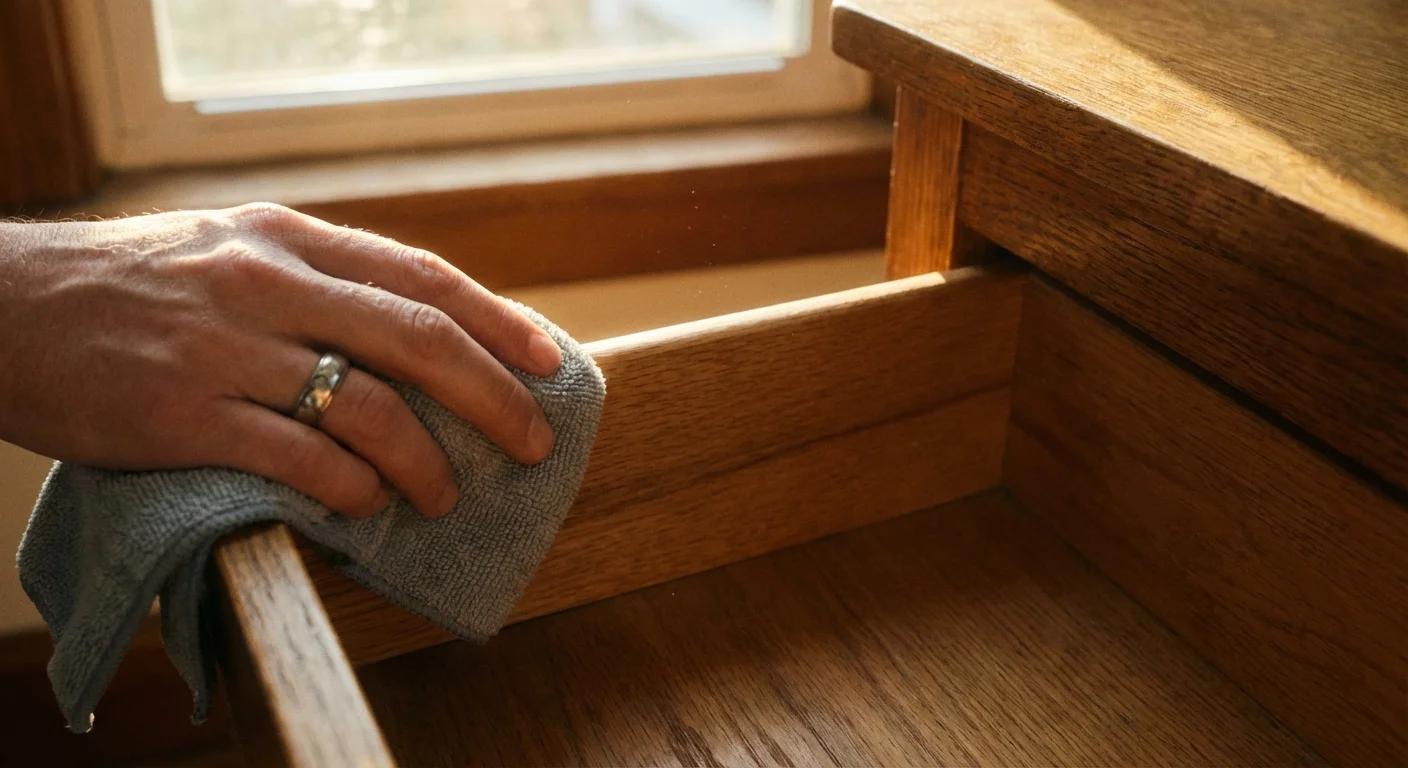
Take this opportunity to deep clean the drawer itself. Vacuum out the dust, graphite shavings, and mysterious crumbs that inevitably gather in the corners. Wipe down the interior with a mild all-purpose cleaner and let it dry completely.
Pro Tip: Before putting anything back, install a high-quality drawer liner. A grippy, non-slip rubber liner protects the wood or melamine from scratches and prevents your future organizer bins from sliding backward every time you open the drawer.

Step 2: Sorting, Purging, and Relocating
With your drawer entirely empty, turn your attention to the mountain of items on your counter. This is where most people get overwhelmed, but you can conquer the pile by sorting it into four distinct groups. Pick up every single item and force yourself to make a rapid decision.
If you often feel overwhelmed by the amount of clutter in your home, tackling this one small space is a great way to build momentum.
Group 1: Obvious Trash
Discard the broken rubber bands, the pens that skip, the hardened superglue, the expired coupons, and the takeout menus for restaurants you order from online anyway. Toss the rusty paperclips and the loose, unidentifiable plastic parts that have been sitting there for a decade. Be ruthless.
Group 2: The Relocation Pile
A utility drawer often becomes a holding cell for items that already have dedicated homes elsewhere. Gather the loose nails, wall anchors, and hex keys; they belong in your actual toolbox. Move the stray lip balm and hair ties back to the bathroom. Take the spare keys and put them on a dedicated key hook. According to Apartment Therapy, grouping like items with their main categories in the home is one of the fastest ways to reduce localized clutter. Relocate these items immediately so they do not creep back into your pile.
Group 3: Action Items
You will likely uncover unpaid bills, school permission slips, receipts you need to file, or a watch that needs a new battery. Do not put these back into the drawer. The utility drawer is a storage space, not a to-do list. Move these items to your desk, your calendar, or your daily planner.
Group 4: The Keepers
What remains is your true utility collection. This pile typically includes:
- Scissors and box cutters
- A permanent marker, a couple of reliable pens, and a pencil
- Clear tape and masking tape
- A small flashlight
- A tape measure
- A lighter or matches
- Superglue
- A handful of frequently used batteries
- Screen-cleaning cloths
Step 3: Measuring and Choosing a Junk Drawer Organizer
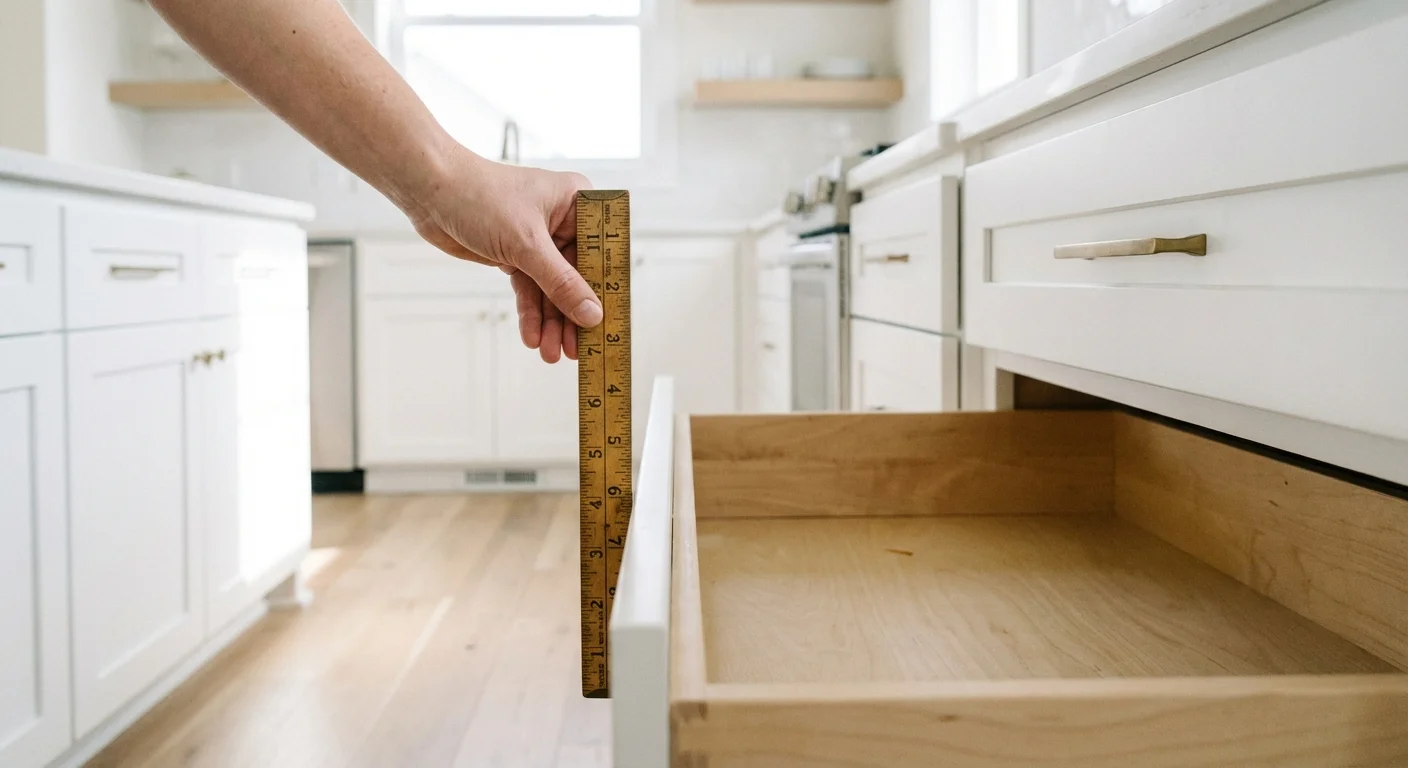
Now that you know exactly what is going back into the drawer, you need a system to contain it. Throwing your curated “Keepers” back into an empty drawer will result in a messy jumble by the end of the week. You need physical boundaries.
Before you buy anything, grab your tape measure. Measure the interior width, depth (front to back), and height of the drawer. Write these numbers down. Do not guess; an organizer that is a quarter-inch too tall will catch on the cabinet frame and jam the drawer entirely.
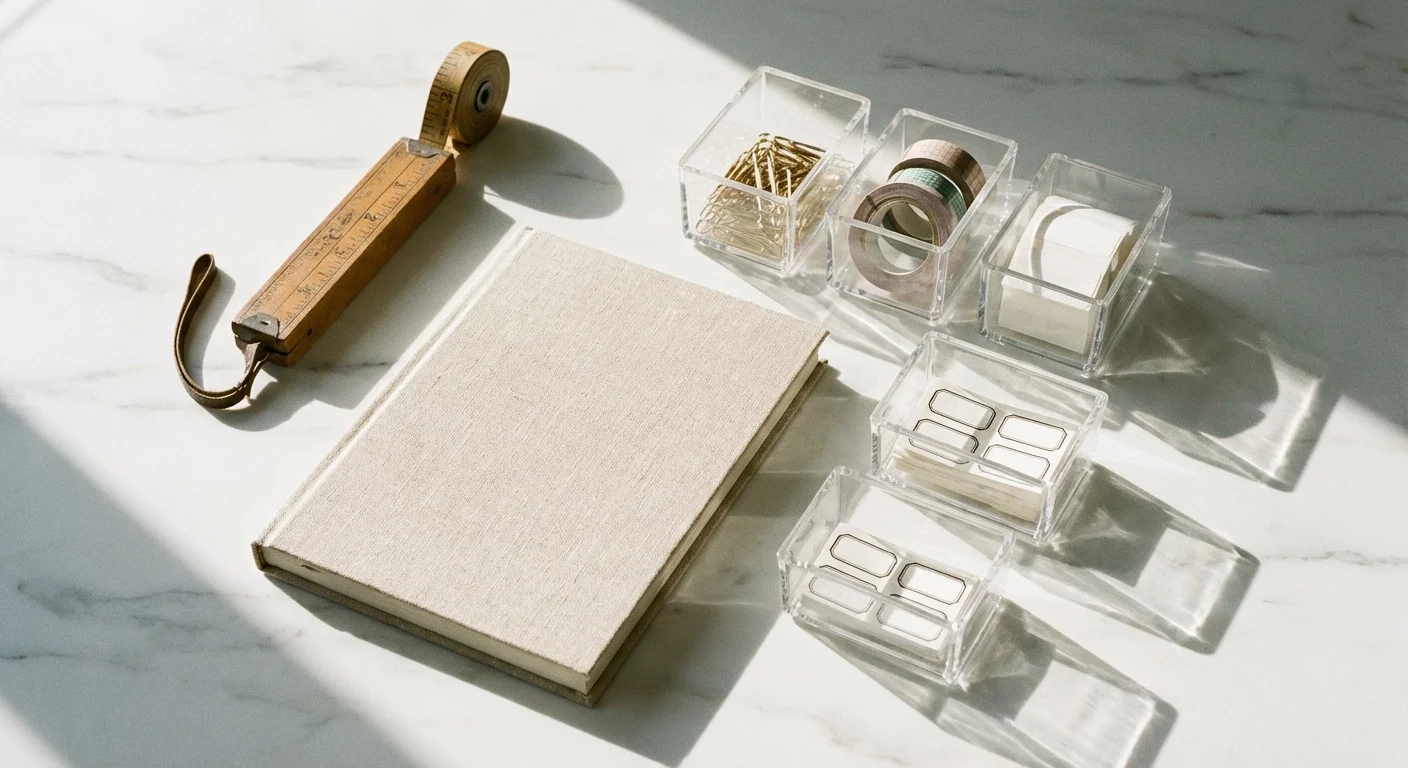
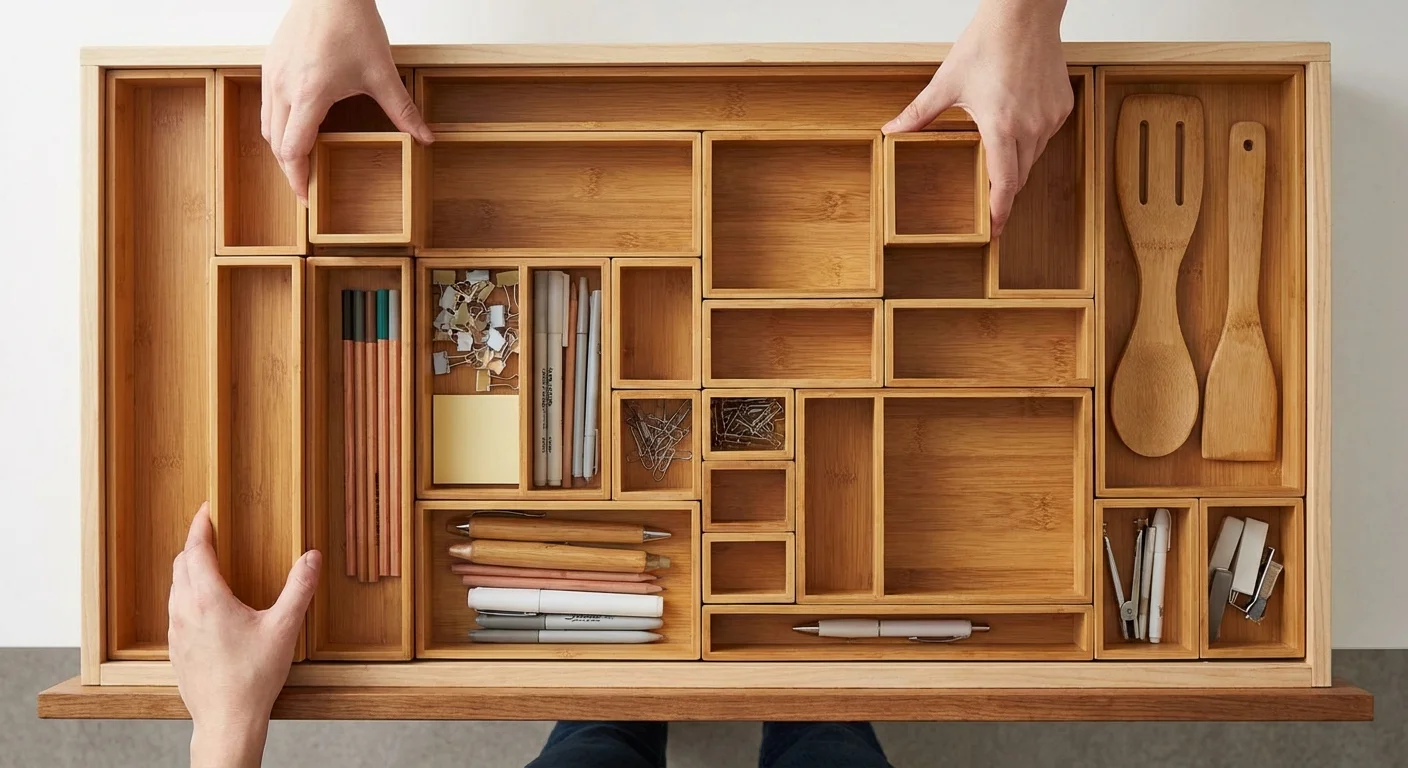
There are several distinct strategies for modular storage, each serving different organization styles.
| Organizer Type | Best Used For | Pros | Cons |
|---|---|---|---|
| Individual Modular Bins | Highly customized layouts; odd-shaped items. | Can be mixed and matched like a puzzle to fit the exact dimensions of your drawer. | They can shift around if you do not use a grippy liner beneath them. |
| Expandable Trays | Standard kitchen drawers with long, narrow items. | Easy to drop in; expands to fill the exact width of the drawer space seamlessly. | Compartment sizes are fixed, which may not fit bulky items like tape measures. |
| Spring-Loaded Dividers | Creating long channels for tools, boxes of foil, or large utensil collections. | Extremely fast installation; easy to adjust on the fly as your needs change. | Does not create the small, square micro-compartments needed for tiny items like paperclips. |
| Repurposed Containers | Zero-budget projects; eco-friendly organization. | Free. You can use shallow jewelry boxes, small mason jars, or ceramic ramekins. | Can look disjointed and messy if the containers clash in style and height. |
For most utility drawers, individual modular bins are the superior choice. Acrylic bins offer a clean, modern look and make it easy to see stray items at the bottom. Bamboo bins add warmth and a premium feel to the interior of your cabinetry. Whichever material you choose, ensure the bins have right angles rather than sloped sides, as right angles maximize your usable space.
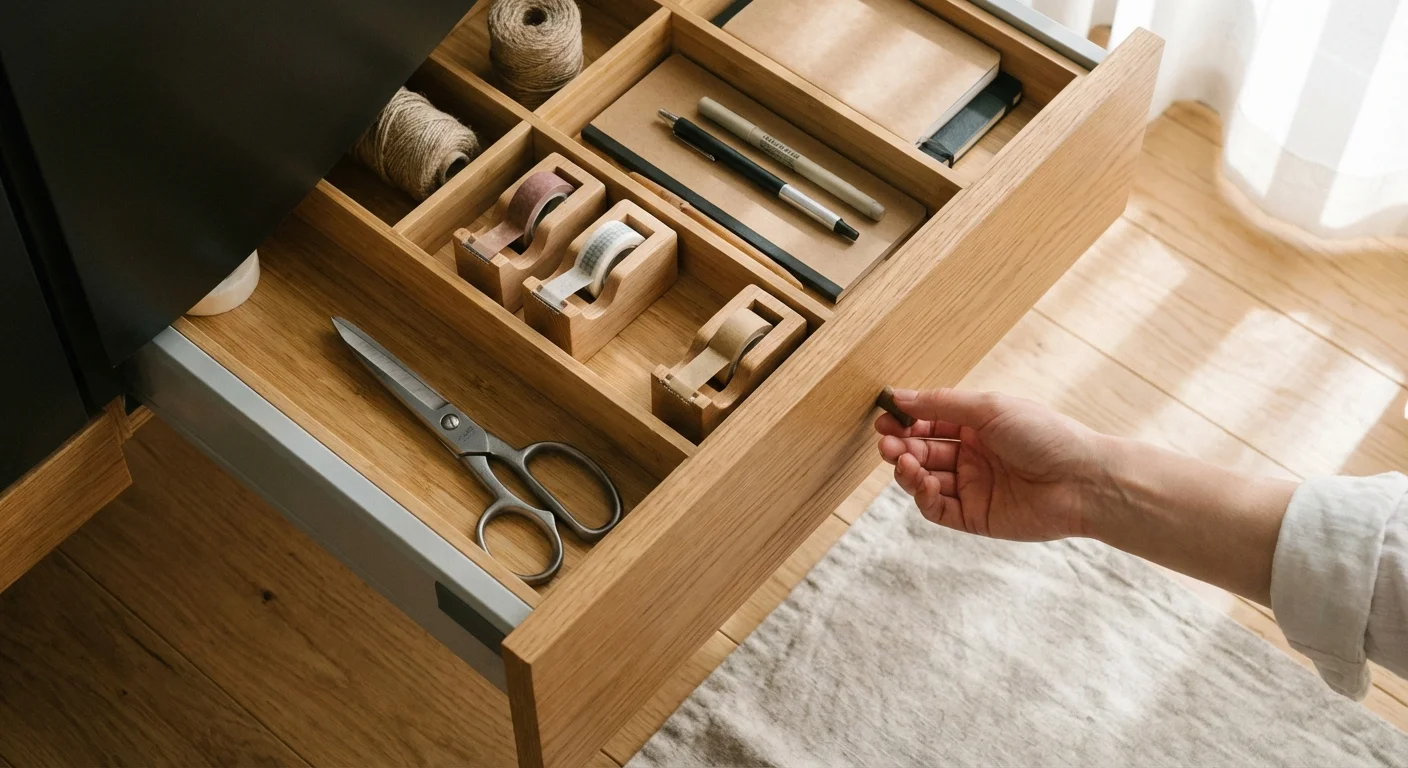
Step 4: Zoning and Assembly
Putting your drawer back together requires strategic thinking. You are not just filling bins; you are creating an ergonomic workspace. Treat the drawer like a map, zoning it based on accessibility.
These zoning principles are very similar to pantry organization strategies, where placing frequently used items at the front saves significant time during meal prep.
Creating these specialized zones is a key part of broader kitchen organization ideas that help your home run more smoothly.
The Front Zone (High Traffic):
The front third of the drawer is your prime real estate. This is where you place the items you grab multiple times a week. Dedicate a long bin for your favorite pens and a sharp pair of scissors. Place a small, square bin right at the front for your box cutter or house keys. You should be able to open the drawer just a few inches and grab these items blindly.
The Middle Zone (Medium Traffic):
The center of the drawer should house items you need regularly but not daily. This is the perfect spot for your tape measure, sticky notes, a small flashlight, clear tape, and batteries. Keep like items together. Grouping all adhesives in one bin and all writing tools in another saves you from hunting.
The Back Zone (Low Traffic):
The deepest part of the drawer is reserved for items you rarely need but must keep on hand. Think superglue, specialty hardware you actually use, extra charging blocks, and matches. Because the back of the drawer is harder to reach and see, avoid putting tiny, loose items back here.
Specific Drawer Declutter Tips for Tricky Items
Some items naturally resist organization. They tangle, roll around, or pose safety hazards. Here is how to handle the most difficult utility drawer offenders:
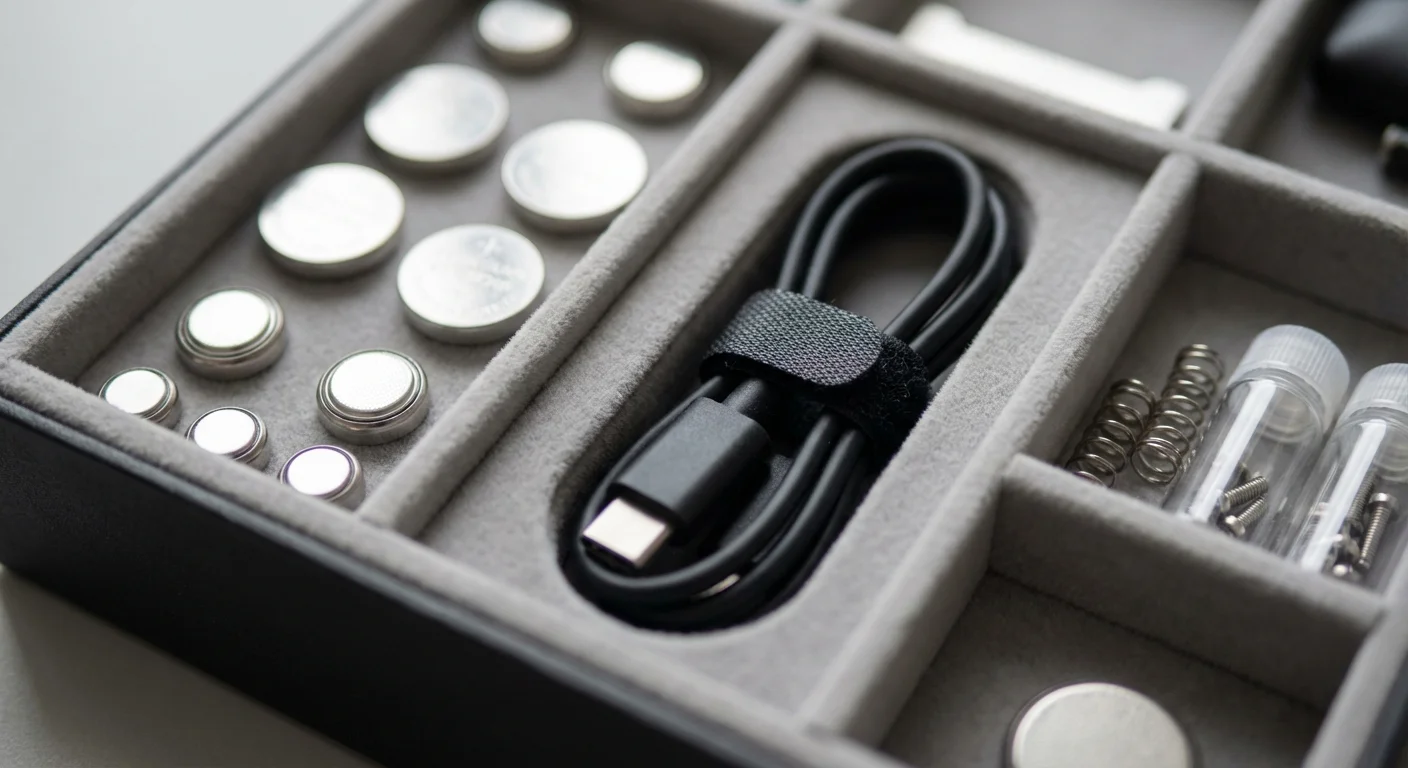
Batteries:
Loose batteries rolling around in a drawer are not just annoying; they are a fire hazard. If the terminals of a 9-volt battery come into contact with a metal paperclip or another battery, they can spark. Keep batteries organized by storing them in a dedicated plastic battery case with individual slots, or keep them in their original packaging. Avoid mixing dead batteries with fresh ones.
Cables and Cords:
A tangled mass of charging cords will ruin an organized drawer instantly. Wrap each cord individually in a neat circle or figure-eight, and secure it with a reusable hook-and-loop velcro tie. Stand the coiled cords upright in a narrow bin so you can easily see the connector types.
Small Hardware and Office Supplies:
Paperclips, thumbtacks, and rubber bands spread like liquid if left uncontained. Use the smallest possible bins for these items. Small, mint-tin-sized acrylic containers with lids are excellent for keeping thumbtacks from spilling and poking your fingers when you reach inside.
For more specific strategies on managing cord clutter and small electronics, resources like Real Simple frequently highlight the value of labeling cords near the plug so you never have to guess what device they belong to.

Junk Drawer Ideas for Different Rooms
While the kitchen is the traditional home of the catch-all drawer, other rooms often develop their own utility spaces. Your strategy should shift slightly depending on the room’s function.
If you are working with limited square footage, specialized small entryway organization strategies can help you maximize every inch of a console or cabinet drawer.
An organized catch-all is a vital component of successful entryway organization, preventing mail and keys from taking over your living space.
The Entryway Console Drawer:
This drawer acts as the transition zone between your house and the outside world. Focus on grab-and-go items. Dedicate bins for sunglasses, lip balm, dog waste bags, a lint roller, and outgoing mail. Keep it ruthlessly edited so you can get out the door faster in the morning.
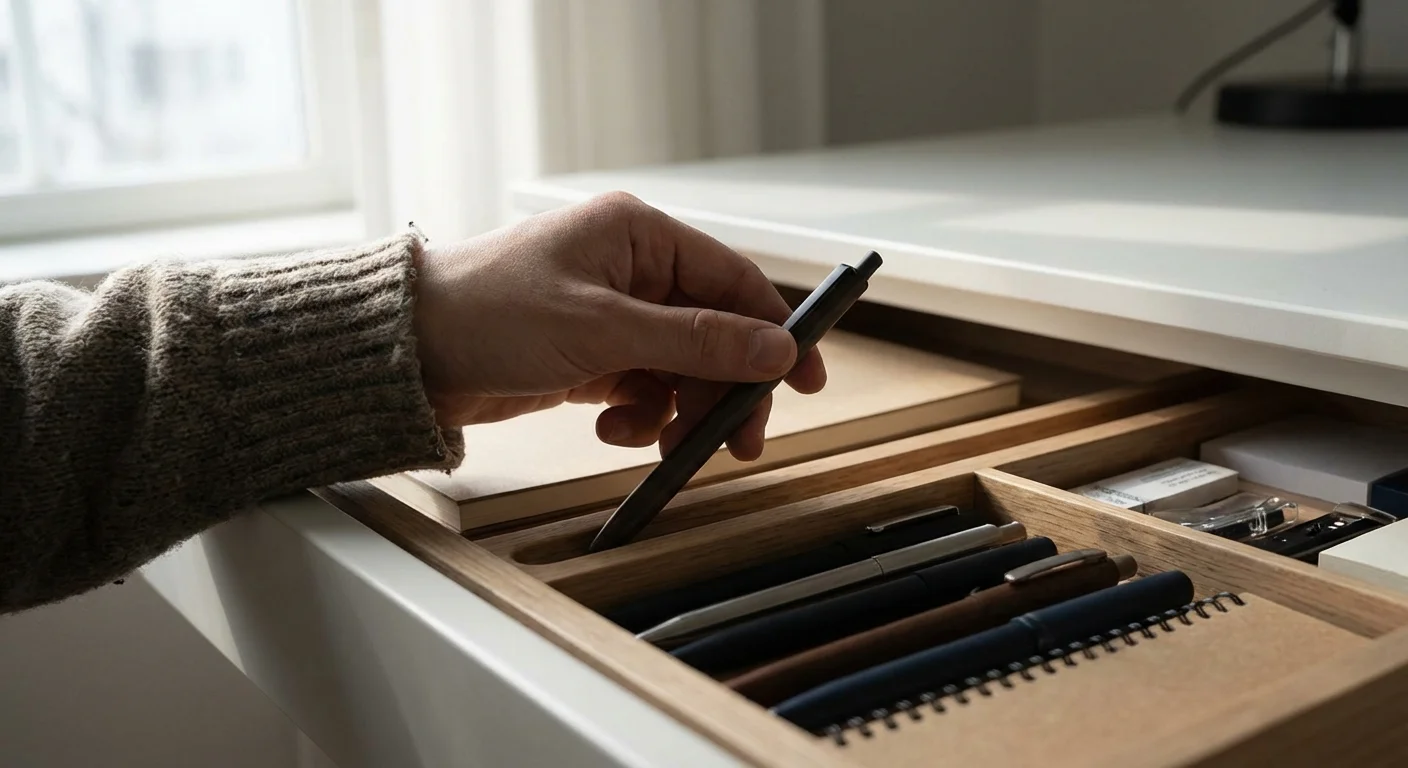
The Home Office Drawer:
An office utility drawer should support your productivity. Skip the household tools and focus entirely on desk supplies. Prioritize specialized organizers that handle postage stamps, paperclips, flash drives, specialized charging cables, and highlighters.
The Nightstand Drawer:
This space should promote rest, not productivity. Keep it minimal. Use a soft, fabric-lined organizer to hold a reading light, earplugs, sleep masks, hand cream, and a charging cable. Keep receipts, tools, and noisy items far away from your sleeping space.
What Can Go Wrong: Common Organizing Mistakes
Even with the best intentions, utility drawers often slide back into chaos. If you want to know how to keep drawers organized permanently, you must avoid these common pitfalls:
Mistake 1: Buying Organizers First
The most common mistake people make is rushing to the store, buying a beautiful set of acrylic trays, and then trying to force their clutter into them. Always declutter and measure first. If you buy containers before you know what you are storing, you will end up with empty bins taking up space, or items that do not fit into the compartments you purchased.
Mistake 2: Making Categories Too Specific
Micro-organizing can backfire. If you have a separate bin for blue pens, black pens, and pencils, you are creating a system that is too tedious to maintain. When you are in a rush, you will just throw the blue pen into the pencil bin, and the system begins to erode. Broader categories—like one bin for “All Writing Tools”—are much easier to sustain.
Mistake 3: Filling the Drawer to 100% Capacity
Every drawer needs breathing room. If your organizer bins are packed tightly with items right up to the brim, you will have to dig and shuffle to retrieve anything. Aim to keep the drawer no more than 80% full. This negative space allows you to drop an item back into its designated spot without forcing it.
“Clutter is nothing more than postponed decisions.” — Barbara Hemphill, Organizing Expert
How to Keep Drawers Organized Long-Term
Setting up your junk drawer organizer is only half the battle. Maintenance is what keeps the system functioning month after month. Organization is not a one-time event; it is a series of small, ongoing habits.
Adopt the “One In, One Out” Rule:
If you buy a new pair of scissors because the old ones are dull, throw the old ones away immediately. Do not keep the dull pair “just in case.” If you bring home a new roll of tape, make sure there is room for it. Keeping a strict inventory limit prevents the drawer from overflowing over time.
The Five-Minute Monthly Reset:
At the end of every month, open your utility drawer and spend exactly five minutes resetting it. Pull out the three stray receipts that got shoved in there. Remove the pen that exploded. Put the tape measure back into its proper bin. By addressing the micro-clutter once a month, you prevent the drawer from ever reaching a critical state of disaster. Resources like The Spruce highly recommend tying this monthly reset to another habit, such as paying your bills or cleaning out your refrigerator, to build consistency.
Respect the Boundaries:
Once you establish a bin for a specific item, respect that physical boundary. If the designated battery bin is full, you cannot add more batteries to the drawer. You either need to use the batteries you have, discard the dead ones, or store the bulk overflow in a garage or basement utility shelf. The physical limits of the organizer must dictate the volume of items you keep.
Frequently Asked Questions
How many utility drawers should a house have?
Most homes function best with one primary utility drawer in the kitchen and perhaps one smaller, specialized drawer in a home office or entryway. Allowing multiple catch-all drawers across the house encourages hoarding and makes it difficult to remember where you placed specific tools.
What should you absolutely never put in a utility drawer?
Avoid storing important financial documents, passports, or social security cards in a high-traffic utility drawer, as they can easily be crumpled, stained by leaking pens, or accidentally thrown away. Additionally, never store loose razor blades or unpackaged sharp tools that could cause injury when you are reaching inside blindly.
How do you stop drawer organizers from sliding around?
The most effective solution is installing a textured, non-adhesive rubber drawer liner underneath the bins. If the bins still shift when you open and close the drawer, use small dots of mounting putty (poster putty) or clear double-sided museum gel under the corners of each bin to lock them firmly in place without damaging the cabinetry.
Are expensive drawer organizers worth the investment?
It depends on your budget and aesthetic preferences. While bamboo and high-grade acrylic organizers are incredibly durable and visually appealing, inexpensive plastic modular bins function exactly the same way. The layout and categorization are far more important than the material of the organizer itself.
Taking Control of Your Space
Organizing a utility drawer might seem like a minor household chore, but the impact it has on your daily friction is immense. When you eliminate the frustrating search for a simple piece of tape or a working pen, you reclaim a small piece of your time and sanity. By emptying the space, purging the literal junk, installing proper boundaries, and committing to light monthly maintenance, you can ensure your catch-all drawer serves you perfectly for years to come.
Start small today. Grab a trash bag, pull out your kitchen drawer, and dump it onto the counter. Once you see the unnecessary clutter spread out in front of you, the path to a streamlined, functional space will be clear.
This guide provides general home improvement information. Every home is different—what works in one space may need adaptation in yours. For structural changes or electrical/plumbing work, consult a licensed professional.
Last updated: February 2026


Leave a Reply