Open the door to your pantry right now; what do you see? If you face a chaotic jumble of half-empty cereal boxes, expired spices, and stray baking supplies, simply planning dinner feels like a chore before you even turn on the stove. Your pantry dictates the rhythm of your kitchen. When you cannot find what you need—or worse, when you buy duplicates of ingredients you already own because they were hidden behind a family-sized box of crackers—you lose time, money, and energy.
A well-executed pantry makeover transforms this frustrating space into the highly functional command center your kitchen deserves. We approach pantry organization not merely as an aesthetic upgrade for social media, but as a practical, sustainable system for running an efficient home. Whether you have a spacious walk-in closet, a narrow reach-in space, or a collection of deep kitchen cabinets, establishing smart systems will fundamentally change how you cook and shop.
At a Glance: The Blueprint for Success
If you feel overwhelmed by the prospect of tackling your food storage, stick to these foundational steps. We will explore each in detail, but keeping this roadmap in mind helps prevent mid-project burnout:
Just as you zone your food, implementing mudroom storage solutions helps manage the flow of bulk groceries from the entry to the kitchen.
- The Blank Slate: Remove every single item from the space to clean and measure your shelves.
- The Ruthless Edit: Toss expired items, consolidate duplicates, and donate untouched, unexpired goods.
- Strategic Zoning: Assign specific shelf real estate based on how frequently you use items.
- Smart Containment: Select containers and bins that solve specific storage problems rather than just looking pretty.
- System Maintenance: Implement the “first in, first out” method to keep your new system functioning long-term.
Phase One: Creating a Blank Slate
You cannot organize clutter; you can only shift it around. The first step in learning how to organize a pantry requires total commitment—you must empty the space entirely. Pull out every can, box, bag, and rogue rolling potato. Place everything on your kitchen counters or dining table.
Once the shelves are sparkling, consider using these same methods for a laundry room organization system to streamline your chores.
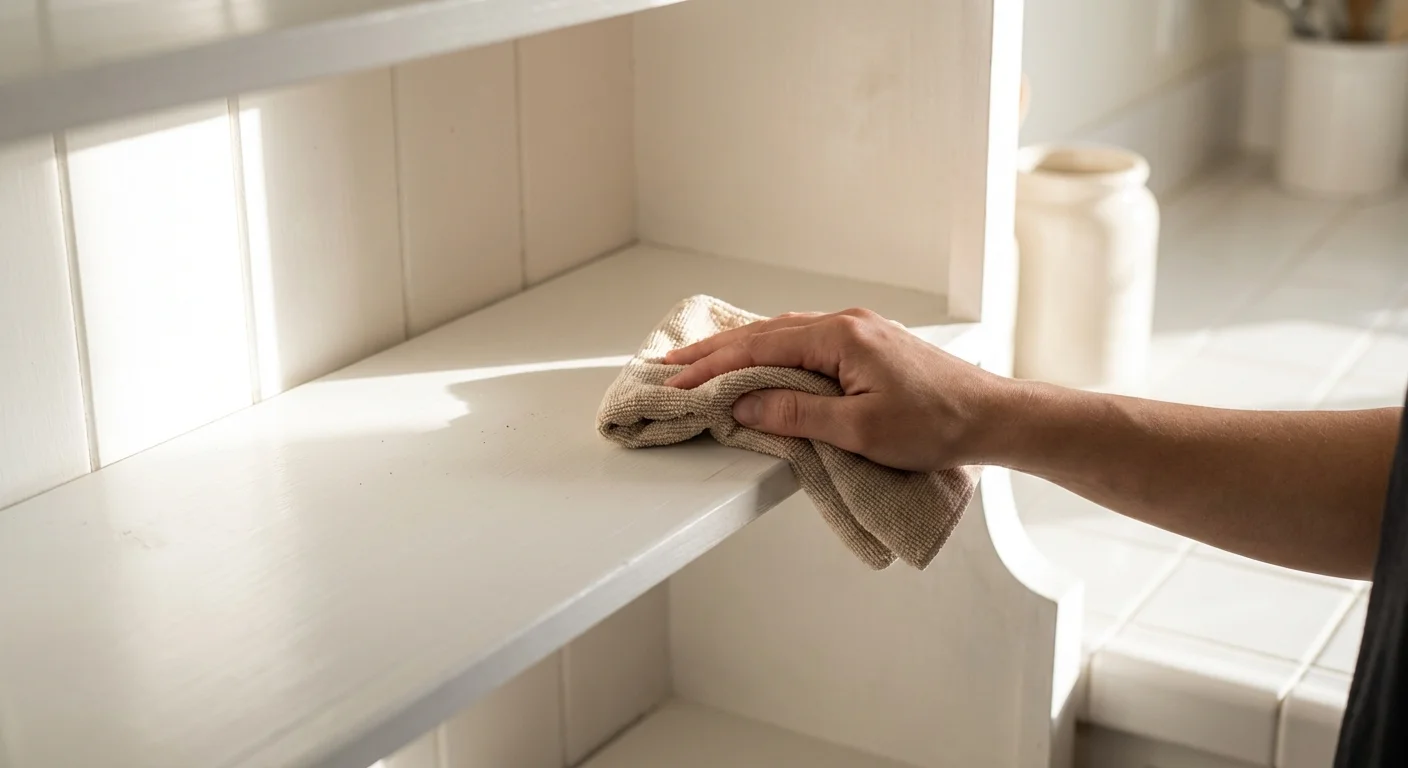
Once the space is empty, you finally see the architecture of your pantry. Now is the time to thoroughly clean the environment. Vacuum the floor, wipe down the shelves with a mild all-purpose cleaner, and scrub away sticky syrup rings or spilled flour. If your shelves look battered, consider applying a durable, wipeable shelf liner. Liners protect the wood or melamine and provide a smooth surface that makes sliding heavy items much easier.
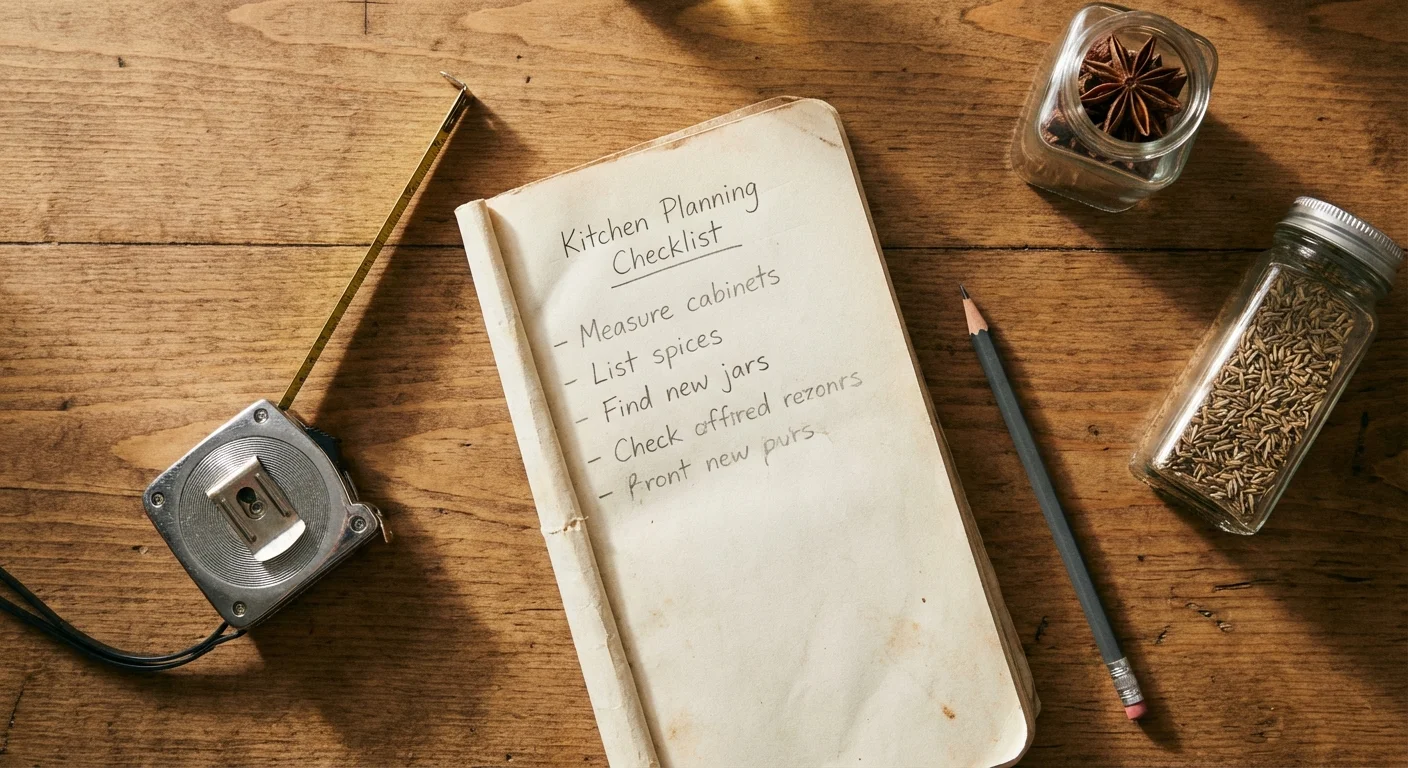
While the pantry remains empty, grab a tape measure. Record the depth of your shelves, the width of the space, and the height clearance between each shelf. Save these dimensions in your phone. This data is critical; it prevents you from standing in The Container Store guessing whether a particular bin will allow your pantry door to close properly.
Phase Two: The Editing Process
With your food inventory spread across your kitchen, you face the editing phase. This step requires honesty about your eating habits. Group all your items by category: place all baking supplies together, cluster the canned vegetables, and pile up the snacks. Seeing three open bags of the same brown sugar is a common revelation during this step.
Cleaning out your shelves is the perfect moment to transition toward zero-waste grocery storage to prevent future food spoilage.
Check every expiration date. Discard anything that has gone bad or smells stale. Next, confront the items you bought for a specific recipe two years ago and never touched again. If the item remains sealed and unexpired, set it aside for your local food bank. Dedicating valuable shelf space to food you will never eat sabotages your organization efforts before they even begin.
“The objective of cleaning is not just to clean, but to feel happiness living within that environment.” — Marie Kondo, Organizing Consultant and Author
Consolidate your duplicates. If you have two half-empty boxes of the same pasta, combine them. Your goal is to reduce visual clutter and physical volume, leaving only the items that currently support your household’s dietary habits.
Phase Three: Designing Your Zones
Effective pantry shelf organization relies on strategic zoning. Think of your pantry shelves as real estate—some zones are incredibly valuable, while others are less accessible. You must assign your categories to these zones based on frequency of use.
Implementing logical pantry organization systems is essential for maintaining order when life gets hectic.
Before you begin placing items back on the shelves, consider how designing a custom pantry storage system can help you manage architectural challenges like deep corners or varying shelf heights.
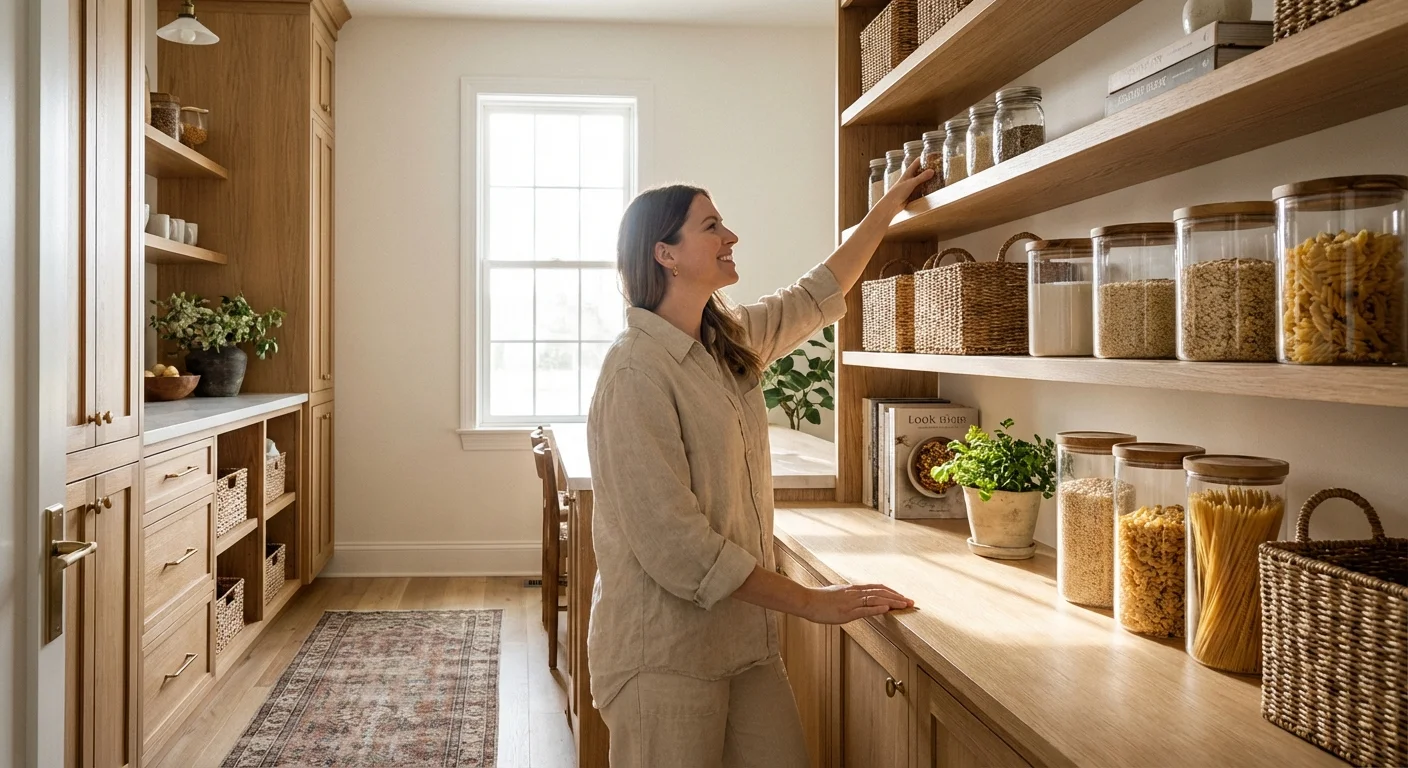
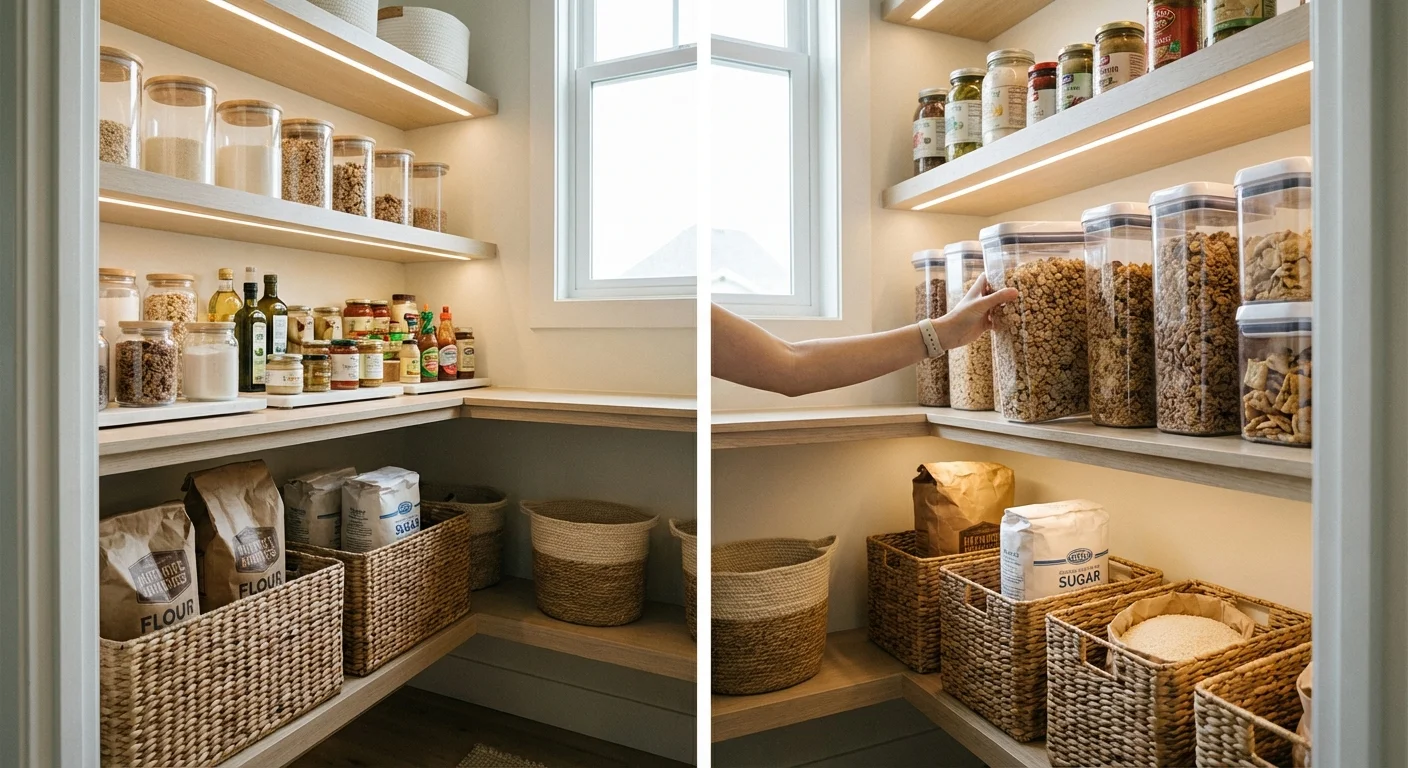
Zone 1: Prime Real Estate (Eye and Waist Level)
The shelves located between your waist and your eye line are your most valuable storage areas. Reserve this space for items you reach for daily. This includes your breakfast items, daily snacks, coffee supplies, and go-to dinner staples like pasta and frequent canned goods. When you are rushing to make lunch on a Tuesday morning, everything you need should be immediately visible and reachable without bending or stretching.
Zone 2: The Heavy Lifting (Lower Shelves and Floor)
Store heavy, cumbersome items below waist level to prevent strain and accidental drops. This zone perfectly houses bulk beverages, heavy bags of rice or pet food, and large kitchen appliances you use occasionally, such as slow cookers or stand mixers. The floor or lowest shelf is also ideal for root vegetables. Store potatoes and onions in breathable wire or woven baskets down here in the cool dark—just ensure you keep them in separate baskets, as onions release gases that cause potatoes to sprout faster.
Zone 3: The Occasional Use (Top Shelves)
Reserve your highest shelves for lightweight items you access infrequently. This is the perfect zone for backstock—extra rolls of paper towels, backup boxes of cereal, or lightweight party supplies. If you buy in bulk, keep the open, active container at eye level and store the heavy surplus bags at the bottom, moving only the lightweight excess to the top.
Zone 4: Specialized Groupings
Create micro-zones based on specific tasks. A “baking zone” is highly effective. Place your flour, sugar, baking soda, vanilla extract, and chocolate chips into a single sturdy basket. When it is time to bake, you simply pull the entire basket out and place it on your kitchen counter, rather than making five trips back and forth to the pantry.
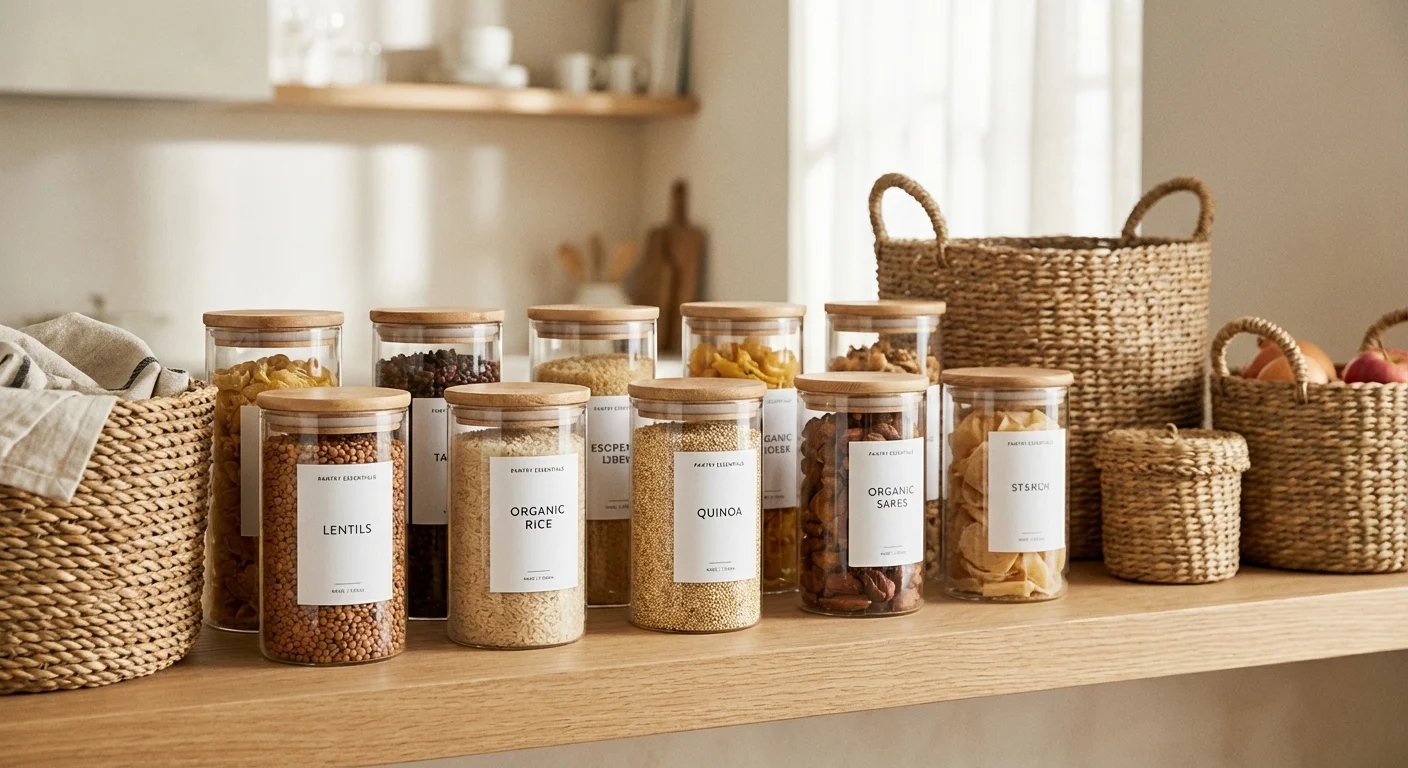
Choosing the Right Pantry Storage Containers
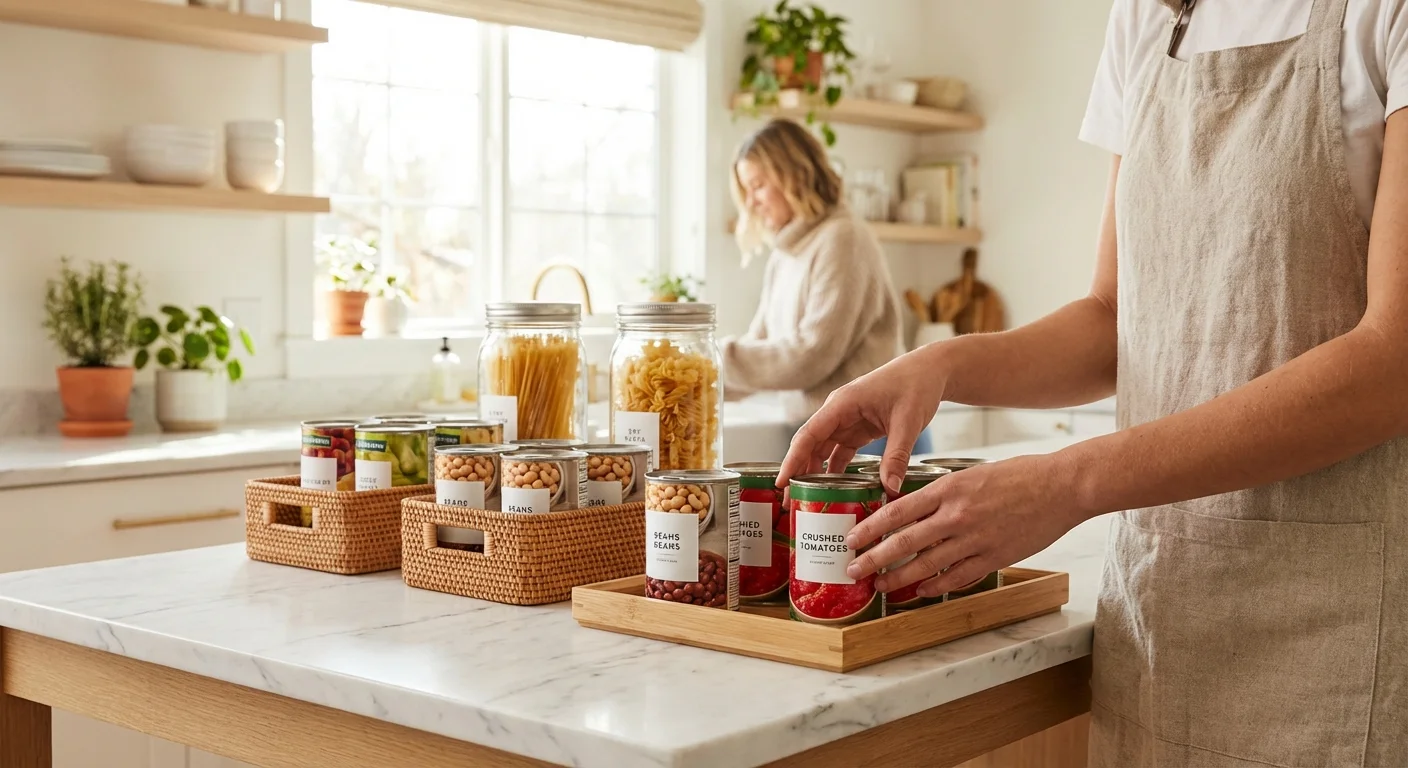
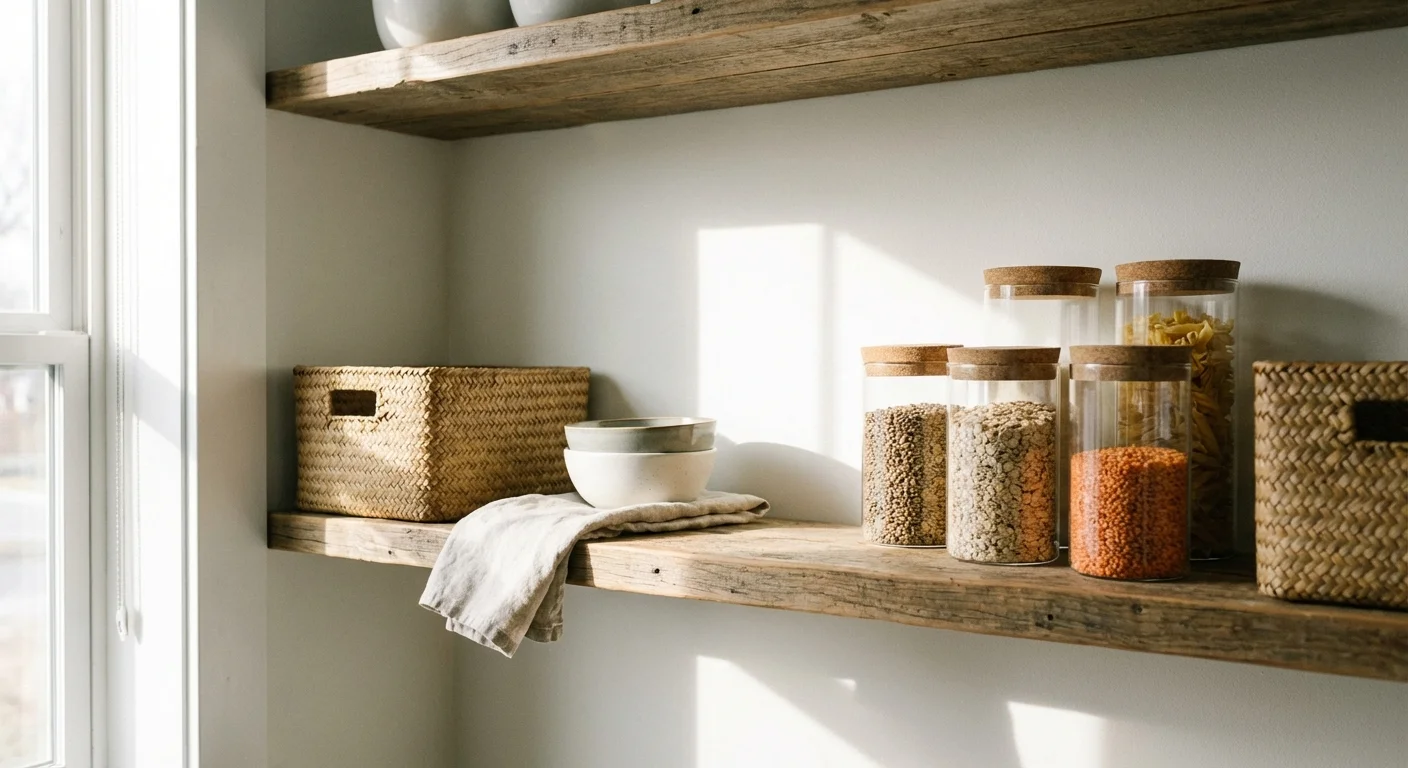
Wandering down the storage aisle without a plan leads to mismatched, inefficient systems. The best pantry storage containers solve specific problems. Decanting—the process of removing food from its original packaging and placing it in a uniform container—offers enormous benefits. It extends shelf life, prevents pest infestations, and provides a clear visual indicator of when you need to buy more.
However, different foods require different housing. Modular, square, or rectangular containers maximize shelf depth far better than round canisters, which leave wasted space between them. For excellent guidance on assessing material durability, resources like Real Simple frequently test and review top container brands for airtight reliability.
Use the following breakdown to match the container material to your specific pantry needs:
| Container Type | Best Used For | Pros | Cons |
|---|---|---|---|
| Clear Acrylic / Hard Plastic | Dry goods (pasta, cereal, flour, sugar, snacks). | Lightweight, shatter-resistant, stackable, allows you to see inventory instantly. | Can scratch over time; cheaper plastics may absorb odors or stain. |
| Glass Jars (e.g., Mason, Weck) | Spices, nuts, seeds, liquids, and acidic ingredients. | Non-toxic, doesn’t absorb odors, completely airtight, elegant appearance. | Heavy, breakable, and round shapes do not maximize shelf width. |
| Wire Baskets | Root vegetables (onions, potatoes), bagged snacks, fruit. | Provides crucial ventilation; easy to see contents; highly durable. | Small items can slip through the gaps; not suitable for loose dry goods. |
| Opaque Bins (Woven, Wood, Solid Plastic) | Backstock, ugly packaging, mismatched bags, specialty tools. | Hides visual clutter instantly; creates a clean, uniform look on the shelf. | Requires strict labeling; “out of sight, out of mind” can lead to forgotten food. |
Brilliant Pantry Organization Ideas for Tricky Spaces
Not everyone possesses a sprawling, walk-in pantry. If you are working with a deep, narrow cabinet or an awkward closet, you must utilize space-maximizing techniques. The goal is to make the back of the pantry just as accessible as the front.
Treating the pantry as a family-friendly zone often mirrors closet organization ideas that help kids find exactly what they need.
Treat Deep Shelves Like Drawers: Deep shelves represent the graveyard of expired canned goods because items get pushed to the back and forgotten. Counteract this by utilizing long, clear acrylic bins. By placing your cans or sauce jars into a bin that extends the full depth of the shelf, you effectively create a drawer. You slide the bin out, grab what you need from the back, and slide it back in. Nothing gets lost in the dark.
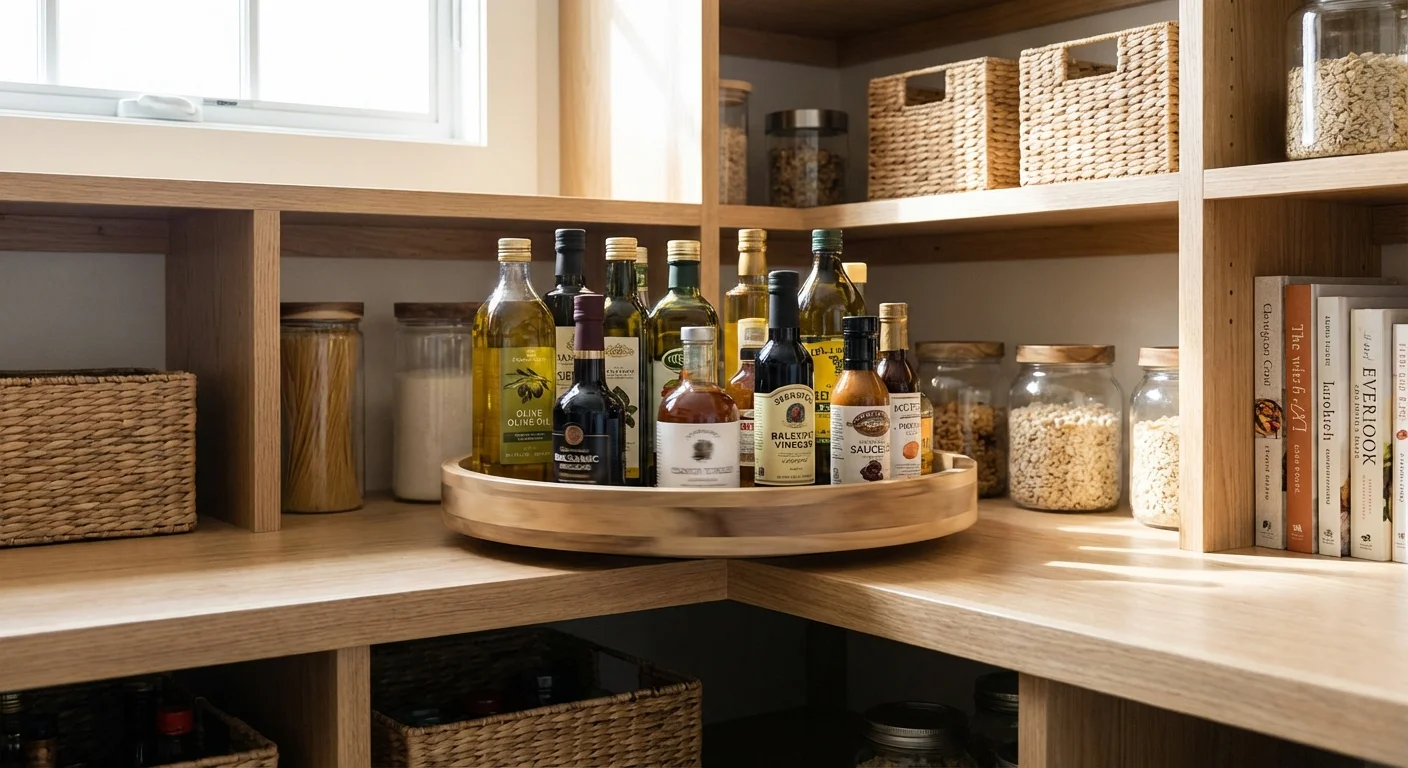
Employ Turntables (Lazy Susans): The corners of a walk-in or L-shaped pantry are notoriously difficult to reach. Place a large turntable in the corner to house your oils, vinegars, hot sauces, or condiments. A quick spin brings the exact bottle you need front and center, completely eliminating the need to knock over front-row items to reach the back.
Maximize Vertical Door Space: The back of your pantry door provides massive, often overlooked storage potential. Installing an over-the-door rack system immediately frees up precious shelf space. Use these shallow door racks for small items that easily get lost on deep shelves, such as spices, packets of seasoning, small jars of jam, aluminum foil, and plastic wrap. Design platforms like Apartment Therapy consistently highlight door organizers as the single most transformative upgrade for small kitchens.
Utilize Shelf Risers: If you have tall spaces between your shelves, you are likely wasting vertical real estate. Shelf risers—small wire or acrylic stands that sit on your existing shelf—allow you to stack items safely. You can place plates or wide bowls under the riser, and mugs or smaller canned goods on top, effectively doubling the usable surface area.
Avoiding Common Errors
Even with the best intentions, a pantry makeover can quickly derail if you fall into certain common traps. Steer clear of these missteps to ensure your system remains functional for the long haul.
Error 1: Buying Containers Before Decluttering. This is the most common and expensive mistake you can make. Do not purchase a beautiful set of 20 clear containers until you know exactly what you need to store. If you buy containers first, you will find yourself forcing items into appropriately sized but practically useless bins. Edit your food first, measure your space second, and buy containers third.
Error 2: Decanting Absolutely Everything. While a fully decanted pantry looks stunning, it is not always practical. You do not need to decant items that you consume rapidly and replace weekly, such as your child’s favorite cracker packets. Furthermore, if you decant items like rice or specialized baking mixes, do not throw away the cooking instructions. Cut the instructions from the box and tape them to the back of the container, or use a dry-erase marker to write the cooking ratio directly on the plastic.
Error 3: Forgetting to Label Opaque Bins. If you choose beautiful woven water hyacinth baskets to hide your backstock, you must label them. When family members cannot see what is inside a bin, they will either rummage through it and destroy the organization, or they will ignore it completely. Clip-on label holders work beautifully for woven baskets.
Error 4: Creating Hyper-Specific Categories. If your systems are too rigid, you will not maintain them. Creating a bin exclusively for “Almond Butter Packets” might work today, but what happens when you switch to peanut butter jars next month? Create broader categories like “Nut Butters & Spreads” or “Morning Snacks.” Flexible categories adapt to your changing grocery habits.
When DIY Isn’t Enough
While most homeowners can execute a stunning pantry makeover ideas over a weekend using off-the-shelf products, certain situations demand professional intervention. Recognize when your structural needs exceed standard plastic bins and wire risers.
- Failing Infrastructure: If your wire shelving is bowing heavily under the weight of canned goods, or if the anchors are physically pulling out of the drywall, empty the shelves immediately. Food storage is incredibly heavy. You may need a contractor to install proper wood shelving anchored securely to the wall studs.
- Deep, Inaccessible Cabinets: If your pantry consists of very deep, narrow cabinet framing (often found in older homes) where bins simply cannot reach the back effectively, consider hiring a custom closet or cabinet company. Installing heavy-duty, full-extension wooden pull-out glides will fundamentally change how you access your food.
- Persistent Pest Issues: If you uncover a severe infestation of pantry moths, weevils, or rodents during your clean-out, standard cleaning is insufficient. You must contact a professional exterminator to eradicate the problem at the source before you introduce new food into the space.
Frequently Asked Questions
How do I maintain my organized pantry when I have a busy family?
Maintenance requires communication and labeling. If you clearly label where “Salty Snacks” and “Baking Goods” live, family members are far more likely to return items to their proper homes. Additionally, implement a “grocery day reset.” Before you put new groceries away, take five minutes to pull older items to the front (first in, first out) and throw away any empty packaging left on the shelves.
Do I have to spend a fortune on acrylic containers for a functional pantry?
Absolutely not. While premium matching acrylic sets look beautiful, functionality does not require a massive budget. You can achieve an incredibly organized space using inexpensive plastic bins from a dollar store, repurposing sturdy cardboard boxes covered in contact paper for backstock, or thoroughly washing and reusing large glass pasta sauce jars for dry goods.
How often should I clean and reorganize my pantry?
If you set up a strong foundational system, you should never have to do a complete, tear-everything-out makeover again. Plan to do a light “maintenance edit” every three to four months. During this seasonal check, quickly wipe down the main shelves, check expiration dates on items pushed to the back, and re-evaluate any zones that feel messy.
What is the best way to store spices?
Spices degrade quickly when exposed to heat and direct sunlight. Store them in a cool, dark zone. If you keep them in the pantry, utilize a tiered shelf riser so you can read the labels of the bottles in the back rows. If you store them on the back of the door, arrange them alphabetically to eliminate the frustration of hunting for the cumin while something burns on the stove.
Taking the Next Step
Transforming your pantry from a chaotic catch-all into a streamlined storage system pays daily dividends. You will stop buying ingredients you already own, meal planning will become significantly easier, and you will experience a brief moment of calm every time you open the door to grab your morning coffee.
Do not let the scope of the project paralyze you. If tackling the entire walk-in feels impossible today, start small. Choose just one shelf. Empty it, clean it, edit the expired items, and put back only what belongs there. Success builds momentum. Once you experience the friction-free reality of one perfectly organized shelf, you will find the motivation to conquer the rest of the space.
This is educational content based on general best practices. Individual results vary based on your home, budget, and circumstances. Always prioritize safety and consult professionals for major projects.
Last updated: February 2026


Leave a Reply